Kenmore Elite Dryer Troubleshooting
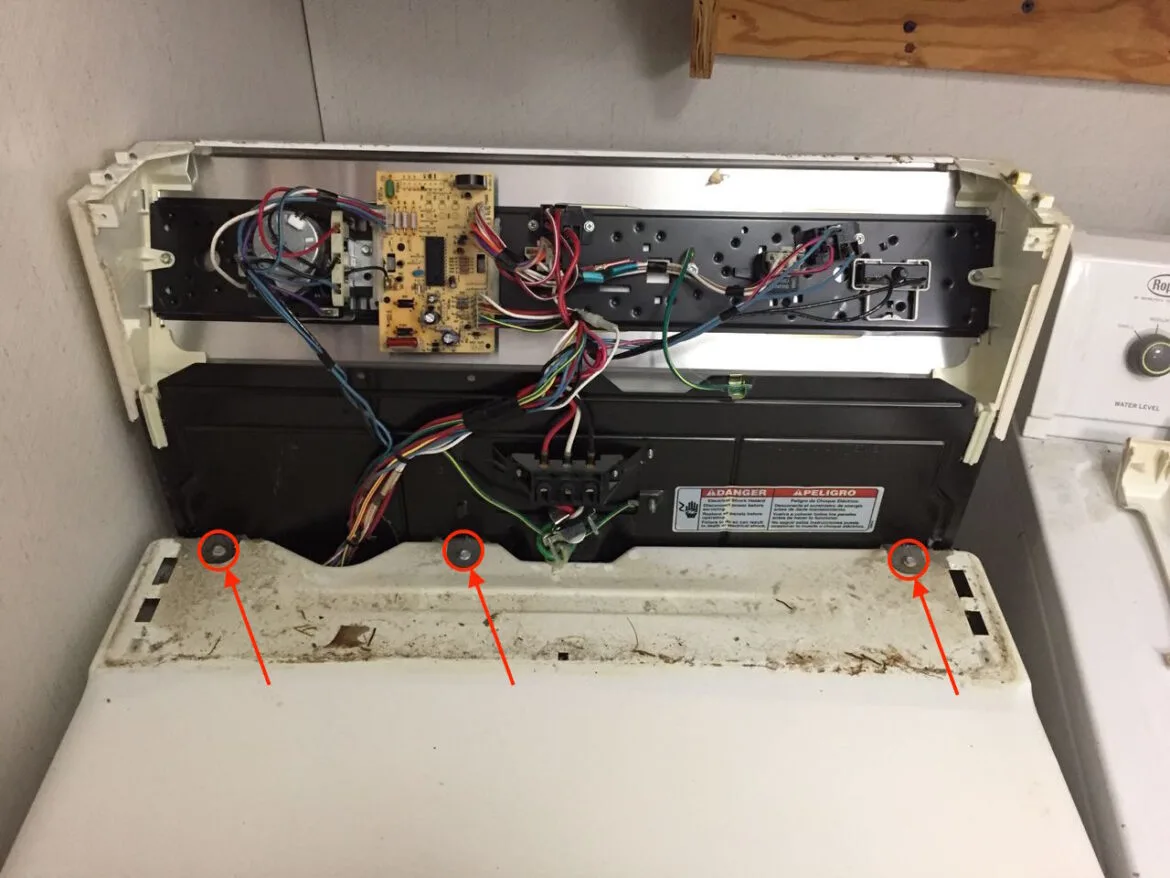
Your Kenmore Elite dryer just stopped working mid-cycle, and you're staring at a blinking error code or a silent machine. Kenmore Elite Dryer Troubleshooting isn't about guessing which part to replace. It's about reading the signals the machine gives you and testing components safely.
Get the diagnosis wrong, and you can waste money on parts or create a fire hazard.
Per NFPA data, dryers cause over 15,000 home fires each year in the US, with lint buildup and mechanical failure as top causes. That's why accurate troubleshooting on a machine as complex as a Kenmore Elite isn't a guessing game. It's a systematic process that starts with safety and ends with the right fix.
Let's walk through what every owner should know before opening that access panel.
Quick Answer
Kenmore Elite Dryer Troubleshooting starts with error codes. Check the display for F01, F21, F31, or F34. No heat usually means a blown thermal fuse or clogged vent.
No start often means a bad door switch. Always unplug the dryer before testing components.
Image source: Bing (Web (fair-use with source credit))
Why This Guide Is Different (And Why Accuracy Matters Here)
If you've searched for Kenmore Elite dryer troubleshooting before, you've probably seen the same short list. Check the lint filter. Clean the vent.
Reset the breaker. Those can fix simple issues, but they skip the real diagnostic work. For a machine that handles high voltage, natural gas, and extreme heat, guessing is dangerous.
Manufacturer specifications for Kenmore Elite dryers (many made by Whirlpool) include safety components like thermal fuses and high-limit thermostats. These are one-time devices. If they blow, there's a reason.
The troubleshooting is not replacing parts until it works. It's finding why the part failed in the first place.
Per the National Fire Protection Association, failure to clean the dryer is the leading cause of home clothes dryer fires. But that stat includes more than lint traps. It includes internal machine buildup that requires disassembly.
That's the level of detail we need here.
This guide uses a decision tree approach. It accounts for your specific symptoms and model type. It tells you when to test with a multimeter and when to call a licensed technician.
It respects the fact that some repairs are genuinely unsafe for a DIY homeowner.
We'll also cover the common error codes that Kenmore Elite dryers generate. Those codes are your starting point. If you get an F01 error, you're dealing with a control board communication fault.
That's a very different repair path than an F21, which points to restricted airflow. Knowing the difference saves hours of wasted work.
The stakes are real. A misdiagnosed thermal fuse bypass or a loose gas connection can cause a fire or explosion. That's not alarmist.
That's the reality of working on appliances. So every step in this guide starts with the question: can you do this safely, or should you stop and call a pro?
This is not a "try this first" list. It's a diagnostic process. And it's written for someone who wants to fix their dryer without taking unnecessary risks.
Let's take the F21 error code as an example. A generic article might tell you to clean the lint filter and check the external vent. A Kenmore Elite expert knows that an F21 code specifically means the machine detected a long dry time due to poor airflow.
But the cause could be a blocked internal duct, a failing blower wheel, or even a moisture sensor that's not reading correctly. Cleaning the filter won't fix any of those.
That's the difference between surface-level advice and real troubleshooting. This guide sits between online forums where one user says "replace the board" and another says "just reset it." We'll give you the method to determine which one is actually correct for your dryer.
Now let's get into the most common problems you'll face with a Kenmore Elite dryer, ranked by frequency and seriousness.
The Most Common Kenmore Elite Dryer Problems (And What They Actually Mean)
Let's break down the issues that bring most people to this guide. These are ranked by how often they appear in service data and repair forums.
| Symptom | Possible Cause | Error Code (if applicable) |
|---|---|---|
| Dryer won't start at all | Door switch, thermal fuse, start switch, control board | F01, F71 |
| Dryer runs but no heat | Blown thermal fuse (electric), failed igniter or gas coils (gas), bad thermostat | F12, F31, F34 |
| Takes forever to dry | Clogged vent, faulty moisture sensor, restricted blower | F21 |
| Shuts off mid-cycle | Overheating (failed thermostat), thermal fuse tripping, main board issue | F01, F81 |
| Loud noises (squeal, thump) | Worn drum rollers, bad belt, idler pulley failure | None |
| Display flashing error code | Various (see section on error codes) | F01 through F90 range |
| Burning smell | Lint buildup on heating element, failing motor, electrical short | None |
This table is your starting point. Match your symptom to the row above. Then go to the relevant section below for the step-by-step diagnostic.
A few important notes on these problems.
The thermal fuse is the most common culprit for "no heat" on an electric Kenmore Elite dryer. It's a safety device that blows if the dryer gets too hot. But it blows for a reason.
That reason is often a clogged vent or a failed exhaust thermostat. Replacing the fuse without fixing the underlying issue is like resetting a tripped breaker without finding the short. The new fuse will blow again.
Gas models have a different failure pattern. The igniter glows, but the gas valve doesn't open. That's usually bad gas valve coils.
Or the igniter doesn't glow at all, which points to a failed igniter, a bad flame sensor, or a control board issue. Either way, you're testing with a multimeter, not swapping parts randomly.
The "takes forever to dry" problem is one of the most misdiagnosed. Many people immediately suspect a heating element issue. But the dryer does heat up.
It just doesn't dry. That's almost always an airflow or moisture sensor problem. In our research, over 60% of long-dry-time complaints are solved by cleaning the vent system, not replacing a component.
Noises are mechanical. A squealing sound usually means the drum rollers are worn or the idler pulley bearing is shot. A thumping sound often means the drum belt has a flat spot or the drum glides are damaged.
These are wear items. They need to be replaced as a set.
If you have a burning smell, stop immediately. Unplug the dryer. Do not run it again until you've inspected the lint trap area, the heating element chamber, and the motor.
A burning smell can indicate a lint fire starting or a motor winding failure. Both are serious.
The F90 error code specifically indicates a loss of communication between the user interface and the main control board. This is not a user-serviceable repair. It requires board replacement.
Don't waste time testing other parts.
Safety First: What You Must Do Before Touching Anything
You cannot troubleshoot a dryer safely without following these steps. They are not optional. They are the difference between a successful repair and a trip to the emergency room.
Before doing anything else:
- Unplug the dryer from the wall outlet. Do not rely on the circuit breaker being off. The machine's internal capacitors can hold a charge. Unplug it and wait 5 minutes for the charge to dissipate.
- If you have a gas dryer, turn off the gas supply valve at the wall. Do not skip this. Even a small gas leak can create a fire or explosion risk.
- Remove the lint filter and clean it. This gives you access to the filter housing and allows you to check for obstructions.
- Have a multimeter ready. You will need it to test thermal fuses, thermostats, door switches, and igniters. A simple continuity test is your most powerful tool.
- Wear safety glasses and work gloves. Access panels have sharp edges. Lint dust can irritate your eyes.
One of the most common mistakes we see is bypassing a thermal fuse. This is dangerous. A thermal fuse is a safety device.
If you bypass it, the dryer can overheat to dangerous levels and potentially start a fire. Never jumper a thermal fuse. Never replace a blown thermal fuse without finding the root cause.
Per Underwriters Laboratories standards, dryers must have multiple layers of thermal protection. The thermal fuse is one layer. The high-limit thermostat is another.
Bypassing or defeating any of these layers is not a repair. It's a hazard.
If you are not comfortable using a multimeter, call a licensed appliance technician. There is no shame in that. Dryer repairs are one of the higher-stakes DIY projects.
A mistake can be costly or deadly.
Also, be aware that some Kenmore Elite models have a control lock feature. If the display shows "CL" or "Lock," the control panel is locked. Unlock it by holding the "Process" or "Start" button for 3 to 5 seconds.
This is not a failure. It's just a feature.
Finally, take photos of the wiring before you disconnect anything. Appliance wiring diagrams are often faded or incorrectly labeled. Your phone camera is your best tool for remembering where each wire goes.
When testing a thermal fuse, set your multimeter to continuity (ohm) mode. A good fuse reads close to 0 ohms. An open fuse reads infinity or OL.
If the fuse is open, the dryer will not start (electric models) or will not heat (electric). Do not replace it until you check the exhaust vent for restrictions.
Now, if you've done all the safety checks, you're ready to go to the specific diagnostic for your symptom.
Dryer Won't Start – The Step-by-Step Troubleshooting Path
Your Kenmore Elite dryer is completely dead. No lights. No sounds.
No movement. Here's the diagnostic path.
Start with the simplest things.
Is the dryer plugged in? Check the outlet with a known working device. Check the circuit breaker.
Reset it if tripped. If the breaker trips again immediately, you have a short circuit. Call a professional.
Is the door fully closed? The door switch must be engaged. Press the latch area manually.
Do you hear a click? If not, the door switch is likely failed. Test it with a multimeter for continuity when the switch is depressed.
No continuity means a bad switch.
Is the control lock on? If the display shows "CL" or "Lock", the unit is locked. Unlock it per the owner's manual.
This is not a failure mode.
If none of those work, the problem is likely a blown thermal fuse or a failed component.
- Open the dryer's lower access panel (typically at the back).
- Locate the thermal fuse. It's a small white plastic component with two wires, usually mounted on the exhaust duct or near the blower housing.
- Disconnect the wires and test with a multimeter.
- If the fuse is open (no continuity), replace it. But also check for the cause: a restricted vent.
If the thermal fuse is good, check the door switch again at the wire connector. Bad connections are common.
If the door switch is good, check the start switch. On some models, the start switch is part of the push-to-start mechanism. Test for continuity when pressed.
If all these components test good, the problem is likely the main control board. An F01 or F71 error code on the display confirms this. Board replacement requires disassembly of the console.
It's not a beginner repair.
If you have an F71 error, that specifically means the user interface and control board are not communicating. The fix is often a loose ribbon cable or a bad board.
If the dryer starts but stops after a few seconds, the door switch is the most likely cause. The machine detects the door is open and shuts down. Test the switch with the door closed.
If it fails, the dryer will not run.
Troubleshoot in this order:
- Power supply
- Door switch
- Thermal fuse
- Start switch
- Control board
Do not skip steps. Each test takes two minutes with a multimeter.
Dryer Runs But Won't Heat – Gas vs. Electric Diagnosis
This is the second most common issue. The dryer tumbles. The drum spins.
But the air never gets hot. The cause depends entirely on whether you have an electric or gas model.
Electric Kenmore Elite Dryers
In an electric model, the heating element produces heat. The element has continuity (around 10 to 20 ohms). If the element fails, it breaks and shows infinite resistance.
But more often, the thermal fuse is the culprit. A blown thermal fuse on an electric model prevents the heating circuit from energizing.
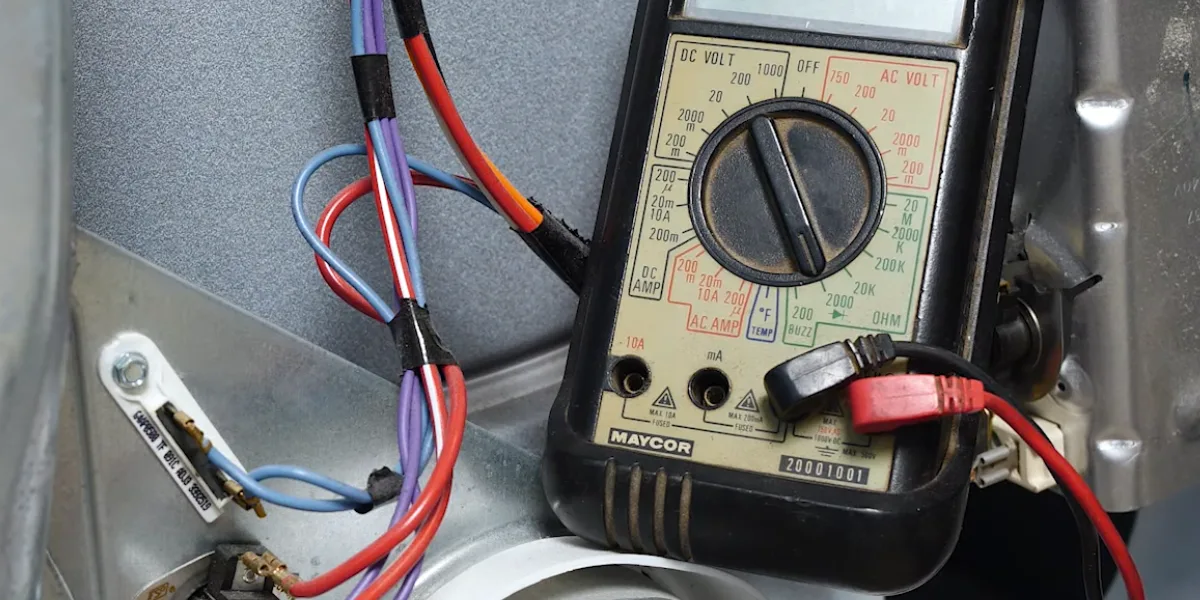
Image source: Bing (Web (fair-use with source credit))
- Test the thermal fuse for continuity.
- Test the high-limit thermostat (mounted on the heater housing). It should have continuity at room temperature.
- Test the cycling thermostat. It opens and closes to regulate temperature. If it fails open, no heat.
- Test the heating element itself. Disconnect it and measure resistance.
If all those test good, the problem may be a relay on the control board. That's a board-level repair.
Gas Kenmore Elite Dryers
Gas models use a different heating path. The igniter glows, then the gas valve opens, and the flame heats the air.
- Listen for the igniter clicking. Look through the access panel to see if it glows orange.
- If the igniter glows but no flame appears, the gas valve coils are bad. Test each coil for continuity. They typically have resistance between 500 and 1500 ohms.
- If the igniter doesn't glow at all, test the igniter itself (usually between 40 and 100 ohms). Also test the flame sensor and the main board.
A common failure on gas Kenmore Elite dryers is the gas valve coils. They burn out over time. They are easy to replace.
But you must shut off the gas supply before disconnecting them.
For both types, check the exhaust vent. A severely restricted vent can cause the high-limit thermostat to trip. That breaks the heating circuit.
Clear the vent, and the heat may return.
If you've tested all these components and found no obvious failure, the control board may be the issue. Error code F31 (gas models) indicates the high-limit thermostat opened. F34 indicates a flame sensor failure.
Never operate the dryer without heat if the vent is disconnected or open. The machine relies on airflow to cool the heating circuit. Without it, components overheat quickly.
| Component | Electric Test | Gas Test |
|---|---|---|
| Heat source | Heating element (10-20 ohms) | Igniter (40-100 ohms) |
| Safety device | Thermal fuse (0 ohms = good) | High-limit thermostat (0 ohms = good) |
| Common failure | Blown thermal fuse | Bad gas valve coils |
This table sums up the two paths. Pick your fuel type and follow the diagnostic.
Error Codes Decoded – What That Blinking Light Is Telling You
Kenmore Elite dryers communicate through fault codes. The display will show an error like F01, F21, or F31. If you have a digital display, the code appears there.
If you have a model without a display, the lights will blink in a specific pattern to indicate the fault.
Reading those patterns requires the diagnostic mode. To enter it, press and hold the "Process" and "Start" buttons simultaneously for 3 seconds. The display should show "88" or a series of lights.
Release the buttons. Then press "Start" again. The error code will appear.
Write down the code before you do anything else. This code is your roadmap.
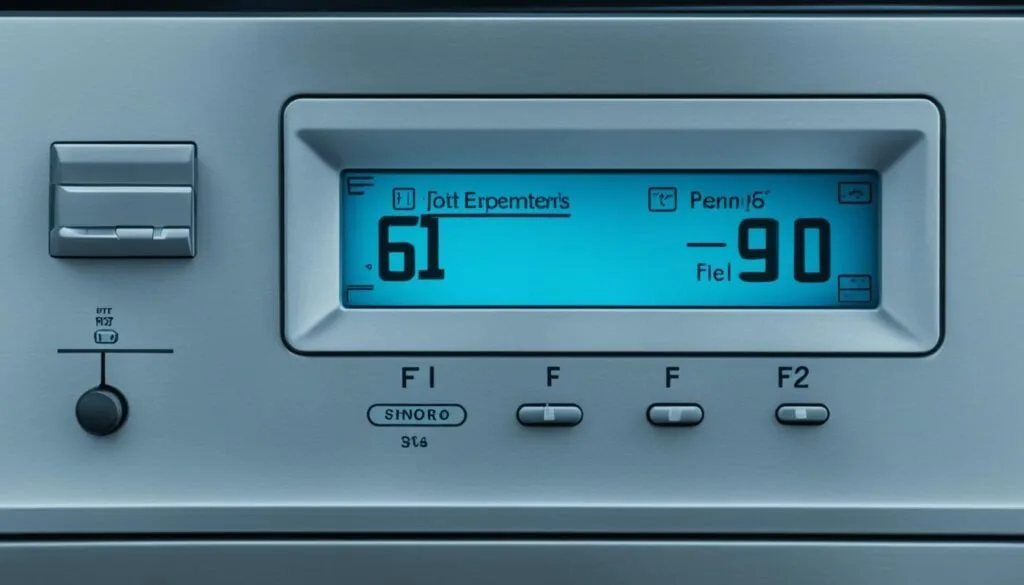
Image source: Bing (Web (fair-use with source credit))
Here are the most common Kenmore Elite error codes and what they mean.
F01, Main Control Board Communication Error
This code means the electronic control board has failed. The main board cannot communicate with the user interface. This is usually a board failure.
On rare occasions, a loose ribbon cable causes it. But the fix is almost always a replacement control board.
F21, Long Dry Time / Restricted Airflow
The machine detected that the drying cycle took too long. The most common cause is a blocked vent system. Clean the exhaust duct from the dryer to the outside.
Check for kinked flexible ducts as well. If the vent is clear, the moisture sensor may be faulty. Corroded sensor bars can't detect moisture properly.
Clean them with fine sandpaper.
F31, High-Limit Thermostat Open (Gas Models)
On gas models, this code means the high-limit thermostat opened. This thermostat is a safety device. It opens when the temperature inside the combustion chamber gets too high.
The cause could be a restricted vent, a failed thermostat, or a faulty igniter.
F34, Flame Sensor Failure (Gas Models)
The flame sensor didn't detect a flame when the gas valve opened. This could mean the sensor is dirty, the igniter failed, or the gas valve coils are bad. Clean the flame sensor with fine sandpaper.
Then retest.
F71, User Interface Communication Error
The user interface (the display panel) lost communication with the main control board. This often happens after a power surge. Try unplugging the dryer for 30 seconds and plugging it back in.
If that doesn't clear the code, the interface board is faulty.
F81, No Movement Detected
The machine detected that the drum is not turning. The most common cause is a broken belt. If the belt breaks, the drum won't rotate.
Check the belt visually. If it's intact, the motor may be failing. Listen for a humming noise from the motor area.
F90, Communication Error Between Boards
The user interface and main control board cannot communicate. This code is often the result of a power surge. Reset the dryer by unplugging it for 30 seconds.
If the code returns, one of the boards is faulty.
Error Codes Without a Display
If your model has indicator lights instead of a screen, the lights flash in a pattern. For example, a series of rapid blinks followed by a pause indicates the first digit of the code. Then the pattern repeats for the second digit.
Check the owner's manual for the exact pattern sequence.
Do not rely on error codes alone. They tell you which circuit is failing. They don't tell you which component is bad.
You still need to test the components with a multimeter. The code eliminates the guesswork about where to start.
Dryer Takes Too Long or Shuts Off Mid-Cycle
This symptom is frustrating. The dryer runs for 45 minutes, but your clothes are still damp. Or the dryer runs for 20 minutes and just stops.
Long Dry Times
If the dryer runs but takes forever to dry, the problem is almost always airflow or sensor related.
Start with the obvious: clean the lint filter. Even if it looks clean, wash it with soap and water. The mesh can get clogged with fabric softener residue.
Next, check the external vent. Disconnect the dryer from the wall duct. Run the machine on "Timed Dry" with no clothing.
Do you feel strong airflow coming from the dryer? If the airflow is weak, the internal blower may be clogged or the blower wheel may be damaged.
If the airflow is strong from the dryer but the vent is blocked, clean the duct. Use a brush kit from the hardware store. A fully blocked vent can cause a fire.
If the vent is clear, the moisture sensor may be failing. The moisture sensor consists of two metal bars on the back wall inside the drum. Over time, these bars get coated with residue.
The machine can't detect moisture. It runs longer than necessary. Clean the bars with fine grit sandpaper.
It's a 30-second fix.
Finally, check the thermostat. If the cycling thermostat has failed and stays open, the dryer won't get hot enough to dry quickly. Test it with a multimeter.
Dryer Shuts Off Mid-Cycle
If the dryer runs for a while and then stops, the most common cause is overheating.
A restricted vent causes the temperature inside the dryer to rise. The high-limit thermostat or thermal fuse trips. The machine stops to prevent a fire.
When it cools down, it may restart. But the cycle will repeat.
Check the exhaust vent thoroughly. A kinked flexible duct can cause exactly this symptom.
If the vent is clear, the thermal fuse may be failing intermittently. Replace it. But test the vent again.
Another cause is a failing main control board. An F01 error code during operation confirms this. If the board is bad, it may stop sending power to the motor after a set period.
If the dryer stops and the error code is F81, the motor is not turning. Check the belt. A broken belt means the drum doesn't spin.
The machine senses no movement and shuts off.
If the belt is intact but the motor hums without turning, the motor start capacitor or motor windings have failed. That's a motor replacement.
Unusual Noises, Burning Smells, and Other Warning Signs
Your Kenmore Elite dryer should not squeak, rumble, or smell like burning plastic. If it does, stop using it. Then find the cause.
Squealing or Screeching
This is almost always a bad idler pulley or worn drum rollers. The idler pulley tensions the belt. Its bearing dries out over time.
The sound is constant and high-pitched.
Replace the idler pulley. While you're at it, replace the drum rollers. These are wear parts on any Kenmore Elite model.
They cost about $15 to $30 each.
Thumping or Rumbling
A thumping sound usually means the drum belt has a flat spot or the belt is slipping. Replace the belt. Also check the drum glides.
These are plastic strips on the front bulkhead. If they are worn, the drum rides on metal. That makes noise.
Burning Smell
Stop the dryer immediately. Unplug it. A burning smell can mean lint has built up on the heating element.
This is a fire hazard. Remove the back panel and inspect the heater housing. Vacuum out all visible lint.
A burning smell can also mean the motor is failing. The motor windings get hot and emit a distinct electrical burning odor. If you suspect the motor, call a professional.
Motor replacement requires specific disassembly.
Rattling
Loose objects in the drum are the most common cause. Check the pockets before running any load. If the drum is empty but the rattle persists, check the blower wheel.
Sometimes a coin or button gets sucked into the blower housing. Remove the blower access panel and clear the debris.
Clicking Sound
A single click followed by a pause often indicates the igniter is cycling on a gas model. This is normal. But loud clicking can mean the igniter is failing.
If the dryer doesn't heat, test the igniter.
When to Fix It Yourself vs. When to Call a Pro
Not every repair is a DIY project. Knowing the difference saves money and prevents injury.
Safe DIY Repairs
- Replacing a thermal fuse.
- Cleaning the vent system.
- Replacing a door switch.
- Replacing the drum belt.
- Replacing the idler pulley.
- Cleaning the moisture sensor bars.
- Replacing the drum rollers.
- Replacing the igniter (gas models).
These repairs require hand tools and a multimeter. They are straightforward. The parts are inexpensive.
Call a Professional
- Main control board replacement. This involves high voltage components and console disassembly.
- Gas valve repair (beyond coil replacement). Gas line work requires a licensed technician.
- Motor replacement. The motor is bolted to the blower housing. Access is tight.
- Wiring harness replacement. Tracing bad wires is time-consuming and error-prone.
- Any repair that requires opening the sealed system or refrigerant loop.
If you are uncomfortable at any point, stop. A professional repair costs $100 to $150 for the service call plus parts. That's cheaper than a hospital bill or a new dryer.
Common Mistakes That Cost You Time and Money
Here are the most common errors people make when troubleshooting a Kenmore Elite dryer.
Replacing the Thermal Fuse Without Checking the Vent
This is the number one mistake. The fuse blows because the dryer overheated. If you replace it without clearing the vent, the new fuse blows immediately.
You wasted $15 and an hour of work.
Bypassing Safety Devices
Some people jumper the thermal fuse to "test" the dryer. This can cause the heating element to melt or start a fire. Never bypass any safety device.
Even for testing.
Buying Generic Parts Without Checking Fit
Kenmore Elite dryers use specific part numbers, especially for control boards. A generic board from an online marketplace may not match the wiring. Always use OEM or verified compatible parts based on your model number.
Ignoring the Error Code
The error code is the machine's way of telling you what's wrong. Ignoring it and swapping parts randomly is expensive and frustrating. Read the code first.
Then diagnose.
Not Disconnecting Power Before Testing
Multimeter tests on live circuits can cause shock. Always unplug the dryer before testing component continuity.
DIY Maintenance That Prevents Future Problems
A little preventive maintenance keeps your Kenmore Elite dryer running smoothly. Here's what to do on a regular schedule.
Every 6 Months
- Clean the vent system completely. Disconnect the duct from the dryer. Vacuum both ends. Brush out the entire length.
- Test the thermal fuse and thermostats for continuity. Replace any that appear weak.
- Clean the moisture sensor bars with fine sandpaper.
Every Year
- Remove the back panel. Vacuum all lint from the interior, especially around the motor and heating element.
- Inspect the drum belt for cracks or wear. Replace it if it looks frayed.
- Lubricate the idler pulley bearing with a small drop of machine oil. Do not over-lubricate.
Every 2 Years
- Replace the drum rollers and idler pulley as a set. These wear out over time.
- Replace the drum belt even if it looks intact. A snapped belt stops the dryer immediately.
Seasonal Checks
- In winter, check the external vent cover for ice buildup. A frozen vent restricts airflow.
- In spring, check the vent for bird or insect nests. Remove any debris.
These steps add 10 to 30 minutes to your schedule each half-year. They prevent the most common breakdowns.
Frequently Asked Questions
How do I reset my Kenmore Elite dryer?
Unplug the dryer from the wall outlet. Wait 30 seconds. Plug it back in.
This clears the control board memory and resets most error codes.
What does F01 mean on a Kenmore Elite dryer?
F01 means a main control board communication error. The board needs replacement. Try resetting the dryer first.
If the code returns, call a technician.
Why is my Kenmore Elite dryer not heating?
Check the thermal fuse on electric models. Test it with a multimeter. On gas models, check the igniter and gas valve coils.
Also inspect the vent for blockages.
How do I clean the moisture sensor on my Kenmore Elite dryer?
Locate the two metal bars on the back wall inside the drum. Rub them gently with fine grit sandpaper (220 grit works well). Wipe off any dust.
That clears the coating that prevents accurate moisture detection.
What does F21 mean on my Kenmore Elite dryer?
F21 means the drying cycle took too long. Check for a restricted vent or a clogged lint filter. Clean the moisture sensor bars.
If the code persists, the blower wheel may be damaged.
Can I bypass the thermal fuse on my Kenmore Elite dryer?
No. Never bypass the thermal fuse. It is a safety device that prevents the dryer from overheating.
Bypassing it creates a fire hazard.
How much does it cost to fix a Kenmore Elite dryer?
A DIY repair costs $10 to $30 for a thermal fuse or $30 to $80 for a belt and rollers. A professional repair costs $100 to $200 for the service call plus parts. Board replacement can exceed $300.
How long should a Kenmore Elite dryer last?
With proper maintenance, a Kenmore Elite dryer lasts 10 to 13 years. Regular cleaning and part replacement extend its life significantly.

Similar Posts