Kitchenaid Fridge Error Code
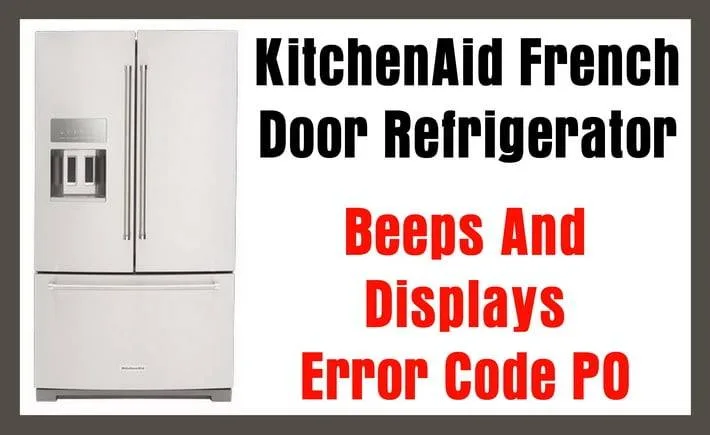
Image source: Bing (Web (fair-use with source credit))
So, your KitchenAid refrigerator is blinking a code at you. That little red or green light, or that strange letter-and-number combo on the display, feels like a secret language you were never taught. I get it.
It’s easy to jump straight to "I need a new fridge," but let’s pump the brakes.
Here’s the good news: most KitchenAid error codes are just the fridge telling you something specific is wrong. It’s not always a death sentence. Sometimes it’s as simple as a dirty filter or a door that didn’t close all the way.
Sometimes it means a part is failing and needs replacing.
In this guide, I’m going to walk you through the most common KitchenAid error codes, what they mean, and exactly what to do about them. We’ll cover how to read the display, how to reset things, and when to call a professional. Think of this as your friendly, no-nonsense manual for getting your fridge back to normal.
First Things First: Read the Code Correctly
Before we dive into the fixes, we need to talk about what you’re actually looking at. KitchenAid refrigerators can show errors in a few different ways. Getting this wrong can send you down a rabbit hole of fixing the wrong thing.
- The Blinking Red Light: Often, this is attached to the water filter indicator. If the red light on the filter button is blinking, it’s usually just telling you the filter is clogged or expired. We’ll fix that in a second.
- The "Sabbath Mode" Confusion: If your display shows "Sabbath Mode" or "Sb," you haven't hit an error. You’ve accidentally enabled a setting that disables the display and cooling cycles for religious observance. Hold the "Lock" and "Options" buttons for three seconds to turn it off.
- The Alphanumeric Codes (E01, F22, etc.): These are the real deal. These are diagnostic codes. You’ll typically see them on the main control panel display. We’re going to focus on these below.
One quick note: If your fridge is completely dark and making no noise, that’s a power issue, not a code issue. Check the outlet, the breaker, and the "Power On/Off" button on the dispenser.
The Most Common KitchenAid Error Codes (And How to Fix Them)
I’m going to break these down into categories. Some of these are simple fixes you can do in 5 minutes. Others require a multimeter and a bit of comfort with taking things apart.
Let’s start with the easy wins.
The Filter Indicator (It’s Not a Breakdown)
This is the most common thing people mistake for an error.
What it looks like: A red or orange light blinking on the water filter button, or the word "Replace" appearing on the display.
What it means: 90% of the time, it just means the water filter has reached its 6-month lifespan. It’s a maintenance reminder, not a malfunction.
The Fix:
- Buy the right filter: Check your model number (usually on a sticker inside the fridge) and grab a KitchenAid EveryDrop filter (usually model 1, 2, or 3).
- Replace it: Twist the old filter counter-clockwise. It will pop out. Push the new one in and twist clockwise until it locks.
- Reset the light: Hold down the "Water Filter" button for 3-5 seconds until the light stops blinking and turns solid.
- Flush it: Run about 3 gallons of water through the dispenser to clear out the air and carbon dust. It will sputter, that’s normal.
Expert Tip: If you just replaced the filter and the light still blinks, you likely didn’t reset the timer. Hold that button down until it beeps.
Temperature Error Codes (The "Is My Food Safe?" Codes)
These are the codes that make you worry. They usually start with an "E" or a "F" and relate to the thermistors (temperature sensors) or the control board.
E01, E02, E03, E09, E13
What they mean: These codes usually indicate a problem with the thermistors. Essentially, the main control board isn't getting a good reading on the temperature inside the fridge or freezer. Sometimes it’s a wiring issue (a loose connector), and sometimes the thermistor itself has failed.
The Fix:
- The Quick Reset: Unplug the fridge for 5 minutes. Plug it back in. If the code clears and the temperature comes down, you might have just had a glitch. But keep an eye on it. If it comes back, move to the next step.
- Check the Wiring: Unplug the fridge. Located the thermistor, it’s usually behind the back panel inside the fridge or freezer. It looks like a small plastic cylinder with two wires. Check the connector to make sure it’s plugged in tight.
- Test the Thermistor: You’ll need a multimeter for this. At room temperature (around 70°F), the thermistor should read around 10,000 to 12,000 ohms. If it reads "OL" (open line) or "0," it’s dead and needs replacing.
What to do: If you're not comfortable testing electronics, this is a good place to call a repair tech. Replacing the thermistor is easy, but diagnosing it takes a little know-how.
F06 or E06
What they mean: This is a defrost system error. The fridge is too cold, or the freezer is icing up because the defrost heater isn't working. This can also cause the compressor to run constantly.
The Fix:
This is more complex. It usually involves the defrost heater, the bi-metal thermostat, or the defrost control board.
- Unplug the fridge.
- Access the evaporator coils: You’ll need to remove the back panel inside the freezer.
- Look for ice: If there’s a solid block of ice, the defrost cycle failed.
- Test the heater: Use a multimeter to check the defrost heater element (the glass or metal rod at the bottom of the coils). It should show continuity (a low resistance reading). If it’s open, it’s burned out.
What to do: If you see a solid block of ice, you can help it melt by unplugging the fridge and leaving the door open for 24 hours. But if the heater is burned out, it will just freeze again. You’ll need to replace the heater kit to fix this permanently.
Frost and Fan Errors (The "Airflow" Codes)
These often relate to the evaporator fan, which pushes cold air from the freezer into the fridge.
F07
What they mean: This indicates a problem with the evaporator fan motor. The fan isn't running, which means cold air isn't circulating. The freezer might still be cold, but the fridge section will be warm.
The Fix:
- Check for Obstruction: Open the freezer. Is there a bag of peas blocking the fan? It’s usually at the back of the freezer behind the panel. If ice has formed around the fan, that’s a defrost issue, but if it's just blocked, that’s an easy fix.
- Test the Fan: Unplug the fridge, remove the back panel, and try to spin the fan blade by hand. If it’s stiff or grinding, the bearing is shot. You can test for voltage at the connector, but if the fan isn't free-spinning, it’s time for a new one.
Real Talk: This is a common failure point. The fan motor runs almost constantly, so it wears out. Replacing it is a standard repair for a pro, but a handy DIYer can do it with a few screwdrivers.
E05
What they mean: This is a freezer thermistor (temperature sensor) error.
The Fix: Similar to the E01 code, this is a sensor issue. Check the wiring and test the sensor in the freezer. It should read a higher resistance when cold (around 16,000-20,000 ohms at freezing temps).
If it's dead, replace it.
The "Air Flow" and Damper Errors
E24 or F24
What they mean: This usually points to a problem with the air damper, a little door that opens and closes between the freezer and the fridge to control temperature. If the door is stuck closed, the fridge is warm. If stuck open, the fridge might freeze your lettuce.
The Fix:
This isn't a DIY part test usually. The damper is a motorized unit. You can check if it's clicking when you change temperatures.
If it’s silent, it may be dead. But more often than not, if you’re getting this code, you’re looking at replacing the damper assembly. This is a job for a pro unless you’re very good with a multimeter and small wiring connectors.
What to Do When the Code Isn't Listed
Sometimes the code isn't in the manual. That sounds stressful, but here’s what I want you to do.
Step 1: The Hard Reset
This clears minor glitches. It's amazing how often this fixes things.
- Unplug the fridge from the wall.
- Wait 5-10 minutes. (This drains the capacitors and lets the control board fully reset.)
- Plug it back in.
- Wait 24 hours for the temperature to stabilize.
Step 2: Check the Condenser Coils
Dirty coils are the root of many evil. If the coils under the fridge are caked with dust, the compressor works too hard, overheats, and can throw weird codes. Vacuum them out.
It’s free and often fixes efficiency issues.
Step 3: Look for the Obvious
Is the fridge tilted? Are the doors sealing properly? Is there frost building up on the back wall?
These visual clues are gold for a repair tech.
Step 4: Call KitchenAid or a Local Pro
If the reset doesn't clear it, and you're not confident with a multimeter, call a certified technician. Tell them the exact code you are seeing. A good tech will know exactly which part to order before they even knock on your door.
Replacing a board blindly can be expensive and wasteful, a pro can diagnose the cause of the code, not just the symptom.
The Truth About "Fixing" These Codes
I want to be straight with you. I fix a lot of these myself, but I also know my limits. If the code involves a sealed system (like a compressor or a refrigerant leak), you don't want to DIY that.
It requires specialized tools and EPA certification.
Here’s a quick breakdown of what’s a DIY job and what’s a pro job:
| The Issue | The Code (Usually) | DIY Difficulty | When to Call a Pro |
|---|---|---|---|
| Water Filter | Blinking Red Light | Easy | You've replaced it and it still blinks. |
| Thermistors | E01, E02, E05 | Moderate | You don't own a multimeter. |
| Defrost Heater | F06/E06 | Hard | You find a block of ice or a broken heater. |
| Evaporator Fan | F07 | Moderate | The fan is seized and you don't want to take apart the freezer. |
| Damper Door | E24/F24 | Hard | The door is stuck and you can't diagnose the motor. |
| Main Board | Various | Hard | You've replaced everything else, and it still fails. |
How to Prevent Future Error Codes
An ounce of prevention is worth a pound of cure, right? Here’s how I keep my fridge running smoothly year after year.
1. Clean the Condenser Coils (Every 6 Months)
This is the #1 thing people neglect. Dust and pet hair act like an insulator, making the compressor work harder and hotter. A $20 coil brush is a lot cheaper than a new compressor.
2. Change the Water Filter (Every 6 Months)
Don't wait for the light. Do it proactively. It keeps the water valve from clogging and stops the "Replace Filter" light from flashing.
3. Check the Door Seals (Annually)
Take a dollar bill and close the fridge door on it. If you can pull the bill out with no resistance, your seal is weak. A bad seal lets cold air out, causing the compressor to run non-stop.
Clean the gaskets with soapy water and a soft cloth.
4. Level the Fridge
If the fridge is tilted, the doors might not close properly or the compressor might be straining. Use a level and adjust the front feet.
5. Don't Overload It
Blocking the vents inside the fridge restricts airflow. Air needs to move to keep temperatures even. This reduces strain on the cooling system.
Final Thoughts: Don't Panic, Diagnose
Seeing an error code on a major appliance feels heavy. But remember, your refrigerator is just a machine that's trying to tell you what's wrong. It's actually a helpful feature, not a punitive one!
Take a deep breath. Check the code. Try the hard reset first.
If that doesn't work, pull the fridge out and clean the coils. That fixes a surprising percentage of issues.
If you are dealing with a code you can't fix or don't feel safe working around electricity, call a reputable appliance repair service. It’s worth the money for the peace of mind. And remember, you’re not replacing the whole fridge over a sensor or a fan, it’s usually a small part and a relatively simple fix.
You've got this.

Similar Posts