Mirrorless Camera Blurry Photos Troubleshooting
You've framed the shot. The light is right. Your subject is poised.
Then you check the LCD and see a soft, blurry mess. If you need mirrorless camera blurry photos troubleshooting, you are in the right place.
The three main types of blur each have a distinct fix. Motion blur, focus errors, and lens technique issues cover nearly every case. Once you know what to look for, the fix is often simple.
Quick Answer
Blurry photos usually come from three sources. Motion blur, focus errors, or aperture technique. Each has a specific fix.
Start by checking your shutter speed. Then verify your autofocus settings.
First, Let's Figure Out What Kind of Blur You're Looking At
Load a full-resolution image onto your computer screen and zoom to 100 percent. Check sharpness at different points across the frame. The pattern of softness tells you the cause.
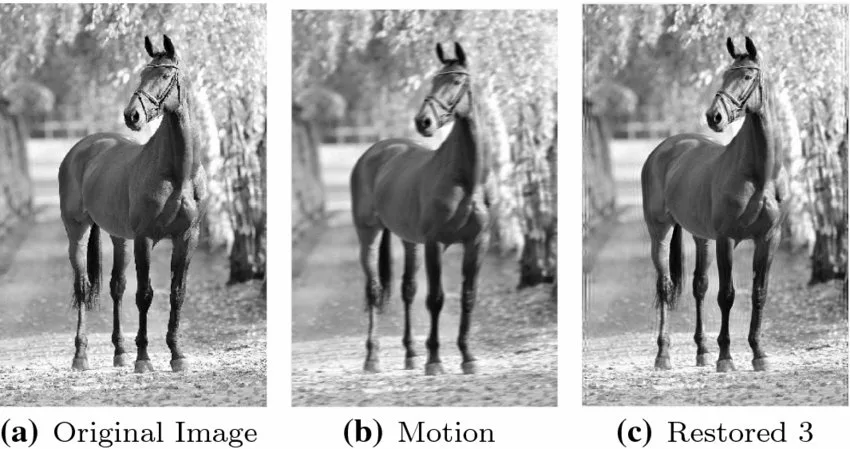
If the entire image looks uniformly soft, that is motion blur. Camera shake or subject movement causes this. The blur has a directional smear.
Increase your shutter speed or use a tripod.
If the background looks crisp but your subject is soft, that is a focus error. The camera locked onto the wrong plane. Fix this by changing your autofocus mode or point selection.
If only one corner or one side of the image looks soft, the lens may be decentered. A protective filter can also cause this. Remove any filters and shoot a test frame.
If the soft spot appears in the same location on every image, check your sensor. Sensor dust creates localized blurry patches visible at smaller apertures like f/16.
On most mirrorless cameras, press the magnify button during image review. This lets you check sharpness at the pixel level without a computer. Do this right after shooting so you can adjust settings on the spot.
The same core logic applies whether you are on mirrorless or have dealt with these challenges on a DSLR before.
The Motion Blur Branch — Camera Shake vs. Subject Movement
Camera shake happens when you move during the exposure. Subject motion happens when the person or object moves. The tell is in where the blur lives.
If the background is also blurred in the same direction, that is camera shake. Everything smears together. If the subject is blurred but the background is sharp, the subject moved while the camera stayed still.
The standard rule for avoiding camera shake is the reciprocal rule. Your shutter speed should be at least 1 divided by your focal length. For a 50mm lens, that is 1/50th of a second.
For a 200mm lens, it is 1/200th.
There is a catch. On an APS-C mirrorless camera with a 1.5x crop factor, a 50mm lens effectively becomes 75mm. Your minimum shutter speed becomes 1/75th.
On Micro Four Thirds with a 2x crop, that same lens needs at least 1/100th.
Image stabilization changes this math. Per CIPA testing, a typical IBIS system offers 4 to 5 stops of correction. In real world use, expect 2 to 3 stops.
Modern stabilization systems perform well, but they are not perfect.
A common mistake is leaving stabilization on when using a tripod. Turn IBIS off when the camera is on a tripod. The system can introduce drift and cause blur.
For subject motion, switch to a faster shutter speed. Action like sports needs at least 1/500th. Use burst mode to capture multiple frames.
One of them will be sharper.
If you still get blur after these checks, raise your ISO to allow a faster shutter. You can also review our guide on stabilization troubleshooting for more detail.
Image source: Web (Bing) / researchgate.net (Web image (fair-use with source credit))
The Focus Error Branch — Missed AF, Wrong Mode, or Just a Soft Lens?
If your subject is soft but the background is crisp, the autofocus missed. The likely cause is your AF mode or point selection.
Mirrorless cameras offer several autofocus modes. AF-S locks focus once. It works well for static subjects.
AF-C adjusts focus as the subject moves. Use it for action. A common mistake is using AF-C for portraits.
The camera keeps adjusting and can land on the wrong spot.
Focus point placement matters just as much. Switch to single point AF. Place the point directly on your subject's eye.
Do not let the camera choose automatically.

Image source: Bing (Web (fair-use with source credit))
Eye AF is a great mirrorless feature. But it has limits. It struggles in low light.
It can miss with glasses or strong backlighting. If Eye AF fails, drop back to a single point. Manual focus with magnification is another reliable method for still subjects.
Back-button focus separates focus from the shutter button. Set the camera to AF-C. Use the AF-On button to initiate focus.
Release the button to lock focus. This prevents the camera from refocusing when you press the shutter.
Sometimes the lens itself is the problem. Many lenses are soft wide open at their maximum aperture. A lens at f/1.4 may lack sharpness.
Stopping down to f/2.8 or f/4 improves sharpness significantly. This is normal.
Check the side of your lens. Most lenses have an AF/MF switch. Make sure it is set to AF.
Also check the camera body setting. These issues are covered in more depth in our guide on fixing blurry photos with a DSLR.
The Lens & Technique Branch — Aperture, Sharpness, and Cleaning
Every lens has a sweet spot aperture where it is sharpest. That is typically two to three stops down from the maximum aperture. A 50mm f/1.8 lens is sharpest around f/4 to f/5.6.
A 24-70mm f/2.8 zoom is best at f/5.6 to f/8.
Do not stop down too far. At small apertures like f/16 or f/22, diffraction sets in. Light waves bend around the aperture blades.
This reduces sharpness across the frame. On full-frame cameras, stay at f/11 or wider. On APS-C, avoid f/16.
On Micro Four Thirds, f/11 is already in diffraction territory.
Lens cleanliness also matters. A smudge on the front element can soften images. A protective UV filter can also degrade sharpness.
Remove the filter and test. If your images get sharper, the filter is the problem.
Sensor dust creates soft spots in the same position on every image. These show up clearly at small apertures. Use your camera's sensor cleaning function or a manual blower.
If the dust persists, a professional clean may be needed.
For critical shots, use a self-timer or remote release. This eliminates shake from pressing the shutter button. We have a full guide on camera timer troubleshooting for more detail.
Shoot in raw for full control over sharpening in post. JPEG files apply in-camera sharpening. If your JPEGs look soft, check your Picture Style settings.
Set sharpening to a higher level.
The Camera Body & Settings Branch — Shutter Type, Release Priority, and Firmware
Shutter shock is a real issue on certain mirrorless models. The mechanical shutter's vibration can cause blur at speeds between 1/8 and 1/125 second. This is more visible with longer lenses.
Switch to the Electronic First Curtain Shutter (EFCS). EFCS eliminates the first curtain's vibration and avoids the worst of shutter shock. Use full electronic shutter for zero vibration and silent shooting.
Electronic shutter can cause rolling shutter distortion with fast-moving subjects. For action, stick with mechanical shutter or EFCS.
Release priority matters. Some cameras let you choose between Focus Priority and Release Priority. Focus Priority only fires the shutter when focus is confirmed.
Release Priority fires immediately, even if the shot is out of focus. Set your camera to Focus Priority for portraits and static scenes. Use Release Priority only for fast action.
Firmware updates improve autofocus accuracy and system stability. Check your camera body and lens firmware versions. Update both if needed.
We have a guide on camera firmware updates that walks through the process.
Back-button focus also helps here. It gives you more control over when the camera refocuses. Practice with it for a few sessions.
Many shooters find it reduces missed focus significantly.

Similar Posts