How to Set White Balance on Mirrorless Camera
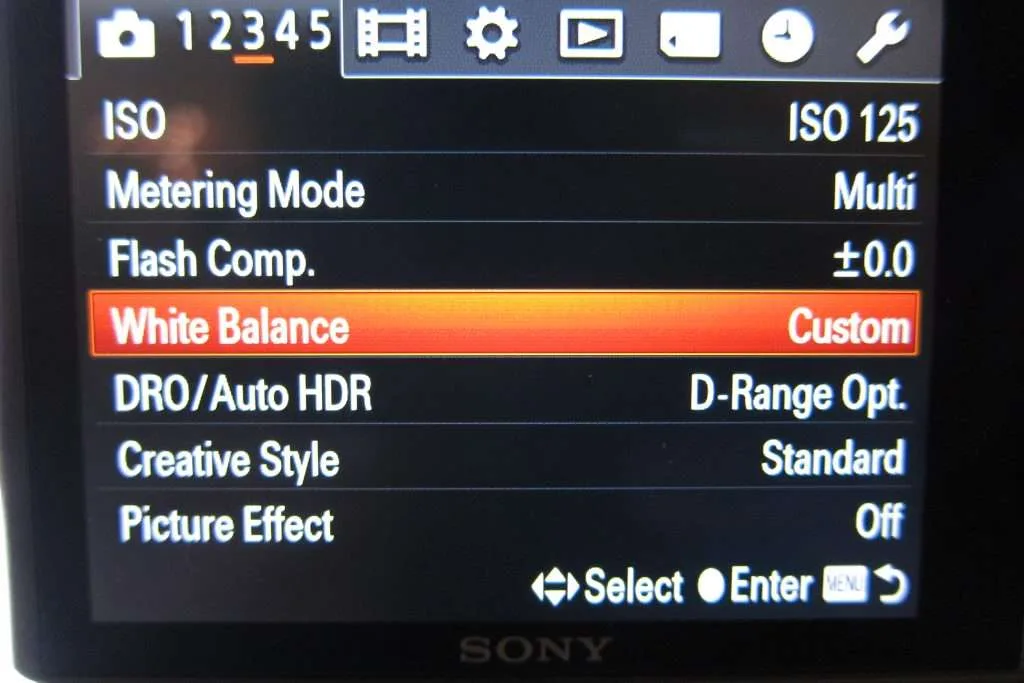
If you've ever wondered how to set white balance on mirrorless camera, you're not the only one. That orange glow from indoor lights is one of the most common frustrations for new shooters. The fix is right in your camera's menu.
Mirrorless cameras give you a huge advantage: you can see the color change in real time through the viewfinder.
Per CIE standard illuminant D65, daylight is roughly 6500 Kelvin. But your camera's Auto White Balance can drift by over 1500K in mixed lighting. That's why knowing how to set it manually makes such a difference.
Let's start with why your camera gets it wrong.
Quick Answer
To set white balance on a mirrorless camera, select a preset or use a gray card. Choose Daylight for sunny scenes. Switch to Tungsten for indoor lights.
Use Custom for maximum accuracy. Frame a gray card in your light source and set it as the reference.
Image source: Web (Bing) / storage.googleapis.com (Web image (fair-use with source credit))
Why Your White Balance Looks Wrong (and It's Not Your Camera's Fault)
Your camera's Auto White Balance tries to guess what light you're under. In bright sunlight, it usually gets it right. But throw in a mix of tungsten bulbs and window light, and the algorithm starts guessing badly.
The camera sees the world as neutral gray. It tries to make everything average out to that gray point. When the scene is dominated by warm light, it attempts to cool things down.
It often overcorrects or undercorrects.
That's why you get inconsistent results. Shoot one frame by the window and another in the corner, and the skin tones shift. The camera doesn't know you want the warm lamplight to stay warm.
It just wants to neutralize everything.
The same challenge applies to any digital camera. The same principles apply whether you're using a mirrorless body or correcting color casts on a DSLR. The fix is taking control away from the algorithm.
How Color Temperature and Tint Actually Work in the Viewfinder
Color temperature is measured in Kelvin. Lower numbers like 3200K give a warm orange glow. Higher numbers like 7000K give a cool blue shade.
Daylight sits around 5500K to 6500K.
But there's a second axis that most people miss: tint. Tint runs from green to magenta. Fluorescent lights often add a greenish cast.
Shade can add a magenta tint. Your camera's white balance adjustment lets you shift both temperature and tint independently.
In the live view display, you can see these changes instantly. Move the temperature slider and watch the scene warm up or cool down. Move the tint slider and watch the green or magenta fade in or out.
This real-time feedback is the mirrorless advantage.
Manufacturer specs confirm that most mirrorless cameras let you adjust in increments of 100K or smaller. Some allow 50K steps. The visual feedback makes it easier to dial in the exact look you want.
The Three Ways to Set White Balance on a Mirrorless Camera
Method 1: Presets
Presets are the fastest option. Pick Daylight, Cloudy, Shade, Tungsten, Fluorescent, or Flash. They work well in single-light situations.
Tungsten at 3200K handles most household bulbs. Daylight at 5500K works for outdoor sun.
Method 2: Manual Kelvin
Set a specific Kelvin value yourself. This gives you more control than presets. Dial in 4500K for a slightly warm look.
Set 6500K for a neutral daylight feel. This is great when you know the light source.
Method 3: Custom White Balance (Gray Card)
This is the most accurate method. Place a gray card in the same light as your subject. Take a photo of it.
Then set that image as your custom white balance reference. The camera calculates the exact color correction needed.

Image source: Bing (Web (fair-use with source credit))
Each brand has a slightly different menu path. Sony puts it under the WB menu. Canon uses a dedicated button on some models.
Nikon uses the i menu. The logic is the same across all brands.
How to Read the Color Cast in Live View (and Fix It)
Live view is your best friend for white balance. It shows you the effect of every adjustment in real time. Watching the preview change in real time is the fastest way to learn.
Look at the white areas in your scene. A white wall, a white shirt, or a piece of paper. If it looks yellow, raise the Kelvin.
If it looks blue, lower the Kelvin. If it looks green, shift the tint toward magenta. If it looks pink, shift the tint toward green.
Use the RGB histogram if your camera has one. A balanced white balance shows roughly equal peaks for red, green, and blue in neutral areas. If red is higher, the image is too warm.
If blue is higher, it's too cool.
For portraits, focus on skin tones. Warm skin looks healthy and natural. Cool skin looks pale or sickly.
Adjust until the skin looks right to your eye, even if the white wall isn't perfectly neutral.
Sony and Fujifilm cameras offer a live view white balance preview that's especially accurate. Canon and Nikon are close behind. The key is trusting what you see and adjusting until it matches what you remember the scene looking like.
White Balance for Different Shooting Scenarios: Portraits, Events, and Mixed Light
Portraits
For portraits, you want natural skin tones. Use a gray card if possible. For outdoor shots, the Cloudy preset at 6500K often gives a pleasing warmth.
For indoor portraits, Tungsten at 3200K works, but check the skin. You may need to tweak the tint. Shooting portraits with consistent lighting is easier when you lock the white balance early.
Events
Events have changing light. Walk from a reception hall to an outdoor patio, and the light shifts. Use Auto White Balance for speed, but lock it once you're in a consistent light.
Or set a custom white balance at the start and stick with it. This keeps skin tones consistent across all shots.
Mixed Light
Mixed light is the toughest challenge. You have a window on one side and a lamp on the other. The camera can't fix both.
Set a compromise Kelvin, like 4000K, and adjust in post. Or light the scene with a flash to override the ambient color.
For landscape work, you can be more creative. A warm sunrise at 4500K feels cozy. A cool snowy scene at 7500K feels crisp.
Capturing landscapes in changing light gives you room to experiment with color mood.
The key is consistency. If you're shooting a series, keep the same white balance for all frames. This makes editing much faster.
Pro Tips for Fine-Tuning White Balance and Keeping It Consistent
Once you get the basics down, a few advanced techniques save you time in editing. The first is white balance bracketing. Some mirrorless cameras let you shoot three frames at once, each with a different color temperature.
You keep the one that looks best.
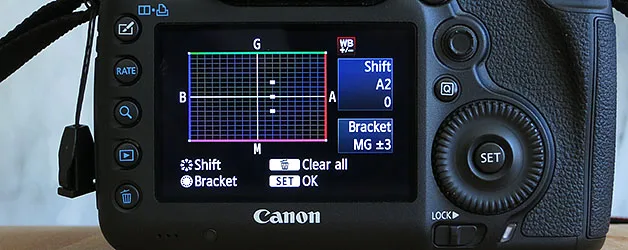
Image source: Web (Bing) / p4pictures.com (Web image (fair-use with source credit))
White balance lock is essential for video. If you let the camera adjust mid-shot, the color shifts visibly. Set your white balance manually before you hit record.
Lock it with the AE-L button if your camera supports that function.
For stills, consider shooting raw. Raw files store all the color data without baking in the white balance. You can adjust it later in editing software.
This is a safety net if you're unsure about the light.
A color checker chart takes accuracy to another level. It includes gray, white, and black patches plus primary colors. You photograph it once, then use software to create a custom profile.
This is standard practice for product photography and commercial work.
If you're shooting a series of portraits, keep the white balance consistent across all frames. The easiest way is to set a custom white balance at the start. Don't let the camera switch back to Auto between shots.
Getting the exposure right first pairs well with locking your white balance.
Aggregate reviews indicate that mirrorless cameras from Sony, Canon, and Nikon all offer white balance shift in the menu. This lets you fine-tune the tint by a few points. Use it when skin looks slightly green or magenta under certain lights.
Frequently Asked Questions About White Balance
What is the best white balance setting for outdoor portraits?
Daylight preset at 5500K works well in direct sun. For shade or overcast conditions, switch to the Cloudy preset at 6500K. This adds a touch of warmth that flatters skin tones.
Adjust the tint if needed.
Can I set white balance after taking a photo?
Yes, if you shoot in raw format. Raw files store all color data. You can adjust the white balance in editing software without losing quality.
JPEG files are locked in, so get it right in camera.
Why does my auto white balance look different between shots?
Auto white balance recalculates for every frame. If the light changes slightly, the color shifts. Lock it to a preset or custom value for consistency.
This is critical for event photography.
How do I use a gray card for white balance?
Place the gray card in the same light as your subject. Fill the frame with it. Take a photo.
Then go to your camera's custom white balance menu and select that image as the reference. The camera calculates the correction.
What is the difference between white balance and tint?
White balance adjusts the warm/cool axis using Kelvin values. Tint adjusts the green/magenta axis. Both are needed for accurate color.
Fluorescent lights often require a tint shift toward magenta.
Is white balance more important for video or stills?
Both matter, but video is less forgiving. A wrong white balance in video is hard to fix without affecting the whole clip. Manual white balance lock is recommended for video to avoid color shifts mid-scene.

Similar Posts