Sony A7 IV How to Use
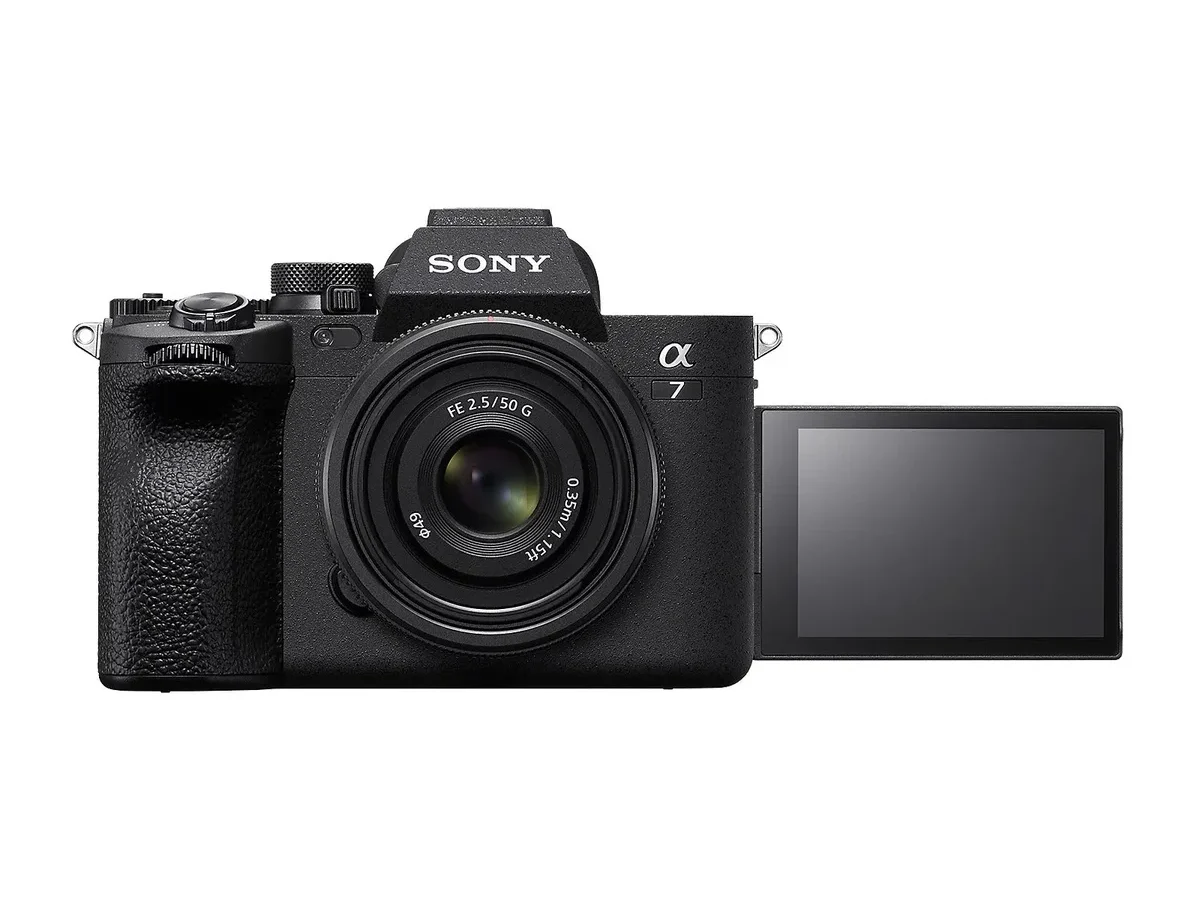
So you just got a Sony A7 IV. You charged the battery, maybe snapped a test shot of your coffee mug. Now you are staring at that dense menu system, wondering where to start.
Learning how to use the Sony A7 IV properly is the difference between a camera that frustrates you and one that practically reads your mind.
The A7 IV packs a 33-megapixel full-frame sensor and the BIONZ XR processor, the same engine found in the flagship Sony A1. As of 2026, it remains one of the most capable hybrid cameras under $2,500. But all that power is useless if you cannot find the settings you need.
Let us walk through the physical controls first.
Quick Answer
Set up a charged battery and formatted memory card. Learn the primary buttons and dials on the top and back of the camera. Navigate the main menu using the four tab groups.
Customize your Fn and custom buttons for quick access. Then adjust settings for photo or video as needed.
Getting to Know Your A7 IV: Buttons, Dials, and Ports
The A7 IV has a lot of physical controls. Do not let that intimidate you. Once you learn which ones matter most, the rest fall into place.
Start with the top plate. On the left is the mode dial. It has standard PASM positions plus dedicated video and S&Q modes.
The shutter button sits on top of the grip. Right behind it is the front control dial. The rear control dial is under your thumb on the back of the camera.
The exposure compensation dial is on the top right, near the record button.
On the back of the camera, the electronic viewfinder (EVF) sits above the vari-angle LCD screen. The LCD flips out to the side. This is great for vlogging or low-angle shots.
Below the EVF is the diopter adjustment dial. Turn it until the viewfinder text is sharp for your eyes.
The key navigation tools are the joystick and the control wheel. The joystick moves the autofocus point. The control wheel scrolls through settings.
The Fn button and the Q button are your shortcuts to the most-used settings. The menu button, playback button, and C1 through C4 custom buttons are all within thumb reach.
On the left side, under the rubber flaps, you will find the microphone jack, headphone jack, USB-C port, and full-size HDMI Type A port. The right side houses the dual memory card slots. Slot 1 supports CFexpress Type A and SD UHS-II.
Slot 2 is SD UHS-II only.
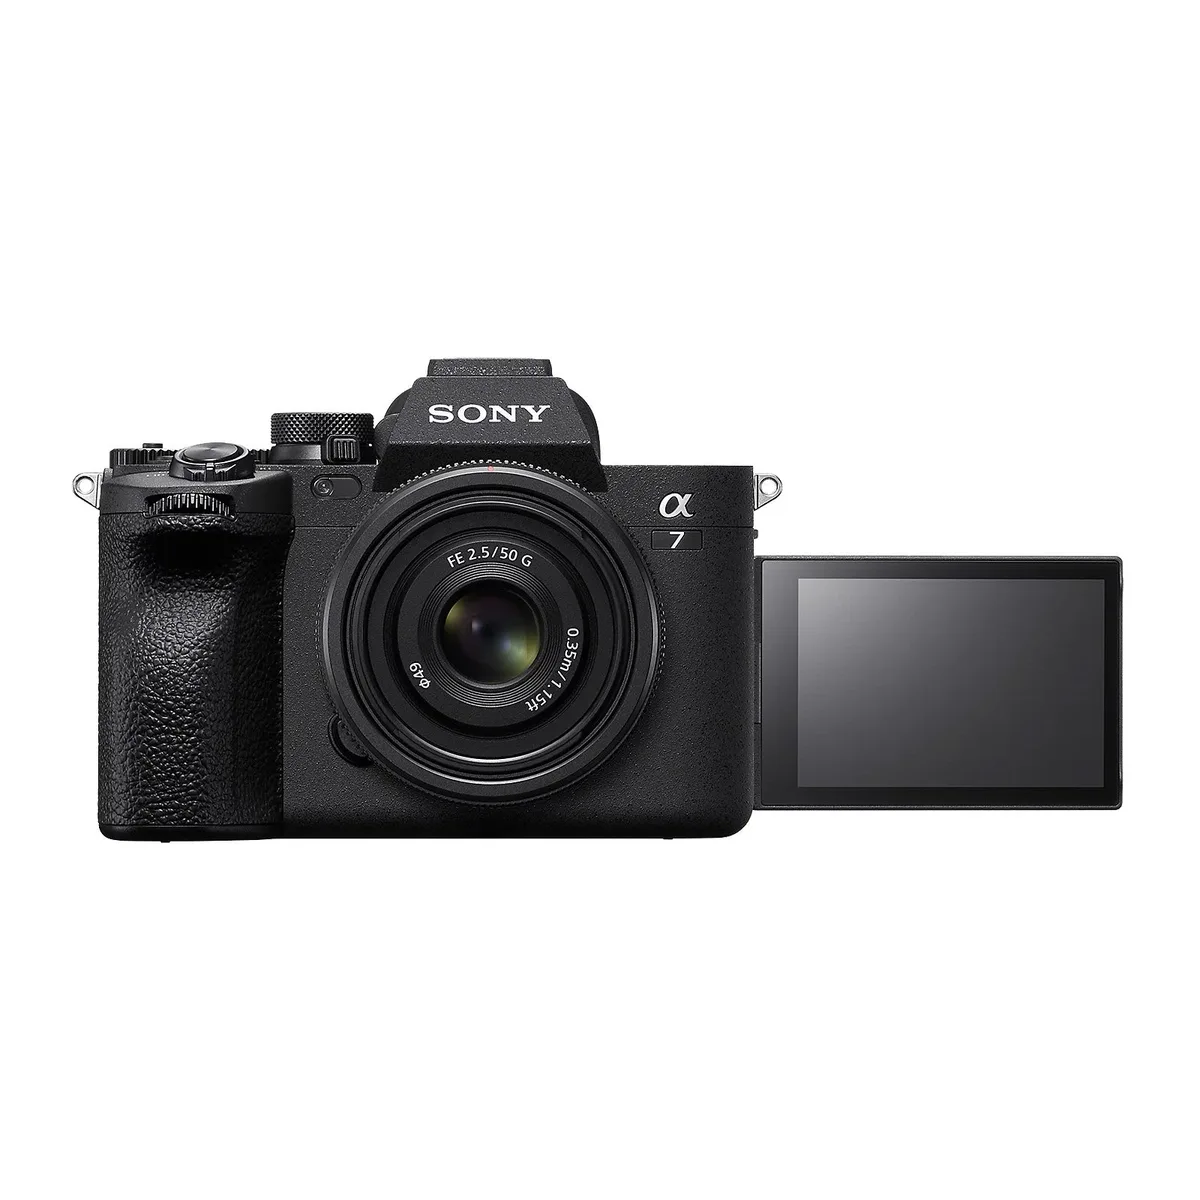
Image source: Bing (Web (fair-use with source credit))
Navigating the Menu System: A Visual Map
The Sony menu system has a reputation for being overwhelming. It is dense, but it is logical once you understand the tab structure. The main menu is divided into four primary tab groups.
The Camera tab (camera icon) contains shooting-related settings. This includes image quality, file format, drive mode, focus mode, focus area, and picture profiles. The Network tab (globe icon) handles Wi-Fi, Bluetooth, and the Imaging Edge Mobile app connection.
The Playback tab (play button icon) is for reviewing, deleting, and protecting images. The Setup tab (gear icon) is where you set the date, format memory cards, and adjust power saving and HDMI output.
Within each tab, there are multiple pages. You will see a small number at the top right of the screen, like "1/14" or "2/14". Use the control wheel to scroll through the pages within that tab.
It is a grid, not a list.
Do not try to memorize every option. Instead, learn the Fn button. Press it while in shooting mode, and you get a 12-item grid of your most common settings.
You can customize this grid. The Quick Navi (Q button) gives you a similar overlay in the viewfinder. Between the Fn menu and the Quick Navi, you can access about 90% of what you need without digging into the main menu.
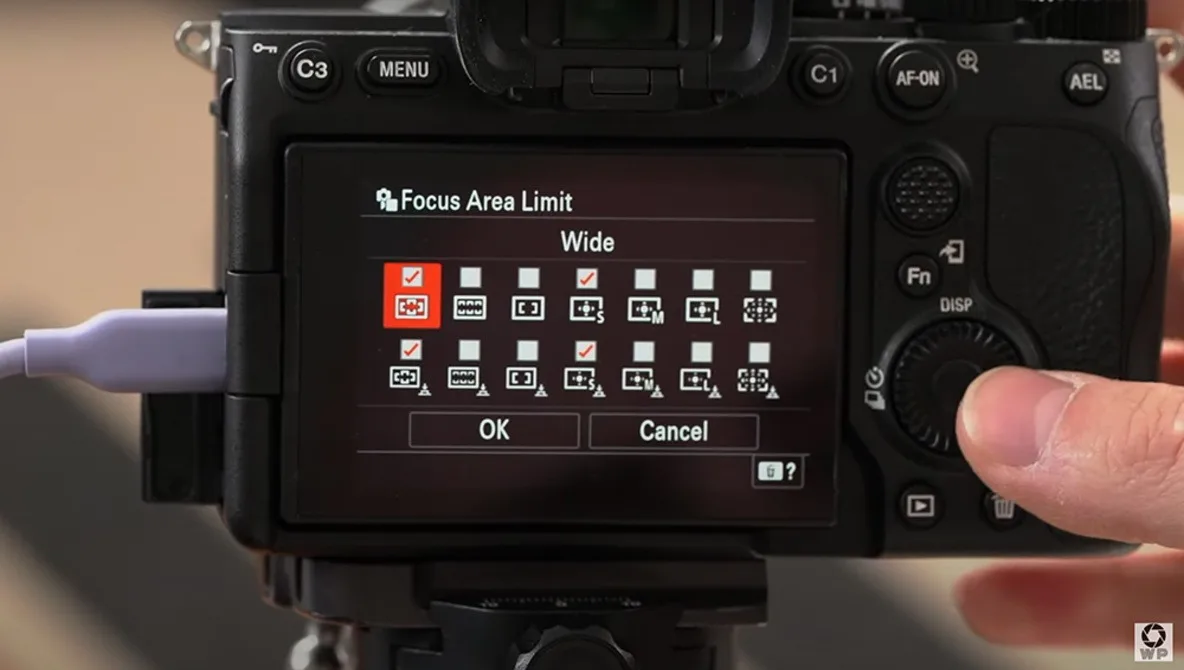
Image source: Bing (Web (fair-use with source credit))
Setting Up for Photos: Autofocus, Exposure, and Drive Modes
The autofocus is the star of the show for still photography. The A7 IV has 759 phase-detection points covering nearly the entire frame. Set the focus mode to AF-S for stationary subjects.
Use AF-C for moving subjects like kids, pets, or sports. Switch to MF for macro work or when you need precise control.
The focus area is just as important. Wide mode lets the camera decide. Zone mode gives you a movable block of points.
Flexible Spot lets you place a small, precise point. Tracking mode locks onto a subject and follows it. For portraits, use Tracking with Real-time Eye AF for humans.
It works on animals and birds too.
Set your exposure mode using the top dial. Aperture priority (A) is great for controlling depth of field. Shutter priority (S) is for action.
Manual (M) gives you full control. The exposure compensation dial is your best friend when shooting in A or S modes. Dial it to the right to brighten, left to darken.
Drive mode determines how many shots you take per press. Single shot is the default. Continuous shooting fires at up to 10 frames per second.
Use the electronic shutter for silent shooting, but be aware of rolling shutter with fast-moving subjects. The mechanical shutter is better for most situations.
Setting Up for Video: Picture Profiles, Frame Rates, and Audio
Video requires a different setup than photos. The most important decision is your picture profile. The camera ships with several built-in profiles.
For general use, S-Cinetone (PP11) gives you a film-like look straight out of camera. For color grading, use S-Log3 (PP8 or PP9) for maximum dynamic range. HLG is best for HDR displays.
Set your frame rate based on the look you want. 24 fps gives a cinematic feel. 30 fps is standard for online content. 60 fps is for slow motion. At 4K 60p, the camera crops in to Super 35mm size. You lose the full-frame field of view.
If you need the full-frame look, shoot 4K 30p or 24p.
The A7 IV records 10-bit 4:2:2 internally. This is a big deal for color grading. Use the XAVC S-I codec for the highest quality but larger files.
Use XAVC S or XAVC HS for smaller files with good quality. HS is H.265, which is more efficient but requires a newer computer to edit.
Audio matters. The built-in microphone is usable for scratch audio, but you will want an external microphone for serious work. The 3.5mm jack is on the left side.
Set the audio levels in the menu. Monitor with headphones via the headphone jack. Keep levels peaking around -12 dB for a safe margin.
One common issue is overheating during 4K 60p recording. If you record long clips in warm environments, the camera may shut down. Use a dummy battery and consider an external recorder for long interviews or events.
You can also check the Sony A6700 overheating problem for similar thermal management strategies, though the A7 IV handles heat slightly better.
Customizing the A7 IV: Buttons, Menu, and Shortcuts
The real power of this camera comes from customizing it to your workflow. Out of the box, the buttons are set to generic defaults. You can change almost everything.
Press the Menu button and go to the Setup tab. Find the "Custom Key Settings" page. This is where you assign functions to the C1 through C4 buttons.
C1 on the top plate is great for ISO. C2 works well for white balance. C3 is handy for focus mode.
C4 near the lens mount is perfect for a quick function like Silent Mode.
The Fn button menu is your most powerful shortcut. Press Fn while in shooting mode. The grid shows 12 slots.
You can customize each slot. Common choices include Picture Profile, Drive Mode, Focus Area, Metering Mode, and White Balance. Go to the Camera tab and find "Fn Menu Set" to edit it.
The joystick is already set to move the autofocus point. You can change it to control other functions if you prefer. The control dials can be reversed in direction.
Go to the Setup tab and find "Dial Set". Try both directions and see what feels natural.
Do not forget the Quick Navi overlay. Press the Q button when using the viewfinder. You get a row of settings at the bottom.
You can change them directly with the control wheel. It is faster than the main menu for changing settings between shots.
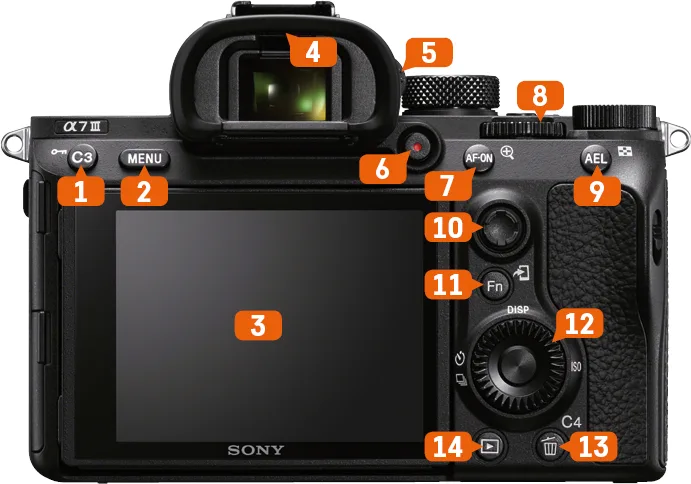
Image source: Bing (Web (fair-use with source credit))
Common Mistakes to Avoid (and How to Fix Them)
Forgetting to format the memory card. Always format the card in the camera before a shoot. Do not just delete files. Formatting clears the card structure and prevents the Sony A7 IV card error that can corrupt your footage.
Format in the Setup tab under "Format".
Using the wrong memory card speed. The A7 IV can shoot fast bursts and high-bitrate video. A slow SD card will cause the buffer to fill up quickly. Use a V60 or V90 SD card for video.
For stills, a UHS-II card with write speeds above 150 MB/s is ideal.
Leaving the lens cap on. The camera will not give you a clear warning. You will just see black in the viewfinder. Check the lens cap before you panic.
Shooting in electronic shutter mode for fast action. The electronic shutter can cause rolling shutter artifacts. Moving subjects look bent or skewed. Use the mechanical shutter for sports, wildlife, or anything with fast movement.
Ignoring the histogram. The LCD screen is bright and can fool you about exposure. Turn on the histogram in the display settings. It shows you the actual tonal range.
If the graph touches the right edge, you are clipping highlights.
Forgetting to update firmware. Sony releases firmware updates that fix bugs and add features. As of 2026, the A7 IV has received several updates that improved autofocus performance and added breathing compensation. Check the official Sony support page for the latest version.
Download it to an SD card and run the update from the Setup tab.
Frequently Asked Questions
How do I format a memory card on the Sony A7 IV?
Go to the Setup tab (gear icon) in the main menu. Scroll to "Format". Select it and confirm.
This erases all data on the card. Always format in the camera, not on a computer.
What is the best SD card for the Sony A7 IV?
Use a UHS-II SD card with V60 or V90 speed rating for video. For stills, a card with write speeds above 150 MB/s works well. Slot 1 also accepts CFexpress Type A cards for the fastest performance.
How do I turn on eye autofocus on the A7 IV?
Press the Fn button. Find "Focus Mode" and set it to AF-C. Then find "Focus Area" and set it to Tracking.
The camera will detect and track human, animal, and bird eyes automatically. You can also assign Eye AF to a custom button.
Why does my A7 IV overheat during video recording?
The camera heats up during long 4K 60p clips, especially in warm environments. Lower the recording resolution to 4K 30p or 24p. Use a dummy battery for extended recording.
Keep the LCD screen flipped out to help dissipate heat.
How do I connect the A7 IV to my phone?
Download the Imaging Edge Mobile app. On the camera, go to the Network tab and select "Smartphone Connection". Follow the on-screen instructions to pair via Bluetooth or Wi-Fi.
You can transfer images and control the camera remotely.
How do I reset the Sony A7 IV to factory settings?
Go to the Setup tab (gear icon). Scroll to "Reset". Select "Initialize" to reset all settings.
Confirm your choice. This is useful if you buy a used camera or want to start fresh.

Similar Posts