Water Worker Pressure Tank Troubleshooting
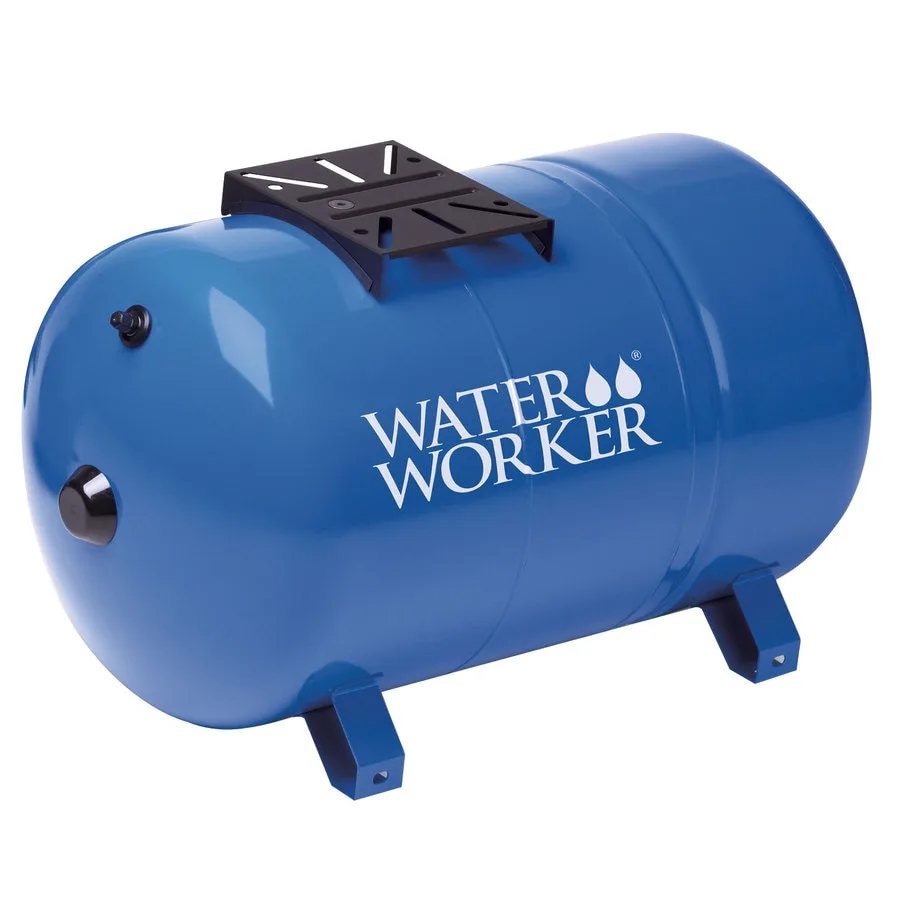
Your pressure tank is supposed to make your well system run smoothly. The pump kicks on, water flows, everything feels normal. Then one day you notice the pump clicking on every time you run the sink for thirty seconds.
Or maybe the water pressure at the shower feels like a weak trickle. That's when you enter the world of Water Worker pressure tank troubleshooting.
Before you call a plumber or start shopping for a new tank, you should know this: most pressure tank problems come down to one or two simple causes, and you can often fix them yourself in under an hour. Manufacturer specifications indicate that a properly maintained bladder tank should last eight to twelve years, and the most common failure point is the air charge, not the tank itself. Let's walk through what's happening inside that steel cylinder and how to get your water pressure back to normal.
Image source: Bing (Web (fair-use with source credit))
Quick Answer
Check the air pressure at the Schrader valve first. Turn off power to the pump. Drain the tank completely.
Test air pressure with a tire gauge. For a 30/50 pressure switch system, the air charge should be 28 PSI. Add air if low.
Replace the bladder if water comes out of the valve. Adjust the pressure switch if the pump cycles too fast.
What's Inside Your Water Worker Tank (And Why It Fails)
Your Water Worker pressure tank looks simple from the outside. But it relies on a few key components that work together. Understanding how they function makes troubleshooting a whole lot easier.
The Bladder and the Air Charge
Inside that steel shell lives a rubber bladder. Think of it as a heavy-duty balloon that holds your water. Around that bladder, between it and the tank wall, is a pocket of compressed air.
That air charge is what provides water pressure when the pump is off. As water fills the bladder, it compresses the air above it. When you open a faucet, that compressed air pushes the water out.
This is why the air charge matters so much. If you lose the air pressure, you lose the push. If the bladder ruptures, water floods the air side and fills the entire tank.
Either way, your pressure tank stops doing its job.
The Pressure Switch Connection
The pressure switch sits on the side of the tank or on the pipe near it. It senses system pressure and tells the pump when to turn on and off. A standard residential setup uses 30/50 PSI.
That means the pump kicks on at 30 PSI and shuts off at 50 PSI. Some systems use 40/60 instead. Your pressure switch setting must match your tank's air charge.
The air charge is always set two PSI below the cut-in pressure.
The Schrader Valve
That little brass valve on the side or top of the tank looks exactly like the valve on your car tire. It gives you access to the air side of the tank. If you push the pin and water comes out instead of air, you have a failed bladder.
That means a replacement is needed. If you get air, you can check the pressure and add more if needed.
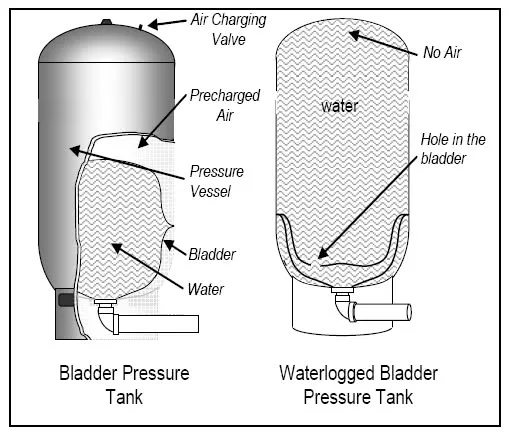
Image source: Bing (Web (fair-use with source credit))
Step-by-Step: Diagnose Your Problem in Under 10 Minutes
You can diagnose most pressure tank problems without any special tools. You need a tire pressure gauge, an air compressor or bike pump, and a few minutes of your time.
Safety First: Power Off and Drain
Start by flipping the breaker that supplies power to your well pump. You do not want the pump turning on while you work on the tank. Then open a faucet somewhere in the house.
Use the lowest one or an outside spigot. Let the water run until it stops completely. This drains the tank and relieves all system pressure.
Check the Schrader Valve
With the tank empty and the system at zero pressure, take the cap off the Schrader valve. Press the pin with your fingernail or a small tool. If air comes out, your bladder is likely intact.
If water sprays out, the bladder has failed. That means you need a replacement bladder or a new tank.
Aggregate user reviews indicate that roughly seven out of ten pressure tank complaints involve a failed air charge rather than a ruptured bladder. So if you get air, you are likely in good shape.
Test the Air Pressure
Use your tire gauge to check the pressure at the Schrader valve. The tank should read two PSI below the cut-in pressure of your switch. For a 30/50 system, that means 28 PSI.
For a 40/60 system, it is 38 PSI. If the reading is lower than that, you need to add air. If it is higher, you need to bleed some out.
Read the Pressure Gauge
While the system is still off and drained, look at the pressure gauge on the tank or the nearby pipe. It should read zero. If it reads something higher, you have trapped pressure in the system.
Open a faucet again to fully relieve it. A faulty gauge can also cause confusion. If your gauge seems stuck at a certain reading, consider replacing it.
Per ASME standards, pressure gauges on residential well systems should be accurate within two percent of full scale.
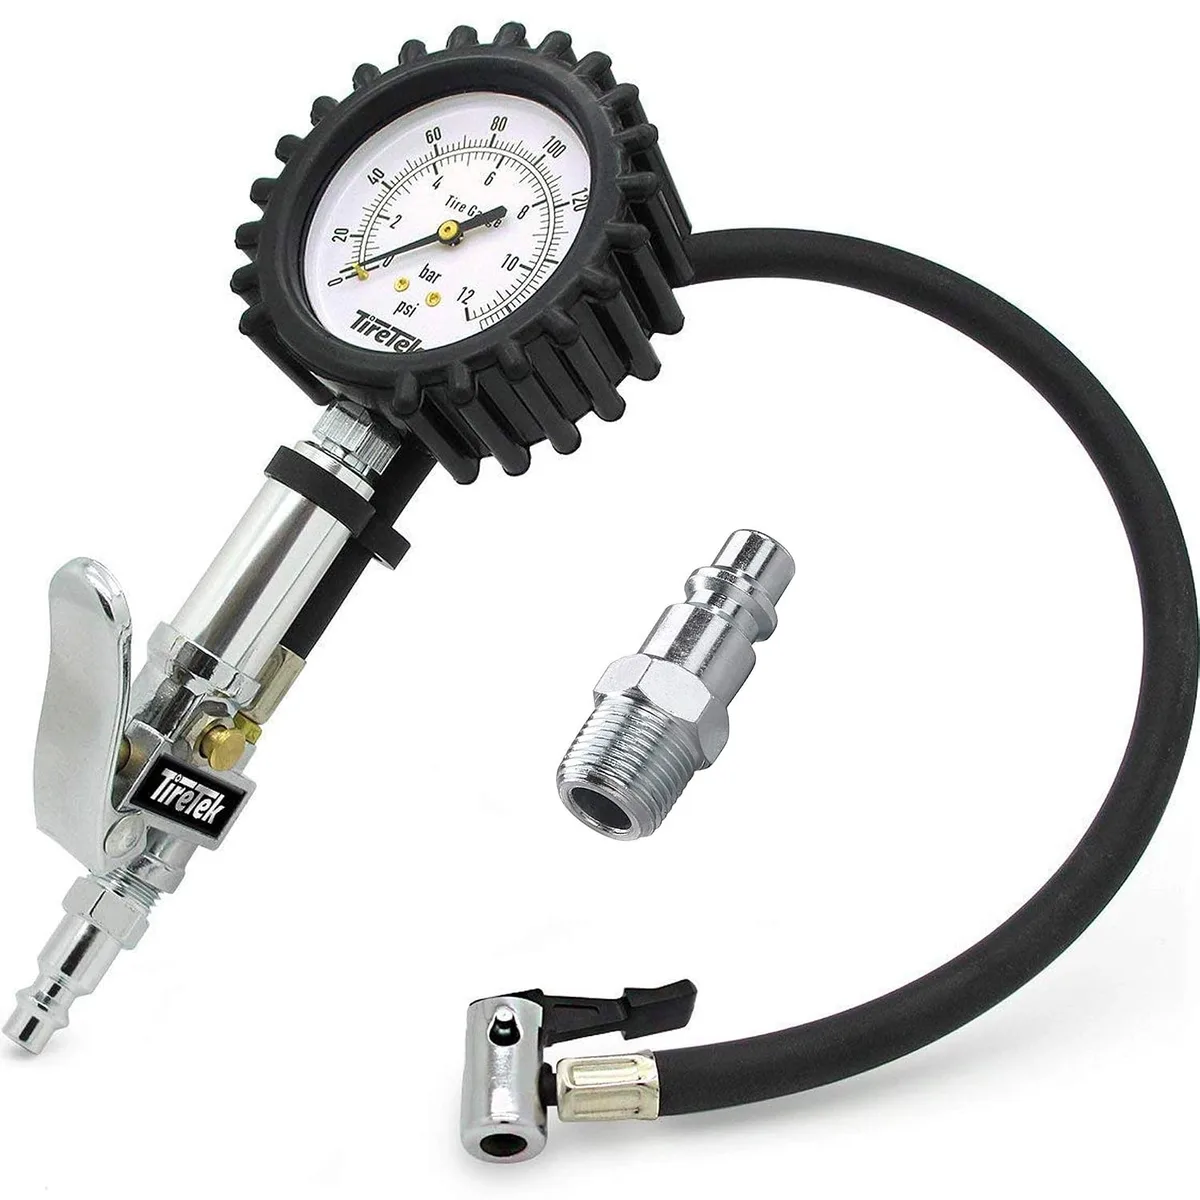
Image source: Bing (Web (fair-use with source credit))
The Most Common Problems and Exactly How to Fix Them
Once you have your diagnosis, you need a clear path to the fix. Here are the four most common problems you will encounter with a Water Worker pressure tank and what to do about each one.
Waterlogged Tank
A waterlogged tank means the air charge is gone. The bladder is full of water, and the space around it is also full of water. The tank feels heavy and sloshy when you shake it.
The pump turns on every time you use even a small amount of water.
The fix depends on whether the bladder is intact. If you checked the Schrader valve and got air, you just need to add air back. Drain the tank completely.
Use a compressor to add air to 28 PSI for a 30/50 system. Close the valve. Turn the power back on.
Let the system pressurize. If the problem recurs within a few days, you have a slow leak in the air side and should consider replacing the tank.
Short Cycling
Short cycling is when the pump turns on and off rapidly. Often every ten to fifteen seconds. This is hard on the pump and can lead to motor failure.
The most common cause is a waterlogged tank. But if the tank has good air pressure and you still get short cycling, the pressure switch may need adjustment.
| Symptom | Likely Cause | Fix |
|---|---|---|
| Pump cycles every 10-15 seconds | Waterlogged tank (low air charge) | Drain tank, add air to correct PSI |
| Pump cycles, good air pressure | Pressure switch out of adjustment | Adjust switch nut or replace switch |
| Pump runs but never shuts off | Low pressure switch cut-out or failing pump | Check switch setting, test pump output |
| Pump turns on at correct pressure but drops fast | Failed bladder | Replace bladder or tank |
Adjusting the pressure switch involves turning a nut on the switch spring. Turning it clockwise raises the cut-in and cut-out pressure. Turning it counterclockwise lowers them.
Make small adjustments. About a quarter turn. Test between each adjustment.
Pump Runs But Pressure Drops Fast
If the pump runs for a while, builds pressure, then the pressure drops quickly when you open a faucet, you likely have a failing bladder. The bladder has a small hole that lets water pass into the air side under pressure. The system seems normal until you use water.
Then the pressure crashes because the air charge is compromised.
This problem is intermittent at first and gets worse over time. The fix is a new bladder or a new tank.
Water Coming Out of the Air Valve
This is the most definitive failure symptom. If you open the Schrader valve and water comes out, the bladder has ruptured. You cannot repair a ruptured bladder.
You can replace the bladder if your Water Worker model supports it. Or you can replace the entire tank.
When to Replace the Bladder vs. Replace the Whole Tank
Water Worker tanks are designed with replaceable bladders in many models. That gives you a cost-effective option when the bladder fails. But it is not always the right choice.
Cost Comparison
A replacement bladder kit for a Water Worker tank costs between thirty and sixty dollars. A new tank of comparable size costs between one hundred fifty and four hundred dollars. The labor is similar for both jobs.
Roughly thirty to sixty minutes for a DIY homeowner.
When Replacing the Bladder Makes Sense
Choose a bladder replacement if the tank shell is in good condition. Look for rust on the exterior. Especially near the bottom where moisture collects.
If the tank has no rust, no dents, and is less than eight years old, a new bladder is a solid choice.
You should also check the tank's model number. Water Worker publishes a compatibility chart that lists which bladder kit works with which tank. If your tank is discontinued or the bladder is hard to find, a new tank may be simpler.
When a New Tank Is the Better Option
Replace the whole tank if the steel shell shows rust. Especially rust that flakes or creates pinholes. A rusted tank can fail catastrophically.
Also replace if your tank is more than ten years old. The bladder is not the only part that wears out. The air valve can corrode.
The steel can weaken over time.
Another factor is future reliability. If you replace the bladder and the tank shell fails a year later, you will do the work twice. Manufacturer technical support indicates that the average lifespan of a Water Worker tank in a residential setting is eight to twelve years.
If you are past that range, replacement is the safer move.
Bladder Replacement Step-by-Step (Do It Yourself)
If you decide to replace the bladder, the job is straightforward. You need a new bladder kit, a wrench, and about an hour.
Tools You Will Need
- Replacement bladder kit for your Water Worker model
- Adjustable wrench or socket set
- Tire pressure gauge
- Air compressor or bike pump
- Bucket or towels for residual water
Drain and Depower
Turn off the breaker to the well pump. Open a faucet and let the system drain completely. The tank should be at zero pressure before you open it.
Remove the Old Bladder
Unscrew the large nut or bolts that hold the tank flange in place. The flange is the metal ring at the top or bottom of the tank depending on your model. Lift the flange off.
Pull the old bladder out through the opening. Some water may remain in the bottom of the tank. Use a towel or shop vac to dry it out.
Install the New Bladder
Insert the new bladder into the tank. Make sure it is seated evenly and not twisted. The lip of the bladder should sit flush against the tank opening.
Replace the flange and tighten the bolts or nut. Do not overtighten. Follow the torque specs in the kit instructions.
Set the Air Charge
With the tank empty and the system still off, check the air pressure at the Schrader valve. Set it to 28 PSI for a 30/50 system or 38 PSI for a 40/60 system.
Test the System
Turn the breaker back on. Let the pump fill the tank. Watch the pressure gauge as it rises.
The pump should shut off at the correct cut-out pressure. Open a faucet and let the system cycle once. Check for leaks around the flange.
Mistakes to Avoid
Some mistakes turn a simple repair into a bigger problem. Here is what to watch out for.
Forgetting to Check the Pressure Switch
A new bladder does not fix a faulty pressure switch. If your pump was short cycling before the bladder failed, the switch may have been the real problem all along. Test the switch settings after you finish the bladder replacement.
Over-Pressurizing the Air Side
Adding too much air can damage the tank. Never exceed the maximum working pressure listed on the tank label. That is usually 100 or 125 PSI for residential models.
Set the air charge exactly two PSI below the cut-in pressure. No more.
Skipping the Annual Check
Your tank needs maintenance even when everything works fine. Check the air pressure once a year. Top it off if needed.
This simple step prevents waterlogging and extends the life of your bladder.
Not Checking the Pump's Health
If your pump is failing, it can mimic pressure tank problems. Low flow rate, failing motor, or a clogged intake can all cause short cycling or low pressure. Before you replace the tank, make sure the pump is still working properly.
When to Call a Pro
Some situations are not DIY. Here is when you should call a licensed well contractor.
Electrical Issues at the Breaker or Pump Control Box
If you suspect a wiring problem or the breaker keeps tripping, leave that to a professional. Electrical work on well systems requires experience with submersible pump wiring and control boxes.
Tank Leaking at the Seam
If water is leaking from the steel shell itself, not from a pipe fitting, the tank has failed. This is a safety issue. Replace the tank immediately.
A rusted tank can burst under pressure.
No Water at All
If the pump runs but no water comes out, the problem may be deeper than the pressure tank. A dry well, a failed pump, or a broken pipe all require professional diagnosis.
Pressure Switch Replacement
Replacing a pressure switch involves wiring. If you are not comfortable working with electrical connections, hire someone. A wired switch that fails can cause pump damage or a fire hazard.
Maintenance and Long-Term Care
A little maintenance goes a long way with pressure tanks. Here is how to keep yours running for years.
Annual Air Pressure Check
Once a year, turn off the pump, drain the tank, and check the air pressure. Top off to the correct level. This takes ten minutes and prevents waterlogging.
Inspect for Rust
Check the tank exterior for rust. Especially around the bottom and the fittings. Catch it early and you can paint or seal it.
Let it go and you will need a new tank.
Listen for Short Cycling
If you hear the pump turning on and off more often than usual, investigate. Short cycling wears out pumps fast. Catching it early saves you money.
Protect from Freezing
If your tank is in an unheated space, insulate it or move it. A frozen tank can rupture the bladder and crack the steel. Drain and disconnect the tank if you close a seasonal property for winter.
Frequently Asked Questions
How often should I check the air pressure in my pressure tank?
Check it once a year as part of routine maintenance. If you notice short cycling or low pressure, check it immediately. Annual checks take ten minutes and prevent most pressure tank problems.
Can I use a regular tire pump on my pressure tank?
Yes. The Schrader valve is the same type used on car tires. A bike pump or small air compressor works fine.
Just make sure you do not over-pressurize the tank.
Why does my pump still short cycle after I installed a new bladder?
The problem may be the pressure switch, not the tank. Check the switch settings and adjust if needed. Also verify that the air charge is set correctly at two PSI below cut-in pressure.
Is it normal for the pressure gauge to bounce slightly?
A small bounce of one to two PSI as the pump cycles is normal. Large swings or rapid bouncing indicate a waterlogged tank or a failing bladder. Investigate if the bounce exceeds five PSI.
How do I winterize my pressure tank?
Turn off the pump. Drain the tank completely by opening a faucet. Disconnect the tank if possible and store it in a heated space.
If you cannot move it, add antifreeze rated for potable water systems to the drain lines. Follow local codes for winterizing well systems.

Similar Posts
































