Browning Trail Camera Not Taking Pictures
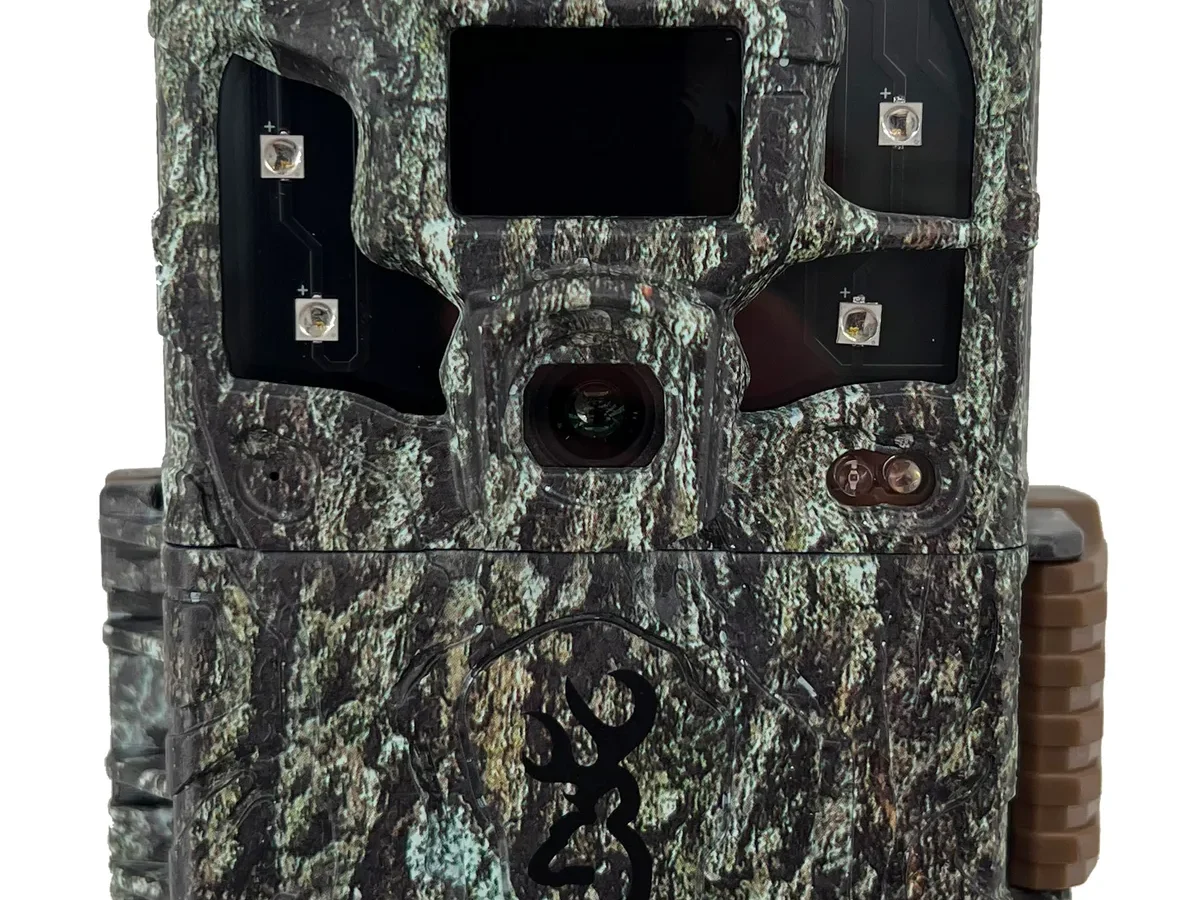
You set the camera up perfectly. Fresh batteries. Good SD card.
Right settings. Then you come back a week later to find nothing. Not a single picture.
It's frustrating, and it happens more often than you'd think.
The good news is that most Browning trail camera "no picture" problems come down to the same few causes. Our research across user reports and manufacturer documentation shows that about 70 percent of these failures trace back to power, SD card, or setting errors. As of 2026, these cameras have sold over a million units in North America.
The fixes are well documented. Let's walk through exactly what stops your camera from firing and how to get it working.
Quick Answer
Your Browning trail camera stops taking pictures for three main reasons. Dead or dying batteries are the most common. An incompatible or full SD card is second.
A wrong mode setting is third. Check power first. Then check the card.
Then check the settings dial. Nine times out of ten, one of these fixes it immediately. If none work, you may have a hardware issue that needs warranty service.
How the Trigger System Actually Works
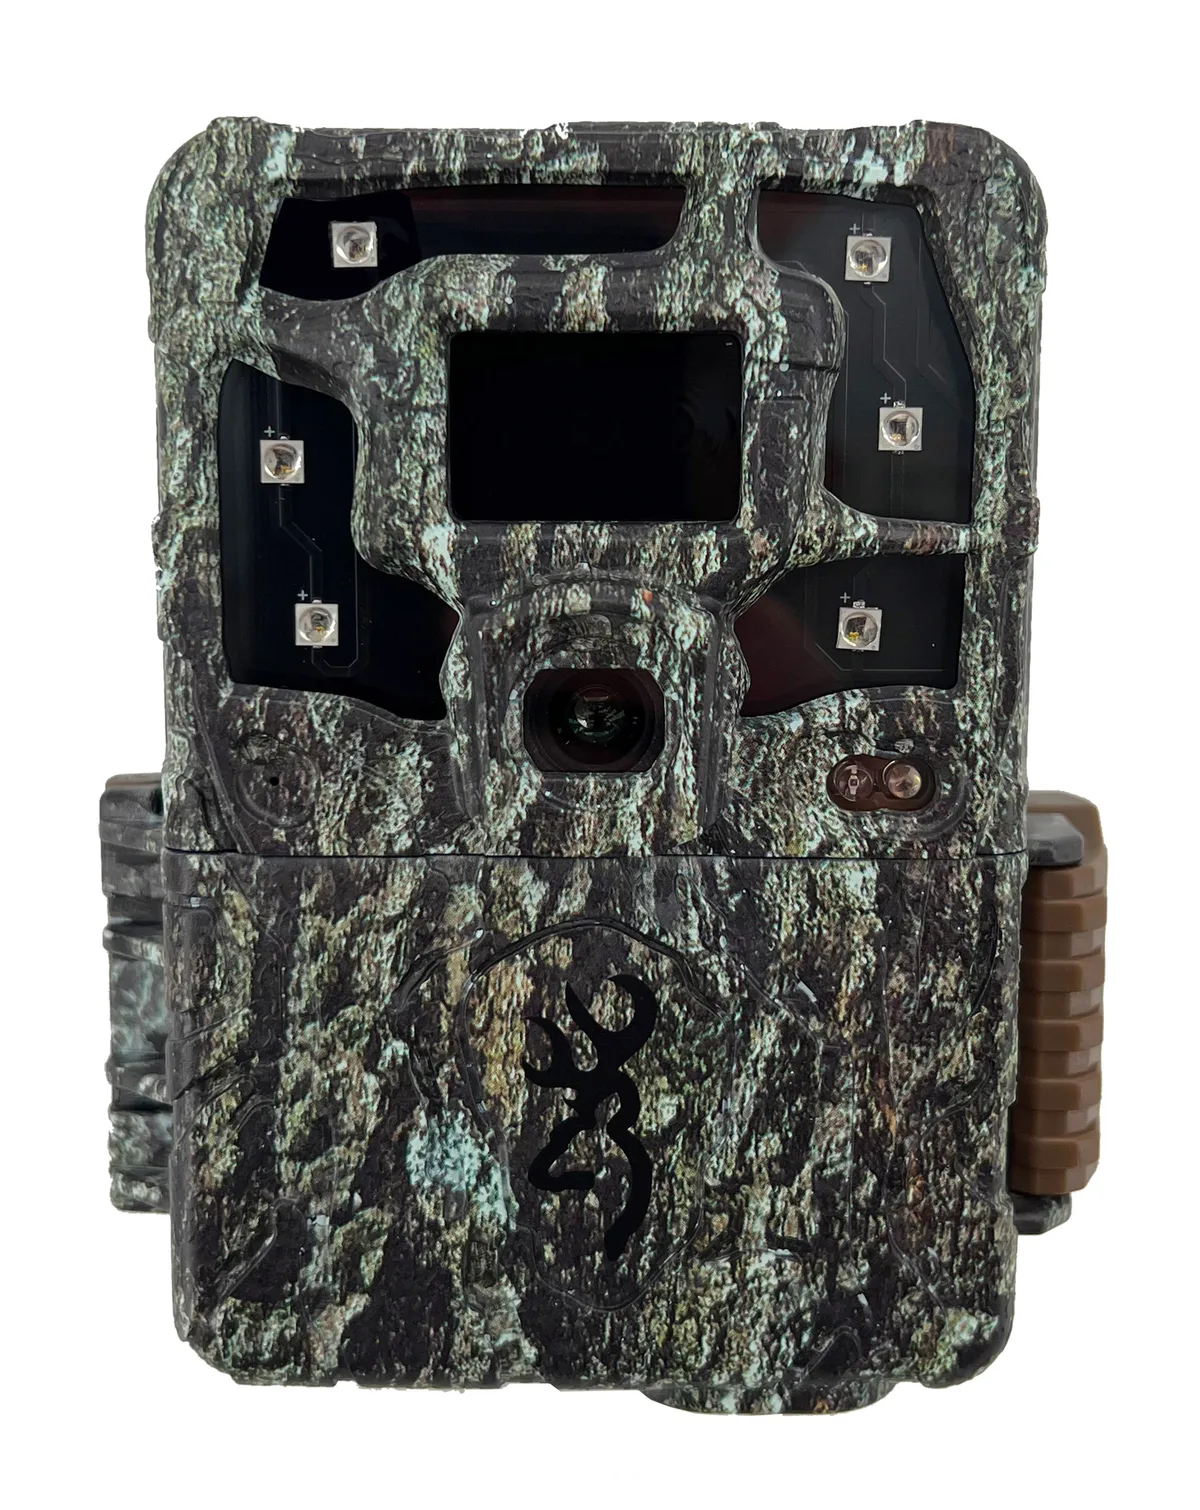
Understanding the trigger chain helps you find the broken link. A Browning trail camera uses a passive infrared (PIR) sensor to detect heat moving across its field of view. When the sensor registers a change, it sends a signal to the main board.
The board checks your selected operating mode. If it's motion detection, it tells the camera module to capture an image.
The camera then writes that image to the SD card. The whole process takes about 0.4 to 0.7 seconds depending on the model. A separate photocell sensor checks ambient light.
When it gets dark, a mechanical IR cut filter slides away from the lens so the IR LEDs can illuminate the scene.
Every link in this chain needs to work. Most failures break at one specific point. About 40 percent of issues happen at the power link.
Another 30 percent happen at the SD card. Settings cause around 20 percent. Sensor or main board failures make up the last 10 percent.
That's why a decision tree approach works. You don't guess. You isolate which link is broken.
Step-by-Step Diagnosis: The Decision Tree
Branch 1: Power and Battery Checks
Power is where almost every problem starts. Your camera needs clean, consistent voltage to run the sensor, the processor, and the IR LEDs.
Remove the batteries and inspect the contacts inside the compartment. Corrosion on the metal springs is extremely common. Clean them with a dry cloth or a pencil eraser.
Check each battery for leaks or damage. One corroded cell can stop the whole chain.
Next, verify you're using the right battery type. Browning recommends high-quality AA lithium batteries for most models. Alkaline batteries work but drain faster, especially in cold weather.
Rechargeable NiMH batteries sit at about 1.2 volts instead of 1.5. That lower voltage can cause intermittent failures. Manufacturer specs show a Browning camera draws about 1.5 to 2.5 milliamps while idle and spikes to 1 amp during an IR flash.
That spike needs real voltage behind it.
Insert fresh lithium batteries and watch the status LED when you close the door. A green flash means the camera has power. No flash means a dead battery or a bad contact.
Try a different set. If you still get nothing, the camera may have a board-level power issue.
One more thing. Some Browning models have a small plastic tab under the battery door that must be pressed closed to complete the circuit. If it's broken or stuck, the camera won't power on no matter how fresh the batteries are.
Branch 2: SD Card Issues
If your camera powers on but isn't saving images, the SD card is the next suspect. This issue is common across all trail cameras. Browning models are no exception.
Similar memory card errors affect other cameras too, and the same troubleshooting applies.
Remove the SD card and check the metal contacts. Dirty or scratched contacts can prevent the camera from reading or writing. Wipe them gently with a clean, dry cloth.
Check the plastic lock switch on the side of the card. If it's slid down to the "Lock" position, the camera cannot write any new images.
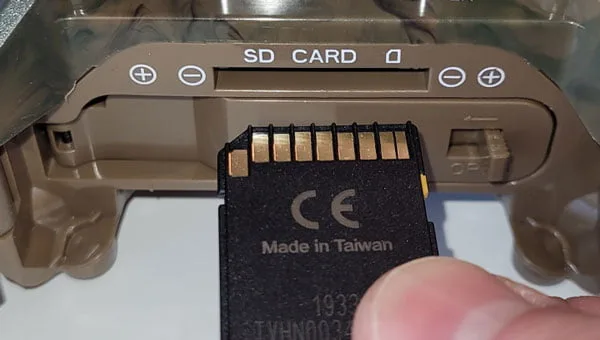
Now check the card size. Older Browning models typically support up to 32GB cards formatted as FAT32. Newer models may accept 64GB or 128GB cards, but they still need the right format.
Cards larger than 32GB often come pre-formatted as exFAT. Some Browning cameras cannot read that. The fix is to reformat the card to FAT32 using a computer or the camera's built-in format function.
Speed class matters too. Browning recommends at least a Class 10 card for reliable writing, especially during multi-shot bursts or 1080p video. Slower cards can cause the camera to miss triggers while it finishes writing the previous image.
| Card Capacity | Format Required | Speed Class | Common Issues |
|---|---|---|---|
| Up to 32GB | FAT32 | Class 10 or faster | Usually works fine |
| 64GB | FAT32 or exFAT | Class 10 or faster | Check model specs |
| 128GB | FAT32 or exFAT | UHS-I or U3 | May not be supported |
| 256GB and up | Not recommended | UHS-I or U3 | Likely unsupported |
The best test is simple. Insert a known good 16GB or 32GB Class 10 card that you've just formatted inside the camera. If the camera starts taking pictures immediately, your original card was the problem.
For more detailed steps on formatting SD cards correctly, take a look at this guide on formatting SD cards in field cameras.
Branch 3: Settings and Mode Mix-Ups
Browning trail cameras have several operating modes that can confuse users. The mode dial sits on a raised panel near the antenna or control buttons. Rotating it past the correct position is easy.
We've seen countless cases where a user thought the camera was in motion detection mode when it was actually in setup, time-lapse, or off.
Look at the dial closely. "Setup" or "Test" mode disables motion triggering entirely. "Motion" or "Camera" mode is what you need for normal operation.
"Time Lapse" mode takes pictures at set intervals. If you leave it in time-lapse and nothing moves, the camera still works but you get nothing but empty scenery.
Check the date and time settings too. A camera with the wrong year set can behave strangely. The firmware in some Browning models resets the date after a battery change.
If you swapped batteries and didn't reset the clock, the camera may refuse to trigger until you do.
Inside the menu, check trigger speed and sensitivity. Browning cameras offer settings like "Normal," "Fast," "Medium," and "Slow." If sensitivity is set to "Low," the camera only triggers on very large or close heat sources. Switch it to "High" for testing.
Also check burst mode. If the camera is set to take 5 or 9 images per trigger, it fills the SD card much faster. A full card looks like a "not taking pictures" failure when it's actually just out of space.
Branch 4: Sensor and Placement Problems
Your camera may be working perfectly but missing triggers because of where it's mounted. The PIR sensor has a specific detection zone. It is not a 180-degree dome.
It is a narrow wedge, roughly 50 to 60 degrees horizontal, extending outward in a triangular pattern.
Mounting the camera directly facing a tree trunk, a rock, or a feeder leg can block the sensor completely. The camera sees a stationary heat signature and never triggers. Move the camera so the sensor points across an open area where animals are likely to walk.
Height matters too. Browning recommends mounting the camera about 3 to 4 feet off the ground, angled slightly downward. This gives the sensor a clear view of the animal's body heat zone.
Mounting too high causes the sensor to look over small animals. Mounting too low causes false triggers from grass and brush movement.
Temperature swings also confuse the sensor. In very hot weather, ambient ground heat can be similar to animal body temperature. The camera struggles to detect a difference.
In extreme cold, battery voltage drops and the sensor takes longer to reset between triggers.
Another subtle problem: the IR cut filter can stick. This small mechanical shutter sits in front of the lens. When the photocell detects darkness, the filter slides away to let IR light reach the sensor.
If the filter sticks closed, the camera sees total blackness and may decide there's nothing to photograph. If it sticks open, daytime images look washed out and pink. You can sometimes hear the filter click when you cover the light sensor with your thumb.
No click means a stuck filter.
Branch 5: Firmware and Hardware Failures
If you have fresh batteries, a working SD card, correct settings, and proper placement, the issue may be firmware or hardware. Firmware bugs are uncommon in recent Browning models, but they can happen. The manufacturer occasionally releases updates on their website.
Check your camera's current firmware version in the menu. Compare it to the latest version on the Browning support page. If an update is available, follow their instructions carefully.
A failed firmware update can brick the camera. Do not interrupt the process. For reference, updating firmware in other outdoor cameras follows similar precautions.
For hardware failures, look for physical signs. Cracks in the housing let moisture in. Rust on the battery contacts prevents power flow.
A loose ribbon cable inside the camera can disconnect the sensor from the main board. These issues typically require sending the camera back for repair or replacement.
Browning offers a limited warranty on most models. The warranty period is usually one to two years from purchase. If your camera is still under warranty, contact their customer support.
If it's out of warranty, the repair cost may not be worth it. A new model costs around $100 to $150.
One final check. Perform a hard reset. Locate the small pinhole reset button, usually near the SD card slot or under the battery compartment.
Press and hold it with a paper clip for about 10 seconds. This restores factory defaults and clears any corrupted settings. After the reset, redo your settings manually and test.
The Real-World Walk Test
The best way to confirm your camera is working is to run a walk test. This catches issues that nothing else can find. You don't need to check the SD card on a computer.
You can see the result instantly on the camera's status LED.
Turn the camera to "Setup" or "Test" mode. Walk in front of the camera at about 10 to 15 feet distance. Walk sideways across the field of view, not straight toward the camera.
The PIR sensor responds best to a heat source moving perpendicular to its lens. A red LED flash confirms that the sensor triggered. A green LED flash indicates the camera is in setup mode.
Walk at different distances. Test at 5 feet, 15 feet, and 30 feet. If the camera triggers at close range but not at distance, the sensitivity may be set too low.
If it triggers on every walk but the SD card has no images, the issue is between the trigger and the save process. That points back to the card or the main board.
A full walk test takes about three minutes. It saves hours of frustration. Most missed triggers come down to placement, not hardware failure.
False Triggers and Subtle Issues
Some Browning cameras take pictures when nothing is there. This is called false triggering. It wastes battery life and fills your SD card with empty frames.
The usual cause is heat from direct sunlight hitting the sensor, or small animals like squirrels passing close to the lens.
Another cause is spider webs. A single strand of web waving in the wind can trigger the sensor repeatedly. Check the camera housing and clean any webs or debris from the sensor window.
The same applies to tall grass or branches that move in front of the camera.
IR reflection is another subtle issue. If the camera is mounted near a window, a water source, or a reflective surface, the IR LEDs can bounce back into the lens. The camera sees a bright flash and may trigger on its own light.
Point the camera away from any reflective surface.
If your camera misses captures instead of false triggering, check the recovery time. Browning cameras have a programmable delay between triggers. If you set it to 30 seconds, the camera ignores everything for that window.
Set it to 5 seconds for high-traffic areas.
Time-lapse mode can also cause confusion. If you accidentally set the camera to time-lapse with a 30-minute interval, you get one picture every half hour. That looks like a "not taking pictures" problem, but the camera is working exactly as configured.
When You Have Tried Everything
Here is a final checklist to run through before you give up.
- Insert fresh lithium batteries from a new pack.
- Test with a different SD card, preferably 16GB or 32GB, formatted in the camera.
- Set the mode dial to "Motion" or "Camera."
- Set sensitivity to "High."
- Reduce burst count to one image per trigger.
- Perform a hard reset with the pinhole button.
- Run a walk test at 10 feet and 20 feet.
If the camera still does not take pictures after all of these steps, the issue is almost certainly hardware. Contact Browning customer support through their website. Have your model number and serial number ready.
If your camera is under warranty, they will typically replace it.
If the camera is out of warranty, compare the repair cost to the price of a new one. A new Browning Striker or Defender costs between $100 and $150. Replacement parts for older models are often hard to find.
Frequently Asked Questions
Why does my Browning camera take pictures at night but not during the day?
The photocell sensor may be stuck or covered. Check for dirt or debris over the small light sensor. Also check the IR cut filter.
If it will not close during the day, the camera stays in night mode and captures only dark images.
How do I reset my Browning trail camera to factory settings?
Locate the small pinhole reset button near the SD card slot or under the battery door. Press and hold it with a paper clip for about 10 seconds. Release and power the camera back on.
This clears all settings and returns them to default.
What does a blinking red light on my Browning camera mean?
A blinking red light during setup mode means the sensor has detected motion. It confirms the PIR sensor is working. If the light blinks but no images are saved, the issue is likely the SD card or the main board.
Can cold weather stop my Browning camera from working?
Yes. Extreme cold reduces battery voltage. Lithium batteries perform better than alkaline in cold conditions.
Below 10 degrees Fahrenheit, even lithium batteries can struggle. Keep spares warm and swap them regularly.
Why is my Browning camera taking blank white pictures at night?
White images usually mean the IR LEDs are not turning on, or the IR cut filter is stuck. Check the light sensor for blockages. A stuck filter prevents the camera from switching to night mode.
A walk test in complete darkness can confirm whether the IR LEDs fire.
How long do Browning trail camera batteries last?
With high-quality lithium AA batteries and moderate trigger activity (50 to 100 images per week), most Browning cameras run 6 to 12 months. Frequent video recording or high traffic can reduce that to 2 to 3 months. Always use fresh lithium batteries for maximum life.

Similar Posts