Canon EOS R5 How to Use
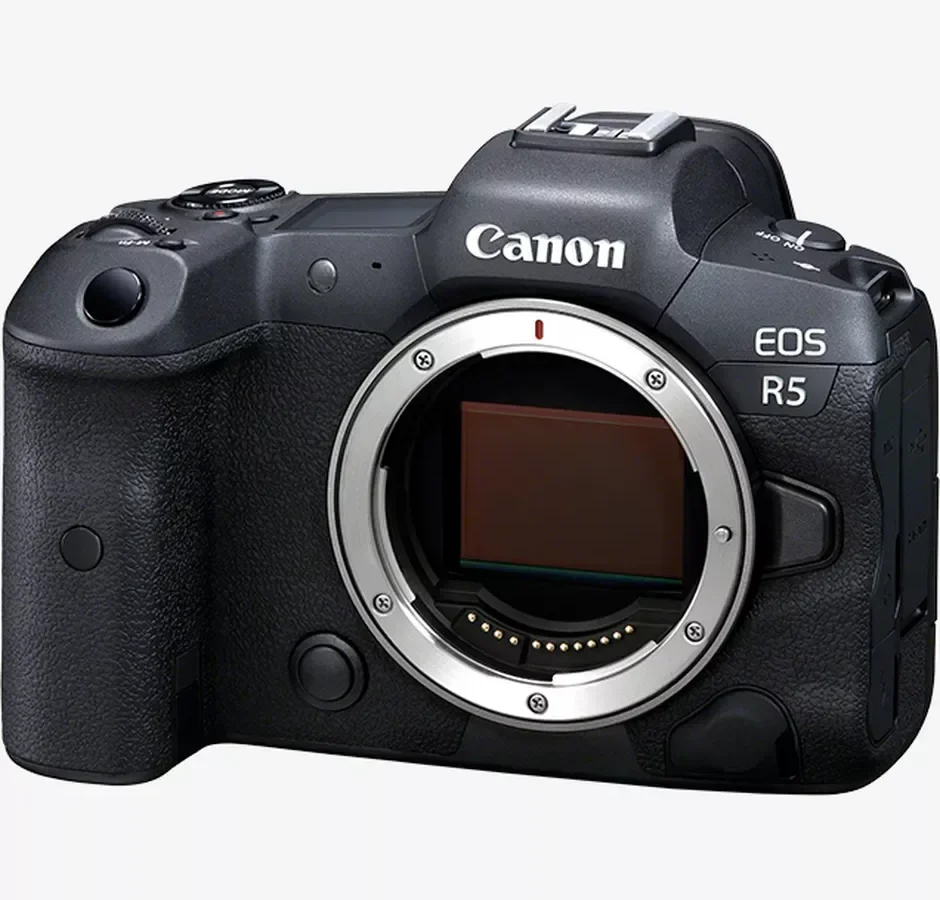
Trying to figure out how to use the Canon EOS R5 can feel overwhelming at first. This camera packs serious power into a compact body, but its deep menu system and dozens of buttons hide a lot of that capability. You might miss a key setting or end up with footage that does not look right simply because you did not know where to look.
Manufacturer specifications available through Canon confirm the R5 captures 45 megapixel stills and records 8K video internally. That makes it one of the most versatile hybrid cameras on the market as of 2026. Understanding the physical layout of the camera is the first step to unlocking its full potential.
Let us start with the body.
Quick Answer
Shoot stills in Av or M mode. Set autofocus to Servo for moving subjects. Select video mode for 8K or 4K.
Use the Q button for quick access to key settings. Review the official documentation for full menu details.
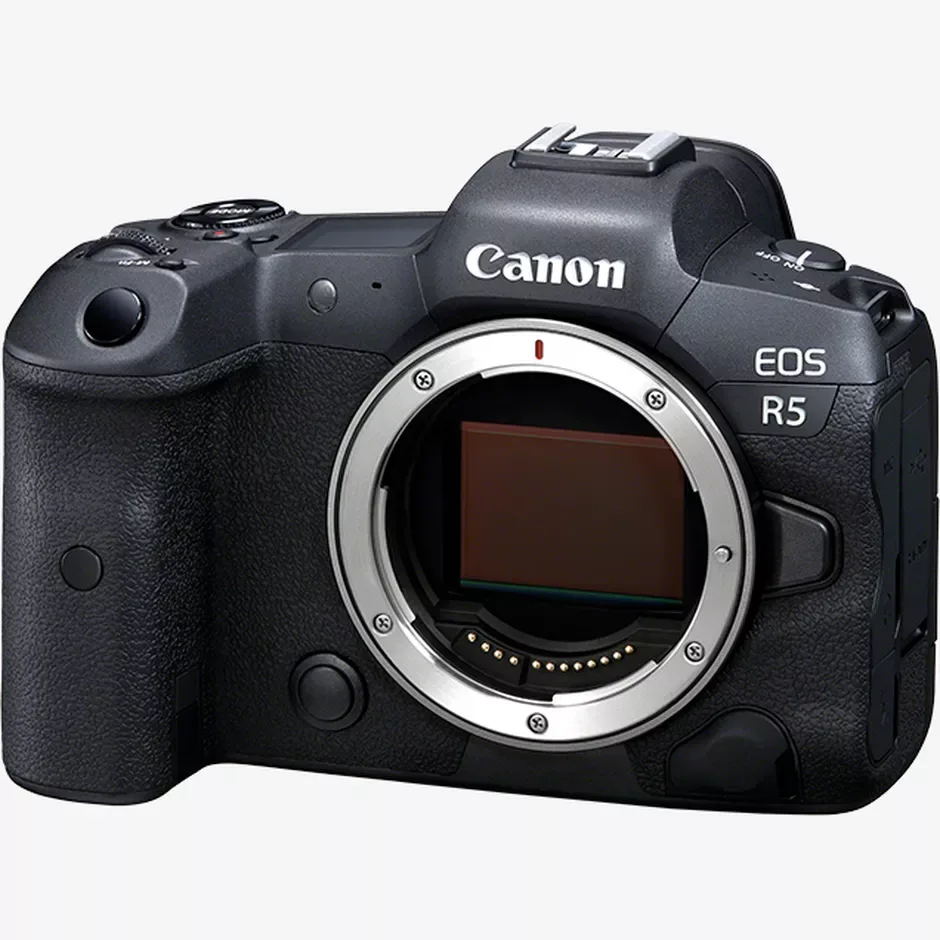
Image source: Web (Bing) / canon.co.uk (Web image (fair-use with source credit))
First Things First: Getting to Know Your R5's Body
The top plate of the R5 is where you make most of your adjustments. The mode dial on the left lets you switch between fully automatic, semi-automatic, and manual modes. On the right, you find the shutter button, the main dial behind it, and the M-Fn button you can customize for your most-used feature.
The back of the camera is dominated by the high-resolution electronic viewfinder and the vari-angle touchscreen. The joystick on the right side controls AF point selection. The AF-ON button works well for back-button focus, a technique many pros prefer.
The Q button gives you instant access to a grid of the most important settings.
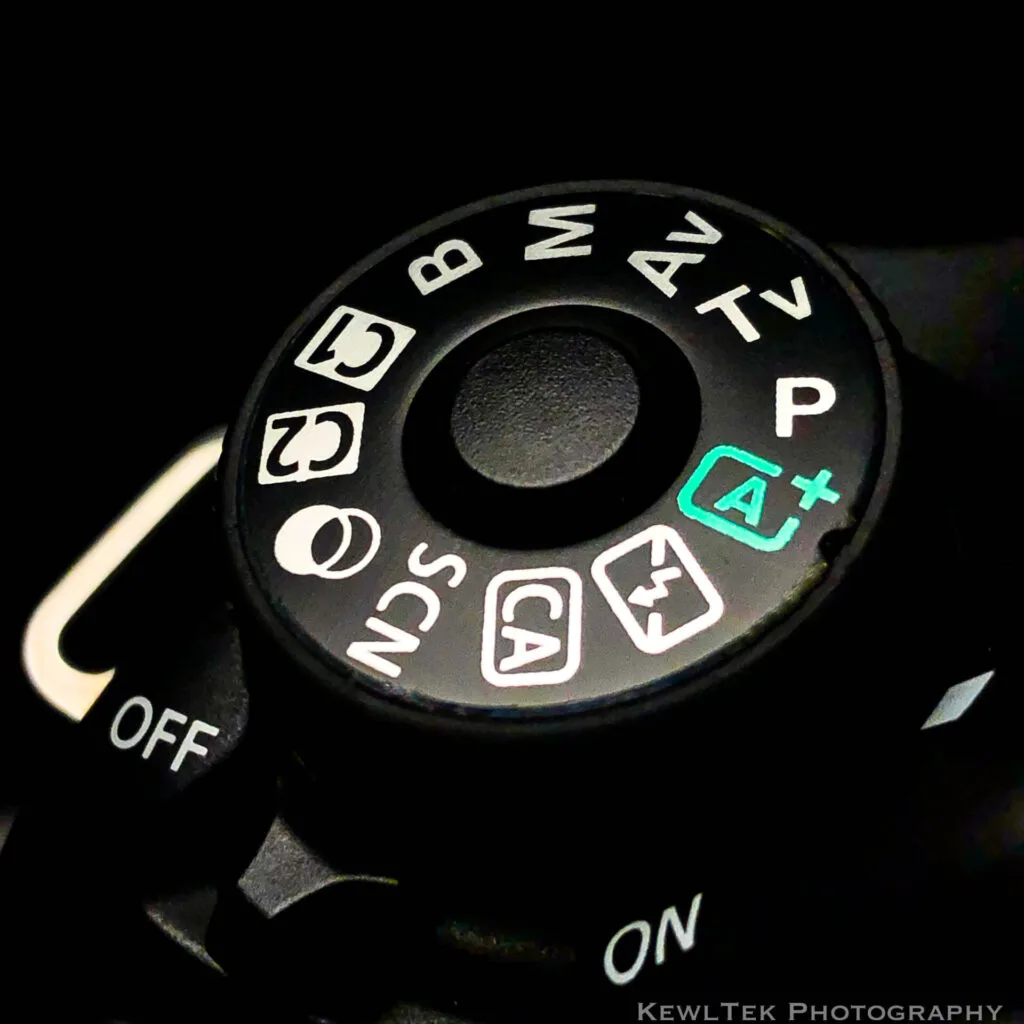
Image source: Web (Bing) / kewltekphotography.net (Web image (fair-use with source credit))
On the left side under the rubber flaps, you find the microphone jack, headphone jack, HDMI port, USB-C port, and flash sync terminal. The right side holds the dual memory card slots: one CFexpress Type B and one SD UHS-II. Using mismatched cards can cause file errors, something we cover in our guide on the Canon EOS R5 card error.
The viewfinder and touchscreen serve different purposes. Use the EVF in bright sunlight or when you need to stabilize the camera against your face. Use the touchscreen for low-angle shots, video, and menu navigation.
The touchscreen also lets you tap to focus and swipe to review images.
Navigating the Menu System Without Losing Your Mind
The R5 menu system is organized into five main tab colors. The red Shooting tabs contain everything about image quality, drive modes, and ISO. The blue AF tabs handle autofocus settings.
The yellow Playback tabs manage image review and protection. The purple Setup tabs cover system settings like date, time, and Wi-Fi. The orange Custom Functions tab holds your personal preferences.
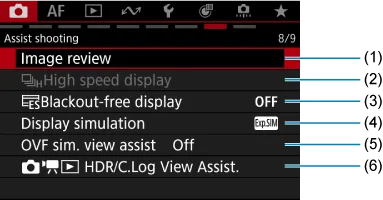
Image source: Web (Bing) / cam.start.canon (Web image (fair-use with source credit))
The Q button is your best friend. Press it in any shooting mode and a grid of 12 to 15 settings appears. Touch the one you want to change, or use the dials to scroll through options.
This is much faster than digging through the main menu every time you need to adjust white balance or picture style.
To find any setting in under 10 seconds, press the MENU button and use the main dial to scroll through the tabs. The tab labels at the top tell you exactly which section you are in. If you get lost, press the INFO button to see a description of the current setting.
This feature alone saves hours of frustration.
The My Menu tab lets you store up to six of your most-used settings. Add options like format card, silent shutter, and Wi-Fi connection. This single customization can cut your menu time in half once you know your workflow.
Setting Up Your Autofocus for Real-World Shooting
The Dual Pixel CMOS AF II system in the R5 uses 1053 AF points that cover nearly the entire frame. This is a massive improvement over earlier DSLR systems. The key is matching the AF mode to what you are shooting.
One-Shot AF is for stationary subjects. Press the shutter half way and focus locks. Use this for landscapes, portraits, and product shots.
Servo AF is for moving subjects. The camera continuously adjusts focus as long as you hold the shutter half way. Use this for sports, wildlife, and kids running around.
AI Focus AF is a hybrid that switches between One-Shot and Servo depending on whether the subject starts moving. It works reasonably well but can be unpredictable in fast-changing situations. Most experienced shooters stick with One-Shot or Servo and switch manually.
Subject tracking is where the R5 really shines. The camera can detect and track faces, eyes of humans and animals, and even vehicles. To activate it, press the AF point selection button and choose Whole Area AF.
The camera automatically finds a subject and locks onto it. Touch the subject on the screen to tell the camera exactly what to track.
The joystick is the fastest way to move your AF point. Press it up, down, left, or right to nudge the point. The touchscreen also works: drag your thumb across the screen while looking through the viewfinder.
This takes practice but becomes second nature quickly.
Choosing the Right Shutter Mode for the Job
The R5 offers three shutter modes: mechanical, electronic first curtain, and electronic. Each has strengths and weaknesses.
Mechanical shutter uses a physical curtain that opens and closes for each shot. It syncs with flash at up to 1/200s. It is the most reliable choice for flash photography and studio work.
It also produces a slight shutter sound that some people prefer for feedback.
Electronic first curtain (EFCS) uses a mechanical curtain for the close but an electronic signal for the open. This reduces shutter shock, the tiny vibration that can blur long exposures. It is a great everyday mode for most still photography.
Electronic shutter is completely silent. The sensor reads out the image without any moving parts. This is ideal for wedding ceremonies, wildlife, and any situation where noise is a problem.
The downside is rolling shutter, which can distort fast-moving subjects like golf swings or helicopter blades. The R5 can shoot at 20 fps with electronic shutter, compared to 12 fps with mechanical, making it a strong choice for action.
The 20 fps burst mode is excellent for capturing fast action. But it fills the buffer quickly. Using a CFexpress card helps.
The slower SD card slot can cause the buffer to choke. Check your card speed before relying on high-speed burst, similar to issues seen with the Nikon Z8 card error situation.
Configuring Video Settings for 8K, 4K, and Slow Motion
The R5 records 8K video at up to 30 fps internally. This is 8K DCI (8192 x 4320) or 8K UHD (7680 x 4320). The 8K mode is useful for extracting high-resolution stills or cropping in post.
But it creates huge files and generates significant heat.
4K 60 fps is oversampled from the 8K sensor. This gives you the sharpest 4K image possible. It is the sweet spot for most videographers. 4K 120 fps is available with a 1.6x crop factor.
It is great for slow motion but reduces the field of view and lowers light sensitivity.
Here are the main bitrates you will encounter:
| Recording Mode | Codec | Bitrate (approx) |
|---|---|---|
| 8K 30p ALL-I | 470 Mbps | 3.5 GB/min |
| 8K 30p IPB | 260 Mbps | 2.0 GB/min |
| 4K 120p ALL-I | 470 Mbps | 3.5 GB/min |
| 4K 60p IPB | 150 Mbps | 1.1 GB/min |
| 4K 30p IPB | 100 Mbps | 750 MB/min |
| 1080p 60p IPB | 50 Mbps | 375 MB/min |
Heat management is the biggest challenge with 8K and 4K 120p recording. The R5 will stop recording after a certain time, especially in warm environments. To extend recording time, set the overheat control to high, lower the recording resolution, and use an external fan or shade.
Keeping the camera out of direct sunlight helps a lot. This is a well-known limitation, similar to the overheating issues covered with the Sony A6700 overheating problem.
Canon Log 3 is available for flat, color-gradable footage. It preserves about 12 stops of dynamic range. Use it when you plan to color grade in post.
For quick turnaround, the standard BT.709 profile looks good right out of camera.
Customizing Your Camera for Speed
The R5 ships with three custom mode slots on the mode dial: C1, C2, and C3. These let you save entire camera setups and recall them instantly. Think of them as preset workflows for different shooting scenarios.
Set C1 for studio portraits. Dial in manual exposure, flash sync at 1/200s, One-Shot AF, and a mechanical shutter. Set C2 for wildlife.
Use aperture priority, Servo AF, animal eye tracking, and electronic shutter at 20 fps. Set C3 for video. Switch to manual video mode, Canon Log 3, 4K 60p, and a clean HDMI output.
To save a custom mode, configure every setting you want, then go to the Setup menu. Select "Custom shooting mode" and choose C1, C2, or C3. The camera saves everything, including exposure compensation, AF settings, and even the ISO range.
This is much faster than manually adjusting each setting on the fly.
Assigning custom buttons is another speed booster. The M-Fn button on the top plate is a good candidate for your most-used feature. Many shooters set it to toggle between One-Shot and Servo AF.
The DOF preview button on the front can be set to activate exposure simulation or zoom in for manual focus.
The My Menu tab is your last line of defense against menu digging. Add up to six items. Common choices include format card, silent shutter, and Wi-Fi connection.
To add items, go to the Setup menu, select "My Menu settings," and choose "Register items." This single step can save you from ever opening the main menu again.
If you ever run into a card-related glitch, check our guide on the Canon EOS R5 card error for troubleshooting steps.
Frequently Asked Questions
How do I update the firmware?
Download the latest firmware from the Canon official website. Copy the file to the root of a formatted SD card. Insert the card, go to the Setup menu, and select "Firmware update." The camera handles the rest.
Always keep the battery fully charged during the process.
Why is the camera overheating and what can I do?
The R5 generates significant heat during 8K and 4K 120p recording. Set the overheat control to high in the menu. Record in cooler environments.
Use an external fan or shade. Lower the resolution to 4K 60p for longer takes. The camera shuts down if internal temperature reaches a critical limit.
What memory cards should I use?
Use a CFexpress Type B card for the main slot. It supports the fastest burst rates and 8K video. Use a UHS-II SD card for the second slot.
The SD slot is slower, so avoid it for primary recording during high-speed burst or 8K. Mismatched cards can cause errors, similar to issues with the Canon EOS R6 card error.
How do I transfer photos to my phone?
Install the Canon Camera Connect app on your phone. Enable Wi-Fi on the R5 from the Setup menu. Select "Connect to smartphone" and follow the on-screen instructions.
The app lets you browse, download, and share images. You can also use the app for remote control and GPS tagging.
How do I reset the camera to factory defaults?
Go to the Setup menu, the purple wrench tab. Select "Clear settings" and choose "Clear all camera settings." This resets everything except the firmware. If you want to clear custom modes, select "Clear custom shooting modes" separately.
How do I use the silent shutter?
Turn the mode dial to your desired shooting mode. Press the MENU button and go to the Shooting tab. Select "Shutter mode" and choose "Electronic." The camera now shoots without any sound.
This is useful for weddings, wildlife, and any quiet environment.

Similar Posts