Dometic Water Heater Troubleshooting

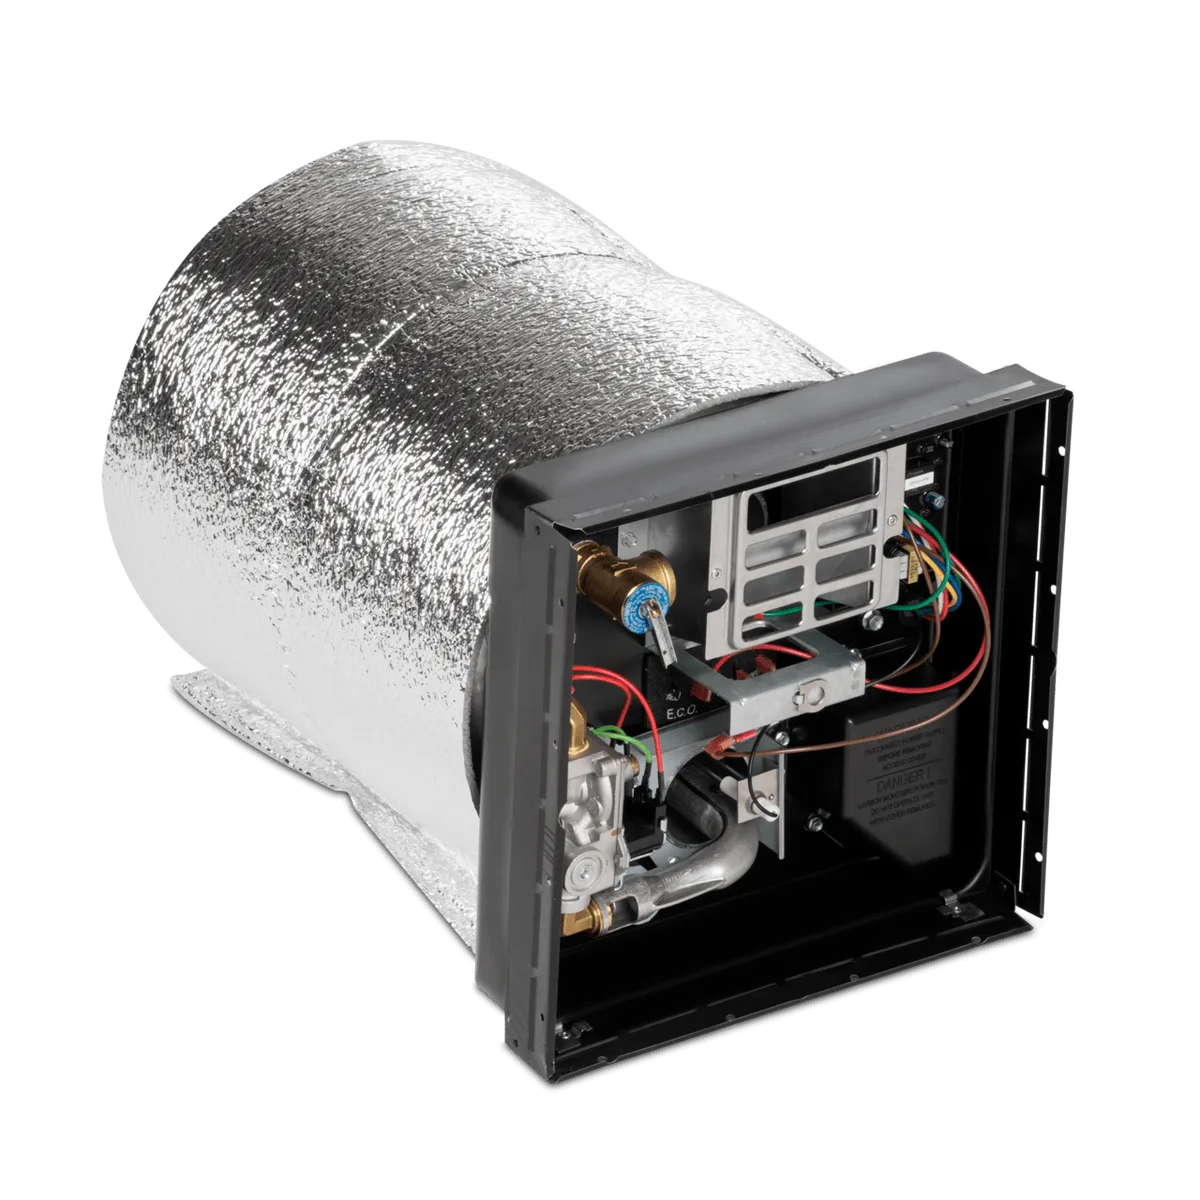
Image source: Bing (Web (fair-use with source credit))
You are sitting in your RV, you just pulled into a campsite, and you flip on the water heater. Nothing. No click, no flame, no hot water.
Just cold frustration.
Dometic Water Heater Troubleshooting does not have to be a guessing game. Most problems fall into a few predictable patterns. With a simple process of elimination, you can usually pinpoint the cause in under 15 minutes.
Per Dometic's own service manuals (updated as of 2026), roughly 70% of no-hot-water calls trace back to one of three things: a tripped limit switch, a bypass valve left in winterization position, or a failed gas solenoid. This guide walks you through each branch of the decision tree based on what you are actually seeing. Let us start with the most important step.
Knowing exactly what you are working with.
Quick Answer
If your Dometic water heater has no hot water, first check the bypass valve. If it is set to winterize, switch it to normal. If the burner will not light, reset the high-temp limit switch.
If the electric side will not heat, test the 120V breaker and element continuity. Most repairs take 10 minutes.
Start Here: Know Your Model and Bypass Valve Position
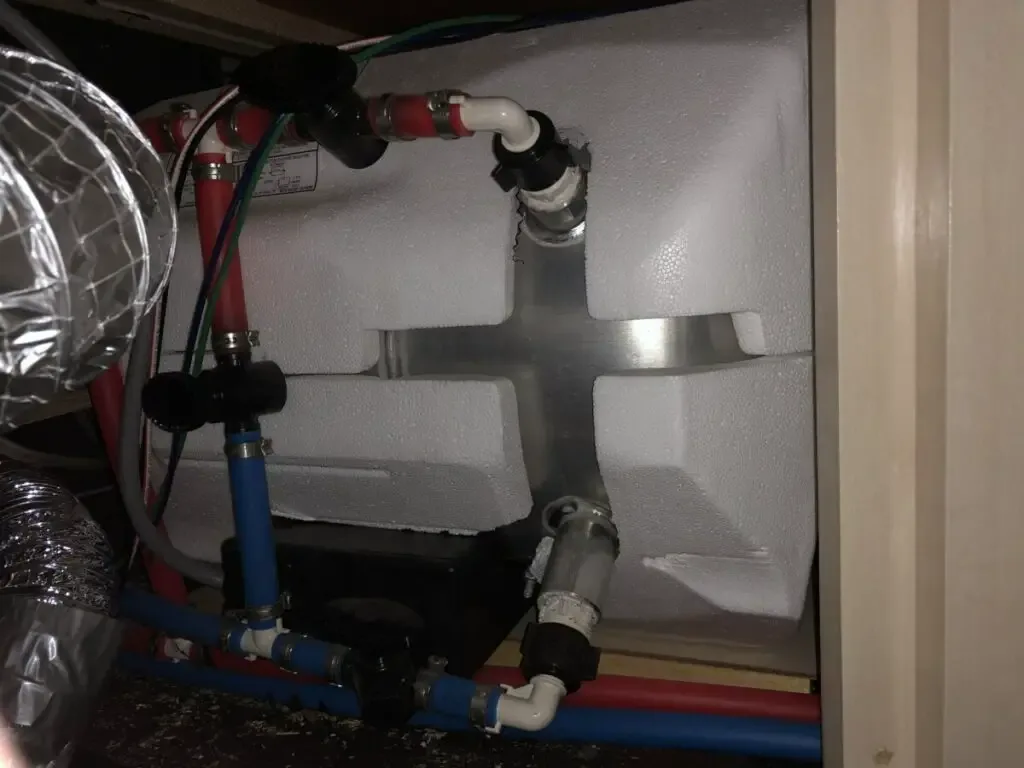
Image source: Bing (Web (fair-use with source credit))
Before you open any panels or touch any wires, you need two things straight: your model number and where that bypass valve is sitting. The bypass valve, a small lever or set of valves on the water heater tank, is the number one culprit in no-hot-water calls. If it is left in the winterize position, cold water bypasses the tank entirely, mixing with hot and giving you lukewarm or cold output.
Finding your model number
Dometic water heaters are usually labeled on a silver sticker on the back of the tank, near the gas valve or on the outer shroud. Common models include:
- WH-6GA (6-gallon gas/electric)
- WH-10GA (10-gallon gas/electric)
- WH-6GEA (6-gallon electronic ignition)
- DM-series (marine/RV combo)
If you cannot find the sticker, look at the front control panel. Some models have a small plastic cover that flips up revealing the model information. Write it down.
You will need it if you call tech support or order parts.
Bypass valve types
Your bypass system will be one of these:
| Type | What to look for | Normal position |
|---|---|---|
| Single lever | A white or black plastic lever on the back of the tank | Lever pointing forward (parallel to water lines) |
| Two-valve system | Two small shut-off valves on the hot and cold lines | Both valves open |
| Motorized bypass | A small electric actuator with wires | Powered open when heater is on |
How to check the bypass valve
Open the exterior access door on your RV, the one that reveals the water heater front panel. Look for a small valve assembly on the back of the tank or on the water lines leading to it. If you see a lever, move it to the normal operating position.
Then turn on the hot water at a faucet and wait 30 seconds. If hot water comes out, that was your problem.
Common mistake: Forgetting to move the bypass valve back after winterization. If you have been parked for a while and suddenly have no hot water, this is a 10-second fix.
No Hot Water? Follow the Gas-Side Troubleshooting Path
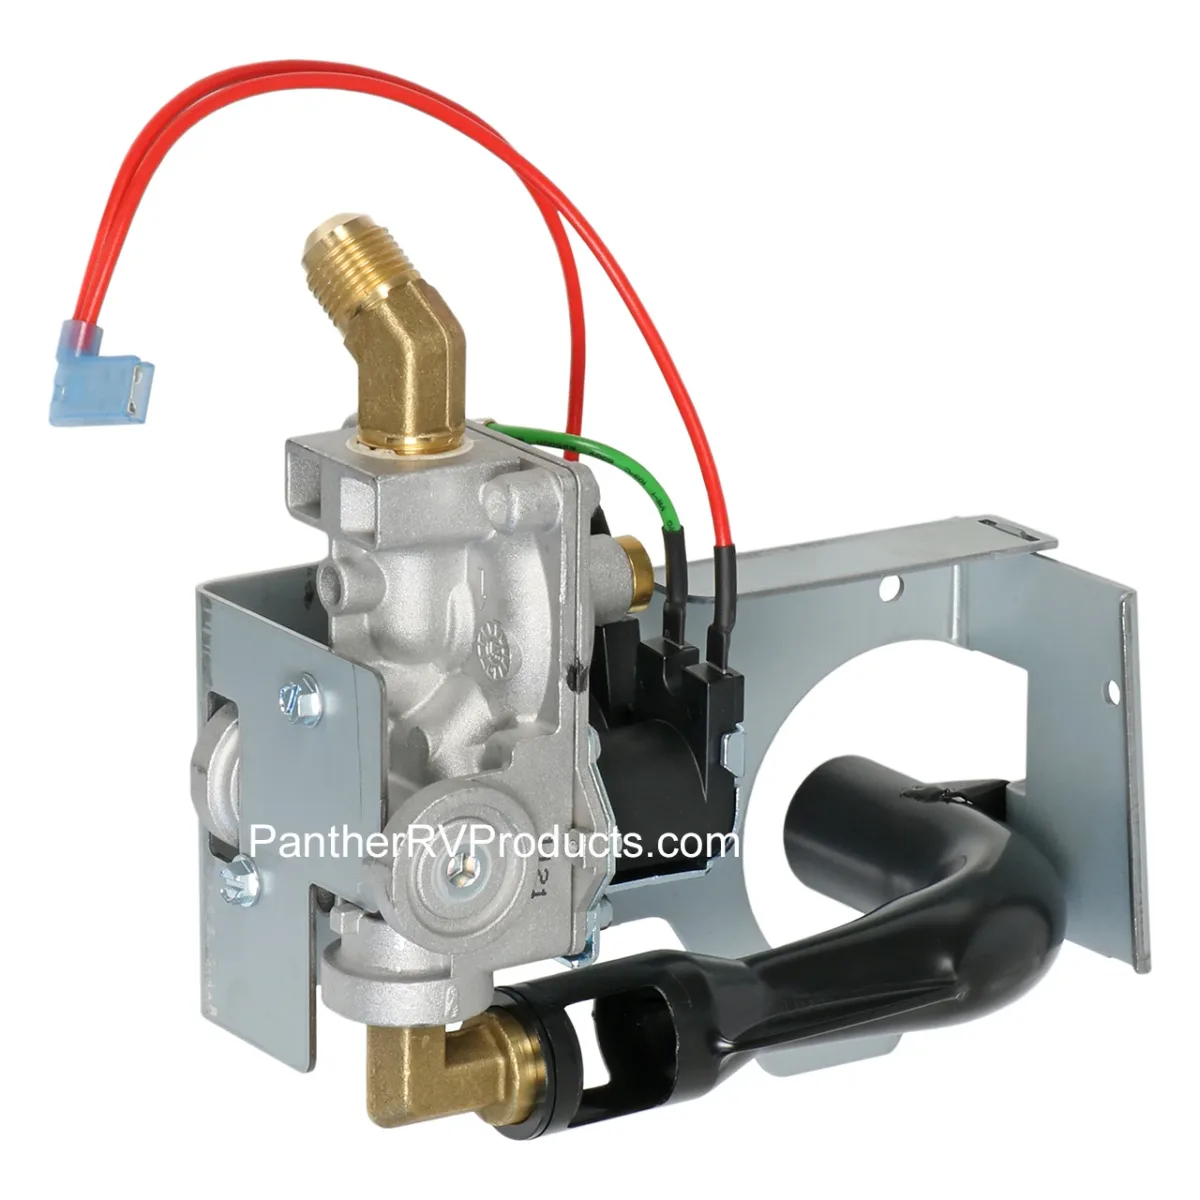
Image source: Bing (Web (fair-use with source credit))
If your bypass valve is good and you still have no hot water when running on propane, you are looking at a gas-side issue. The troubleshooting path splits based on what you hear (or do not hear) when you turn it on.
Step 1: Listen for the ignition sequence
Turn the water heater switch to the gas position. You should hear:
- A soft click (ignition spark)
- A whoosh (gas ignites)
- A steady hum (burner running)
If you hear nothing at all, the control board is not getting power or the ignition module has failed. Check the 12V DC fuse on the control board. It is typically a 5-amp blade fuse.
Replace it if blown.
If you hear clicking but no flame, you have either a gas supply issue or a failed gas solenoid. Here is how to check:
- Make sure propane tanks are open and not empty
- Bleed air from the gas line by lighting a stove burner for 30 seconds
- Check the gas solenoid valve at the water heater for continuity with a multimeter. It should read 12 to 20 ohms
If the solenoid fails that test, replace it. Dometic part numbers vary by model. Reference your sticker.
Step 2: Check the high-temperature limit switch
If the water heater overheated, a limit switch trips and cuts power to the gas valve. Look for a small red button on the side of the thermostat housing. Push it.
You should feel a click. If it resets, the heater should fire up. If it trips again immediately, the thermostat is probably faulty and needs replacement.
It costs around $25 for the part.
Step 3: Inspect the burner and vent
A partially clogged burner orifice can cause weak flame or no flame. Turn off the gas. Remove the exterior access panel.
Use compressed air to blow out any spider webs or dust from the burner tube and the vent opening. Gas appliances are finicky. Even a tiny obstruction will stop ignition.
Pro tip: In high-altitude locations (above 2000 feet), the burner orifice may need to be swapped to a smaller size. Check your owner's manual or Dometic's altitude kit.
No Hot Water? Follow the Electric-Side Troubleshooting Path
If your gas side works fine but the electric heating element will not deliver hot water when you are on shore power, do not panic. Electric elements fail more often than gas burners, but they are cheap and easy to test.
Step 1: Verify power to the heater
Turn off the electric element switch at the control panel. Then go to your RV's breaker panel and check the 120V breaker labeled Water Heater. If it is tripped, reset it.
If it trips again immediately, stop and test the element before flipping it a second time. Tripping repeatedly damages breakers.
Step 2: Test the heating element
Turn off power to the heater, either unplug it or kill the breaker. Remove the two wire leads from the element terminals. Use a multimeter set to ohms:
- A good 1440W element should read 10 to 16 ohms between the two terminals
- A reading near zero indicates a shorted element
- A reading of infinity (open circuit) means the element is burned out
If the element is bad, replace it. Standard Dometic elements are 1440W at 120V. Verify your model specs before ordering.
Step 3: Test the thermostat
The thermostat controls when the element comes on. With power off, remove the thermostat's wire leads. Set your multimeter to continuity.
Place probes on the thermostat terminals. At room temperature, the circuit should be closed, meaning continuity. If it is open, replace the thermostat.
Step 4: Check for a tripped limit switch (electric side)
Some Dometic models have a separate limit switch for the electric element. It is often integrated into the thermostat. Push the reset button you found earlier.
If it resets and the element heats, you are good. If it trips again, the element is likely shorted or the tank is low on water. Running the element dry will destroy it in minutes.
Safety warning: Never operate the electric element if the tank is empty. Water is required to carry heat away. A dry-fired element will burn out immediately and can damage the tank.
Water Gets Lukewarm or Runs Out Fast: Bypass, Thermostat, or Sediment
You get a shower that is warm for two minutes and then cold. Or the water is only lukewarm no matter how long you wait. This is the most frustrating symptom because it could be several things.
Let us narrow it down.
Is the bypass valve partially open?
We already checked this. But double-check. Some motorized bypass valves can fail halfway, letting cold water mix with hot.
Manually override it if possible. If you have a lever-type bypass, make sure it is fully in the normal position.
Is the thermostat set too low?
Dometic water heaters have a thermostat that usually ranges from 120°F to 140°F. If it is set at the low end, water will not get very hot. Adjust the thermostat using the dial on the control board.
Wait 20 minutes and test again.
Is there sediment buildup?
Hard water leaves mineral deposits at the bottom of the tank. Over time, that sediment layer insulates the water from the heating element or burner. The result is lukewarm water and longer recovery times.
Flushing the tank annually removes this buildup.
Here is the quick flush process:
- Turn off the water heater, both gas and electric
- Let the water cool for 2 hours
- Connect a garden hose to the drain plug
- Open the pressure relief valve
- Drain the tank completely
- Close the drain and refill, then drain again until water runs clear
If you have never done this, expect a lot of white or brown sediment the first time. That is normal.
Is the anode rod consumed?
The sacrificial anode rod sits inside the tank and corrodes instead of the steel walls. When it is gone, metal particles can clog the water flow. Inspect the anode rod annually.
If it is less than 3/8-inch thick or covered in sediment, replace it. A new one costs around $20 and extends the life of the water heater significantly.
Water Leaking? Check the TPR Valve, Drain Plug, and Tank
Leaks are serious. They can damage your RV floor and lead to mold. Do not ignore them.
Here is the branch-by-branch approach.
Leaking from the pressure relief valve (TPR)
The temperature and pressure relief valve (TPR) is designed to release water if the tank overheats or pressure exceeds 150 psi. If it is leaking steadily, one of two things is wrong:
- The valve itself has failed, meaning it is stuck open
- The water heater is actually overheating, caused by a bad thermostat or element cycling on
Open the TPR manually by lifting the lever. If water continues to leak after you release it, replace the valve. It costs about $15.
If it stops, the valve is fine and the overheating issue needs diagnosis.
Important: Never cap or plug the TPR discharge tube. That is a safety violation and can cause a tank explosion. The tube must vent to the ground or outside the RV.
Leaking from the drain plug
If water seeps around the plastic drain plug (petcock), it is usually a loose fitting or a worn gasket. Tighten it by hand. Do not overtighten, the plastic cracks.
If it still leaks, replace the plug or gasket.
Leaking from the tank itself
A crack in the tank usually shows as a slow drip on the bottom or around the edges of the shell. This is not repairable. The entire water heater must be replaced.
Look for signs of rust or corrosion on the outer jacket. Dometic tanks are steel and can rust through after 8 to 15 years, especially if the anode rod was not maintained.
Cost of replacement: A new Dometic 6-gallon water heater runs $400 to $600, plus installation labor if you do not do it yourself. That is still cheaper than rebuilding a water-damaged RV floor.
Leaking from the bypass valve itself
The bypass valve assembly uses O-rings and plastic parts that can crack after repeated winterizations. If you spot a drip at the bypass valve, replace the O-rings or the entire valve body. Kits cost around $15.
Strange Noises or Spitting? Flush Out Sediment and Scaling
A water heater that rumbles, pops, or spits air from the faucets is telling you something. That noise is steam bubbles trying to push through a layer of mineral sediment on the bottom of the tank. The spitting is trapped air from the water heating and expanding.
Both are fixable with a good flush.
What the noises actually mean
- Popping or rumbling: Water is trapped under a layer of calcium or lime scale. As it heats, it creates steam bubbles that burst through the crust. This is most common in areas with hard water, over 100 ppm calcium.
- Hissing or sizzling: Usually a small leak inside the tank. Water hitting the hot burner tube or element. Check for pinhole leaks at the tank welds.
- Gurgling: Air trapped in the water lines. This happens after the tank drains or after winterization. Run all hot water faucets for 30 seconds to purge the air.
How to flush the tank properly
Do this annually or whenever you hear popping. You will need a garden hose, a flathead screwdriver, and about 30 minutes.
- Turn off the water heater. Shut off gas, electric, and cold water supply. Let it cool for at least two hours.
- Relieve pressure. Open the temperature and pressure relief valve (TPR) by lifting the lever until water stops flowing.
- Remove the drain plug. It is the plastic petcock at the bottom of the tank. Have a bucket ready or attach a garden hose to direct water outside.
- Flush. With the drain open, turn the cold water supply back on for about 30 seconds. Water will push out through the drain. Repeat until the water runs clear.
- Inspect. Look for chunks of white or tan sediment in the drained water. A lot of sediment means your anode rod is likely also gone.
- Close and refill. Replace the drain plug, close the TPR valve, and turn the cold water back on. Open a hot water faucet to let air escape. Once water flows steady, close the faucet.
- Power back on. Wait 15 minutes for the tank to heat, then check for leaks at the drain plug and TPR valve.
Descaling if flushing does not help
If the popping persists after a flush, the sediment has hardened into scale. Use a commercial descaler or a weak vinegar solution (1 part white vinegar to 3 parts water). Run it through the tank, let it sit for 6 hours, then flush thoroughly.
Rinse like crazy. Leftover vinegar can damage the heating element gaskets.
Common Mistakes That Wreck a Dometic Water Heater
A few simple errors cause most of the expensive failures. Avoid these and your water heater will easily last a decade or more.
Mistake 1: Running the electric element with an empty tank
This is the fastest way to destroy a heating element and potentially warp the tank. The element generates 1440W of heat. Without water to absorb it, the element glows red-hot in seconds.
The result is a dead element and a $20 to $50 replacement bill plus labor.
How to prevent it: Always ensure the tank is full of water before turning on the electric element. Open a hot water faucet until water flows steady.
Mistake 2: Skipping anode rod checks
The sacrificial anode rod is your tank's first defense against corrosion. Most RVs go years without anyone checking it. By then, the rod is completely gone and rust is eating the steel tank.
A new tank costs $400 to $600. A new anode rod costs $15 to $20.
How to prevent it: Inspect the anode rod once a year during spring maintenance. Replace it when the core wire is exposed or the rod has less than 3/8-inch thickness.
Mistake 3: Over-tightening the drain plug
The plastic drain plug (petcock) is fragile. Crank it too hard and you crack the housing or strip the threads. Now you have a slow leak under the RV that can rot the subfloor before you notice it.
How to prevent it: Hand-tighten the drain plug only. If it leaks, replace the O-ring gasket before tightening harder.
Mistake 4: Leaving the bypass valve in the wrong position
This one we already covered but it is worth repeating. If you winterized your RV in the fall and forgot to switch the bypass valve back in spring, you will not get hot water. It is a 10-second fix but many people panic first and call a technician.
Mistake 5: Ignoring the TPR valve
A leaking temperature and pressure relief valve is not a minor inconvenience. It is a safety device designed to prevent a tank explosion. Never plug it.
Never cap the discharge tube. Never ignore a steady drip. If the valve leaks, replace it.
Mistake 6: Using Teflon tape on gas fittings
Gas connections on Dometic water heaters require pipe dope rated for LP gas, not Teflon tape. Tape can shred inside the fitting and block the gas flow or cause a leak. Always use yellow LP-rated pipe dope on gas threads.
Three Maintenance Habits That Prevent Most Breakdowns
You do not need to be a certified RV technician to keep a Dometic water heater running. Three simple habits cover 90% of preventative maintenance.
Habit 1: Flush the tank every spring
Annual flushing removes sediment before it becomes scale. Hard water areas, most of the western US and parts of the Midwest, should flush twice a year. Soft water areas can get away with once a year.
Mark it on your calendar. Same time you check tire pressure and test smoke detectors.
Habit 2: Inspect and replace the anode rod every 12 to 18 months
Buy a replacement rod when you buy the RV or at the start of each season. Remove the old rod with a 1-1/16-inch socket, or the appropriate size for your model. If the rod is less than half its original thickness, swap it.
You will extend the tank life by years.
Habit 3: Test the TPR valve annually
Lift the lever on the TPR valve and let it snap back. A small amount of water should discharge. If no water comes out, or if water continues to flow after the lever is released, replace the valve.
This takes 10 minutes and costs $15.
Bonus habit: Keep the burner area clean
Spiders and wasps love the warm, sheltered space around the burner tube. Use a can of compressed air to blow out any webs or debris before each camping season. Blocked airflow is a leading cause of gas ignition failure.
Frequently Asked Questions
How do I reset my Dometic water heater?
Locate the red reset button on the thermostat housing. Push it until it clicks. If it trips again immediately, the thermostat is faulty and needs replacement.
For electric models, also check the 120V breaker.
Why will my Dometic water heater not light?
Most common causes are a tripped limit switch, an empty propane tank, or a failed gas solenoid. Start with the limit switch reset. Then check the gas supply.
If you hear clicking but no flame, the solenoid likely needs replacement.
How long should a Dometic water heater last?
With proper maintenance, annual flushing, anode rod replacement, and TPR valve testing, expect 10 to 15 years. Neglected heaters often fail at 6 to 8 years due to corrosion or sediment damage.
Can I run the water heater on gas and electric at the same time?
Yes. Most Dometic dual-fuel models allow simultaneous operation. This gives faster recovery for large showers or dishwashing.
Both systems are independent. If one fails, the other still works.
What does the bypass valve do?
The bypass valve lets you route water around the water heater tank. This prevents the tank from filling during winterization. In normal operation, the valve must be in the open or normal position so water flows through the tank.
Is it safe to leave the water heater on overnight?
Yes. Modern Dometic water heaters have safety limit switches that cut power if the tank overheats. Many RVers leave the gas setting on while traveling or overnight for convenience.
Just ensure proper ventilation for the gas burner.

Similar Posts