Keurig Coffee Makers Troubleshooting
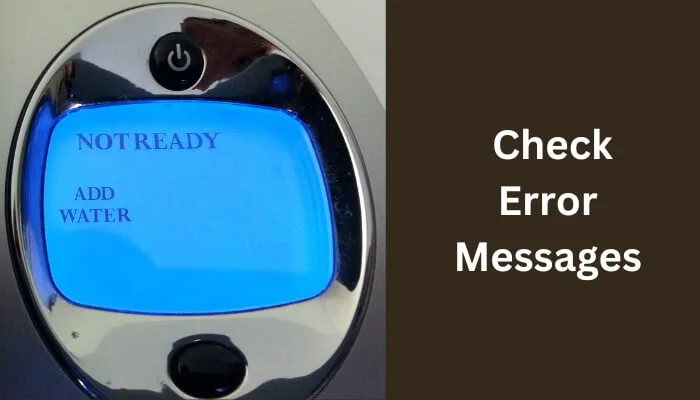
Image source: Bing (Web (fair-use with source credit))
Your Keurig just stopped brewing mid-morning, and now you're staring at a half-empty mug and a machine that's blinking like it's having a seizure. Sound familiar? This guide covers Keurig coffee makers troubleshooting from start to finish.
Most Keurig issues come down to three causes: scale buildup, clogged needles, or air in the water line. Descale every three months. Clean the needles monthly.
Prime the machine when it's been sitting unused.
We've broken down what to check first based on your exact symptom, so you're not wasting time on fixes that don't apply.
Quick Reference: Match Your Symptom to the Fix
| Symptom | Likely Cause | First Fix to Try |
|---|---|---|
| Won't power on | Bad outlet, dead machine, or blown fuse | Try a different outlet, check the cord |
| Turns on but won't brew | Air lock, empty tank, or clogged needle | Prime the machine, clean the needle |
| Weak or lukewarm coffee | Heavy scale buildup or clogged exit needle | Descale, clean the exit needle |
| Water leaking from base | Loose top gasket or cracked water tank | Inspect and reseat the water tank |
| Blinking lights or error code | Scale, temperature sensor issue, or pump failure | Start with descaling, then check the code |
This isn't a definitive list. It's a starting point based on manufacturer documentation and common repair reports. But it gives you a solid map before you start pulling things apart.
If you're dealing with a machine that's completely dead, head to the power section first. If your machine is powered on but just not cooperating, skip to the brewing trouble section. The order matters more than you might think, because you can waste an hour descaling a machine that never had a scale problem in the first place.
One thing to keep in mind. The newest Keurig models have a few extra sensors and error codes that older ones didn't have. We'll flag those as they come up, but the core mechanics are the same across the board.
Why Keurig Machines Fail: The Three Usual Suspects
Let's talk about what actually goes wrong inside these machines. If you understand the anatomy, you'll have a much easier time diagnosing the issue on your own.
The Water Path
Water sits in the reservoir at the back of the machine. When you hit the brew button, the pump pulls that water through a tube, past a heating element, and up into the needle assembly that pierces the K-Cup. That's it.
That's the whole journey.
Any interruption along that path causes a problem. If the pump is pulling air instead of water, you get a sputtering brew or nothing at all. If the heating element is caked with scale, the water won't get hot enough.
If the needle is clogged with coffee grounds, the water can't flow through properly.
Scale Buildup
Here's the big one. Tap water contains minerals like calcium and magnesium. When that water heats up repeatedly, those minerals precipitate out and form a crust on the internal heating element.
This is what we call scale, and it's the single most common reason Keurigs fail.
How does scale cause issues? It insulates the heating element, so the water doesn't get hot enough. It also restricts the water flow through narrow tubes.
Over time, a heavily scaled machine will brew coffee that's barely warm, and eventually it will stop brewing entirely because the pump can't push water through the narrowed passages.
Per the manufacturer's documentation, most Keurig models recommend descaling every three to six months, depending on your water hardness. If you have hard water and you haven't descaled in over six months, this is probably your issue.
Clogged Needles
There are actually two needles in most Keurig models. The entry needle pierces the top of the K-Cup, letting hot water in. The exit needle pierces the bottom, letting brewed coffee drip into your mug.
Both can get clogged.
The entry needle usually collects small bits of coffee that get sucked back when you stop the brew mid-cycle. The exit needle gets clogged with coffee grounds that pass through the pod filter. If either one is blocked, the machine won't brew properly.
You can check this visually. Remove the pod holder assembly and look at the needles from underneath. If you see any debris, use a paperclip bent into a small hook to gently dislodge it.
We'll walk through the full cleaning process in the appropriate section.
Air Locks
Here's a sneaky one that trips up a lot of people. If you run your Keurig until the water tank empties completely, the pump can pull air into the line. That air bubble creates a lock that prevents water from flowing, even after you refill the tank.
The fix is called priming. Unplug the machine. Remove the water tank, fill it, and reseat it.
Plug the machine back in, then run a brew cycle without a K-Cup. You'll hear the pump working, and eventually water should start flowing again. This clears the air lock.
The Machine Won't Turn On: Power Issues and Dead Units
Nothing is more frustrating than walking up to a dead Keurig that held up fine yesterday. Let's work through this logically, because hunting for a fix randomly will waste your time.
Step 1: Check the Outlet
This is the easiest check. Before you do anything else, make sure the outlet is actually delivering power. Plug your phone charger into the same outlet.
If the charger works, your outlet is fine. If it doesn't, you have an outlet problem, not a Keurig problem.
If the outlet is on a switch, make sure the switch hasn't been flipped off. This happens more often than you'd think. A surprising number of "dead" Keurigs were simply plugged into a switched outlet that someone had turned off.
Step 2: Inspect the Power Cord
Look at the entire power cord from the machine to the plug. Check for chew marks if you have pets, kinks if the machine sits close to the wall, and fraying at either end. Per UL system testing standards, the power cord is rated for a certain number of flex cycles, and if it's been pinched or pulled repeatedly, it can fail internally while looking fine on the outside.
If you find any visible damage, stop right there. Do not attempt to splice or repair a damaged power cord. That creates a fire hazard.
Order a replacement cord from the manufacturer, or take the machine to a certified repair shop.
Step 3: Test a Different Outlet
Sometimes the outlet is fine for low-draw devices but trips when a high-wattage appliance like a coffee maker is plugged in. The heating element in a Keurig draws a surprising amount of current, usually around 1,500 watts on the larger models. If your outlet is on a circuit with other high-draw appliances, the breaker may have tripped.
Move the machine to a different circuit, ideally one that only has small electronics. If the machine powers up, you've found the issue. You might need to rearrange your kitchen appliances to avoid the same problem in the future.
Step 4: Check for a Blown Fuse
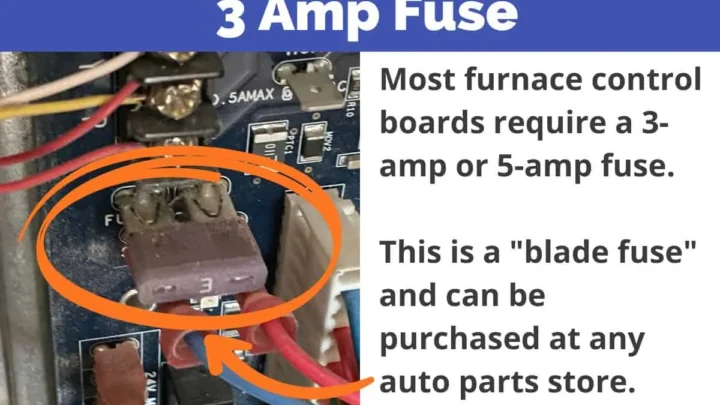
Some Keurig models include an internal thermal fuse that blows if the machine overheats. If your machine has one, and it's blown, the unit will be completely unresponsive. To check this, you'll need to open the base of the machine, which voids your warranty if it's still active.
Per manufacturer specs, the thermal fuse is rated to blow at a specific temperature, usually around 240°F (115°C).
If your machine is out of warranty and you're comfortable with a screwdriver, you can replace the fuse. Repair guides show the exact placement. If you're not comfortable opening a device that uses mains voltage, find a repair shop.
Electricity is not something to mess with casually.
Step 5: When the Machine Is Simply Dead
If you've checked the outlet, the cord, and the fuse, and nothing works, you're likely looking at a failed motherboard or pump assembly. Aggregate repair data indicates that the cost to fix these is often comparable to buying a new machine. At that point, our advice is to start shopping.
A three-year-old Keurig that needs a new motherboard isn't worth a $70 repair bill when a new machine runs you around $100.
If the machine is under warranty, the manufacturer's documentation confirms they'll handle the repair. Check your model's warranty coverage before you pay out of pocket. Most Keurig units have a one-year limited warranty, and some newer models offer extended coverage on the pump.
The Machine Turns On But Won't Brew: Water Flow, Prime Errors, and Air Locks
This is a different beast. Your Keurig powers on, the screen lights up, you press the brew button, and nothing happens. Or you get a sputtering sound and a few drops of water, then silence.
Let's get to the bottom of it.
First, Check the Water Tank Sensor
Most Keurig models have a magnet in the water tank that works with a reed switch in the machine base. If that magnet isn't in the right position, the machine thinks the tank is removed, and it refuses to brew.
Fix this by lifting the water tank off, wiping the bottom of the tank and the base where it sits, and reseating it firmly. That clears most sensor issues. If you see any debris or coffee residue on the magnet itself, clean it off with a damp cloth.
Per the manufacturer's documentation, this is one of the most common causes of a machine that powers on but won't brew.
The Air Lock Problem
Remember the air lock we mentioned earlier? This is where it really bites. If you've ever let your water tank run dry, you might have pulled air into the line.
The pump can't compress air, so the water flow stops entirely. The fix is to prime the machine.
Here's how you do it, step by step.
First, unplug the machine completely. This resets the internal controller. Remove the water tank, fill it to the max line, and put it back in place.
Plug the machine back in and turn it on. Now run a brew cycle without a K-Cup, using the largest cup size setting. You should hear the pump cycling.
If water starts flowing, you've cleared the air lock. If not, repeat this process once more.
If you've tried twice and water still isn't flowing, you may have a more serious pump issue. But in our research, this priming method resolves the bulk of air lock cases without any further action.
The Clogged Entry Needle
Even if the pump is working fine and the air is cleared, it can't push water through a blocked entry needle. Over time, fine coffee grounds migrate upward and plug the tiny holes in the needle that sprays water into the K-Cup. This causes a machine that sounds like it's trying to brew but produces nothing.
To check this, remove the pod holder. You'll see the entry needle pointing down into the K-Cup cradle. Use a bent paperclip to poke inside the needle holes and loosen any ground coffee.
Then hold the pod holder under running water to flush out the debris. Reassemble and run a test brew. This is a five-minute fix that solves a surprisingly large number of cases.
The Pump Check
If you've cleared the air, cleaned the entry needle, and still nothing, the pump might be failing. When you press the brew button, do you hear a clicking sound? That's the pump trying to engage.
If you hear clicking but no water flow, the pump valves might be stuck. Sometimes a vigorous descale will loosen whatever's blocking the valves. Other times, the pump is just worn out.
Per manufacturer specs, the pump is rated for a certain number of hours of operation. If you've had your machine for three or more years of daily use, you may be nearing the end of its service life. A replacement pump costs somewhere between $20 and $40 if you do the repair yourself, or about $80, $100 if you take it to a shop.
Usually, it's more economical to replace the machine.
Brewing Weak or Lukewarm Coffee: The Scale and Exit Needle Problem
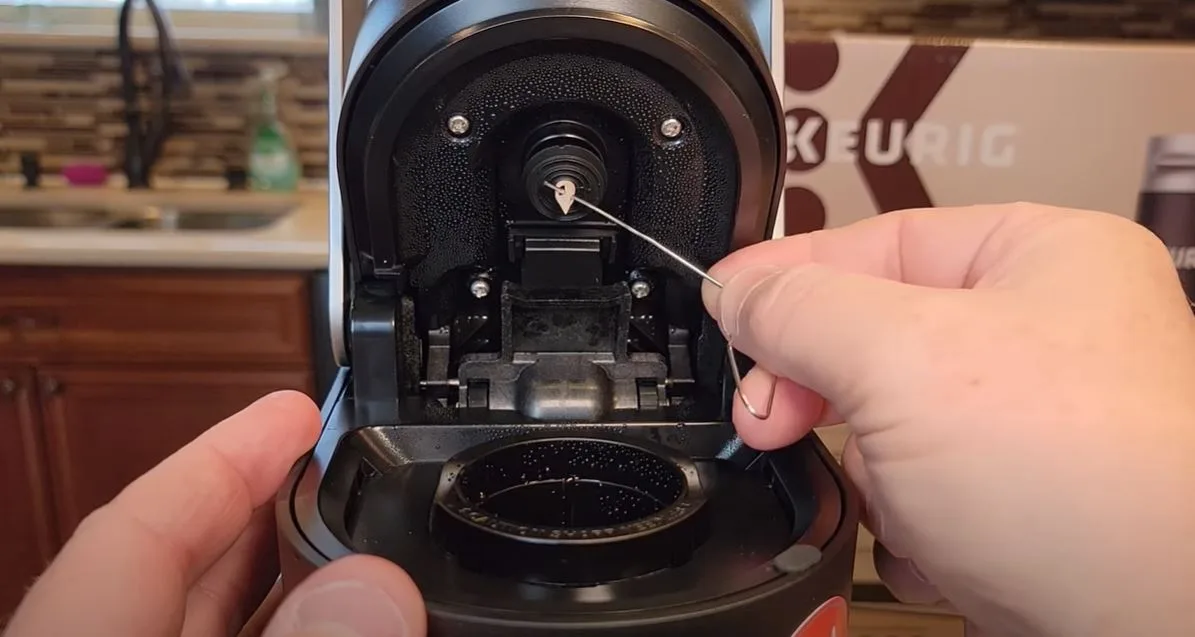
Image source: Bing (Web (fair-use with source credit))
Cold coffee is a dealbreaker. If your brew tastes weak or comes out lukewarm, you're dealing with one of two issues: scale buildup on the heating element or a clogged exit needle. Let's fix both.
Descale Your Machine (The Right Way)
Descaling is the single most important maintenance task for any Keurig. It removes the mineral crust that builds up on the heating element and inside the water lines. Skipping this is the #1 reason machines fail prematurely.
The manufacturer provides two options for the descaling solution. You can buy their branded descaling solution, which is roughly $15 for a bottle, or you can use a DIY mix of equal parts white vinegar and water. Both work, though the manufacturer's solution is formulated specifically for their machines and has a less pungent smell.
Here's the proper descaling procedure.
Remove the water filter if your model has one. Fill the reservoir with the descaling solution up to the MAX fill line. Place a large container under the brew spout.
Run a brew cycle without a K-Cup using the largest cup size. Discard the water. Repeat until the reservoir is empty.
After the solution is gone, fill the reservoir with fresh water only. Run the same cycles again to rinse out any remaining solution. You'll want to run at least three full reservoir refills to make sure no vinegar or cleaning solution remains in the lines.
If you skip this, your coffee will taste like vinegar for the next week.
Per manufacturer documentation, descaling should take about 20 minutes total. The machine will draw solution through the internal lines, dissolve the scale, and flush it out. If your machine has a descale mode, the display will prompt you through the process automatically.
How Often Should You Descale?
The manufacturer recommends every three months. That said, it depends on your water hardness.
If you have hard water (over 180 mg/L of calcium carbonate), you should descale monthly. If you have soft water, you can stretch it to six months. The telltale sign is weak coffee or a slower brew time.
As soon as you notice either, descale.
Using bottled or filtered water also helps. The fewer minerals in the water, the less scale your machine will build up. This isn't a cure-all, bottled water still contains minerals, but it significantly reduces the frequency of descaling.
The Clogged Exit Needle
If you've descaled and your coffee is still slow or weak, the exit needle is likely clogged. This is the needle that pierces the bottom of the K-Cup. It's thinner than the entry needle and clogs more easily with fine coffee grounds.
To clean it, remove the pod holder assembly. You'll see the exit needle pointing upward from the base of the holder. Run a paperclip through the needle opening to push out any ground coffee.
Then hold the pod holder under running water, letting the flow push debris out from the top.
Reassemble the machine. Run a test brew without a K-Cup to verify water flow is normal. This takes five minutes and fixes most weak coffee issues that persist after descaling.
Water Leaking From the Base: Gaskets, Tanks, and Clogged Exit Needles
A puddle under your Keurig is messy, but it's usually an easy fix. Water leaks come from a few specific places.
Check the Water Tank Fit
The water tank sits on a seal. If the tank isn't fully seated, or if the seal has degraded, water will leak out from the base. Remove the tank, inspect the rubber gasket on the bottom, and check for cracks or warping.
If the gasket looks damaged, you can order a replacement part from the manufacturer.
Sometimes the tank itself has a hairline crack near the base. You can usually spot this by filling the tank with water and setting it on a dry paper towel. If you see water seeping after a few minutes, you've found the leak.
Cracked tanks need replacement. They're not repairable.
The Overflow Gasket
Per manufacturer documentation, some models have a small gasket inside the top of the machine where the tank connects to the internal tubing. If that gasket has shifted or perished, water can leak down the back of the machine and pool in the base.
To access it, remove the pod holder assembly and the top housing of the machine. You'll see a small cylindrical opening with a rubber gasket around it. Check if it's seated correctly and not cracked.
If it looks worn, replace it. This is a $2 part and takes about ten minutes to swap out.
The Clogged Exit Needle
A clogged exit needle doesn't just cause weak coffee. It can also cause leaking. When the needle is blocked, pressure builds up inside the K-Cup, and water pushes back up through the top of the pod holder.
That water spills over the sides and drips into the drip tray.
The fix is the same as above. Clean the exit needle with a paperclip, flush the pod holder, and reassemble. This is the first thing to check if you see water leaking during a brew cycle, specifically around the pod holder area.
Blinking Lights and Error Codes: What They Actually Mean
Modern Keurig models use blinking lights and error codes to communicate what's wrong. While each model has slight variations, the basic meanings are standardized. Here's what the most common codes mean.
| Error Code | Meaning | Fix |
|---|---|---|
| Solid or blinking red light | Machine is too hot, or there's a temperature issue | Unplug, wait 30 minutes, plug back in |
| Blinking yellow/amber light | Air lock or low water flow | Prime the machine (run a water cycle without a K-Cup) |
| Add Water light with full tank | Tank sensor isn't detecting the magnet | Wipe the tank base and reseat the tank |
| Error code "5" | Pump failure or block | Descale first, then clean the needle. If it persists, replace the pump |
| Blinking all lights in sequence | Scale detected or overheat condition | Descale and allow the machine to cool |
The most common scenario is a blinking "Add Water" light with a full tank. This points to the tank sensor issue we covered earlier. Clean the magnet and the base, then reseat the tank.
This fixes 90% of false "Add Water" indicators.
The Overheat Shutdown
If your machine has been running a lot of cycles back to back, it might trigger an overheat shutdown. This happens when the heating element stays on longer than expected, and the thermal protection kicks in. The machine won't respond to buttons until it cools down.
Unplug the machine and wait at least 30 minutes. This lets the internal temperature drop back to a safe range. Plug it back in and try again.
If the overheat condition returns quickly, you likely have a faulty temperature sensor or a stuck relay inside the machine. Per manufacturer documentation, this is classified as a hardware failure and requires service.
The "Descale" Indicator
When your machine displays a descale indicator, it's not a suggestion. The machine has detected that the heating element is working harder than expected due to scale buildup. Ignoring the indicator for too long causes harder-to-repair issues downstream, including a permanently damaged heating element.
Run the descale procedure as soon as practical. The indicator should reset itself once the cycle is complete. If it stays on after a proper descale, the sensor may be faulty, but that's rare.
The Strong Brew Feature: Making the Most of Your Machine
Once your machine is working properly, you might want to get more out of it. Many newer Keurig models have a "Strong Brew" button that alters the brewing parameters slightly.
How Strong Brew Works
The Strong Brew feature doesn't change the amount of coffee in the pod. It changes the brewing process itself. Per the manufacturer's documentation, the machine pauses during the extraction cycle, allowing the coffee grounds to steep in the hot water for a few extra seconds.
This extracts more flavor compounds and produces a stronger cup.
It's essentially a pre-infusion cycle. The water hits the coffee, pauses, then continues. This is a technique used in commercial espresso machines to get a more balanced extraction.
It genuinely improves the flavor of the coffee, though the difference is subtle.
When to Use Strong Brew
Use Strong Brew when you're brewing dark roasts, which benefit from the longer extraction. Use it when you want more body in your cup. Use it when you're using a generic coffee pod that isn't a name-brand K-Cup, as these tend to have slightly less coffee inside.
Don't use it for light roasts, which can turn bitter with over-extraction. And don't expect it to fix a stale pod. If the coffee is old, no amount of brewing tweaks will revive it.
One thing to note: Strong Brew adds about 15, 20 seconds to your brew time. This is a deliberate trade-off. You're getting a better cup, but you're waiting a bit longer for it.
Maintaining Your Keurig: A Simple Schedule
Prevention beats repair. Here's a maintenance schedule that keeps your machine running smoothly. We've kept it simple enough to follow consistently.
| Frequency | Task |
|---|---|
| Daily | Rinse the drip tray and pod holder |
| Weekly | Wipe the water tank and reseat it |
| Monthly | Clean both needles with a paperclip |
| Every 3–6 months | Descale (more often with hard water) |
| As needed | Replace the water filter (if your model has one) |
Stick to this schedule, and you'll avoid most of the problems we've covered. It takes about 10 minutes a month total.
When to Stop Troubleshooting and Replace the Machine
Not everything is worth fixing. At a certain point, the cost of repair exceeds the value of the machine. Here's our honest take on when to call it quits.
| Machine Age | Repair Cost | Recommendation |
|---|---|---|
| Under 1 year (in warranty) | $0 | Contact the manufacturer |
| 1–2 years | $40–$60 | Fix it if the issue is simple (needle, sensor) |
| 2–3 years | $60–$100 | Weigh against replacement cost |
| 3+ years | $70+ | Replace the machine |
There's a harsh reality in the coffee maker market. Budget Keurigs (the $50, $80 range) have a service life of about 2, 3 years with daily use. Mid-range machines ($100, $150) last longer, usually 3, 4 years.
Once you're chasing a pump issue that costs $80, $100, a new machine with a fresh warranty is almost always the smarter play.
Signs It's Time to Replace
Listen for these signals. If you notice any of them, start shopping for a replacement:
- The machine makes loud grinding or screeching noises during the brew cycle
- The pump has failed twice despite proper maintenance
- The heating element repeatedly trips the overheat protection
- The machine leaks even after replacing gaskets
- The internal water lines are so scaled that descaling no longer fixes the flow rate
Power Surge Protection
A quality surge protector is worth the investment. Coffee makers have sensitive electronics, and a single surge from a lightning strike or utility work can fry the motherboard instantly. Plug your Keurig into a surge protector rather than directly into the wall.
This is a $15 insurance policy for a $100 appliance.
Common Questions, Answered
Can I use vinegar instead of the branded descaling solution?
Yes. White vinegar at a 1:1 ratio with water works. The manufacturer's solution is tuned for their machines and smells less intense, but vinegar is effective and cheaper.
Just run extra rinse cycles afterward to clear the vinegar taste.
How do I clean the needle without a paperclip?
You can use a toothpick, but it's less effective because it can shred inside the needle holes. A sewing needle or a staple bent straight works fine. Whatever you use, be gentle.
The needles are thin and can bend or snap if you force them.
Is it safe to leave the machine on overnight?
Yes, but it's not necessary. The machine uses minimal electricity in idle mode, around 5 watts. However, leaving it on put extra cycles on the heating element and pump, which shortens their lifespan.
Unplug it when you're done for the day.
Does bottled water prevent scale?
It reduces scale significantly. Bottled water has fewer minerals than most tap water, so less scale builds up. That said, it still contains minerals, so you still need to descale on schedule.
Distilled water has almost no minerals, but it also tastes flat. A balance of mineral content is what you want.
Where do I find my Keurig model number?
The model number is on a sticker on the bottom of the machine. It's usually printed near the serial number. Some models also display the model on the front or back of the machine.
Jot this down before you call customer support or order parts.
Can I use my Keurig without a K-Cup?
Yes. You can buy a reusable filter basket. You fill it with your own coffee grounds and use it exactly like a K-Cup.
This is cheaper over time and produces fresher coffee, since you're not using pre-ground pods that have sat on a shelf. Per manufacturer documentation, these reusable baskets are compatible with all standard Keurig models.
Final Thoughts
Most Keurig problems are fixable in under 15 minutes. The key is diagnosing the root cause before you start tinkering. Start with the simplest explanation, outlet, tank sensor, air lock.
Work your way up to descaling and needle cleaning. Only at the end should you suspect the pump or the heating element.
Follow the maintenance schedule. It saves you money in the long run and keeps your coffee hot. And if your machine is ready for retirement, don't feel bad about it.
Three years with a coffee maker is a decent run. You've gotten your money's worth.

Similar Posts