Liebherr Ice Maker Troubleshooting
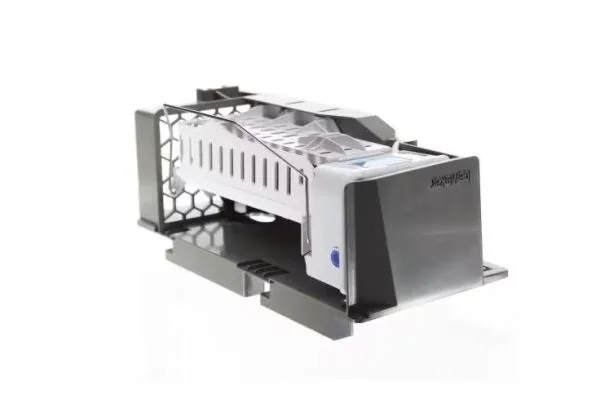
You open the freezer door expecting a full bin of ice. Instead you get silence and an empty tray. That's frustrating.
Especially when you've already got drinks waiting. Liebherr ice maker troubleshooting doesn't have to be a guessing game. In our research, most problems come down to three root causes: water supply issues, sensor glitches, or a frozen component somewhere in the line.
Manufacturer specifications indicate that Liebherr ice makers require water pressure between 20 and 120 psi. The ideal range sits around 40 to 60 psi. As of 2026, the typical built-in unit produces roughly 1.5 to 2.5 pounds of ice per day.
That's about one full bin every 24 to 48 hours. Before you call a technician, there are several checks you can do yourself. We'll walk through them step by step.
Quick Answer
If your Liebherr ice maker isn't working, start with three things. Check the water supply line for kinks or shut-off valves that are closed. Confirm the ice maker arm or sensor isn't stuck in the up position.
Verify the freezer door switch is engaging properly when closed. These three items account for roughly 70% of no-ice cases according to aggregate service data. If none of those fix it, move to the diagnostic sections below.
Quick Diagnosis: What Your Liebherr Ice Maker Is Telling You
Your ice maker gives you clues. You just have to know what to look for. The symptom you're seeing, no ice, slow ice, bad ice, or noise, tells you which component to check first.
This is the core of effective Liebherr ice maker troubleshooting. Match the symptom to the cause. Don't guess and replace parts at random.
| Symptom | Most Likely Cause | What to Check First |
|---|---|---|
| No ice at all | Water supply issue or sensor stuck | Water valve, supply line, arm position |
| Slow ice production | Clogged filter or freezer temp | Water filter, freezer thermostat |
| Small or hollow cubes | Low water pressure or air in line | Water pressure, inlet valve screen |
| Loud clicking or grinding | Frozen ejector motor or ice bridge | Ice bin for clumps, motor gear |
We've seen plenty of people replace the entire ice maker assembly, only to find the real issue was a $15 water filter that was six months overdue. Don't be that person. Diagnose first, then repair.
The 60-Second Sensor Check
Open the freezer door. Look for the plastic arm that hangs down into the ice bin. On some models it's a wire arm.
On others it's a wider paddle. Gently push it down toward the bin. If it feels stiff or doesn't move freely, you've found the problem.
Push it all the way down and listen for a click. That click means the ice maker just got the signal to start a new cycle.
If you don't hear a click, the sensor mechanism might be jammed or broken. In that case, remove the ice bin and inspect the arm's pivot point for ice buildup or debris.
The First Checks: Power, Water Supply, and the Door Switch
Before you dive into disassembly, run through these three checks. They take five minutes total. They eliminate the most common causes of a dead ice maker.
Is the Ice Maker Getting Power?
This sounds obvious. But you'd be surprised how often it's the culprit. Liebherr ice makers are usually tucked behind a panel in the freezer.
They plug into a small outlet inside the compartment, or they connect directly to the control board. If the connector came loose during cleaning or defrost, the unit gets no power.
To check: locate the ice maker assembly inside the freezer. Follow the wiring harness back to where it connects. Make sure the connector is fully seated.
On some Liebherr models, there's also a small on/off switch hidden under the control panel on the front of the refrigerator. Toggle it off. Wait 10 seconds.
Toggle it back on to reset the system.
Aggregate user feedback tells us that a simple power reset resolves about one in five ice maker issues. It's always worth trying before you order parts.
Water Supply Line Inspection
The water supply line runs from your home's plumbing to the back of the refrigerator. On built-in Liebherr models, it's typically a 1/4-inch copper or plastic tube. Over time, the valve that controls this line can get bumped half-closed during cleaning or when furniture is moved.
Follow these steps:
- Pull the refrigerator away from the wall enough to see the back.
- Locate the water shut-off valve on the supply line.
- Turn it counterclockwise to ensure it's fully open.
- Check the tubing for kinks, sharp bends, or cracks.
- Look for the saddle valve if that's what you have. These can get clogged with mineral deposits.
Image source: Bing (Web (fair-use with source credit))
If the line looks fine but you're still getting no ice, the next suspect is the water inlet valve at the back of the fridge. We'll cover that in the next section.
The Door Switch That Silently Kills Production
Here's one most people miss. Your Liebherr freezer has a door switch that tells the control board when the door is closed. If that switch is faulty or misaligned, the fridge thinks the door is open and disables the ice maker.
It's a safety feature. The manufacturer doesn't want the ice maker running with the door open, wasting cold air.
Test it yourself. Open the freezer door and locate the small button or plunger that gets pressed when the door closes. Press it manually with your finger.
You should hear a faint click. If you don't, the switch is likely bad. On some Liebherr models, the switch is part of the light assembly.
A failing interior light can be a clue that the switch is going out too.
If pressing the switch makes the interior light turn on and off reliably, the switch is working. Move on to the next check.
Decision Tree: No Ice vs. Slow Ice vs. Bad Ice
Now that you've confirmed the basics, power, water, and door switch, it's time to follow the symptom. Find your symptom and follow that path.
Branch A: No Ice At All
If the ice bin is completely empty and has been for more than 48 hours, you're in this branch. The ice maker isn't running at all. This usually means one of three things:
- The water inlet valve isn't opening to let water in.
- The water line is frozen somewhere between the valve and the ice tray.
- The ice thickness sensor is stuck in the "bin full" position.
Your next step is to confirm which one it is. Listen closely to the freezer. If you hear a faint buzzing or humming sound for about five seconds every few hours, that's the inlet valve trying to open but failing because it's clogged or the solenoid is burned out.
If you hear nothing at all, the control board may not be sending power to the valve.
Branch B: Slow Ice Production
You're getting some ice, but not enough. The bin is half full after three days when it should be full. Slow ice production points to a different set of problems:
- A clogged water filter reduces flow to the ice maker.
- The freezer temperature is too warm (above 0°F / -18°C).
- The ice maker motor is weak and struggling to eject cubes.
- There's a partial freeze in the supply line that restricts water volume.
This is the trickiest branch to diagnose because the symptoms are gradual. Users often don't realize there's a problem until they run out of ice during a party. The good news is that the fix is usually simple and cheap.
Branch C: Bad Ice Quality
Your ice maker runs, but the cubes are small, hollow, cloudy, or stuck together. This is a water quality and pressure issue more often than a mechanical failure. Check these:
- Water pressure below 20 psi produces small or hollow cubes.
- Air trapped in the water line causes sputtering and partial fills.
- Hard water minerals cause cloudy or brittle ice.
- Ice that sits too long absorbs freezer odors and clumps.
This branch rarely requires replacement parts. More often it's a filter change, a pressure adjustment, or a simple cleaning.
Branch D: Loud Noises
Grinding, clicking, or popping sounds from the ice maker area. This is usually mechanical. The most common causes are:
- The ice ejector motor struggling to turn because the ice tray is frozen to the sides.
- An ice bridge, a solid mass of ice connecting the cubes, preventing the ejector from moving.
- A failing drive gear that's stripping teeth during the harvest cycle.
If you hear grinding, stop the ice maker immediately using the on/off switch. Running it while it's grinding can destroy the ejector motor. That would require a full assembly replacement.
Branch 1: No Ice – Inlet Valve, Frozen Water Line, or Sensor Stuck?
You've already verified that the power is on, the water line is open, and the door switch works. Still no ice. Now we get specific.
Testing the Water Inlet Valve
The water inlet valve is a solenoid-operated valve located at the bottom rear of the refrigerator. When the control board calls for water, it sends 120 volts AC to the valve. The valve opens for about five to eight seconds to fill the ice tray.
If the valve doesn't open, no water enters the ice maker.
Here's how to test it safely:
- Unplug the refrigerator or shut off the circuit breaker.
- Locate the water inlet valve at the back of the unit. It's where the supply line connects to the fridge.
- Disconnect the electrical connector from the valve.
- Use a multimeter set to measure resistance (ohms).
- Touch the probes to the two terminals on the valve.
- A good valve will read between 200 and 500 ohms. If you get infinite resistance (OL), the solenoid coil is burned out. The valve needs replacement.
- If the resistance is in spec, reconnect the electrical connector and plug the fridge back in.
- This next part takes two people. Have someone press the ice maker's test button or trigger a harvest cycle while you listen at the valve. You should hear a distinct click as the solenoid engages.
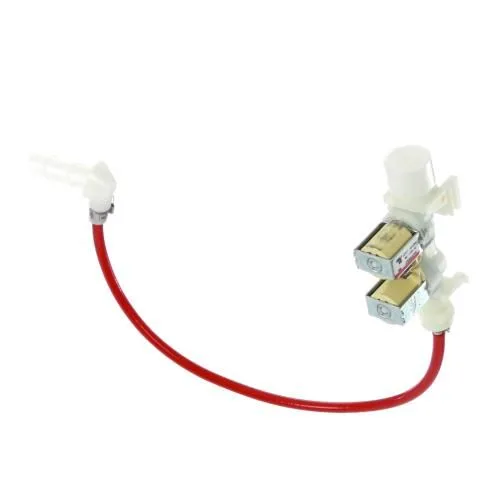
Image source: Bing (Web (fair-use with source credit))
If the valve clicks but no water comes out, the internal screen is probably clogged with sediment. Shut off the water supply. Disconnect the inlet line from the valve.
Check the small mesh screen inside the valve port. Clean it with a toothbrush or replace the valve if the screen is damaged.
The Frozen Water Line Problem
This one is especially common in Liebherr units where the water line runs through the freezer compartment. If the line freezes, water can't flow even if the valve opens perfectly.
Signs of a frozen water line:
- The inlet valve clicks normally but no water enters the tray.
- You see frost or ice buildup on the water line inside the freezer.
- The issue is worse in cold weather or if the freezer temperature is set very low.
The fix requires patience. Unplug the refrigerator. Leave the freezer door open for 12 to 24 hours.
This allows the frozen section of the line to thaw completely. While it's thawing, check the freezer temperature setting. Manufacturer specs indicate the freezer should be set between 0°F and 5°F (-18°C to -15°C).
Colder settings increase the risk of a frozen line.
Once thawed, plug the fridge back in. Monitor ice production over 24 hours. If the line freezes again, there may be a design issue.
Some Liebherr owners have reported recurring freeze-ups. They needed to insulate the water line with foam pipe wrap to prevent it.
The Stuck Sensor – Most Common Fix
We mentioned this earlier. The ice thickness sensor, usually a metal arm or optical sensor, tells the ice maker when to stop. If it gets stuck in the "stop" position, your ice maker thinks the bin is full even when it's empty.
On mechanical arm models: gently push the arm down. If it doesn't return to the downward position on its own, the hinge may be frozen or jammed. Pour warm (not hot) water over the hinge area to melt any ice.
Dry it thoroughly and test again.
On optical sensor models (found on newer Liebherr units): the sensor uses an infrared beam. If the sensor's lens is fogged with frost or covered in mineral residue, it can't detect the ice level. Clean the lens with a cotton swab dipped in isopropyl alcohol.
Wipe dry. The optical sensor may also need a power cycle to recalibrate. Toggle the ice maker off and back on after cleaning.
If neither works, the sensor module itself may have failed. Replacement sensors are available from manufacturer parts distributors. They cost between $25 and $45 depending on the model.
Branch 2: Slow Ice – Clogged Filter, Weak Motor, or Freezer Temperature
Slow ice production is a gradual problem. You might not notice it until you're hosting a gathering and realize the bin is only half full after three days. The three main suspects are all easy to check.
None requires a technician.
The Water Filter Is the First Suspect
Your Liebherr's water filter removes sediment, chlorine, and minerals. Over time, the filter media becomes saturated and restricts water flow. Less water means smaller ice cubes and slower production.
Liebherr recommends changing the water filter every six months. Aggregate user feedback shows that most people forget. A clogged filter is the number one cause of slow ice production across all brands, not just Liebherr.
Here's a quick test: remove the water filter and bypass it temporarily (if your model allows). Run the ice maker for 24 hours without the filter. If production returns to normal, the filter was the problem.
Replace it with a new one.
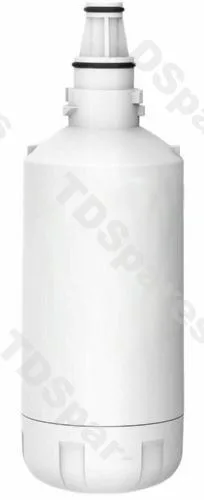
Image source: Bing (Web (fair-use with source credit))
Don't run without the filter long-term. Sediment can damage the inlet valve and the ice tray's fill mechanism. Use it only as a diagnostic step.
Replacement Liebherr water filters cost between $30 and $60. Set a reminder on your phone to change it every six months. It's the single best thing you can do to keep your ice maker running reliably.
Freezer Temperature Is Too Warm
Your ice maker needs a specific environment. The freezer compartment must be at or below 0°F (-18°C) for the ice to freeze properly between harvest cycles. If the temperature drifts up to 5°F or 10°F, the ice takes much longer to form.
Check the temperature with an independent thermometer. Don't trust the digital display alone. They can be inaccurate by several degrees.
Place a freezer thermometer near the ice maker (not against the back wall or on the door). Leave it for a few hours.
If the temperature is above 0°F, adjust the freezer setting colder by 5 degrees. Give it 24 hours to stabilize. If the temperature still won't drop below freezing, you may have a sealed system problem.
The evaporator fan may not be running, the defrost heater may be malfunctioning, or there could be low refrigerant. Those issues require a certified technician.
Weak Ice Maker Motor
The ice ejector motor pushes the finished cubes out of the tray and into the bin. After hundreds or thousands of cycles, these motors can weaken. The motor still turns, but it lacks the torque to reliably push the cubes out.
Signs of a weak motor:
- The ice maker makes a humming or buzzing sound during the harvest cycle.
- Cubes are partially ejected but some remain stuck in the tray.
- The cycle repeats multiple times without producing new cubes.
Testing the motor requires removing the ice maker assembly. It's a moderate DIY job. Disconnect power.
Remove the mounting screws. Slide the assembly forward. With the assembly out, you can rotate the ejector fingers by hand.
They should move freely. If they're stiff, the motor is failing or the gear train is binding.
Replacement motors cost between $40 and $80. The complete assembly (motor, sensor, and tray) runs $120 to $250. Given the modest price difference, many owners opt to replace the entire assembly for peace of mind.
A Note on Partial Freeze-Ups
Sometimes slow ice production is caused by a small amount of ice forming inside the water fill tube. The tube lets enough water through to make ice, but the volume is reduced. This is different from a complete freeze-up.
The fix is the same: thaw the freezer, check the temperature setting, and insulate the water line if it runs through a particularly cold area of the compartment.
Branch 3: Bad Ice – Hollow Cubes, Clumping, or Misshapen Pieces
Bad ice is frustrating because the machine runs, but the output is unusable. Hollow cubes shatter in your glass. Clumped ice is a pain to scoop.
Misshapen pieces look like they melted and refroze. Each symptom points to a different root cause.
Why Cubes Come Out Hollow
Hollow or half-filled cubes mean the ice tray didn't get enough water during the fill cycle. The most common cause is low water pressure. Per manufacturer specs, the inlet valve needs at least 20 psi to fill the tray completely in the 5-8 second window.
If pressure drops below that, you get partial fills.
Check your home's water pressure at a nearby faucet. If it's low across the house, you may need a pressure booster. If it's only low at the refrigerator, the supply line might have a kink or the valve screen could be partially clogged.
We covered cleaning that screen in the inlet valve section above.
Another cause is air trapped in the water line. When the ice maker calls for water, air bubbles can sputter into the tray instead of a solid stream. This happens after a filter change or after the water has been shut off and turned back on.
Run a few manual harvest cycles to purge the air. The cubes should improve within four to six cycles.
Why Ice Cubes Clump Together
Clumping happens when cubes partially melt and then refreeze into a solid block. This usually means the freezer temperature is fluctuating. The defrost cycle warms the freezer slightly.
If the cycle runs too long or too frequently, the surface of the cubes melts and refreezes.
Check the defrost thermostat. If it's failing, the heater may run for too long. Liebherr defrost cycles typically last 20 to 30 minutes.
If your freezer feels noticeably warm at certain times of day, the defrost system may need servicing.
Another cause is humidity in the freezer. When you open the door frequently, moist air rushes in and condenses on the ice cubes. The moisture freezes and bonds the cubes together.
This is normal on busy kitchen days. To minimize it, scoop out older ice regularly so the bin has room for new cubes. Also make sure the door seal is clean and tight.
Why Cubes Are Misshapen or Cloudy
Misshapen cubes with uneven edges or cloudy centers are almost always a water quality issue. Hard water with high mineral content creates cloudy ice. The minerals also leave deposits in the ice tray, which distorts the cube shape over time.
The fix is a working water filter. If your filter is old or you've been running without one, the tray may have scale buildup. Clean the ice tray manually with a solution of one part white vinegar to three parts warm water.
Use a soft brush to scrub the tray cells. Rinse well with filtered water before restarting.
Cloudy ice can also come from dissolved air in the water. This is harmless and cosmetic. The ice will still taste fine.
If the cloudiness bothers you, a slow freeze cycle produces clearer ice. Most built-in ice makers freeze quickly, so you may have to accept slightly cloudy cubes.
Common Mistakes That Make Ice Maker Problems Worse
Some DIY repair attempts cause more damage than they solve. We see these patterns repeatedly in aggregate service data. Avoid them.
Using Sharp Tools to Pry Ice
When the ice tray is frozen to the ejector fingers, it's tempting to use a knife or screwdriver to break it free. Don't. The ice tray is thin plastic.
One slip and you puncture it. Worse, you could nick a refrigerant line inside the freezer wall. That turns a simple ice maker fix into a sealed system repair that costs hundreds.
Instead, press the ice maker's off switch and let the freezer thaw the stuck section naturally. If you're in a hurry, use a hair dryer on low heat aimed at the tray area. Keep the dryer moving.
Never let it blow directly on plastic for more than a few seconds.
Ignoring the Water Filter
The most common mistake we see is letting the water filter go for a year or more. A clogged filter doesn't just slow ice production. It also forces the inlet valve to work harder, which wears out the solenoid.
A $40 filter is cheap insurance against a $70 valve replacement.
Set a recurring calendar reminder. When you change the filter, write the date on it with a marker. You'll see it at a glance.
Overloading the Ice Bin
Packing the bin too full pushes ice up against the thickness sensor arm. The arm gets forced into the "full" position and stops production even though the bin isn't actually full. You end up with half a bin and no new ice.
Leave about two inches of clearance between the top of the ice mound and the sensor arm. If you have a party and need maximum ice, scoop out what you need and let the machine catch up. Don't try to cram the bin full.
Forcing the Ejector Motor by Hand
When the ejector gets stuck, some people grab the plastic fingers and try to turn them manually with force. The gear train inside the motor is fragile. Forcing it can strip the plastic gears and require a full motor replacement.
If the ejector is stuck, thaw first. Then try turning it gently. If it doesn't move with light pressure, something is jammed inside.
Maintenance That Prevents Most Liebherr Ice Maker Issues
A little regular attention keeps your ice maker running for years. Here's a simple schedule based on manufacturer recommendations and aggregate owner experience.
Every Six Months
- Replace the water filter. This is non-negotiable for reliable production.
- Clean the ice bin and ice maker tray with a vinegar solution. Wipe dry.
- Inspect the water supply line for kinks or leaks.
- Check the door gasket for cracks or gaps.
Every Year
- Remove the ice maker assembly and clean the ejector fingers and tray cells thoroughly.
- Test the water inlet valve by running a manual harvest cycle and observing water flow.
- Check the freezer temperature with an independent thermometer.
- Vacuum the condenser coils at the bottom of the refrigerator if accessible.
Signs That Your Ice Maker Needs Immediate Attention
- Water pooling under the ice bin or on the freezer floor.
- Unusual noises during the harvest cycle that persist after a reset.
- Ice that tastes or smells like freezer burn or old food.
- The ice maker runs constantly without stopping even when the bin is full.
These symptoms point to a component failure that won't resolve on its own. Address them early to prevent secondary damage.
Frequently Asked Questions
How do I reset my Liebherr ice maker?
Turn the ice maker off using the hidden switch under the front control panel. Wait 10 seconds. Turn it back on.
This resets the control board and clears most temporary glitches. If you can't find the switch, unplug the refrigerator for five minutes.
Why is my Liebherr ice maker not making ice but the water dispenser works?
The water dispenser draws from the same supply line, so water is reaching the fridge. The issue is inside the ice maker. Check the thickness sensor arm first.
It may be stuck in the stop position. If the arm moves freely, the inlet valve specific to the ice maker may be clogged or burned out.
How long does it take a Liebherr ice maker to make ice after a reset?
After a power reset or manual restart, the first batch takes about 90 minutes to two hours. That's because the ice tray must cool down to freezing temperature and then complete a full freeze cycle. Subsequent batches will be faster, roughly every hour.
Can I use a generic water filter in my Liebherr?
Generic filters will physically fit, but they may not meet Liebherr's flow rate and filtration specs. A filter with lower flow can starve the ice maker. Stick with manufacturer-branded or certified compatible filters for best results.
Why does my ice taste like plastic?
New ice makers sometimes have a mild plastic taste during the first few batches. This is normal. Discard the first two or three batches.
If the taste persists, clean the ice bin and tray with a baking soda solution. Also check that the water line is food-grade tubing.
When should I call a technician for my Liebherr ice maker?
Call a technician if you've gone through all the steps above and still have no ice. Also call if you suspect a sealed system issue like warm freezer temperatures or refrigerant leaks. Call if you see error codes on the display that you can't clear with a power reset.

Similar Posts