Maytag Dishwasher Error Codes
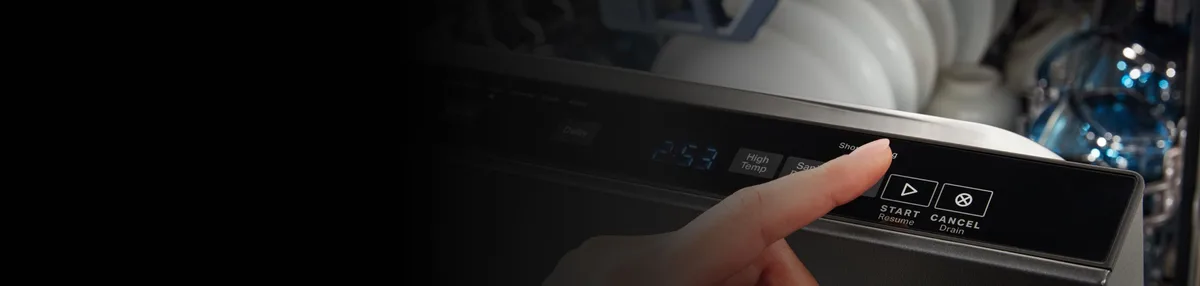
Image source: Bing (Web (fair-use with source credit))
Seeing a blinking error code on your Maytag dishwasher is stressful, but it's rarely a death sentence for the machine. Those codes are actually a helpful diagnostic system built into the control board. They tell you exactly which component failed or which condition triggered a safety stop.
Most issues are fixable at home with basic tools, a multimeter, and about an hour of your time.
This guide breaks down every common Maytag dishwasher error code, explains what each one means, and walks you through the exact fix. We'll also cover how to run the diagnostic test mode to clear stored codes and verify your repair actually worked.
How Maytag Dishwasher Error Codes Work
Modern Maytag dishwashers use a self-diagnostic system. The electronic control board, the "brain" of the machine, continuously monitors every component, from the water inlet valve to the heating element to the drain pump. When something goes wrong, the board logs a specific two-letter error code in its memory.
How the code displays depends on your model:
- Digital display models show the code directly on the screen (like "F6" or "E1").
- Indicator light models use blink patterns. For example, the "Clean" light might blink twice, pause, then blink twice again to signal code F2.
The letter prefix tells you the category of the problem before you even look up the specifics:
F-codes (F1, F2, F3, F4, F5, F6, F7) point to electrical, sensor, or communication faults. These usually involve the control board, thermistor, wiring, or motor.
E-codes (E1, E2, E3, E4, E5) point to water-related issues like slow draining, a stuck inlet valve, or a leak detected by the float switch.
This simple split helps you prioritize. An "E" code means you're dealing with water flow or a pump. An "F" code means you'll need a multimeter to test electrical components.
One important thing to know: the first code you see isn't always the root cause. For example, an E2 (drain failure) often appears because something clogged the drain pump, but it can also show up if the control board isn't sending power to the drain motor. That's why troubleshooting in a logical order matters.
You don't want to replace a $150 drain pump when the real issue was a piece of glass jamming the impeller.
The First 5 Minutes: Resets and Simple Checks
Before you pull out a screwdriver, spend five minutes on basic checks. A startling number of error codes are triggered by something simple like a power surge or a stuck button.
Hard Reset (No Tools Required)
A hard reset clears the control board's RAM and wipes temporary faults. It's the equivalent of rebooting your computer.
- Unplug the dishwasher from the wall outlet, or flip the breaker that feeds the dishwasher circuit.
- Wait 60 seconds. A full minute. Count it.
- Plug it back in or flip the breaker on.
- Open the door and press "Start" within 30 seconds.
Many error codes are momentary glitches. The board lost its logic for a second, and a full power cycle clears it. If the code disappears and the cycle runs normally, you're done.
If it comes back, you've narrowed the problem down to something persistent.
Check the Door Latch
Several "F" codes occur because the door latch isn't sending the "closed" signal to the control board. If the door sits slightly ajar or the latch mechanism sticks, the dishwasher refuses to run and logs a fault.
Inspect the small plastic hook that slides into the strike plate. If it's cracked or loose, the board never sees the closed signal. Press the door firmly until you hear a solid click.
If the latch feels sloppy or broken, it's a cheap part (usually under $40) that takes about 10 minutes to replace with a screwdriver.
Check for Stuck Buttons
Here's a weird one that happens more than you'd expect: a food particle or water droplet gets behind the membrane buttons on the console. The board thinks you're holding down a button, which disrupts the cycle logic and generates a phantom code, often F2 (stuck key).
Press every button on the console a few times. Feel for any that feel mushy or stuck. If one feels odd, press it firmly a dozen times to break it free.
Often that's enough to restore contact. If not, the keypad membrane is worn out, and you'll need a new user interface panel. That's a bigger job, but still doable at home.
Maytag Error Code Library: F-Codes and E-Codes
Here's the full breakdown of the most common Maytag dishwasher error codes. This covers roughly 95% of the codes you'll actually encounter.
F1: Water Leak Detected
What it means: The leak detection system (a float switch or a sensor in the base tray) has detected moisture where it shouldn't be. The board immediately stops the cycle to prevent water damage.
The fix:
Start by checking the base pan, the plastic tray under the dishwasher tub. Pull out the bottom rack and look for standing water.
- Dry base pan: The float switch is probably stuck in the raised position. Jiggle it to free it.
- Wet base pan: The leak is coming from a hose connection, the wash motor seal, or the tub itself. Tighten visible hose clamps first. If the leak is internal and not visible, you'll likely need a service call to replace seals.
F2: Stuck Key or Thermistor Failure
What it means: This code has two meanings depending on your model. On most models, F2 means a button was pressed continuously for over 30 seconds. On some models, F2 actually indicates a thermistor (temperature sensor) short circuit.
The fix:
This is a decision tree. First, check the keypad for stuck buttons as described above. If the buttons are fine, you're looking at the thermistor.
It's located at the bottom of the tub near the wash motor.
Test it with a multimeter. At room temperature, it should read between 10,000 and 12,000 ohms. If it reads near zero or infinite, it's dead and needs replacement.
A thermistor typically costs $20, $40.
F3: Control Board Communication Error
What it means: The main control board isn't communicating properly with the user interface or the shift actuator motor. This is often an intermittent wiring issue.
The fix:
Check the wiring harness connections between the control board (under the dishwasher) and the console. Look for loose spade connectors or pinched wires. If everything is seated snugly, check the door wiring for breaks where the door flexes.
A wire can break inside its insulation without showing visible damage, you'll need a continuity test to find it.
If the wiring checks out, the user interface board is likely faulty. That's a $100, $200 part.
F4 / F5: Wash Motor Issues
What it means: F4 means the wash motor is drawing too many amps. F5 means the motor isn't running at all. Both point to the main circulation pump.
The fix:
Check the pump impeller for a jammed object, glass shard, bone fragment, or a piece of a broken dish. You can access the impeller by removing the spray arm and the sump cover.
If the impeller is clear, test the motor's run capacitor with a multimeter. If it reads outside its rated microfarad range, replace it. That's a $15 part and the most common cause of F4.
If the motor hums but doesn't spin, the motor bearings are seized, and you'll need to replace the entire pump assembly. That's a $150, $250 job.
F6: Heater Failure
What it means: The heating element isn't reaching the required temperature to dry dishes or heat the wash water. The thermistor can't read the temperature correctly, so the heater runs too long or not at all.
The fix:
First, test the heating element for continuity. Disconnect power and check the resistance between the two terminals. You're looking for around 10 to 50 ohms.
If it reads infinite resistance, the element is burned out and needs replacement, a $40, $120 part.
If the element reads fine, test the thermistor again. A poor temperature reading can make the board think the heater is faulty.
E1: Water Inlet Failure
What it means: The dishwasher didn't fill with water, or didn't fill fast enough. The control board expects a certain water level within a set time window, and the water inlet valve failed to deliver.
The fix:
Start with the supply side:
- Make sure the water supply valve under the sink is fully open.
- Check the inlet hose for kinks.
- Check the inlet screen where the hose connects to the dishwasher, hard water scale or debris can clog it.
If all that is clear, the inlet valve coil is probably burnt out. Test the coil with a multimeter for continuity. If the resistance reads near zero or infinite, replace the valve.
That's a $60, $120 part.
E2: Drain Failure
What it means: Water isn't draining from the tub. The board senses the drain pump is running but the water level isn't dropping, or the pump isn't running at all.
The fix:
Start with the obvious: clean the filter and the drain pump. Even on models with self-cleaning filters, food particles accumulate in the drain pump impeller.
- Remove the bottom rack.
- Take out the filter assembly.
- Visually inspect the pump chamber for debris.
- Remove anything that's stuck.
If the pump is clear, check the drain hose for a clog or a kink. Also verify the high loop is properly configured to prevent backflow.
If the pump motor doesn't run at all, test it for continuity. A jammed pump often burns out the motor, so replacement is common. A new drain pump runs $100, $150.
Other Codes Worth Knowing
F7: Shift actuator failure. The actuator that routes water between the wash arms isn't working. Test the actuator for continuity; replace if open.
E3: Overfill condition. Water level exceeds the safe limit. Check the pressure switch or the float switch for sticking.
E4: Water supply temperature is too high. This usually happens when the dishwasher is connected to a hot water line that exceeds 150°F (65°C). Verify the water heater setting.
E5: Water supply temperature is too low. The inlet water is below the minimum required temperature, often because the cold water line is connected instead of hot.
Running the Diagnostic Test Mode
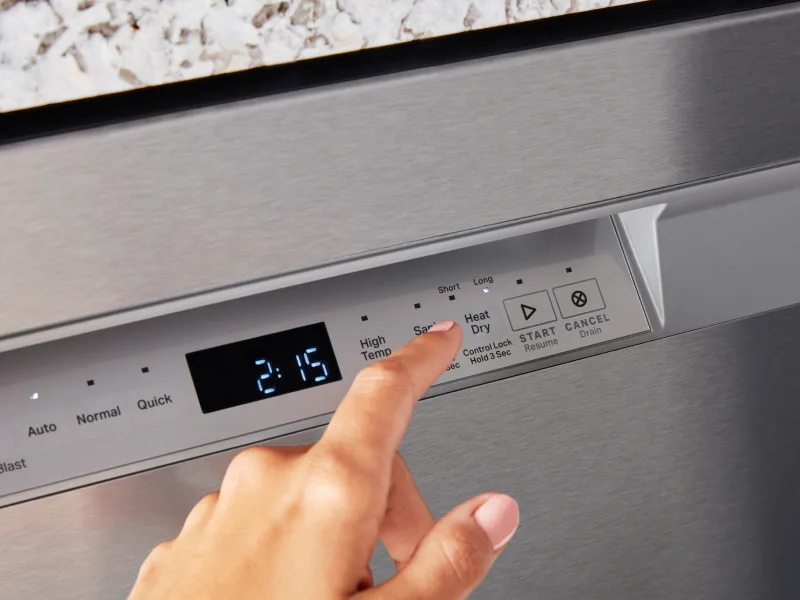
Image source: Bing (Web (fair-use with source credit))
This is a skill you'll use every time your Maytag throws a code. Running the diagnostic test mode does two things: it performs a full system check and it clears stored error codes from the control board's memory.
This process works across most Maytag models, including those sold under the Whirlpool and KitchenAid umbrellas.
Why You Can't Just Press Start
Here's the thing: fixing the underlying issue doesn't automatically clear the code. The control board stores the fault in its log. Even after you replace the drain pump, the old error stays in memory until you run a diagnostic cycle that verifies the fix.
The dishwasher runs a series of automated tests, confirms the system is healthy, and then wipes the log.
The Button Sequence
The exact sequence is as follows. Perform it quickly, in order, without delay.
- Press "Start/Reset" to cancel any current cycle, or make sure the dishwasher is idle.
- Press "Heat Dry" three times within 10 seconds.
- Press "Normal" once.
- Press "Heated Dry" three times again within 10 seconds.
- Watch for the cycle indicator lights. They should all light up.
- Press "Start/Reset" once. The dishwasher will begin the diagnostic cycle, which takes about 2 to 5 minutes.
If the machine doesn't respond, the sequence may be slightly different for your model year. Check the tech sheet, it's usually taped to the side or back of the dishwasher behind the toe kick panel. The tech sheet prints the exact diagnostic method for your unit.
Reading the Results
Once the diagnostic cycle completes, the dishwasher will display a code indicating the last known fault.
- No code appears: The system is healthy. You're good to go.
- Code appears: Note it down. This is the code you need to fix.
- Same code appears after your fix: The repair didn't solve the root cause. Dig deeper.
The Final Step: Lock It In
After the diagnostic test passes, exit the mode properly by pressing a button to return to standby. If you just unplug the dishwasher, the fresh diagnostic data may not save correctly.
Run a regular quick wash cycle afterward. If it completes normally, your repair is confirmed.
Quick Reference Chart
| Code | Category | Common Cause | Repair Cost Range |
|---|---|---|---|
| F1 | Electrical | Leak / float switch | $0 – $300 |
| F2 | Electrical | Stuck key / thermistor | $0 – $40 |
| F3 | Electrical | Wiring / UI board | $0 – $200 |
| F4 | Electrical | Wash motor / capacitor | $15 – $250 |
| F5 | Electrical | Wash motor seized | $100 – $250 |
| F6 | Electrical | Heating element | $40 – $120 |
| E1 | Water | Inlet valve / supply | $0 – $120 |
| E2 | Water | Clogged drain pump | $0 – $150 |
| E3 | Water | Overfill / pressure switch | $0 – $80 |
| E4 | Water | Water too hot | $0 |
| E5 | Water | Water too cold | $0 |
When to Call a Professional
Some jobs are genuinely beyond the average DIYer. Call a service technician if you encounter any of these situations:
- Recurring F1 leak codes after you've replaced obvious seals. Internal tub leaks are hard to find and can cause significant water damage if you guess wrong.
- Control board replacement, if the main board itself is fried, diagnosing the exact failure point requires advanced electronics knowledge.
- No power at all, if the dishwasher won't turn on and you've already checked the breaker and the outlet.
- Wiring harness issues, tracing a broken wire inside the door harness is time-consuming and frustrating without proper tools.
Maintenance Tips to Prevent Future Error Codes
Most dishwasher error codes trace back to two root causes: food debris and hard water scale. Here's how to minimize both.
Clean the filter monthly. Remove the filter assembly, rinse it under hot water, and scrub off any greasy film. A clogged filter strains the drain pump and leads to E2 errors.
Run hot water before starting a cycle. Before you press start, run the sink faucet until the water is hot. This ensures the dishwasher fills with hot water from the start, which reduces cycle time and prevents heating-related faults.
Use rinse aid. Rinse aid helps water sheet off dishes, which reduces mineral buildup on the heating element. Less scale means a longer-lasting heater and fewer F6 errors.
Check the door seal. Wipe down the rubber gasket around the door every few weeks. Food particles caught in the seal prevent the door from closing fully, which triggers F-code latch errors.
Inspect hoses annually. Look for cracks, bulges, or loose connections. Replace any hose that feels brittle. A burst inlet hose can flood your kitchen in minutes.
Final Thoughts
Maytag dishwasher error codes look alarming, but they're actually your machine's way of telling you exactly what's wrong. Most codes point to a specific component or condition that you can fix at home with basic tools and less than an hour of work.
Remember the key steps: try a hard reset first, check for simple issues like stuck buttons or clogged filters, run the diagnostic test mode to identify the stored fault, and fix the root cause, not just the symptom. The diagnostic cycle will confirm your repair and clear the code.
If you're ever unsure, the tech sheet taped to your dishwasher contains the model-specific diagnostic instructions you need. And if a repair exceeds your comfort level, there's no shame in calling a professional. A $150 service call is cheaper than a $600 replacement when you're in over your head.
Your dishwasher is telling you what it needs. Listen to it.

Similar Posts