Honeywell Proseries Thermostat Troubleshooting
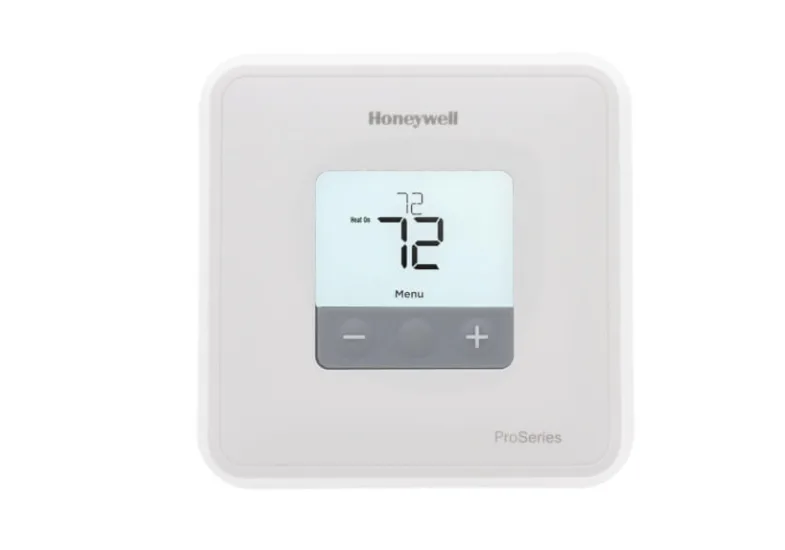
Image source: Bing (Web (fair-use with source credit))
Your Honeywell ProSeries thermostat is acting up, and you're not alone. Whether it's a blank screen, a system that won't stop running, or temperature readings that seem completely off, these issues are more common than you'd think. The good news is most problems have a straightforward fix you can handle yourself, no expensive service call required.
Before you pay for an HVAC visit, it's worth spending twenty minutes working through the most likely culprits. Most thermostat issues trace back to power loss, wiring faults, or simple settings errors, not hardware failure. Here's how to diagnose and fix the most common ProSeries problems, step by step.
First Things First: A Quick Decision Guide
Before you start pulling wires or flipping breakers, take a breath. The fastest way to solve a thermostat problem is to identify exactly what's happening, then work through the logical branch for that symptom. Guessing and poking at random settings usually makes things worse.
Most DIY troubleshooting failures happen because people skip the basic observation step. They see "no heat" and immediately start changing settings, when the real issue is a tripped breaker or a dead battery. So let's start with a simple framework.
Step 1: Look at the screen. Is it completely blank? Dim? Showing an error code?
Or does it look perfectly normal but the system isn't responding? Write down exactly what you see.
Step 2: Check the system type. Is this a heat pump, a conventional gas furnace, or electric heat? The ProSeries handles all of them, but the wiring and troubleshooting steps differ. If you're not sure, check your outdoor unit (heat pumps have one) or your furnace's nameplate.
Step 3: Think about recent changes. Did anything change right before the problem started? A new Wi-Fi router, a power outage, someone touched the settings, or a recent HVAC service? Most issues trace back to a recent event.
Step 4: Match your symptom to the right section.
| Symptom | Likely Cause | Go To Section |
|---|---|---|
| Blank screen | Dead batteries, tripped breaker, bad C-wire | Section 2 |
| Heat or cool won't run | Wiring fault, settings lock, system delay | Section 3 |
| Short cycling (on/off rapidly) | Clogged filter, wrong settings, sensor issue | Section 4 |
| Wrong temperature reading | Sensor position, calibration, draft | Section 5 |
| Fan runs constantly | Fan setting on "On" vs "Auto", wiring | Section 6 |
Step 5: Try the obvious reset. A simple power cycle fixes a surprising number of issues. Pull the thermostat off the wall plate, wait 30 seconds, and put it back. Or flip the circuit breaker for the HVAC system off and on.
This clears glitches in the thermostat's microprocessor.
If you've worked through the relevant branch below and nothing helped, don't feel defeated. Sometimes the issue is the furnace or AC unit, not the thermostat at all.
Blank Screen or Dead Thermostat
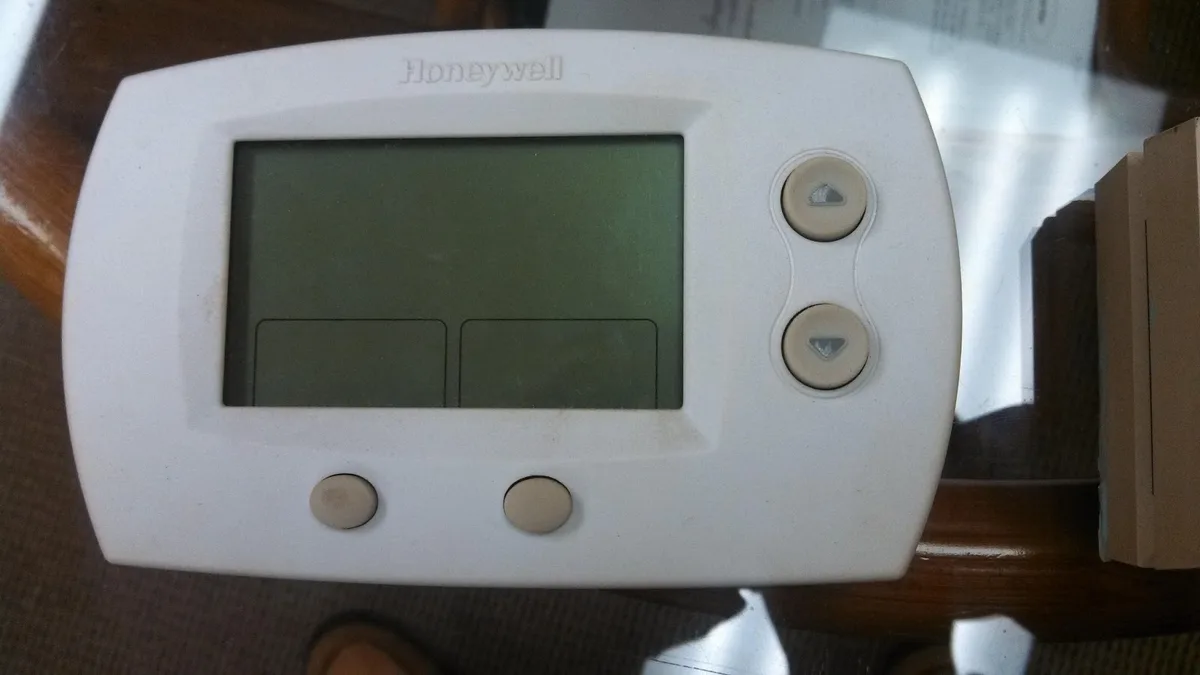
Image source: Bing (Web (fair-use with source credit))
A completely dead screen is the most common ProSeries complaint. The good news? It's almost always a simple fix.
Let's work through the possibilities in order of likelihood.
Check the Batteries
The ProSeries units run on two AA batteries as a backup power source. If the screen is completely dead, the batteries might be drained. Replace them with fresh alkaline batteries, not rechargeable ones, rechargeables don't hold voltage consistently enough.
Wait about 10 seconds after inserting the new batteries, and the screen should light up.
Check the Circuit Breaker
Your HVAC system should have a dedicated breaker in your main electrical panel. It's usually labeled "Furnace," "AC," or "HVAC." Flip it off, wait 15 seconds, then flip it back on. Sometimes the breaker hasn't tripped fully, so even if it looks in the "on" position, cycle it anyway.
Check the C-Wire Connection
This is where things get interesting. The ProSeries thermostat derives its main power from the 24VAC system in your HVAC setup, and that power comes through the C-wire (common wire). If the C-wire isn't connected properly at either the thermostat or the furnace control board, the unit loses power.
Here's the thing: the thermostat might still work on battery power alone, but many ProSeries models won't function correctly without the C-wire providing steady power. A loose C-wire connection is a common cause of dim or flickering screens.
To check this:
- Turn off power at the breaker first (safety).
- Remove the thermostat faceplate by pulling it straight off.
- Look for a wire connected to the terminal labeled "C." Is it firmly seated? Is there bare copper showing?
- If it looks loose, push it in and tighten the screw.
- Also check the other end at your furnace's control board. The C-wire connects there too.
What About a Low Battery Warning?
If the screen shows "Lo Batt" or a low battery icon, that's different from a completely dead screen. The batteries are weak but the thermostat is still running. Replace them right away to prevent a full shutdown, which would leave you without heat or cooling.
The Final Test: Check Voltage
If all of this checks out and the screen is still dark, there's one final test. Use a multimeter to check for 24VAC between the R and C terminals on the thermostat's wall plate. Set your multimeter to AC voltage, touch the probes to R and C, and see if you get a reading around 24 volts.
A reading below 18 volts indicates a wiring or transformer problem that likely needs a professional.
No voltage at all? That points to a blown transformer or a wiring short somewhere in the system. That's beyond DIY territory in most cases, and we'll cover when to call a pro later in this article.
Heat or Cool Won't Run at All
If the thermostat shows the correct temperature and the screen looks fine, but the furnace or AC just won't come on, work through these checks in order.
Check the Mode Setting
It sounds too simple, but it's the number one cause. Make sure the system is set to "Heat" or "Cool," not "Off" or "Fan Only." Many people accidentally switch the mode without realizing it.
Check for the Compressor Delay
Modern HVAC systems have a built-in compressor delay of about five minutes. The AC won't start until that timer expires, especially after a recent power outage or if you just changed the temperature settings. Wait a few minutes before assuming something's wrong.
Check the Temperature Differential
On ProSeries models, the temperature differential (also called the "cycle rate" or "deadband") determines how much the temperature must deviate from the setpoint before the system kicks on. If this is set too wide, say 5 degrees instead of 1, the system won't start until the temperature swings significantly.
To adjust this:
- Press and hold the Menu button for five seconds to access advanced settings.
- Look for "Cycle Rate," "CPH" (cycles per hour), or "Differential."
- For most gas furnaces, a cycle rate of 3 to 5 cycles per hour is standard. If it's set higher, reduce it.
- For heat pumps, a narrower differential (around 1 degree) usually works better.
Check for a Wiring Fault
If the mode is correct and the delay has passed, check the wiring. Remove the thermostat faceplate and verify that each wire is firmly seated in its correct terminal. Look for:
- Loose wires that might have pulled out
- Corroded or tarnished terminals
- Bare wires touching adjacent terminals (causing shorts)
Common wiring labels on the ProSeries:
- R or Rh = 24VAC power (heating)
- Rc = 24VAC power (cooling)
- C = Common wire
- W = Heat call
- Y = Cool call
- G = Fan
If the W wire is loose or disconnected, the heat won't come on. If the Y wire is loose, the AC won't activate. If the G wire is loose, the fan might run but no heating or cooling will occur.
Check for a Software Lock
Some ProSeries models have a keypad lockout feature. If the screen shows a padlock icon, the settings are locked. To unlock, press and hold the center button for three seconds, or check your manual for the specific unlock sequence.
This prevents accidental changes but can also block legitimate adjustments.
System Runs Constantly (Never Shuts Off)
A system that never shuts off is almost as annoying as one that won't start. Here are the usual culprits.
Fan Set to "On" Instead of "Auto"
The most common cause of a constantly running blower is the fan set to "On" instead of "Auto." In "On" mode, the blower runs continuously, even when the heating or cooling cycle has finished. Switch it to "Auto" and the fan will only run during active cycles.
Setpoint Too Aggressive
If you crank the thermostat to 90 degrees in winter, the furnace will run essentially forever trying to reach that temperature, especially in a poorly insulated home. Set the thermostat to a reasonable temperature and see if the system cycles normally.
G Wire Wiring Issue
We mentioned this earlier, but it bears repeating. If the G wire (fan wire) is connected to the wrong terminal, the fan might run continuously. Double-check that the G wire goes to the G terminal, not to something else.
Stuck Relay
If the fan keeps running in "Auto" mode with no heating or cooling demand, and the G wire is correctly connected, there might be a stuck relay in the furnace control board. This is a mechanical failure inside the equipment, not a thermostat issue. It requires professional attention.
Quick test to isolate the problem: Set the fan to "On" and wait 10 minutes. Then switch it to "Auto." If the fan keeps running in "Auto" mode with no heating or cooling demand, there's a wiring or relay issue that goes beyond the thermostat.
Short Cycling: System Turns On and Off Repeatedly
Short cycling is when your HVAC system starts, runs for a couple of minutes, then shuts off, only to repeat the cycle a few minutes later. It's not just annoying, it's hard on your equipment and wasteful on your energy bill.
The Air Filter Is Always the First Suspect
A clogged filter restricts airflow, which causes the heat exchanger (in furnaces) or the evaporator coil (in ACs) to overheat or freeze. The system's safety sensors then shut it down to protect the equipment. This is the most common cause of short cycling in residential systems, across all thermostat brands, not just Honeywell.
Check your filter. Hold it up to the light. If you can't see through it, replace it.
This should be done every one to three months depending on usage and whether you have pets. It's a five-dollar fix that solves a lot of expensive problems.
Cycle Rate Settings
If the filter is clean, move to the thermostat settings. On some ProSeries models, the cycle rate settings are configurable. If the cycle rate is set too aggressively, the thermostat might be sending frequent on/off commands.
Access the advanced settings menu (press and hold Menu for five seconds). Look for "Cycle Rate" or "CPH." Reduce it to the recommended range for your system type.
Bad Temperature Sensor
The ProSeries uses a small thermistor inside the unit to read room temperature. If that sensor is failing, it might give erratic readings, causing the thermostat to constantly flip between heating and cooling calls.
How to test:
- Remove the thermostat faceplate from the wall.
- Wait 5 minutes.
- Check the temperature reading on the screen.
- Compare it to a known-accurate thermometer in the same room.
If the reading jumps around significantly (more than 2 degrees in a short period) without any environmental changes, the sensor is likely faulty. Replacement thermistors are available, but the installation requires careful soldering. Unless you're comfortable with electronics work, this is a job for a professional.
Low Refrigerant (Cooling Only)
If your AC short cycles only during cooling, the refrigerant might be low. This isn't something you can fix at home, it requires a licensed HVAC technician with the right gauges. But if the filter is fresh, the settings are correct, and the thermostat is in a good spot, refrigerant is a strong suspect.
Temperature Readings That Seem Wrong
Your thermostat says 72 degrees, but you're shivering. Or it says 74, and you're sweating through your shirt. The air coming out of your vents feels right, so the system itself is working, but the number on the wall doesn't match reality.
This is incredibly common, and it's usually not a thermostat failure.
The Location Factor
A thermostat measures the temperature where it's mounted, not everywhere in your house. If it's in a hallway while you spend all day in a sun-facing living room, the readings will never match your comfort level.
That's why so many "wrong temperature" complaints happen in homes with open floor plans. The thermostat sits in a neutral spot, but the main living area has different conditions.
Here's what to look for:
- Direct sunlight: Sunlight heats the sensor housing and inflates the reading.
- Drafty windows or exterior doors: Cold air will make it read low, causing the heat to run longer.
- Supply vents blowing directly at it: Warm or cool air blowing at the thermostat will constantly push the reading toward the vent's output temperature.
- Exterior wall mounting: These walls are colder than interior walls in winter, which skews readings.
Calibrate the Sensor
Honeywell ProSeries thermostats have a temperature offset or calibration setting. You can adjust it to account for a known discrepancy between the thermostat's location and your actual living space.
To calibrate:
- Access the advanced settings menu (press and hold Menu for five seconds).
- Scroll to "Temperature Offset" or "Calibration."
- Compare the thermostat's reading with an accurate thermometer placed in the same room, about five feet off the ground.
- Adjust the offset by the difference. If the thermostat reads 73 and your thermometer reads 70, set the offset to -3 degrees.
Know the Accuracy Specs
A typical residential thermostat should read within about 2 degrees Fahrenheit of the true room temperature. If your Honeywell is off by more than that, check for the environmental factors above before assuming hardware failure.
If it's within 2 degrees, it's performing within spec, and the problem is likely subjective comfort perception, not a faulty unit. Maybe you run cold, or the humidity levels are off, which makes the air feel warmer or cooler than the actual temperature.
Fan Runs Constantly
We covered some of this in the "System Runs Constantly" section, but fan issues deserve their own branch because they have a few unique causes.
Fan Switch Setting
The most basic cause: the fan switch on the thermostat is set to "On." This forces the blower to run continuously. Move it to "Auto" and the fan will only run when heating or cooling is active.
Wiring Issue
If the G wire is connected to a terminal that provides continuous power, the fan will run regardless of the thermostat settings. Double-check the wiring against the labels we listed earlier.
Failed Fan Relay
A stuck relay can keep the fan running even when the thermostat sends no fan command. This is a hardware failure. You might hear a clicking sound from the furnace or air handler.
This requires professional repair.
System Diagnostic: Isolate the Thermostat
If you suspect the thermostat itself is sending a constant fan signal, you can test it:
- Turn off power at the breaker.
- Remove the thermostat faceplate.
- Restore power at the breaker.
- Listen, does the fan start running?
If the fan starts with the thermostat removed, the thermostat is sending the signal. If the fan starts even with no thermostat connected, the problem is in the HVAC equipment's control board. That's a professional repair.
Wi-Fi Connection Issues
The ProSeries models with Wi-Fi capability can drop connections or fail to connect entirely. While this doesn't affect physical operation (heat and cooling still work), it kills your remote access and smart features.
Reconnect the Thermostat to Wi-Fi
- Go to the thermostat's main menu by tapping the Menu icon.
- Select "Wi-Fi" or "Network."
- Choose your network from the list.
- Enter your Wi-Fi password.
If the network doesn't appear, your router's broadcasting might be disabled. Check your router settings to ensure the SSID is visible.
Check for Signal Interference
The ProSeries uses 2.4GHz Wi-Fi, which has better range but is more susceptible to interference. Common sources of interference include:
- Microwaves (especially when running)
- Cordless phones (older 2.4GHz models)
- Baby monitors
- Thick walls or metal ductwork between the thermostat and router
Move the router closer to the thermostat if possible, or consider a Wi-Fi extender. Per FCC guidelines on 2.4GHz band operations, interference from these household devices is a known limitation of the frequency band.
Update the Firmware
Honeywell periodically releases firmware updates for its smart thermostats. These updates fix bugs and improve performance. To check for updates:
- Open the Honeywell Home app on your phone.
- Select your thermostat.
- Look for "Firmware Update" or "Software Update" in the settings.
- If an update is available, install it.
If you can't connect the thermostat to Wi-Fi at all, check if the thermostat's date and time are set correctly. An incorrect date/time can cause connection issues with encrypted networks.
Reset the Wi-Fi Module
If all else fails, power-cycle the thermostat by pulling it off the wall plate for 30 seconds, then putting it back. This resets the Wi-Fi radio without affecting your temperature settings.
Error Codes and What They Mean
The ProSeries displays various error codes that can help narrow down the problem. Here are the most common ones:
| Error Code | Meaning | Fix |
|---|---|---|
| E1 | Internal sensor failure | Replace thermostat |
| E2 | Communication error with indoor unit | Check wiring, reset system |
| E3 | Communication error with outdoor unit | Check wiring, verify power to outdoor unit |
| LO | Low battery | Replace batteries |
| HI | High temperature warning | Check for heat source near thermostat |
| CPH | Cycle rate setting issue | Adjust cycle rate in advanced settings |
| Err | General system error | Power cycle, check wiring |
E2 and E3 codes are common in heat pump systems where the thermostat needs to communicate with both the indoor furnace and the outdoor compressor unit. A loose wire on the Y or C terminal can cause these errors.
When to Call a Professional
There's a limit to what DIY troubleshooting can solve. Here's when to stop tinkering and call a licensed HVAC technician.
You've Checked Everything and Nothing Helps
If you've worked through the relevant sections above and the problem persists, you've done your due diligence. Continuing to experiment with wiring or settings risks damaging the equipment.
You See Signs of Electrical Problems
- Burning smells from the thermostat or furnace
- Sparking or arcing at the wiring terminals
- Repeatedly blown fuses or tripped breakers
These indicate a serious electrical issue that requires professional attention.
The System Won't Start at All
If you've verified power, wiring, and settings, and the furnace or AC simply won't activate, the problem might be in the HVAC equipment itself, not the thermostat. A technician can test the control board, contactors, and relays to pinpoint the fault.
Your System Is Old
If your HVAC system is over 15 years old (as noted by ENERGY STAR guidelines for typical system lifespan), it might be time for a professional evaluation. Faults in aging systems are often more than simple thermostat issues, and replacement might be more cost-effective than repeated repairs.
What to Expect from a Service Call
When you call a professional, have the following information ready:
- Your thermostat model number (usually printed on the back of the faceplate)
- The HVAC equipment brand and approximate age
- A description of the exact problem and when it started
- What troubleshooting steps you've already tried
A good technician will test the thermostat, check the control board, verify refrigerant levels (if cooling), and provide a clear diagnosis with repair options.
Preventative Maintenance to Avoid Future Issues
A little regular maintenance goes a long way toward keeping your thermostat and HVAC system running smoothly.
Change the Air Filter Regularly
This is the single most important maintenance task. A clean filter prevents short cycling, reduces strain on your equipment, and improves air quality. Check it monthly and replace it every one to three months.
Keep the Thermostat Clean
Dust and debris can accumulate on the thermostat's sensor and skew its readings. Gently wipe the faceplate with a soft, dry cloth every few weeks. Avoid using cleaning sprays directly on the device.
Check Batteries Twice a Year
Replace the batteries in your thermostat when you change your clocks for daylight saving time. This prevents unexpected shutdowns and low battery warnings.
Verify Wiring Connections Annually
Once a year, turn off power and check that all wiring connections are tight. This is especially important in homes with seasonal temperature swings that cause wiring to expand and contract.
Schedule Professional HVAC Maintenance Annually
Have a licensed technician inspect and tune your HVAC system once a year, typically in the spring for AC and the fall for heating. This catches small issues before they become major problems.
Final Thoughts
Honeywell ProSeries thermostats are generally reliable, but like any piece of technology, they have their moments. The majority of issues you'll encounter have simple fixes that don't require a professional: dead batteries, loose C-wire connections, clogged filters, and incorrect settings.
The key is to work through the troubleshooting branches in order, starting with the most likely causes. Don't skip the basics. And when you've genuinely exhausted the DIY options, don't hesitate to call a professional.
A service call is cheaper than a fried control board caused by well-meaning but misguided tinkering.
Start with the reset, check the power, verify the wiring, and adjust the settings. Nine times out of ten, one of those will solve your problem. If not, you'll have a clear picture of what's wrong when you call for help, and that saves time and money for everyone involved.

Similar Posts