Frigidaire Fridge Error Codes
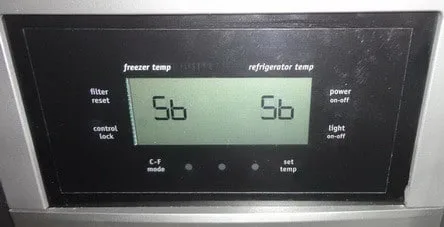
Image source: Bing (Web (fair-use with source credit))
That blinking number on your Frigidaire fridge display isn't random. It's the unit trying to tell you exactly what's wrong. Frigidaire error codes are part of a built-in self-diagnostic system that monitors sensors, motors, and temperature readings around the clock.
The problem is, most owners have no idea what these codes mean. Worse, they panic and call a technician for something they could fix in ten minutes with a butter knife and a vacuum hose.
Understanding what your fridge is telling you is the difference between a $15 DIY fix and a $250 service call. Let's walk through how this system works, what each code means, and the exact steps to take when one pops up.
How Frigidaire's Self-Diagnostic System Works
Frigidaire's diagnostic system relies on a network of thermistors, small temperature-sensitive resistors placed in key locations throughout the fridge and freezer compartments. These thermistors constantly send resistance readings back to the main control board. The board interprets those readings as temperature values and uses them to cycle the compressor, fans, and defrost heater.
When a thermistor's reading falls outside an expected range, or when a motor fails to respond within a specific time window, the control board logs an error code. Some codes trigger immediately. Others require the fault to occur multiple times in a row before the board commits to showing you the code.
That's why you might see a code appear and then disappear. The board was monitoring a marginal condition, and once conditions improved, it cleared the fault.
The self-diagnostic cycle runs continuously, but it's not checking every component at the same frequency. Temperature sensors get polled constantly because the compressor needs real-time data to maintain proper temperatures. Motors and actuators get checked only when they're supposed to be running.
The defrost heater, for example, is only monitored during the defrost cycle, which typically runs two to four times per day for about 20 minutes each cycle.
Here's where things get interesting for DIY troubleshooters. Frigidaire also has a hidden service mode that gives you access to live sensor data, component test functions, and historical error logs. You access this mode by pressing a specific sequence of buttons on the control panel.
The sequence varies by model generation, but on most 2015-and-later units, it involves holding down the "Up" and "Down" temperature buttons simultaneously for about 10 seconds until you hear a beep.
This service mode is a game-changer if you're trying to diagnose an intermittent problem. Instead of waiting for the code to reappear, you can watch live temperature readings from each thermistor, run the ice maker through a manual cycle, or force the defrost heater on to test it. You can also pull up the stored error history, which shows past codes that have since cleared.
That history is invaluable because intermittent faults are almost always the hardest to catch.
The caveat is that service mode isn't documented in the user manual. You'll need the technical data sheet for your specific model, which you can usually find on the manufacturer's website or by searching for your model number plus "service manual."
One important safety note before we go further: the main control board operates on line voltage, and the high-voltage components like the compressor start relay and the defrost heater carry enough current to hurt you. When we get to the diagnostic steps, you'll need to unplug the fridge before touching any internal components.
Common Error Codes and What They Actually Mean
Not every error code is created equal. Some are rare enough that you'll probably never see them. Others are so common that appliance repair techs can recite them in their sleep.
Let's start with the ones you're most likely to encounter.
E40, E41, and E42: Ice Maker and Auger Faults
The E-series codes are the most frequently reported across Frigidaire models, and they're all tied to the ice maker assembly. Here's what each one means in plain English:
E40 is an auger motor stall fault. The auger motor is the small gear-driven motor that pushes ice from the bin into the dispenser chute. When the board commands the auger to turn and doesn't get a confirmation signal back within a specific time frame, it logs E40.
The most common causes are ice jamming the auger blades, a broken auger coupling, or a failed motor.
E41 indicates the ice maker's thermostat is out of range. The thermostat sits inside the ice mold and closes when the mold reaches freezing temperature, telling the board it's time to start the ejection cycle. If the thermostat reads open or shorted for too long, you get E41.
Usually, the thermostat itself is bad, but it can also point to a wiring harness issue.
E42 means the ice maker's harvest motor failed to complete its cycle. Unlike E40, which is about the dispenser auger, the harvest motor is what pushes the ice cubes out of the mold into the bin. When it fails, the board sees the motor never returning to its "home" position within the allotted time.
Failed harvest motors are common, and the replacement part is relatively inexpensive.
If you're seeing one of these codes, here's your immediate action plan: empty the ice bin completely, check for any frozen chunks blocking the chute, and manually rotate the auger by hand to confirm it moves freely. Then unplug the fridge for ten minutes and plug it back in. In a decent percentage of cases, a simple ice jam is the culprit, and clearing it plus resetting the board is all you need.
Sy, "Service," and Dispenser Codes
The "Sy" code is one of the most commonly misdiagnosed error codes in the entire Frigidaire lineup. When you see "Sy" on the display, it's easy to assume it stands for something ominous like "system failure." It doesn't. It actually indicates a problem with the ice crushing and dispensing assembly.
The letter "S" stands for "sensor" in this context, and the "y" is a sub-code pointing to a specific component within the dispenser assembly. "Sy" is most frequently triggered by a blocked or jammed ice chute door.
Here's why this happens so often: crushed ice, especially in humid climates, tends to clump and freeze together inside the bin. When you select crushed ice, those clumps can plug the chute opening. The dispenser's air solenoid then struggles to push the ice through, and after a few failed attempts, the control board logs "Sy."
The fix is almost always manual. Empty the bin, break up any clumps, and clear the chute with a wooden spoon or a plastic utensil. Never use a metal tool in the ice chute because you can damage the plastic auger blades or the dispenser door.
Once the bin is clear, unplug the fridge, wait ten minutes, and power it back up. Most "Sy" codes resolve with this exact procedure.
If the code persists after clearing the chute, the air solenoid itself might be stuck. You can test it in service mode by running the dispenser component test. If the solenoid doesn't click when energized, you'll need to replace it.
The part is typically $40 to $80, and it's accessible from the dispenser cavity on most models.
CF, EF, and Temperature Sensor Codes
Now we move into the temperature sensor codes. These are more straightforward because they name the specific zone having trouble.
CF stands for "cold failure." In practice, it means the freezer thermistor is reading out of range. The freezer compartment isn't reaching the temperature the board is commanding, or the sensor itself is sending erroneous readings. If your freezer is still cold but frost is building up, the sensor might be fine and the defrost heater is the real culprit.
If the freezer is warm, you're likely dealing with a sealed system issue, which we'll cover later.
EF is the evaporator fan failure code. The evaporator fan circulates cold air from the freezer coils into the fridge compartment. When it fails, the fridge gets warm while the freezer stays cold.
The fan module is usually located behind the back panel in the freezer section, and it's a DIY-replaceable part on most models. The part itself typically runs $60 to $100.
Beyond these, you might see codes like 10, 11, or 12 on older models, which indicate thermistor failures in specific zones. These often get confused with temperature readings by people who don't know the diagnostic system. If your display shows a number in the low double digits that doesn't match your set temperature, check whether you're looking at an error code, not the actual temperature.
A quick power cycle usually tells you which it is.
How to Read Error Codes on Your Specific Model
Frigidaire has been making refrigerators for over a century, and the diagnostic system has evolved significantly over time. A code reading method on a 2010 model might not work on a 2023 model, and vice versa. Before you even start troubleshooting, you need to identify which generation of Frigidaire fridge you own.
Display Panel Codes vs. Hidden Diagnostic Mode
Most Frigidaire models from 2010 onward will display error codes directly on the main temperature readout. You'll see something like "E40" or "Sy" appear where the fridge temperature usually shows. On units with a single display, the code might alternate between the fridge and freezer readouts.
If you see a code, write it down immediately. Some codes clear themselves after a few minutes, and if you don't capture it, you'll be guessing later.
Older models, particularly those from the early to mid-2000s, often don't display codes at all. Instead, you'll see a flashing light on the control panel, or the digital readout will show a number that doesn't correspond to anything you set. If that's what you're dealing with, you'll need the service manual for your specific model.
The manual contains a table that maps fault indicators to specific error codes.
For models with an ice and water dispenser, the diagnostic mode is usually accessed by pressing and holding the "Options" and "Lock" buttons simultaneously for 10 to 15 seconds. Look for the display to show a single dash or go blank. The newer models (2020 onward) typically require pressing "Fridge Temp" and "Freezer Temp" together.
If you own a model with a full-touchscreen panel, swiping down from the top of the screen usually reveals a diagnostics menu.
Once you're in diagnostic mode, the display cycles through a series of numbered parameters. Each parameter corresponds to a different sensor or component. For example, parameter 1 might be the fridge thermistor temperature, parameter 2 the freezer thermistor, and so on.
The service manual lists what each parameter means. This mode also lets you run component tests, like energizing the ice maker heater or cycling the dispenser auger, so you can confirm whether a part is actually dead or just receiving bad signals.
The most important thing to remember: if you can't find the service manual for your model, don't guess. The button sequences are not universal, and pressing the wrong combination on the wrong model generation can inadvertently trigger a forced defrost cycle (which is harmless but confusing) or, in rare cases, wipe the historical error log.
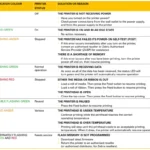
Step-by-Step Diagnostic Flowchart: What to Do When a Code Appears
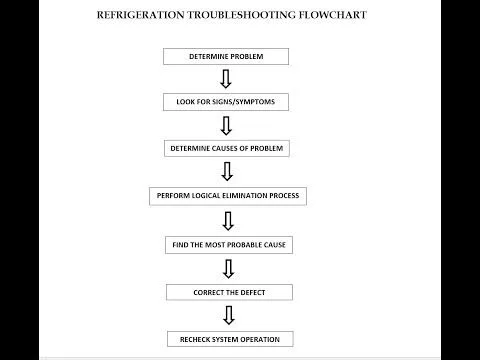
Image source: Bing (Web (fair-use with source credit))
When an error code appears on your Frigidaire fridge, there's a specific order of operations you should follow. It saves you time, reduces the risk of damaging components, and keeps you from ordering parts you don't need.
Step 1: Write Down the Code
Every code that pops up is data. Record the exact code, the date, and the time of day. This matters because some codes only appear under specific conditions, like on hot days when the dispenser solenoid is working harder, or after you've been opening the door frequently.
Step 2: Check the Obvious Stuff First
Before you dive into electronics, check mechanical things. Is the ice bin jammed? Is the chute door blocked?
Are the condenser coils (the metal fins on the back or bottom of the fridge) matted with dust and hair? Nearly a third of error codes trace back to a simple mechanical obstruction or airflow restriction. Start with what you can see before what you're going to have to test.
Step 3: Perform the 10-Minute Power Reset
Unplug the fridge, wait ten full minutes, then plug it back in. Set a timer if you have to. This resets the control board and clears transient codes.
If your refrigerator has an "off" button on the control panel, you can use that instead, but a hard unplug is more thorough because it completely discharges the control board capacitors.
Step 4: Clear the Fault Code
After the reset, if the code is gone and the fridge is cooling properly, you're done. If the code reappears, you need to clear the fault history before proceeding with further testing. This is where knowing your model's diagnostic mode matters because the clear function usually lives inside that menu.
Step 5: Observe and Re-Test
If the code comes back, watch when it appears. Does it flash the moment the fridge is plugged in, or does it take several hours? If it appears immediately, it's likely a hard electrical fault that needs parts replacement.
If it takes hours, it's probably tied to a specific cycle, like the defrost cycle or the ice maker's harvest cycle.
Step 6: Start Component-Level Testing
Once you've confirmed the code is persistent, you need to test the component that corresponds to the code. This is where a multimeter is your best friend. Check for continuity in thermistors, check the wiring harness for broken pins or corrosion, and verify that motors actually receive power when commanded.
If you find a real fault, order the replacement part. If you don't find a fault, the problem might be on the main control board itself, which is a more expensive fix. At that point, the cost of a service call might be justified, especially if you're not comfortable working with live electrical components.
Component-Level Troubleshooting for Specific Faults
Testing the Evaporator Fan (EF Code)
The evaporator fan sits behind the freezer's back panel. Before you test anything, unplug the fridge and let the freezer thaw enough for the panel to come off. You'll need a screwdriver to remove the mounting screws, which are typically located at the top and bottom of the back panel.
Once the panel is off, you'll see the fan module. Disconnect the wiring harness and check the fan blade for any debris or frost buildup. Ice damage is common if frost builds up on the coil and the fan physically hits it.
The blade can turn black from repeated contact, and the noise alone is usually a dead giveaway.
Test the fan motor with a multimeter. Set the meter to ohms and place the probes on the two power pins. A healthy motor will read between 30 and 100 ohms.
An open reading (infinite resistance) means the motor is blown. A shorted reading (near zero) means the motor is burning out internally. Both require replacement.
Testing Thermistors (CF, EF, 10, 11, 12 Codes)
Thermistors are easy to test and even easier to replace. Disconnect the thermistor from the wiring harness and measure its resistance with a multimeter. Compare the reading to what the temperature is in that compartment.
Here's the key: thermistors are resistance devices that change with temperature. A fridge thermistor should read around 10,000 ohms at 70°F (21°C) and around 6,500 ohms at 41°F (5°C). If the reading doesn't change when you warm the thermistor between your fingers, it's defective.
Replace it.
When replacing a thermistor, note that the part must match your model exactly. Frigidaire uses several different resistance curves across different years, and an incorrect thermistor will send wrong readings to the board, causing temperature swings.
Testing the Ice Maker Thermostat (E41 Code)
The ice maker thermostat is a small disc-shaped component attached to the side of the ice mold. Unplug the fridge, then disconnect the two wires connected to the thermostat. Measure resistance across the terminals.
At room temperature, the thermostat should read open (infinite resistance). When the mold temperature drops to roughly 15°F, the thermostat closes and reads near zero ohms. To test this, you'll need to put the thermostat in the freezer for about 30 minutes, then check the reading on the meter.
If it doesn't close, it's defective.
When to Call a Professional (And When Not To)
There's an honest line here. Some error codes indicate faults you can fix yourself. Others require specialized tools and refrigerants that you can't legally handle without an EPA Section 608 certification.
Know the difference before you start.
DIY-Friendly Fixes
- Ice jams (E40, Sy): Clear the bin, clear the chute, reset the unit. This is the easiest fix in the entire system.
- Defective thermistors: Testable and replaceable with a screwdriver and a multimeter.
- Faulty evaporator fan motor: The part is accessible behind the freezer panel, and replacement takes about 30 minutes.
- Control board reset: Power cycling clears transient codes without any tools.
Call a Professional When:
– The compressor never runs. If the fridge is warm and the compressor isn't humming at all, you're dealing with a start relay, run capacitor, or compressor motor issue. These are testable, but the compressor itself is not a DIY replacement. It requires refrigeration skills and equipment.
– There's a refrigerant leak. If the freezer is barely cold and you see oil residue near the suction line or the back of the compressor, you've got a leak. You can't fix this without recovering the refrigerant, repairing the leak, and recharging the system. That's a professional job.
– The main control board is dead. If the display is blank and the unit won't respond to any button presses, the control board might be fried. Replacing it is possible but requires careful matching of the board part number and programming on some newer models. If you're not electrician-minded, this is where you hand over the wallet.
– The sealed system has failed. If the code reappears after a reset and the temperatures aren't stabilizing, the sealed system (compressor, condenser, evaporator in a closed loop) is compromised. There's no DIY fix here.
Model-Specific Notes and Quirks
Frigidaire doesn't use the exact same diagnostic system across all models. Here's what to watch for on specific generations:
2010–2015 Models
These units use the classic button panel with "Fridge Temp," "Freezer Temp," and "Options." The diagnostic mode requires holding "Options" and "Lock" for 10 seconds. Two beeps indicate you're in. Code E40 on these models almost always means a jammed ice auger, not a motor failure.
The motors on this generation are surprisingly durable.
2016–2020 Models
These use a sleeker panel with touch-sensitive buttons. To enter diagnostic mode, press and hold "Fridge Temp" and "Freezer Temp" simultaneously for 15 seconds. On these models, error codes often appear as a combination of a letter and a number.
Codes starting with "E" relate to electrical/electronic issues, while codes starting with "C" relate to communication errors between the main board and the dispenser board.
One specific quirk: on 2017 and 2018 models, a fully frozen ice bin can cause the auger motor to overheat, which triggers a code that looks like a sensor failure. If you get an "E" series error on these models, thaw the ice bin completely before you order any parts.
2021 and Newer Models
The newer models have a more advanced diagnostic system that stores more detailed fault data. You can access a comprehensive error history log without entering service mode, just press "Options" and "Lock" for five seconds. The display will show the most recent fault, then cycle through older ones.
These models also have a self-cleaning ice maker feature that runs a periodic cycle to prevent clumping. If "Sy" appears on a 2023 or 2024 model, check whether the self-cleaning cycle is stuck. Running it manually from the dispenser panel often clears the fault.
Preventive Maintenance: Keeping Error Codes Away
Most Frigidaire error codes don't just happen out of nowhere. They follow a pattern of neglect that builds up over time. Here's how to stay ahead of the failures:
Clean the condenser coils twice a year. Dust, pet hair, and kitchen grease coat the coils and force the compressor to work harder. A clean coil extends the life of the compressor and prevents overheating-related codes. Use a coil brush or a vacuum with a brush attachment.
Don't overload the ice bin. Packed ice doesn't freeze together as easily if the bin has airflow. Leave at least 20% headroom in the bin so the harvest cycle can drop ice without jamming against the top.
Replace the water filter on schedule. Clogged water filters restrict flow to the ice maker. This causes thin, hollow ice cubes that freeze at different rates and shatter, which jams the auger. Frigidaire recommends replacing the filter every six months.
If your water pressure is hard, replace it more often.
Keep the door seals clean. A failing door gasket lets warm air in, which causes the compressor to run longer and the evaporator coils to frost up. Wipe the gaskets monthly with a mild soap solution and check for tears or hardening.
Check the defrost drain annually. The defrost drain carries meltwater from the evaporator coil to the drain pan. Over time, it can clog with debris and freeze. Clear it with warm water and a pipe cleaner.
Final Thoughts on Frigidaire Error Codes
Frigidaire fridge error codes are a tool, not a curse. They point you toward the failing component and save you from guessing. But they're only the start of the story.
The real skill is in testing the component, checking the wiring, and verifying the fix before you put the panel back on.
Start with the cheap and easy fixes. Clear the ice jam. Reset the unit.
Clean the coils. Test the sensors with a multimeter. Replace what's broken.
Most people who encounter a Frigidaire error code find that it's either a simple mechanical issue or a relatively inexpensive sensor replacement.
If you hit the point where the diagnosis points to a sealed system failure or a dead compressor, don't throw money at it. A sealed system repair on a fridge over eight years old often costs more than a replacement unit. The honest math says to upgrade.
But for the 80% of cases that fall outside that scenario, you've got this. Write the code down, work the flowchart, and fix it. You'll save the service call fee and gain a solid understanding of how your refrigerator actually works.

Similar Posts