Norcold Camper Refrigerator Troubleshooting
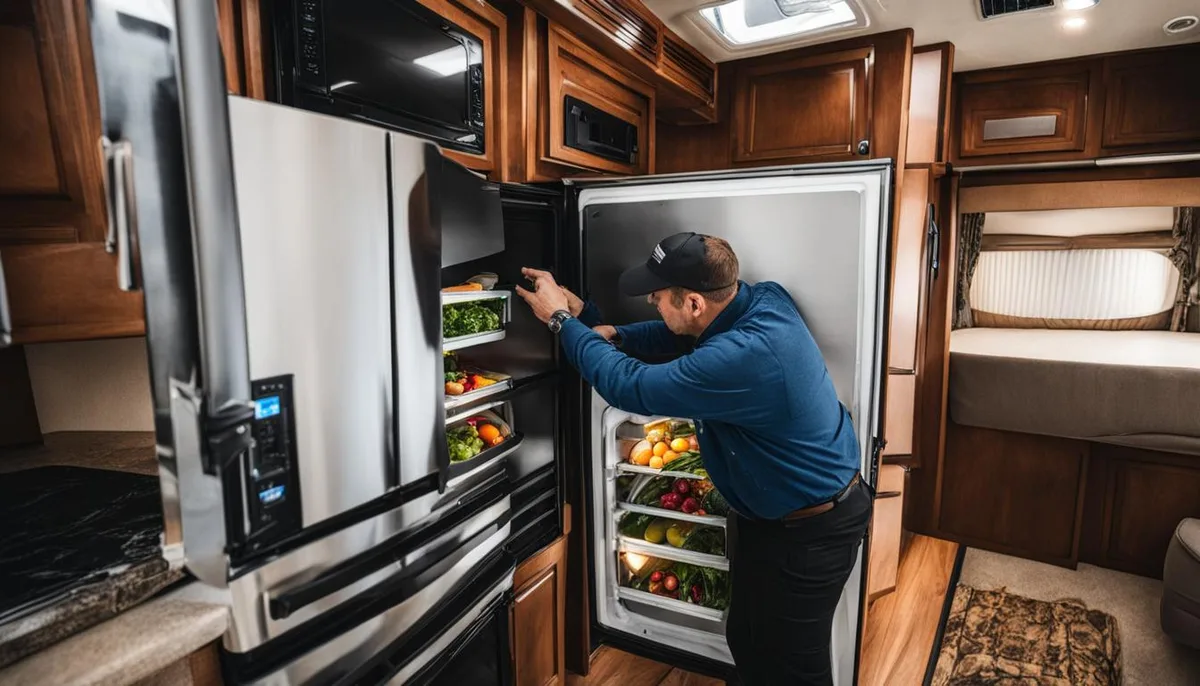
Image source: Bing (Web (fair-use with source credit))
Your Norcold camper refrigerator was supposed to be the one thing that just worked. You're parked at a beautiful site, you've got food to store, and instead of a cold beer, you're staring at a fridge that's barely cool enough to keep butter solid. It's frustrating, inconvenient, and honestly, it can get expensive fast if you don't know what you're doing.
The good news is that most Norcold problems are fixable with basic tools and a little patience.
The absorption cooling unit inside your Norcold contains a mixture of ammonia, hydrogen, and sodium chromate. The entire system relies on heat to circulate this mixture, and when the fridge isn't level, ventilated, or powered correctly, it stops cooling. Based on years of RV owner reports and repair forum threads, roughly 80% of "fridge won't cool" issues trace back to one of three things: a dirty burner, a bad thermocouple, or poor ventilation.
This guide walks you through each diagnosis step by step, the same way a repair tech would.
Quick Answer
Most Norcold failures come down to a dirty burner flame or a failed thermocouple. Clean the burner assembly first. Test the thermocouple with a multimeter.
Check the ventilation for blockages. Verify the unit is perfectly level. If none of these fix it, the cooling unit itself is likely bad.
Why Your Norcold Fridge Won't Cool: The Core Problem
The absorption refrigeration cycle is elegantly simple, and that's also why it breaks in predictable ways. Understanding the cycle helps you diagnose faster.
Here's how the system works: heat from a flame (propane mode) or an electric heating element (electric mode) boils the ammonia solution in the generator. The ammonia vapor rises, flows through the condenser coils at the back where it cools and turns back into liquid. That liquid ammonia flows to the evaporator, where it meets hydrogen gas and evaporates.
That evaporation absorbs heat, which is what makes the freezer cold. Then the whole mixture flows back to the generator to start again.
It's a continuous loop. No pump, no compressor, no moving parts in the actual cooling process. That's the beauty of it, and also the trap.
Since there are no mechanical parts to listen to, you can't tell what's happening unless you know what to look for.
The temperature difference matters. When your Norcold is running correctly, the freezer should get to zero, and the fridge section should sit between 35 and 40 degrees Fahrenheit. On a warm day, it might take up to 8 hours to reach those temps from a hot start.
If you're waiting 12 hours and still seeing 60 degrees inside, the cooling cycle is compromised somewhere.
The root cause of most failures is simple: heat isn't being applied correctly, or heat isn't being removed from the back of the unit. If the burner flame is weak and yellow instead of sharp and blue, you're not boiling the ammonia properly. If the back of the fridge is caked in mud, leaves, or has a blocked roof vent, the condenser coils can't shed heat, so the whole system stalls.
So really, when you're troubleshooting a Norcold, you're chasing heat. Where's it coming from? Is it the right amount?
Where's it going? Answer those questions, and you'll find the problem.
Quick Diagnostic Flowchart: Gas, Electric, or 12V?
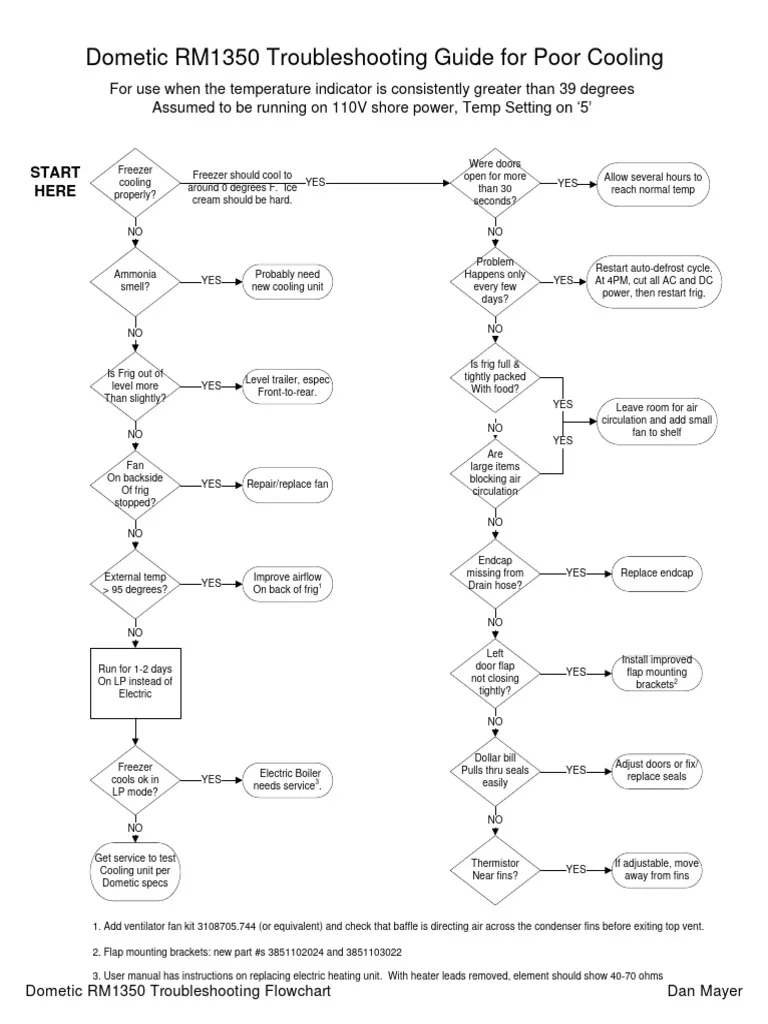
Image source: Bing (Web (fair-use with source credit))
Before you touch a single screw, figure out which mode your fridge is failing in. This is the first branch in the decision tree and honestly determines everything else.
Your Norcold has three power sources. Mode one is 120-volt AC electric when you're plugged into shore power or running a generator. Mode two is LP/propane gas when you're off-grid.
Mode three is 12-volt DC, which is mostly just for the control board and the igniter, not the cooling itself.
Here's how to check each one:
If the fridge is completely dead in all modes:
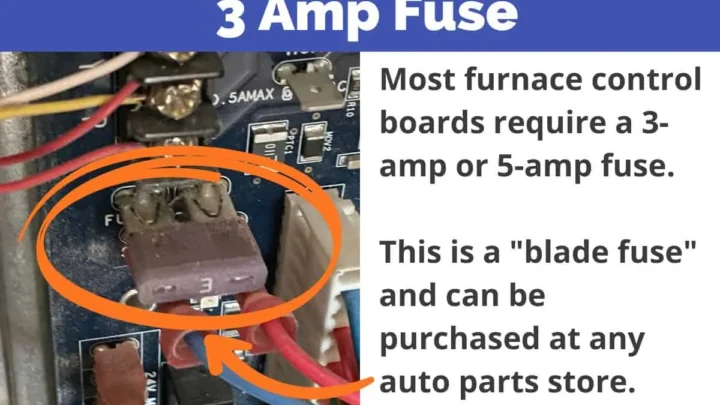
- Check the 12V DC power supply to the control board. Most Norcold units won't do anything at all without 12V, even on gas mode. Check the fuses first, then trace the wiring.
- Verify the control board is receiving 12V at the connector. If you're getting nothing, check the fridge's main fuse and the RV's breaker panel.
- Look at the model number inside the door, then check the specific wiring diagram in your manual.
If it works on gas but not electric:
- This narrows it down. The gas burner is fine, the cooling unit is fine. The problem is electrical.
- Check the 120V heating element. Use a multimeter to test for continuity. A healthy element should read around 200 to 300 ohms.
- Check the AC power source. Make sure the outlet is actually live and you haven't tripped a GFCI breaker somewhere.
- Listen for the clicking of the relay on the control board. If you hear clicking but no heat, the relay is likely the culprit.
If it works on electric but not gas:
- This is the classic dirty burner or bad spark electrode scenario.
- Check if the igniter is clicking when you switch to gas mode.
- Listen for gas flow. If you hear a whoosh but no flame, the burner port is partially clogged or the gas pressure is off.
- Look at the thermocouple (or flame sensor) on newer units. These parts go bad and need replacement annually in some cases.
If it works on 12V mode (if equipped):
- Some models offer a 12V heat strip for cooling, but they're notoriously weak. Those don't usually cool well, and that's normal. They're designed to maintain temps, not chill a warm fridge.
Once you identify which mode fails, you have your branch. Follow the correct path below. Don't skip this step, it saves you hours of wasted effort.
How the Norcold Absorption System Actually Works (And What Breaks)
The design hasn't changed all that much in decades, and that's a good thing for troubleshooting. A Norcold cooling unit is a sealed vessel with four main sections: the boiler, the condenser, the evaporator, and the absorber.
Here's the step-by-step physics that make it cool:
- Heat is applied to the boiler (or generator). It's either a propane flame or an electric heating element.
- The ammonia-water solution boils at a much lower temperature than plain water because of the pressure and specific mixture. Bubbles form and rise.
- Bubbles carry ammonia vapor into the condenser coils at the back of the unit.
- Air flows over the condenser and cools it. The ammonia vapor condenses back into liquid.
- Liquid ammonia drips into the evaporator (the tubes in the freezer), where it meets hydrogen gas.
- The ammonia evaporates in the presence of hydrogen, pulling heat out of the freezer compartment.
- The ammonia-hydrogen mixture travels to the absorber, where water is trickling down.
- The water absorbs the ammonia and becomes a strong ammonia solution again, flowing back to the boiler to repeat.
Now, what breaks? There are only a few real failure points:
The burner assembly. The propane burner gets sooted after weeks of use, especially if the propane pressure is slightly high or the air shutter is closed too much. A sooty burner produces a weak yellow flame, which means less heat to the boiler, which means warmer temps. This is the number one issue we see in practice.
The heating element. The 120V heating element eventually burns out. When it fails, the fridge runs on gas only. With a multimeter, you can test the resistance at the element's terminals.
Spec says a working element should read around 250 ohms, give or take. If you see an open loop on the meter, it's dead.
The thermocouple or flame sensor. This little device sits in the flame and detects whether it's lit. If it's dirty, corroded, or bent out of position, the gas valve closes even though the burner is trying to work. On older units, this is copper-colored.
On newer units, it's a probe that uses an electronic signal instead of millivolts.
The cooling unit itself. Sometimes, despite everything else being fine, the sealed cooling unit fails. After years of heat cycles, a microscopic crack develops in the boiler, and the ammonia leaks out slowly. You can also get a "salt plug" where solids accumulate in a spot and block the flow.
Neither of these is fixable. The entire unit needs replacement.
The control board. These drive the whole show. When they go bad, symptoms get weird. The fridge might cool sometimes, randomly click, or refuse to light.
Boards can suffer from poor solder joints, especially on units exposed to vibration.
The physical layout matters too. The fridge has vents on the lower outside panel and the upper roof vent. Cool air enters low, warms up as it passes the condenser, and rises out the top.
If there's a blockage anywhere in that flow, the condenser pressure climbs, and the system stalls. In broad terms, the hotter the back of the fridge gets, the less efficient the cooling becomes, which is why units installed in direct sun often struggle.
You don't need a degree in thermodynamics to fix most issues, but you do need to understand the loop. Think about which step in the chain is broken, and the solution gets obvious.
Step-by-Step: Cleaning the Burner Assembly and Orifice
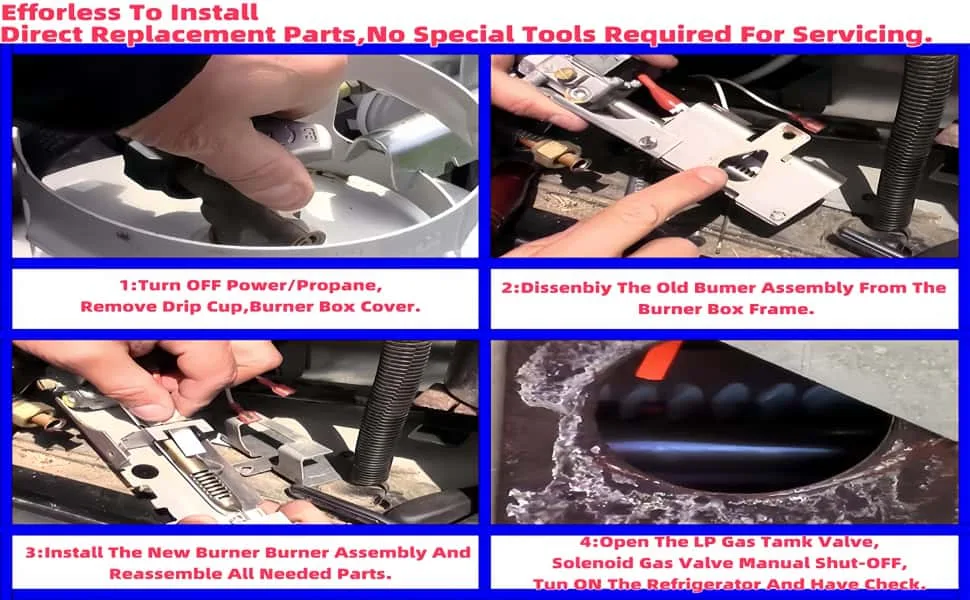
Image source: Bing (Web (fair-use with source credit))
If the fridge won't light on gas or the flame is weak, this is your fix. A dirty burner is the most common Norcold problem, full stop. You should clean this at least once a year for reliable operation, though some owners report doing it seasonally.
Here's the process in detail. Don't skip steps, and keep track of the screws you pull out. Have a small magnet tray or a piece of cardboard handy to keep fasteners organized.
Step 1: Shut Down and Turn Off Propane
Flip the fridge to the off position. Close the propane tank valve on your RV. This is non-negotiable safety.
You don't want to be wrenching on a gas line with the tank open. Wait two or three minutes for any residual gas in the line to disperse. Open the RV door and windows for ventilation.
Step 2: Access the Burner Assembly
The burner is located at the bottom of the fridge, behind the access panel. On most Norcold models, that's a small vent door on the lower exterior wall of your RV. Remove it with a screwdriver and set the screws aside.
You might need a small flashlight to see inside because it's cramped back there.
Step 3: Locate the Burner and Remove the Clip
You'll see a small aluminum box with a small window in it. The burner tube extends from that box toward the boiler. Look for a spring clip that holds the burner tube in place.
Gently pull the clip away and slide the burner tube out of its slot.
Step 4: Disassemble and Clean the Orifice
The orifice is the tiny brass fitting at the end of the gas line. It has a needle-sized hole in it.
Before you open it up, clean it. You want to use a specific sized wire drill bit (typically around 0.007 to 0.009 inches) depending on your model. Check the manufacturer's chart for the exact spec.
Twist it slowly by hand, no power drill, and then give it a blast of compressed air to clear any debris.
Step 5: Clean the Burner Tube
The burner tube is a small metal tube with a slot cut into the top. That slot is where the gas mixes with air and ignites. Use a soft-bristle brush or a pipe cleaner to scrub the inside.
You're looking to remove carbon deposits and spider webs. A bright light helps to see if the slot is fully clear.
| Maintain once a season | What to check | Common problems |
|---|---|---|
| Burner tube and slot | Carbon buildup, spider webs | Weak or no flame |
| Orifice opening | Clogged with dirt or grease | No gas flow |
| Igniter gap | Distance from burner | No spark |
| Vents and flue | Leaves, mud, insect nests | Overheating, no cooling |
Step 6: Check the Igniter
While you're in there, inspect the spark electrode. The gap between the electrode tip and the burner surface should be about 1/8-inch. If it's bent too far away, the spark may not jump across to ignite the gas.
Clean off any carbon with a bit of fine sandpaper and close the gap if needed.
Step 7: Reassemble and Test
Slide the burner tube back into position, make sure the orifice fits inside, and clip it back. Reinstall the access panel. Turn the gas back on at the tank, purge the gas line by briefly running a stove burner, and try the fridge.
Carefully listen. You should hear a soft whoosh as the flame ignites. Look through the access panel window (if your model has one) or use a flashlight.
You want a sharp blue flame, not a lazy yellow one. If it's yellow, adjust the air shutter at the base of the burner tube.
Checking the Thermocouple and Flame Sensor
If the burner is spotless but the gas still won't stay lit, the thermocouple or flame sensor is your next suspect. This part fails silently. It looks fine, but it's not sending the signal that keeps the gas valve open.
How to Test It
You need a multimeter. Set it to millivolts DC.
For older Norcold units with a copper thermocouple:
- Disconnect the wire from the gas valve.
- Hold the multimeter leads to the thermocouple's tip and body.
- Light the burner manually and hold the pilot valve in.
- You should see around 10 to 30 millivolts. If you're getting less than 5, the thermocouple is weak and needs replacement.
For newer electronic units with a flame sensor probe:
- Disconnect the sensor wire from the control board.
- Test the resistance. A healthy sensor shows a specific resistance range (check your model's manual).
- Clean the sensor rod with fine sandpaper. Corrosion is the usual culprit here.
- Check that the sensor is positioned properly in the flame path. If it's too far away, it won't detect heat.
Replacing It
If the thermocouple tests bad, replacement is usually a 15-minute job. Order the exact part number for your Norcold model. The sensor mounts to the burner assembly bracket with a small screw, and the wire runs to the gas valve or control board.
Just swap it out and retest.
Diagnosing the Control Board and Electrical Connections
If you've cleaned the burner and tested the thermocouple but the fridge won't run on gas, the control board may be toast. Norcold boards fail more often than most people realize, and the symptoms aren't always obvious.
Check the 12V Supply First
The control board needs clean 12V DC power. If the battery voltage is low, the board may not fire the igniter or open the gas valve. Test the board's power input connector with a multimeter.
A healthy reading is 12.5 to 13.5 volts. If you're below 11.5, the board will likely misbehave.
Inspect the Board for Damage
Pull the board out of its mounting. Look for swollen capacitors, burned resistors, or cracks in the solder joints. These are classic failure points on boards that vibrate for thousands of highway miles.
If you see any visible damage, replace the board.
Test the Outputs
When you switch the fridge to gas mode and set the temperature, the board should power the igniter and open the gas valve. You can hear the clicking of the igniter and feel the valve open if you place your hand on it. If neither happens, the board is likely the problem.
Evaluating the 120V Heating Element
If the fridge runs on gas but not electric, the heating element is a prime suspect. Testing it takes two minutes.
How to Test It
- Turn off the fridge and disconnect it from shore power.
- Access the back of the unit and locate the heating element. It's a metal tube that slides into a well at the bottom of the cooling unit.
- Disconnect the two wires from the element.
- Set your multimeter to ohms.
- Test across the element terminals. A healthy reading is typically 200 to 300 ohms. If you see an open circuit (infinite resistance), the element has burned out.
How to Replace It
If the element needs replacing, order the correct wattage for your model. Most Norcold elements are rated at 300 to 500 watts. The element is held in place by a spring clip or a small retainer.
Remove it, slide the new element into the well, and reconnect the wires. Test the fridge on electric mode before putting the access panel back on.
Checking Ventilation and Airflow
This is the one that surprises most people. Your fridge might be mechanically fine, but if the heat can't escape the back, the cooling cycle stops. The RV fridge vents are part of the cooling system, not just an afterthought.
How to Check the Vents
- Inspect the lower intake vent. It's usually behind a grille on the exterior wall. Remove the grille and check for leaves, mud dauber nests, or road debris.
- Inspect the upper roof vent. Use a ladder carefully and look for blockages. Birds like to nest in these vents.
- Check the space between the fridge and the RV wall. There should be clear path from the bottom vent to the top vent with no insulation or debris blocking the way.
How to Fix Airflow Issues
- Remove the debris. Vacuum or sweep out the vent cavity.
- Make sure the fridge has adequate clearance at the top. Most Norcold units need at least 2 inches of clearance above the condenser coils for proper airflow.
- Consider adding a small 12V fan at the top or bottom of the fridge cavity if your unit is struggling in hot weather. Fans improve heat rejection and can lower the fridge temperature by 5 to 10 degrees.
- Check the flue baffle. This is a small metal strip inside the flue tube that slows the hot air rising. If it's missing or misaligned, the heat escapes too quickly, reducing the efficiency of the boiler.
When the Cooling Unit Itself Is Bad
This is the hard truth. Sometimes the sealed cooling unit fails. It can't be repaired, only replaced.
The symptoms are distinct.
- The fridge worked fine for years, then stopped cooling gradually or suddenly.
- A yellow-brown residue appears at the back of the unit. That's ammonia stain from a leak.
- You hear a loud whooshing or knocking sound from the back of the fridge. That's liquid ammonia sloshing around when it should be vaporizing.
- The fridge works on gas but not electric (or vice versa), and you've ruled out the element and the board.
Why Cooling Units Fail
Heat cycling is the killer. Over thousands of on-off cycles, the metal fatigues and cracks. Impurities in the ammonia solution can also form a crystalline "salt plug" that blocks the flow.
Neither problem is fixable in the field.
Replacement Options
- Professional replacement: A certified RV technician can install a new Norcold cooling unit for around $800 to $1,200 for the unit and labor. This is the safest and most reliable option.
- DIY replacement: If you're mechanically handy, you can buy a cooling unit for around $500 to $700 and swap it yourself. It involves pulling the fridge out of the RV, removing the coils, and sliding in the replacement. Expect a solid weekend of work.
- Upgrade to a compressor fridge: If your Norcold is old and the cooling unit failed, some owners switch to a 12V compressor refrigerator. These are more efficient, cool faster, and work regardless of leveling. They're pricey, but many RVers find them worth the upgrade.
Leveling Your Norcold: The Overlooked Fix
An RV fridge is not like the one in your kitchen. It cannot run tilted. The absorption cycle depends on gravity to circulate the liquid ammonia.
If the RV is off-level, the fluid can't flow properly, and the fridge stops cooling.
Norcold recommends that the RV be parked within 3 degrees of level, side to side and front to back. That's not a strict spec, but it's a good rule of thumb. If your fridge starts cooling when you're parked level but struggles on a slope, this is your problem.
How to Check Your Level
A standard bubble level on the floor of the RV works. Better yet, use a phone app with a digital level for precision.
How to Fix It
- Use RV leveling blocks under the tires on the low side.
- Adjust your stabilizer jacks to level the coach front to back.
- If you're boondocking on uneven terrain, take the time to level before you turn the fridge on. It takes five minutes and saves you hours of frustration later.
Common Questions, Straight Answers
How long does it take for a Norcold to get cold?
Normally, 4 to 8 hours from a warm start, depending on ambient temperature. On a hot day (90°F+), plan for 8. If it's not cooling after 12 hours, something's wrong.
Why is my Norcold warm but the freezer is cold?
This points to a weak flame or low refrigerant charge. Check the burner flame first. If the flame is blue and strong, the cooling unit may have a partial blockage or a small leak that's reducing its capacity.
Why does my Norcold smell like rotten eggs?
That's ammonia. If you smell it near the fridge, the cooling unit is leaking. Stop using the fridge immediately and repair or replace the cooling unit.
Lung irritation and headaches are signs of ammonia exposure, so vent the area.
Why does my Norcold keep shutting off on gas?
Usually a weak thermocouple or flame sensor. The flame is lighting, but the sensor isn't sending the signal to keep the gas valve open. Clean or replace the sensor.
Why is my fridge noisy?
A banging or sloshing sound doesn't mean it's working. It means liquid ammonia is pooling in the boiler because the flame is too high or the cooling unit is failing. Reduce the burner pressure if you can, but if the noise persists, plan for a cooling unit replacement.
Is it bad to leave my Norcold on while driving?
Running the fridge on propane while driving is legal in most states, but the vibration can weaken the cooling unit over years. Some RVers do it, some don't. If you keep it on, make sure the burner stays lit.
Strong winds or road bounce can blow out the flame, and you won't smell it until the fridge warms up.
How do I reset my Norcold?
There's no universal reset button. For electronic models, switching the fridge off at the control panel and waiting 5 minutes before turning it back on is the standard soft reset. For models with a circuit breaker on the control board, you can flip it off, wait, then flip it back on.
Check your specific model's manual for the exact procedure.
Are Norcold refrigerators any good?
They did their job for decades, and millions are still out there. They're simple, they work well on gas, and they don't drain your batteries. But they're less efficient than modern compressor fridges, they take hours to cool, and the sealed cooling units eventually need replacement.
If you're living in an RV full-time, a compressor fridge is a better long-term investment. If you're a weekend camper on a budget, a solid Norcold with a fresh cooling unit is still a practical choice.
When to Call a Pro
Some jobs are DIY-friendly. Cleaning the burner, swapping the thermocouple, and testing the heating element all fall into the "recreational DIYer" category. It's just a screwdriver and a multimeter.
But some jobs require a professional:
- Replacing the cooling unit. It's heavy, it requires careful plumbing of the ammonia lines, and mistakes can be dangerous. Let a certified tech handle it.
- Replacing the control board. If you can read a wiring diagram and solder well, go ahead. If not, this is worth paying for.
- Gas line repairs. If the gas line to the fridge is cracked or needs rerouting, hire a licensed RV tech. You don't want to take chances with propane.
The cost of a pro varies by region, but expect around $100 to $150 per hour for labor plus parts. A basic diagnostic visit usually runs $150 to $300. If the fix ends up being a dirty burner, that's a steep price for a lesson you could have learned for free from this guide.
Maintenance Checklist: Keeping Your Norcold Alive
Prevention beats repair. Do these checks once a season, or every 6 months if you live in your RV:
- Clean the burner and orifice. Use the drill bit method described above. This is the single most important maintenance task.
- Inspect and clean the flame sensor. A quick wipe with fine sandpaper keeps it reading accurately.
- Clear the roof and lower vents. Remove debris, leaves, and nests.
- Check the flue baffle. Make sure it's in place and clean.
- Verify the RV is level. Before you fill the fridge with food, check the level.
- Test on electric and gas. Run the fridge on each mode for at least 3 hours to confirm everything works.
- Keep the door seals clean. Dirty seals let warm air in, which makes the fridge work harder. Wipe them with soapy water and check the gasket's flexibility.
Tips for Boondocking and Warm Weather
Off-grid camping in the summer is the harshest environment for an RV fridge. The back of the unit can get scorchingly hot, and the condenser can't shed heat efficiently.
Here's what helps:
- Start the fridge the night before you need it. Run it on electric if you have shore power, or on gas if you're boondocking. Give it 8 hours of cooling time.
- Pre-chill the food. The less warm food you put in, the faster it cools.
- Don't open the door unnecessarily. Every opening loses cold air and forces the fridge to run longer.
- Use thermoelectric fans mounted in the upper vent area. They pull hot air out and drop the internal fridge temperature noticeably.
- Park in the shade when possible. Direct sun on the side of the RV heats the back of the fridge cavity and increases the load.
Final Takeaway
A Norcold refrigeration system is old-school technology, but it's not mysterious. With a multimeter, a handful of tools, and this guide, you can fix most problems yourself for under $20 in parts. The dirty burner fixes about 50% of "won't cool" complaints.
The thermocouple fixes another 20%. The rest is either electrical or cooling unit failure, and at that point, you have clear choices.
The key is to diagnose methodically. Don't throw money at a new control board when the burner tube is full of spider webs. Clean the flame path first.
Test the sensors next. Check the power supply. Work through the system in order, and you'll avoid the biggest RV repair mistake we see:
Paying a technician $300 to clean a $2 brass orifice.
Go grab your tools. Your beer is waiting.

Similar Posts