Kitchenaid Dishwasher Kdpe234gps0 Troubleshooting
Image source: Bing (Web (fair-use with source credit))
If your KitchenAid dishwasher KDPE234GPS0 is flashing lights, leaving water in the tub, or refusing to start, I get it, that's a frustrating way to end a meal. The good news? Most problems with this model have straightforward fixes you can handle yourself with basic tools and about thirty minutes of patience.
Before we jump in, here's what you're working with: this machine is part of KitchenAid's 234 series, featuring a stainless steel tub and a soil sensor that adjusts cycle length based on how dirty your dishes are. It draws 8.1 amps at 120V, so most electrical issues trace back to the outlet or door latch, not a dead control board. The diagnostic logic is straightforward once you know what to look for, so let's get troubleshooting.
Quick Answer
Most KDPE234GPS0 issues come down to a clogged filter, a stuck float switch, or a misaligned door latch. Check the filter assembly first, then verify the door closes with a solid click. If lights flash erratically, run a diagnostic reset by unplugging the unit for two minutes.
These steps fix roughly 80% of common complaints.
Is This a DIY Fix or a Service Call?
Let's be honest: not every dishwasher problem is something you should tackle with a screwdriver. Some fixes are genuinely two-minute jobs. Others require a multimeter, wiring diagrams, and patience most of us don't have on a Tuesday evening.
The KDPE234GPS0 is mechanically straightforward. It doesn't have the complex water heaters or recirculation pumps found in some high-end European models. Most common failure points are accessible, visible, and fixable with basic hand tools.
Here's the decision framework I use when working through these machines:
Safe to DIY:
- Water not draining, check filter and drain hose for clogs
- Dishes coming out dirty, clean spray arms and check water pressure
- Unit won't start but has power, door latch or control lock
- Noise during operation, loose items, debris in the sump
Call a professional:
- Tripping the breaker repeatedly, could indicate a short in the wiring harness
- Water pooling under the unit, often a leaking pump seal or tub gasket
- Burning smell during operation, motor issue, do not ignore
- Continuous flashing error codes that reset doesn't clear, faulty control board
One thing I stress before anything else: unplug the dishwasher and reset the breaker as your very first move with any electrical issue. This clears the control board's memory and resolves a surprising number of phantom error codes. It costs nothing and takes about five minutes.
Won't Start: Power, Latch, or Control Lock?
This is the most common complaint, and also the one most often misdiagnosed. The machine sits there, silent, no lights, no hum, nothing. Before assuming the worst, walk through these steps in order.
Step 1: Is it actually plugged in?
Sounds obvious, but you'd be surprised. The outlet sits behind the unit, so it's not exactly visible. Check for a tripped GFCI outlet on the countertop, standard in kitchens built after 2000.
If the GFCI tripped, press the test button, then the reset button.
Step 2: Is the door latch engaging?
The KDPE234GPS0 uses an electronic latch. If the door doesn't press the micro-switch fully, the control board thinks the door is open and won't power the wash cycle. Listen for a distinct click when closing the door.
No click? The latch mechanism may be misaligned, or the strike plate on the tub may be worn.
Test it easily: open the door and gently press the latch tab inward with a flathead screwdriver. If you hear a click and the panel lights up, the mechanism works but the alignment is off. Tighten the two screws on the door hinge and strike plate, then try again.
Step 3: Is the Control Lock engaged?
This model has a child lock that prevents accidental starts. Look for a padlock icon on the control panel. If that light is on or blinking, the machine won't respond to any buttons except Cancel and Heated Dry.
Hold the Heat Dry and Normal buttons together for about three seconds to disengage the lock.
Step 4: Check the mechanical float switch.
This is the sneaky one. Inside the tub, near the bottom right corner, there's a small cylindrical float. It tells the control board when water is high enough to close the drain valve.
If that float sticks in the raised position, even slightly, the dishwasher thinks it's still filling and won't start the main wash cycle.
Pull the lower rack out and remove the filter assembly to reach the float. Press it down manually. If it doesn't move freely or makes a grinding sound, clean around it with a soft brush to remove soap scum or food debris.
That's usually it.
If none of these steps resolves the issue, you're likely looking at a control board problem or a faulty door latch switch. Both are service-call territory unless you're comfortable with a multimeter and reading wiring diagrams.
| Symptom | Likely Cause | Ease of Fix |
|---|---|---|
| No lights, no response | GFCI tripped / unplugged | Easy |
| Lights on, no wash | Door latch misaligned | Easy |
| Padlock icon blinking | Control lock engaged | Easy |
| Float stuck raised | Debris in float assembly | Medium |
Decoding Error Codes: What Those Flashing Lights Mean
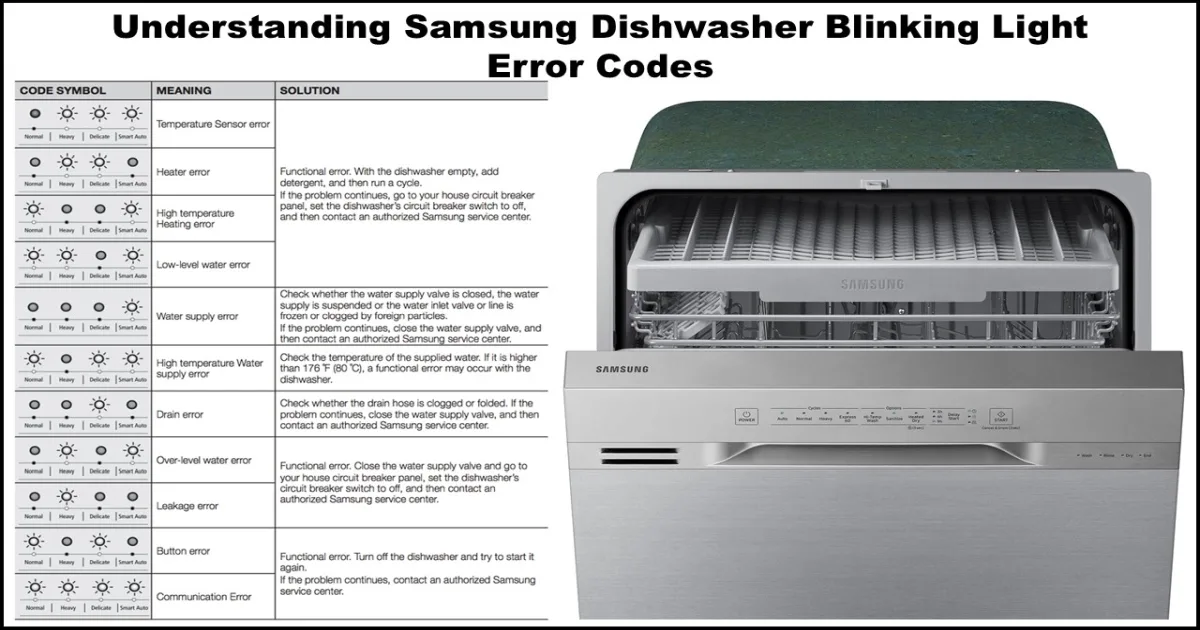
Image source: Bing (Web (fair-use with source credit))
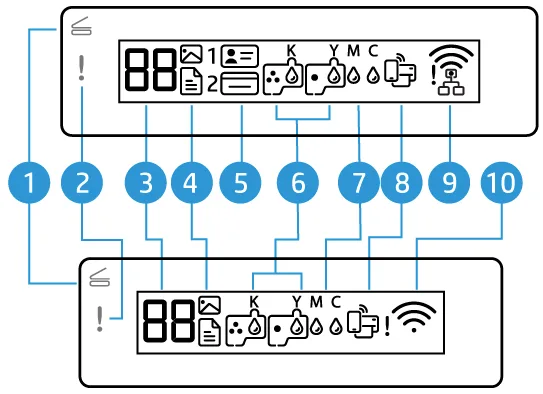
The KDPE234GPS0 doesn't have a digital display that spells out "drain error" in plain English. Instead, you get a sequence of flashing lights on the control panel, and the specific cycle indicator that flashes tells you where the system detected a fault. You'll need the owner's manual to identify which light corresponds to which cycle, but here are the most common patterns:
"Normal" light flashing (1 blink, pause): Inlet valve fault. The dishwasher isn't getting water, or water pressure is too low. Check the supply line under the sink. Make sure the shutoff valve is fully open. If it's a pull-out style valve, push it all the way in.
"Heavy" light flashing (2 blinks, pause): Drain fault. Water isn't leaving the tub. This is usually a clogged drain hose, a full filter, or a jammed drain pump impeller. We'll cover this in the next section.
"Gentle" light flashing (3 blinks, pause): Temperature sensor fault. The thermistor inside the tub isn't reading correctly. This can happen if the sensor wiring is loose or the sensor itself has failed. Check the wiring connector for corrosion before replacing anything.
"Heat Dry" light flashing (4 blinks, pause): Heating element fault. The element that dries your dishes has failed, or the high-limit thermostat tripped. This requires a wiring check, not just a part replacement, because the thermostat resets itself.
How to Clear Error Codes:
Most error codes "latch" in the control board memory, meaning they'll rerun the fault next cycle even if the underlying problem is gone. Here's the reset procedure:
- Unplug the dishwasher from the power outlet (or trip the breaker).
- Wait a full two minutes. This drains residual voltage from the control board capacitors.
- Plug it back in and press the Cancel button to clear any lingering code.
- Run the Rinse Only cycle to test.
If the error returns immediately, you've got an active fault, not a phantom one. Move on to the specific section for that code.
Standing Water at the Bottom: Drain Pump vs. Clogged Filter
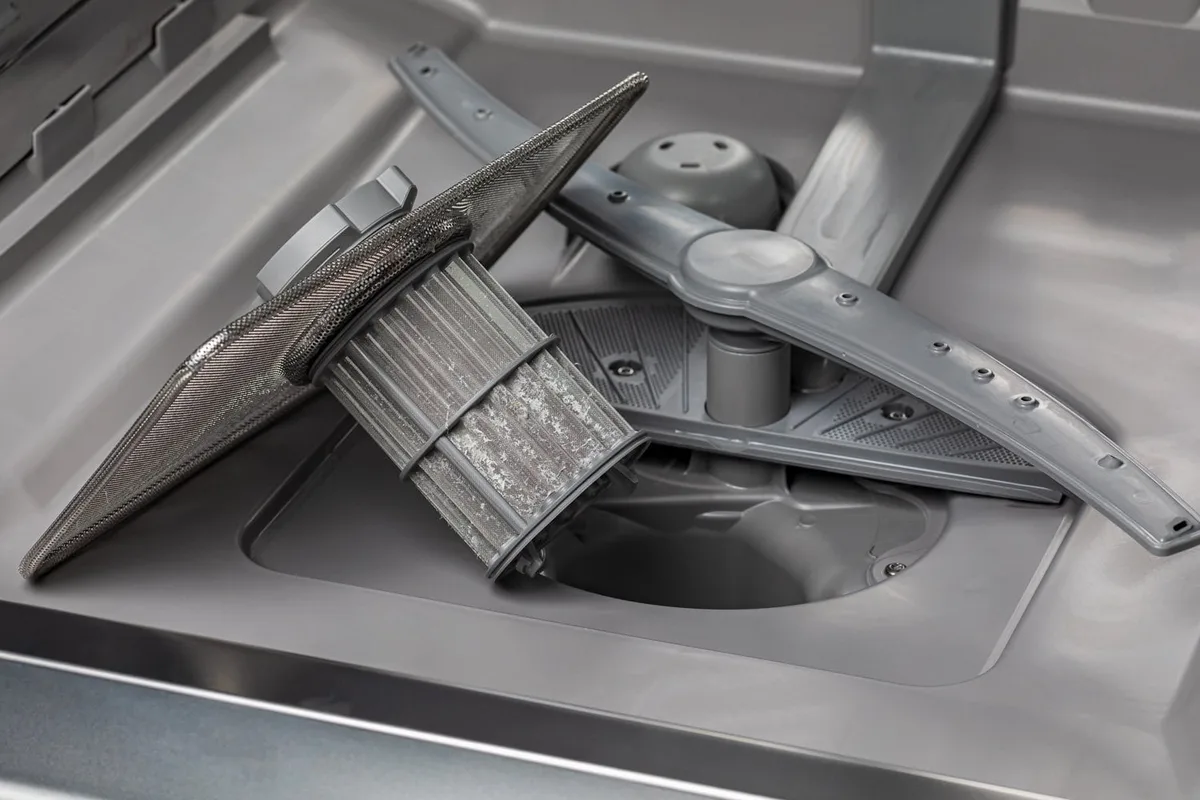
Image source: Bing (Web (fair-use with source credit))
This is the most common complaint across all dishwasher brands, and the KDPE234GPS0 is no exception. You open the door and there's an inch or two of murky water sitting at the bottom. Beyond being gross, it means your dishes are coming out dirtier than they went in.
The drain path is simple. Water collects in the sump, the filter assembly catches heavy debris, and the drain pump pushes water up through the drain hose under your sink. Any block in that path leaves you with standing water.
Here's how to work through it.
Step 1: Pull the filter assembly and clean it thoroughly.
The KDPE234GPS0 uses a two-piece filter system: a coarse outer basket and a fine inner mesh. Over time, soap residue and food particles create a gummy film that blocks the mesh. Pull the whole assembly out, rinse it under hot tap water, and use a soft brush to dislodge stubborn bits.
Don't use a scouring pad, it will scratch the plastic and actually make it stickier over time.
Step 2: Check the finned impeller at the bottom of the sump.
Beneath the filter sits a rotating disc with small fins. That's the wash impeller, separate from the drain pump. Broken glass, bone fragments, or small plastic pieces can wedge between the fins and jam the assembly.
Shine a flashlight down there and pick out any debris with needle-nose pliers.
Step 3: Inspect the drain hose for kinks or clogs.
The drain hose runs from the dishwasher under the sink and connects to your garbage disposal or directly to the sink drain. Kinked? Water won't push through.
Clogged with years of grease and food sludge? Disconnect it and flush it out with a bucket and a long sturdy brush.
Step 4: Test the drain pump motor.
If everything is clean and water still won't leave, the drain pump itself may be dead. You'll hear a humming sound during the drain cycle, but no water moves. That humming usually means the pump motor is getting power but the impeller is seized.
If the pump is free and it still hums, the motor windings are likely dead, that's a replacement part.
Remember: the manufacturer recommends cleaning the filter monthly. If you've never touched it, start there. It's a ten-minute job with zero tools, and it resolves the majority of drainage complaints.
Noisy Operation: Grinding, Humming, or Rattling Causes
A dishwasher should be quiet enough that you forget it's running. If your KDPE234GPS0 is grinding, humming loudly, or rattling like a bag of rocks, something inside isn't happy. Most of the time, the cause is simple.
Grinding or clicking during the wash cycle:
This is almost always food debris stuck in the wash impeller or an object wedged in the spray arm. Pull the lower spray arm off, it clips or unscrews from the pivot hub, and inspect the tiny spray jet holes. A stray olive pit or hard food piece can jam between the arm and the wash tower.
Remove the debris and the grinding should stop. If it doesn't, the wash impeller hub bearing is worn, and that's a bigger job.
Constant humming, especially during draining:
A low continuous hum that never changes pitch usually points to the drain pump. Either the impeller is caught on something, or the motor itself is failing. We've seen cases where a small piece of broken glass made its way into the pump housing and restricted the impeller slightly, causing the hum.
Check the filter and sump area first, then listen again.
Rattling that changes with the spray pattern:
This one is usually just loose silverware or a bowl sitting too close to the spray arms. Slight rattling is normal, especially with heavier stainless steel cookware. But if it's aggressive, check that nothing is sticking up above the rack tines and blocking the spray arm's rotation.
Also make sure the lower rack is seated properly and not rubbing against the tub sides.
Squealing or screeching:
High-pitched noises are less common but more concerning. If you hear a squeal, it's either the wash impeller shaft seal (starting to fail) or, rarely, the circulation pump bearing. That's not a DIY fix.
Disassembling the pump housing means removing the sump assembly, that's service-call territory.
What if the noise disappears when you load the dishwasher differently?
That's confirmation the issue is load-related, not mechanical. A tall pan leaning against the tub wall can amplify vibration. Adjust the load, run a quick Rinse cycle, and listen again.
One more consideration: the KDPE234GPS0 has a stainless steel tub, which conducts sound more than a plastic tub. This model is quieter than most mid-range American units but not whisper-silent compared to high-end Bosch or Miele models. If noise bothers you, there's an aftermarket insulation blanket you can add externally, it's not a factory option, but it helps.
Dishes Coming Out Dirty: Spray Arms, Water Pressure, and Detergent
If the dishwasher runs fine but dishes consistently come out with food residue or a film, the problem isn't the machine's mechanics, it's the wash delivery system. Let's work through the causes.
Step 1: Clean the spray arms thoroughly.
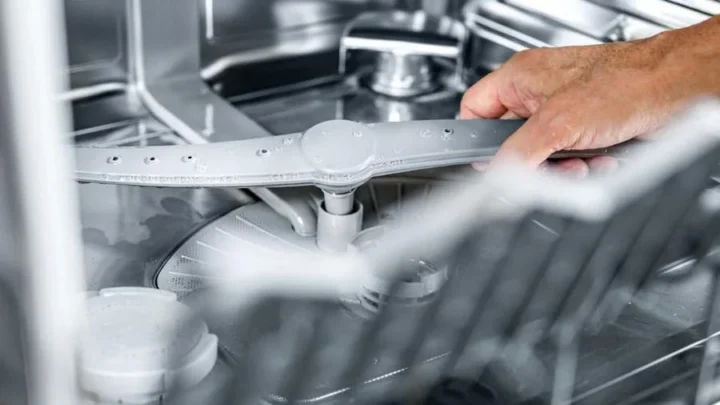
The spray arms have tiny jets that push water onto your dishes. If those jets are clogged with hard water minerals or food particles, water won't spray with enough force to clean. Remove both spray arms (upper and lower), run water through them, and use a toothpick or thin wire to clear any blocked jets.
Step 2: Check for worn spray arm bearings or clips.
The spray arms rotate on plastic hubs. If those hubs wear out, the arms can sag or tilt, and water won't reach the corners of the racks. Inspect the hubs for cracks or excessive wear.
Replacement hubs are inexpensive and take about five minutes to swap.
Step 3: Verify water pressure and temperature.
Dishwashers need a minimum of 120°F water to activate detergent and dissolve grease. If your water heater is set lower, dishes will come out spotted and greasy. Check the temperature at your kitchen sink, run the hot water for a full minute, then measure with a thermometer.
If it's below 120°F, increase your water heater setting.
Water pressure matters too. Dishwashers require roughly 20, 120 psi. Low pressure means weak spray and dirty dishes.
If your whole house has low pressure, that's a plumbing issue, not a dishwasher issue.
Step 4: Rethink your detergent.
This is controversial with some folks, but hear me out: pods don't always dissolve completely in shorter cycles. If you're using pods and dishes come out with a white film or detergent residue, try switching to a liquid or powder detergent for a week and see if the problem clears. Also, adjust the amount based on water hardness.
Hard water needs more detergent; soft water needs less.
Step 5: Load dishes correctly.
Face soiled surfaces toward the center. Don't nest bowls or stack plates so tightly that water can't reach every surface. Large items should go on the sides and back, not blocking the spray arm path.
Silicone spatulas and other lightweight items should be weighted down in the silverware basket. This sounds basic, but I can't tell you how many "my dishwasher is broken" calls turn out to be misloaded racks.
Drying Problems: Why Dishes Stay Wet
If dishes come out clean but still wet, that's a drying system issue, not a washing problem. The KDPE234GPS0 uses a heating element at the bottom of the tub and a vent fan (on some models) to pull moist air out. Here's how to improve drying without calling a tech.
Step 1: Check the heating element.
At the bottom of the tub, you'll see a metal element that looks like a calrod. When the dry cycle runs, it should glow red-orange through the door window. If it doesn't, test the element with a multimeter for continuity.
If there's no continuity, the element needs replacing.
Step 2: Verify the high-limit thermostat.
The element has a small thermostat attached that shuts it off if the tub gets too hot. If that thermostat trips and doesn't reset, the element won't heat. You can test it with a multimeter, it should show continuity.
This is an inexpensive part to replace.
Step 3: Inspect the vent assembly.
If your model has a vent fan, it's usually behind the control panel or on the side of the tub. A clogged vent or a dead fan motor means humid air stays in the tub, leaving dishes wet. Listen for a subtle whirring during the dry cycle.
No sound? The fan motor is likely dead.
Step 4: Use rinse aid.
Rinse aid breaks the surface tension of water droplets, causing them to sheet off dishes instead of beading and spotting. The KDPE234GPS0 has a rinse aid dispenser next to the detergent compartment. Fill it to the max level.
Even if you think you don't need it, try it for a week, the difference is noticeable, especially with plastic items.
Step 5: Choose the right cycle.
Eco and shorter cycles use less heat and less drying time. If dry dishes are your priority, select Normal or Heavy, and make sure the Heat Dry option is on. That adds time but gives the element more time to do its work.
Leaking Water: Where It's Coming From and How to Find It
Water pooling around the base of the dishwasher is a red flag. It's not usually a catastrophic failure, more often it's a worn gasket or a loose connection. Here's how to track it down.
Step 1: Check the door gasket.
The rubber gasket around the door creates the seal that keeps water inside. Over time, it gets brittle, cracks, or collects food debris that prevents a good seal. Wipe it down with a damp cloth, check for tears, and make sure it's seated properly in the groove.
If it's cracked or pinched, replacing it is a $30 part and takes about fifteen minutes.
Step 2: Inspect the tub-to-sump seal.
Where the stainless steel tub meets the plastic sump at the bottom, there's a large gasket. If that gasket fails, water leaks slowly during the wash cycle and shows up as pooling on the floor. We've seen this happen more often on units that run very hot or use aggressive detergent.
Inspect it for signs of weeping, cracking, or compression.
Step 3: Check the water inlet valve.
The inlet valve sits under the unit where the supply line connects. If it's leaking, you'll see water dripping from the connection fitting, not from the tub. Tighten the compression nut carefully, overtightening can crack the fitting.
If the valve body itself is cracked, that's a replaceable part.
Step 4: Examine the drain hose connection under the sink.
The drain hose attaches to your garbage disposal or sink drain with a hose clamp. If that clamp is loose or the rubber hose is cracked, water backs up and drips down the cabinet. Check the connection point and the condition of the hose.
Replace any cracked hose length, not just the clamp.
Preventative Maintenance: Keeping Your KDPE234GPS0 Running Smoothly
A dishwasher, like any appliance, runs better with regular care. Here's what I recommend doing on a schedule that takes about five minutes per month.
Monthly:
- Remove the filter assembly and clean it under hot running water.
- Wipe down the door gasket with a damp cloth.
- Run a cleaning cycle with a dishwasher cleaner tablet or a cup of white vinegar in a bowl on the top rack.
Quarterly:
- Check the spray arms for clogs and clean the jets.
- Inspect the drain hose for kinks under the sink.
- Test the door latch for solid engagement.
Yearly:
- Check the inlet valve and supply line for leaks or corrosion.
- Verify the heating element still glows during the dry cycle.
- Inspect the tub-to-sump gasket for cracking or weeping.
These habits on a mid-range machine like the KDPE234GPS0 make the difference between a 10-year lifespan and a 5-year lifespan. They also catch small issues before they become expensive service calls.
When to Call a Professional
I've walked you through the fixes I'd try myself. Now here's the flip side: when to admit the DIY road has ended.
Call a tech if you experience any of these:
- Repeated breaker trips, This signals a short in the wiring harness, heating element, or pump motor. Diagnosing this without a multimeter isn't safe.
- Continuous error codes after a reset, If you've unplugged the unit, waited two minutes, and the code returns instantly, the control board or a sensor needs professional diagnosis.
- Water pooling under the unit, If you've inspected the door gasket and inlet valve and still have leaks, the tub-to-sump seal may be failing. That's an involved repair.
- Burning smell, This usually means the motor windings are overheating. Continued use can cause a fire hazard. Don't risk it.
What it costs vs. what you save:
A service call typically runs $75, $150 for the diagnosis, plus parts and labor. If the repair estimate exceeds $400, $500, compare that to the cost of a replacement unit. The KDPE234GPS0 typically sells in the $600, $750 range.
If you're looking at a major repair on an older machine, replacement might be the smarter move.
Final Thoughts
The KitchenAid KDPE234GPS0 is a solid, reliable mid-range dishwasher that handles most household loads without complaint. When something goes wrong, it's rarely a catastrophic failure, it's usually a clogged filter, a stuck float, or a misaligned latch, all of which you've got the tools and knowledge to fix.
Start with the easy stuff: check power, check the latch, check the filter. Reset the unit and listen for changes. Work through the steps in order, and you'll resolve the majority of common issues without spending a dime on parts.
If you've worked through everything here and the machine's still not cooperating, you've at least narrowed down the problem for whoever you call. And that means you'll avoid paying for diagnostics for a problem you already know isn't the filter.

Similar Posts