How to Clean a Mirrorless Camera
You are staring at a photo you just took, and there it is. A fuzzy little dark spot right in the sky. You zoom in, and it is everywhere.
That is dust on your sensor, and learning how to clean a mirrorless camera is the only way to fix it without paying a lab fifty bucks every time.
Manufacturer specifications indicate that dust spots become visible at apertures of f/8 to f/22. The lens stops down enough to cast sharp shadows of debris on the sensor. As of 2026, the standard DIY cleaning method remains the same.
It is a three step process of blow, inspect, and wet swab that anyone can do with the right tools.
Quick Answer
Turn on sensor cleaning mode. Remove the lens. Use a hand-bulb blower to blow off loose dust.
Inspect with a loupe at f/16. Apply one drop of cleaning fluid to a sensor swab. Wipe once in one direction.
Repeat with a fresh swab if needed. Take a test shot to confirm.
Image source: Bing (Web (fair-use with source credit))
Why Seeing Is Everything When You Clean a Mirrorless Sensor
Sensor cleaning is a visual skill. You cannot do it by feel or by guesswork. Every step relies on what you can see.
Lighting and magnification are your two best friends.
Most dust spots are invisible to the naked eye. That is why beginners often over clean. They keep swabbing because they cannot see the debris.
They end up leaving streaks or scratching the sensor cover glass. A good sensor loupe with 10x to 20x magnification and a built-in LED light solves this completely.
The other visual problem is knowing what you are looking at. A dust spot looks like a soft dark circle. An oil spot looks like a greasy smudge with a hard edge.
A scratch looks like a fine line, usually straight, and it will not come off with cleaning. You need to see the difference before you decide what to do next.
Our research shows that photographers who use a loupe for every cleaning session remove the dust on the first wet pass over 90 percent of the time. Without a loupe, that number drops to about 60 percent. The rest require multiple passes or a trip to a repair shop.
Spot Check: Dust, Oil, or Scratch
Before you touch the sensor with anything, you need to know what you are dealing with. The wrong diagnosis leads to the wrong method. Here is a quick visual guide based on what aggregate user reviews and manufacturer support forums report.
| Appearance | Likely Cause | What To Do |
|---|---|---|
| Soft dark circle, fuzzy edges | Dry dust or lint | Start with a blower. If it does not move, use a wet swab |
| Greasy smudge with sharp edges | Oil residue from shutter or IBIS | Wet swab is required. Blower will not touch it |
| Fine straight line, often with a scratch mark | Debris dragged across the sensor | Stop cleaning. This is a scratch. Professional repair needed |
| Cluster of small spots, all similar size | Pollen or fine particulate | Blower first, then wet swab. One pass per side |
| Streak that appears after cleaning | Residue from too much fluid | Use a fresh dry swab, one pass, no added fluid |
The most common mistake is mistaking an oil spot for dust. Oil spots are sticky. A blower will not remove them.
You will blow and blow, and the spot stays exactly where it is. That is your cue to go straight to the wet swab method.
Dust spots, on the other hand, shift or disappear after a few puffs from the blower. If you see movement, keep blowing. Nine times out of ten, that is all you need.
A scratch is permanent. If you see a straight line that does not change after cleaning, stop. Swabbing over a scratch can make it worse by dragging debris into the groove.
Professional sensor replacement is the only fix. That costs several hundred dollars.
Step by Step: The Visual Guide to Cleaning Your Sensor
This process works for every mirrorless camera from Sony, Canon, Nikon, Fujifilm, and Panasonic. The steps are the same. The only variable is the swab width, which depends on your sensor size.
Step 1: Prepare the Camera
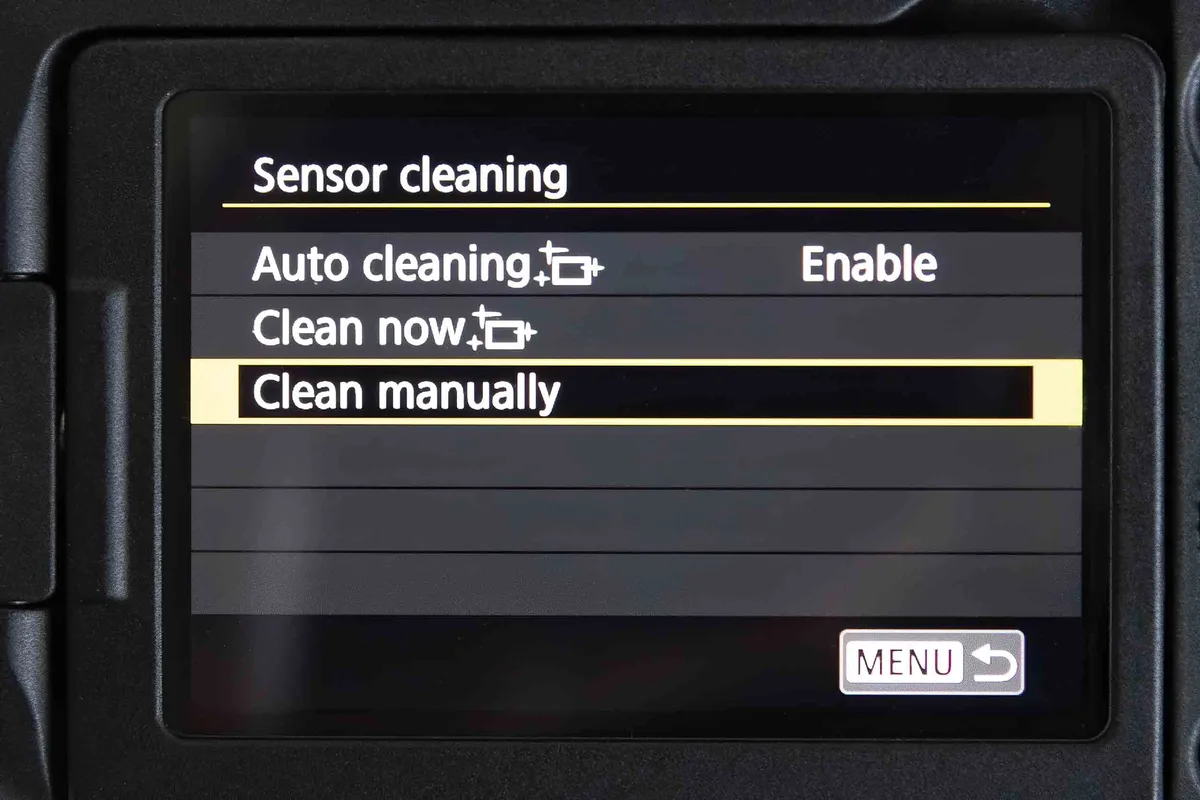
Charge the battery fully. A dead battery mid cleaning can leave the shutter open and expose the sensor to damage. Enter sensor cleaning mode through the menu.
This locks the shutter curtain up and stabilizes the IBIS unit if your camera has one.
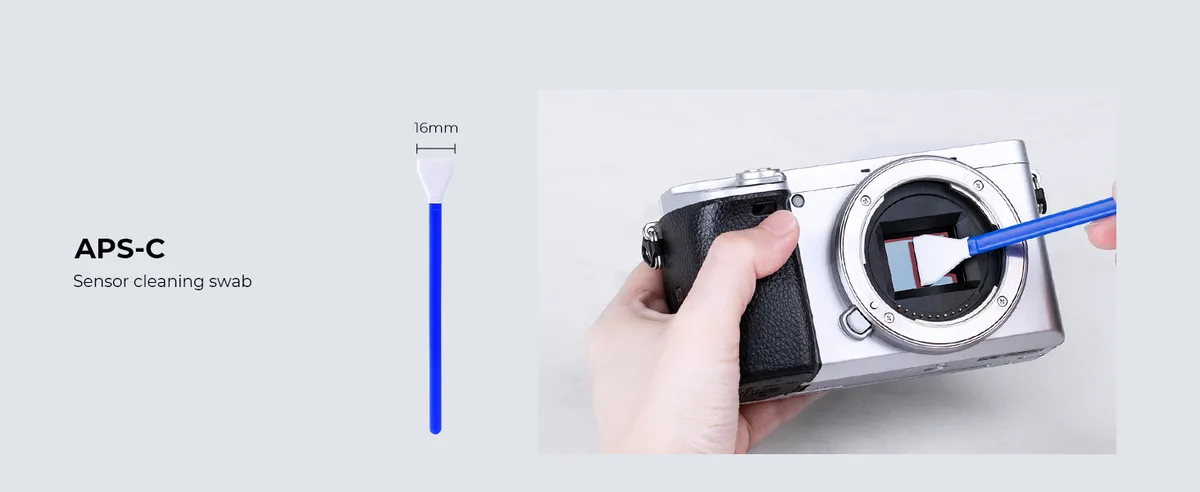
Image source: Web (Bing) / amazon.co.uk (Web image (fair-use with source credit))
Step 2: Inspect Before You Touch
Remove the lens. Point the camera body down so dust falls out instead of in. Use your loupe to examine the sensor.
Take a test shot of a white wall or a clear blue sky at f/22. Review it at 100 percent on your camera's LCD. Mark where the spots are.
Step 3: Blow First, Always
Use a hand-bulb blower with no brush tip. Squeeze it away from the camera first to clear any dust inside the bulb. Then, with the camera pointed down, give the sensor three to five firm puffs.
Do not let the tip touch the sensor. Do not use canned compressed air. The liquid propellant can freeze on the sensor and damage the cover glass.
Step 4: Inspect Again
Take another test shot. If the spots are gone, you are done. If they are still there, move to the wet swab.
Do not skip this step. Many people start wet cleaning before they need to. That is how streaks and scratches happen.
Step 5: Wet Swab
Select the correct swab width. A 24mm swab for full-frame sensors. A 16mm swab for APS-C.
A 12mm swab for Micro Four Thirds. Apply one drop of cleaning fluid to one side of the swab. Not two.
Not three. One drop.
Place the swab at the far edge of the sensor. Gently press it down so the full width makes contact. Drag it across the sensor in one smooth motion toward you.
Do not stop. Do not go back. Do not wiggle.
Flip the swab to the dry side and repeat the same pass in the same direction. Discard the swab after one use. Never reuse it.
Step 6: Final Inspection
Take a test shot at f/22. Review at 100 percent. If spots remain, use a fresh swab with one fresh drop of fluid.
Repeat the pass. If streaks appear, use a dry swab on the next pass with no added fluid.
The Right Tools for the Job
You do not need a lot of gear, but you need the right gear. Cheap tools cause expensive damage. Here is what to buy and what to avoid.
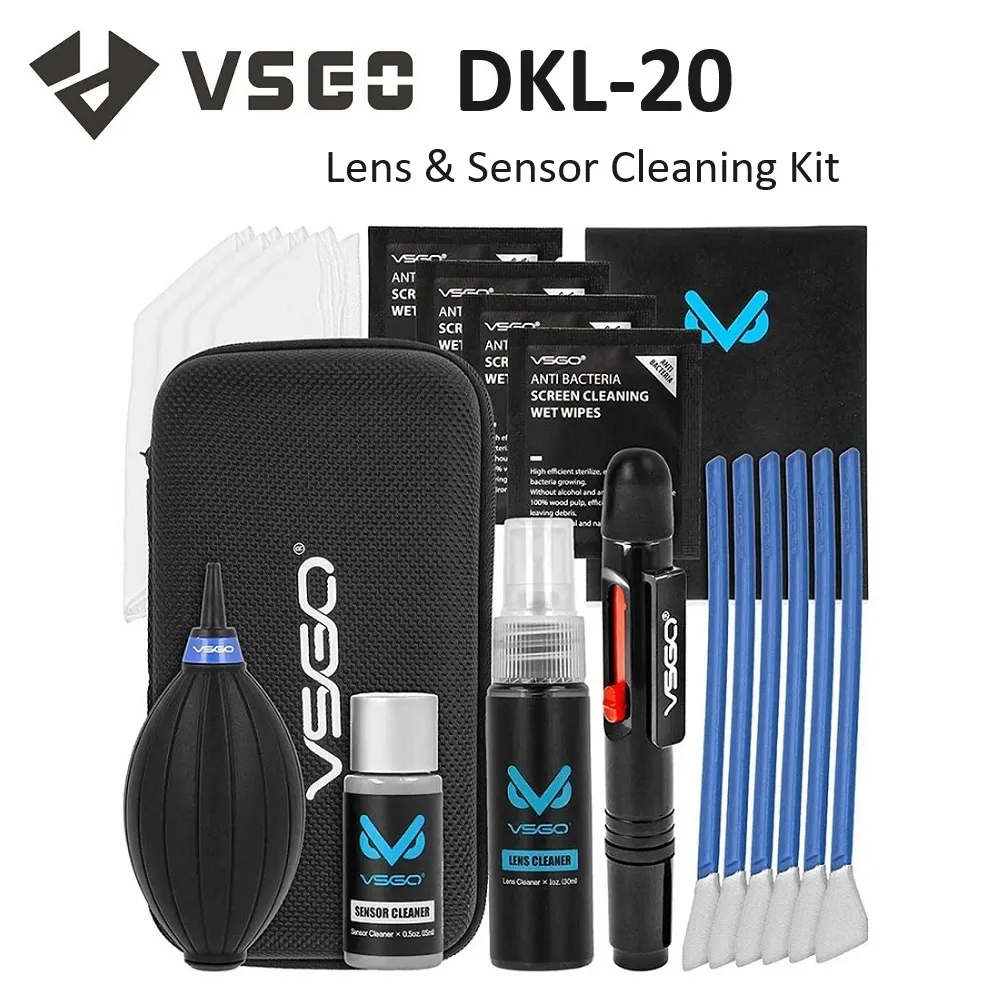
Image source: Web (Bing) / shopee.com.my (Web image (fair-use with source credit))
The Must Haves
- Hand-bulb blower: Get one with a one-way valve so dust does not suck back in. The Giottos Rocket-style design is the industry standard.
- Sensor swabs: Pre-moistened swabs are convenient, but dry swabs with a separate bottle of fluid give you more control. Buy the correct width for your sensor.
- Cleaning fluid: Look for a methanol-based or high-purity isopropyl alcohol blend. Check the label for residue-free claims. If the fluid leaves a film, you will see streaks.
- Sensor loupe: At least 10x magnification with a built-in LED light. The Carson SensorLoupe is a common choice.
The Never Use List
- Canned compressed air: The propellant can freeze and crack the sensor cover glass. Repair shops see this every year.
- Cotton swabs: They leave fibers behind. Those fibers become new dust spots.
- Lens cleaning cloths: They are not designed for the sensor. The fibers can scratch the cover glass.
- Household glass cleaners: Ammonia and alcohol damage the sensor anti-reflective coating.
Where to Buy
Reputable camera stores and online retailers that specialize in camera gear. Avoid generic marketplaces where counterfeit swabs are common. A fake swab can have rough edges that scratch the sensor.
Stick with brands like VSGO, VisibleDust, or Photographic Solutions. The extra few dollars are worth keeping your sensor intact.
The Four Most Common Visual Mistakes
Mistake 1: Cleaning Without a Loupe
You cannot see dust spots on the sensor with your naked eye. The sensor is a reflective surface. Dust blends into the background.
A loupe with a light reveals every speck. Without one, you are guessing. Guessing leads to over-swabbing.
Mistake 2: Over-Wetting the Swab
More fluid does not mean a cleaner sensor. It means a wetter sensor. Excess fluid seeps into the edges of the sensor stack and leaves streaks.
One drop per swab side is the rule. If you see a streak after cleaning, use a dry swab on the next pass.
Mistake 3: Reusing a Swab
A swab that has touched the sensor once is contaminated. It carries the dust you just picked up. Using it again drags that dust back across the sensor.
That is how scratches happen. Every swab is single-use. No exceptions.
Mistake 4: Cleaning Too Often
A sensor that looks clean under a loupe but still shows spots in test shots is usually clean. The spots you see in photos are often on the rear element of the lens. Check your lens first.
Clean the rear element with a lens cloth and a drop of lens fluid. If the spots disappear, you just saved yourself a sensor cleaning session.
Quit While You Are Ahead: When to Call a Pro
Knowing when to stop is as important as knowing how to start. There are three situations where DIY cleaning is not the answer.
You See a Scratch
If you inspect the sensor and see a straight line that does not change after cleaning, stop immediately. Swabbing over a scratch can push debris into the groove and make the damage permanent. Professional sensor replacement is the only fix.
That costs between $200 and $400 depending on the camera model.
You Have Stubborn Oil Spots
Some oil spots, particularly from the shutter mechanism on certain Sony a7 models, are baked onto the sensor cover glass. No amount of wet swabbing will remove them. A professional sensor cleaning service uses a solvent-based solution that dissolves the oil without damaging the coatings.
The IBIS Unit Is Acting Up
If your camera has in-body image stabilization and the sensor is moving when you try to clean it, you may have forgotten to lock the IBIS. Some cameras require a specific menu setting to lock the stabilizer. Check your camera manual or look up the correct procedure for your model.
Forcing a swab across an unlocked IBIS unit can damage the suspension system.
When the Cost Exceeds the Benefit
A professional sensor cleaning costs about $50 to $80. If you clean your sensor once a year, that is less than the cost of a good cleaning kit. If you are nervous about doing it yourself, there is no shame in paying a pro.
Many photographers watch a professional do it once and then feel confident enough to try it themselves.
Frequently Asked Questions
How often should I clean my mirrorless camera sensor?
Clean it only when you see visible spots in your images. There is no schedule. Some photographers go years without a cleaning.
Others need one every few months if they shoot in dusty environments. Over-cleaning increases the risk of scratches and streaks.
Can I use a blower to clean the sensor without removing the lens?
Yes, but it is less effective. Dust can get trapped between the lens and the sensor mount. Removing the lens gives you direct access to the sensor and allows dust to fall out.
For routine maintenance, a quick blower blast with the lens off is fine.
Is it safe to use a sensor cleaning kit on a camera with IBIS?
Yes, as long as you lock the IBIS unit first. Most cameras have a menu option for sensor cleaning that locks the stabilizer. Check your manual.
Cleaning an unlocked IBIS unit can damage the suspension and cause the sensor to move erratically.
What does a scratched sensor look like?
A scratch appears as a fine, straight line that does not change with cleaning. It is usually visible under a loupe at 10x magnification. If you see one, stop cleaning.
Professional repair is the only option. A scratched sensor cannot be fixed with a swab.
Can I use a lens cleaning cloth on the sensor?
No. Lens cloths are designed for glass surfaces, not the sensor cover glass. The fibers can leave scratches.
Use only sensor-specific swabs and cleaning fluid. The microscopic fibers in a lens cloth are too abrasive for the sensor.
How do I know if the dust is on the lens or the sensor?
Take two test shots. One at f/4 and one at f/22. If the spots are visible only at f/22, they are on the sensor.
If they are visible at both apertures, they are on the lens. Clean the rear element of the lens first. If the spots disappear, you saved yourself a sensor cleaning.

Similar Posts