How to Shoot Underwater Video
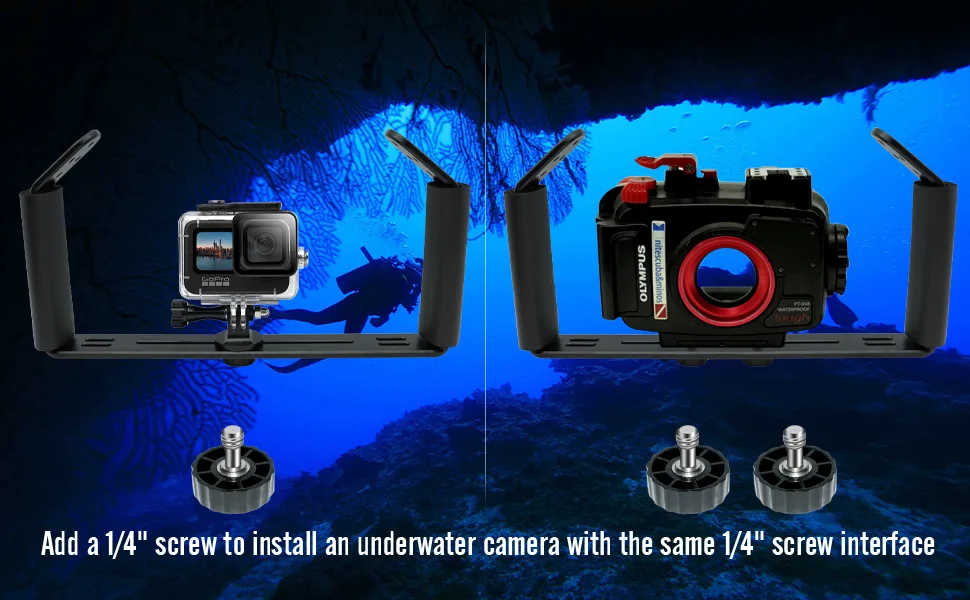
You want to learn how to shoot underwater video, but your first clip came back looking like a blue fog. You were right there, pointing the camera at a turtle, and the footage turned out flat, cold, and hazy. It's not your fault.
Nobody teaches you this, so you learn the hard way.
Water absorbs light differently than air. Red light drops off by half at around 5 meters, and by 20 meters you're working with mostly blue and green wavelengths. That's why automatic settings fail.
The camera doesn't know how to compensate. Learn to give it the right white balance, add light at the right depths, and you'll never trash a dive reel again.
Image source: Bing (Web (fair-use with source credit))
Quick Answer
Set a custom white balance, stay close to your subject, and use a red filter. At depths above 8 meters, a red filter works well. Deeper than that, use video lights.
Keep shutter speed at 1/60 for 24fps. Stabilize with a tray and arms. Test your housing before every dive.
Why Your First Underwater Video Looks Blue and Washed Out
You press record, film a coral reef, and review the clip later. It looks like someone spilled blue ink on the lens. The subject is there, but the colors are wrong, and the whole frame feels hazy.
This is the standard introduction to underwater videography.
The core cause is automatic white balance. The camera doesn't understand that the water removed all the red light. So it guesses.
Underwater, it guesses wrong. On land, the same setting would give you perfect colors, which is why you never touch it until you dive.
The second culprit is distance. Water scatters light. The farther you are from your subject, the more color and contrast you lose.
If you're 3 meters away, you're already fighting heavy degradation. Get closer. Your subject should fill at least a third of the frame.
If you're shooting with an action camera like a GoPro, there's also the wide-angle problem. The lens makes everything look small and far away. The fix is the same: get closer.
And if you're scuba diving, stability is the third issue. You need to become neutrally buoyant before you can hold the camera steady.
If your footage is blue, don't panic. It's rarely one mistake. It's a combination of white balance, distance, and stability.
Fix those three and your next dive will look entirely different. For shallow water, a red filter alone can save you. Below 9 meters, you'll need video lights.
Keep that rule in mind and you're already ahead of most beginners.
The Water Problem: Why Light and Color Change at Depth
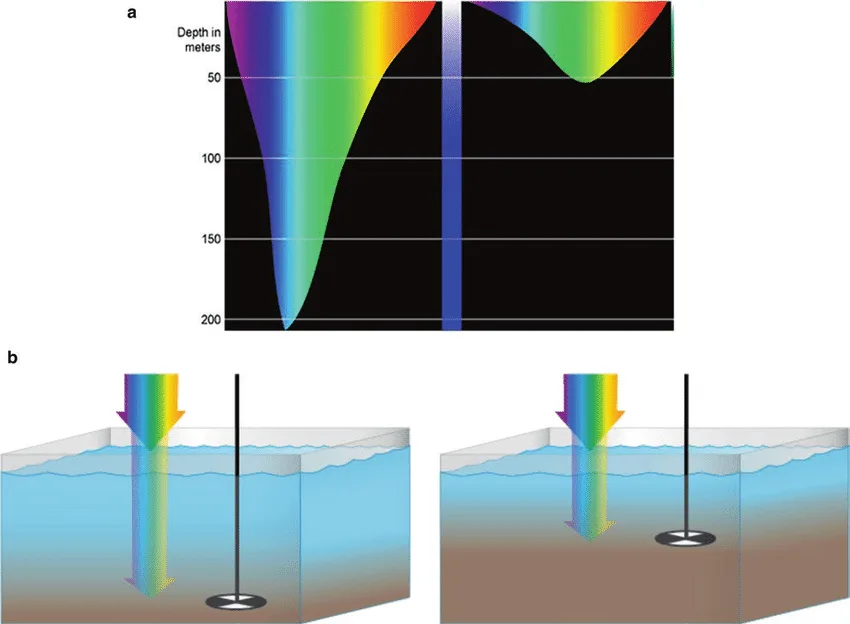
Image source: Web (Bing) / researchgate.net (Web image (fair-use with source credit))
Water is a filter. As you descend, it strips away wavelengths of light one by one. Red goes first, around 5 meters.
Orange is next, roughly 10 meters. Yellow follows at about 15 meters. By 20 meters, only blue and green remain.
This isn't a camera defect. Any sensor records what's physically there. The trick is restoring the missing color.
You have two ways to do it: add light or filter the light that's already present. A red filter blocks some blue-green wavelengths. That helps the camera rebalance the scene.
In shallow water, it's nearly perfect. At depths beyond 8 or 10 meters, there isn't enough red light left to pass through, so the filter just makes the frame dark and muddy.
Video lights solve that problem by adding the missing color directly. They also add contrast and sharpness. The catch is distance.
Lights only reach about 1 or 2 meters in clear water. If you point them straight ahead, they light up all the particles between you and the subject, causing backscatter.
Depth and water quality decide which tool to use. If you're at 5 meters in clear water, a filter works. If you're at 18 meters, you need lights.
If the water is turbid, lights can make things worse, so you aim them outward. This is standard underwater optics, and the physics are well documented. The absorption coefficients are core to NOAA's ocean science research.
It's also about knowing where the action will be before you dive. Same idea as placing a wildlife camera near a game trail: you're predicting the shot.
Your Decision Guide: Choose Your Setup Based on Depth and Budget
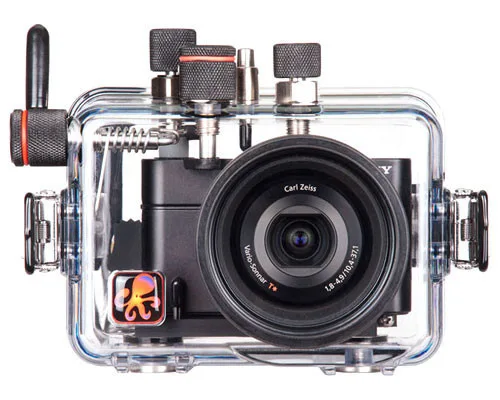
Image source: Bing (Web (fair-use with source credit))
Let's make this practical. Your setup depends on two variables: depth and budget. Match those to one of these branches.
If you're only snorkeling in shallow, bright water, don't overthink. A GoPro with a red filter and a simple tray is enough. Stay above 5 meters and let the sun do the work.
As of 2026, action cameras like the HERO12 shoot 5.3K video, which gives you room to crop and still keep quality.
If you're diving between 5 and 10 meters, you still want a filter, but you'll also need a tray to keep the camera steady. A compact camera like the Sony RX100 in a rigid housing gives you far more control than an action cam. You can set a custom white balance and adjust exposure manually.
If you're planning dives deeper than 10 meters, lights become mandatory. Get a tray with arms and at least one 2000-lumen video light. Aim it outward to minimize backscatter.
You'll also want a camera that shoots in a flat or log profile so you can color grade later.
For professional work, you're in mirrorless territory. That means a dome port, dual lights, and a strobe system. Budget over $6,000 and expect a steep learning curve.
| Depth / Condition | Recommended Tool | Example Setup | Budget Range |
|---|---|---|---|
| 0-5m, bright sun | Red filter or nothing | GoPro with red filter | $300-$800 |
| 5-10m, clear water | Red filter + tray | GoPro or compact camera | $500-$2,000 |
| 10-20m, any water | Video lights | Compact camera plus lights | $1,500-$4,000 |
| 20m+ / night / wrecks | Dual lights + strobe | Mirrorless with dome port | $6,000+ |
If you're just starting, don't buy the expensive rig first. Master what you can get with an action cam. Then upgrade when you know exactly what you're missing.
And think about reviewing your clips later. A clean workflow for pulling footage off the camera saves you stress on a long dive trip.
The 5 Mistakes That Ruin Underwater Video (and How to Fix Them)
We all make these. Recognize them, fix them, and your next dive will look like a different person shot it.
1. Letting auto white balance run wild. It guesses, and underwater it guesses blue. Set a custom white balance using a white slate at your working depth.
Or use a preset like 6,000K for shallow water. It takes 10 seconds and saves an entire dive.
2. Lighting up the snowstorm. That's what backscatter looks like. Your video light illuminates tiny particles between you and the fish, creating a blizzard on screen.
Fix it by aiming your lights outward, away from the lens. Also, get closer to your subject. Less water between you and the subject means fewer particles in the light path.
3. Going handheld. Even the best image stabilization can't fix moving hands. Use a tray with two handles.
Or press your elbows into your body and breathe slowly. Buoyancy control is the real solution. Practice neutral buoyancy and your camera will still.
4. Filming too far away. Water eats light, color, and detail. If you're more than 2 meters from your target, you'll see the difference immediately.
Get close. The framing will feel tight at first, but the footage will look professional.
5. Forgetting your shutter speed. For normal video at 24fps, set the shutter to 1/60. Anything slower gives you motion blur.
Anything faster makes movement look unnatural. Then use ISO and aperture to control exposure. Most modern cameras can handle this if you switch to manual or aperture-priority modes.
The best way to avoid these is to practice in a pool first. Just like any remote camera you'd deploy, confirm your camera works before you trust it underwater.
Pro Tips for Better Color, Stability, and Focus
Let's push your footage from good to great with a few pro moves.
Get close, then get closer. Underwater video rewards proximity like nothing else. If you think you're close enough, swim another meter toward your subject. Color, contrast, and presence all improve the moment you do.
Rebalance your white balance at every depth change. Water shifts your light temperature as you descend. When you move from 5 meters to 10 meters, the color cast changes again. Run a custom white balance at each depth station.
Divers do this with a white slate card before they start filming.
Master your buoyancy. Neutral buoyancy is the foundation of steady footage. When you wobble on every fin kick, the camera reflects it. Practice hovering in one spot until it takes no thought.
Once you're stable, the shot gets easy.
Shoot in a high-bitrate flat profile. Look for log or flat color profiles in your camera. They preserve more detail in highlights and shadows. That gives you extra room to fix colors in post-production.
DaVinci Resolve is free and handles log footage beautifully.
Plan your battery budget. Cold water drains batteries faster, and there's no outlet on a reef. Check the charge on every battery before the dive, carry spares, and keep them warm. Treat recording time the same way you'd manage remote trail camera power, with a clear plan before you head out.
Transfer files immediately. The longer footage sits on a memory card, the higher the risk of corruption. Back everything up as soon as you're back on the boat. The same logic applies to remote monitoring cameras you might run elsewhere, so build a consistent workflow and stick to it.
Frequently Asked Questions
Do I need a red filter or video lights for underwater video?
That depends on depth. Above 8 meters, a red filter restores color well. Below 10 meters, there's too little red light in the water for a filter to work.
Switch to video lights instead. Lights also work in shallow water, but aim them outward so they don't create backscatter.
What frame rate should I use for underwater video?
Shoot 24fps or 30fps for normal diving footage. Use 60fps or 120fps if you want slow-motion clips of fast swimmers. Remember to adjust your shutter speed to match.
At 60fps, use 1/120. At 24fps, stick with 1/60.
Why does my camera housing fog up underwater?
Fog forms when humid air inside the housing hits cold glass. Moisture condenses on the lens port. Fix it by sealing the housing in a cool, dry room.
Add silica gel packets before closing it. If fog appears mid-dive, surface slowly and reseal the housing.
Can I shoot underwater video with a phone?
Yes, in a waterproof case rated for your depth. Phone cameras handle shallow water well, especially above 5 meters. Below that, colors fade and you'll need a housing plus lights.
For serious diving, a GoPro or compact camera gives you better controls, wider lenses, and safer housings.
How do I fix blue underwater footage in post-production?
Use a color correction tool in an editor like DaVinci Resolve or Premiere Pro. Raise red and orange levels in the color wheels, then reduce blue slightly. If you shot in a flat or log profile, you'll have more recovery room.
Correcting white balance first makes everything easier.

Similar Posts
































