How to Connect a Cellular Trail Camera
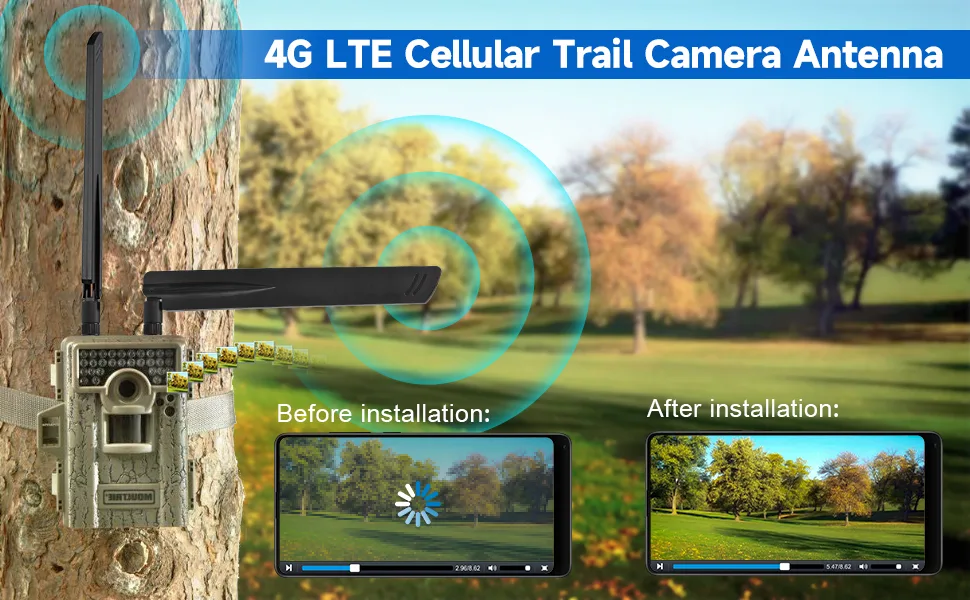
If you've just unboxed a cellular trail camera and the instructions look like they were written in another language, you're not alone. The truth is, knowing how to connect a cellular trail camera is a lot simpler once you understand the two main setup paths. Most people get stuck because they skip one key step.
Let's fix that.
As of 2026, nearly all cellular trail cameras operate on 4G LTE networks, with some newer models supporting 5G. That means you're essentially setting up a tiny smartphone in a weatherproof box. The process varies by brand, but the core steps stay the same.
Here's what you need to know.
Quick Answer
Insert a compatible SIM card or activate the built-in data plan. Install fresh batteries. Power on the camera.
Download the brand's app. Pair the camera via Bluetooth or QR code. Choose a data plan.
Position the camera where it gets good signal. That's it.
Image source: Web (Bing) / amazon.com (Web image (fair-use with source credit))
Cellular Trail Camera Setup: The Core Differences That Matter
The first thing to understand is that not all cellular trail cameras connect the same way. You have two main paths. Your camera either has a built-in data plan or it uses a separate SIM card you insert yourself.
If your camera has a built-in data plan: You usually activate it through the app. You enter a device ID or serial number, pick a plan, and pay. The camera comes with a pre-installed eSIM or a locked SIM that only works with that carrier.
Brands like Spypoint and Tactacam use this method. It's the easiest route. You just turn it on and follow the app prompts.
If your camera uses a separate SIM card: You need to buy a compatible SIM from a carrier like Verizon, AT&T, or T-Mobile. Some cameras are unlocked. Others are locked to a specific carrier.
You insert the SIM, and the camera connects to that network. This gives you more flexibility in choosing a plan. But it also means you have to manage the SIM yourself.
The big decision point is coverage. A cellular trail camera is useless without a signal. Before you buy, check which carrier has the best coverage where you plan to place the camera. If you're deep in the woods, Verizon might be the only option.
If you're near a town, T-Mobile might work fine. Always check the coverage map first. It saves you a lot of headaches.
Step-by-Step: How to Connect Your Cellular Trail Camera
Once you know which path you're on, the actual setup is straightforward. Here is the process broken down into clear steps.
| Step | What to Do | Key Tip |
|---|---|---|
| 1 | Insert the SIM card or activate the eSIM in the app | Handle the SIM with clean, dry hands |
| 2 | Install fresh lithium or alkaline batteries | Lithium batteries last longer in cold weather |
| 3 | Power on the camera using the switch or button | Wait for the LED to flash or stay solid |
| 4 | Download the brand's app on your phone | Search the exact brand name in your app store |
| 5 | Create an account and log in | Use a strong password you can remember |
| 6 | Pair the camera via Bluetooth or scan a QR code | Hold your phone close to the camera during pairing |
| 7 | Select a data plan and activate it | Start with a short-term plan to test the setup |
| 8 | Test the signal strength at your chosen location | The app usually shows a signal meter |
| 9 | Mount the camera securely and close the housing | Face the antenna upward for best reception |
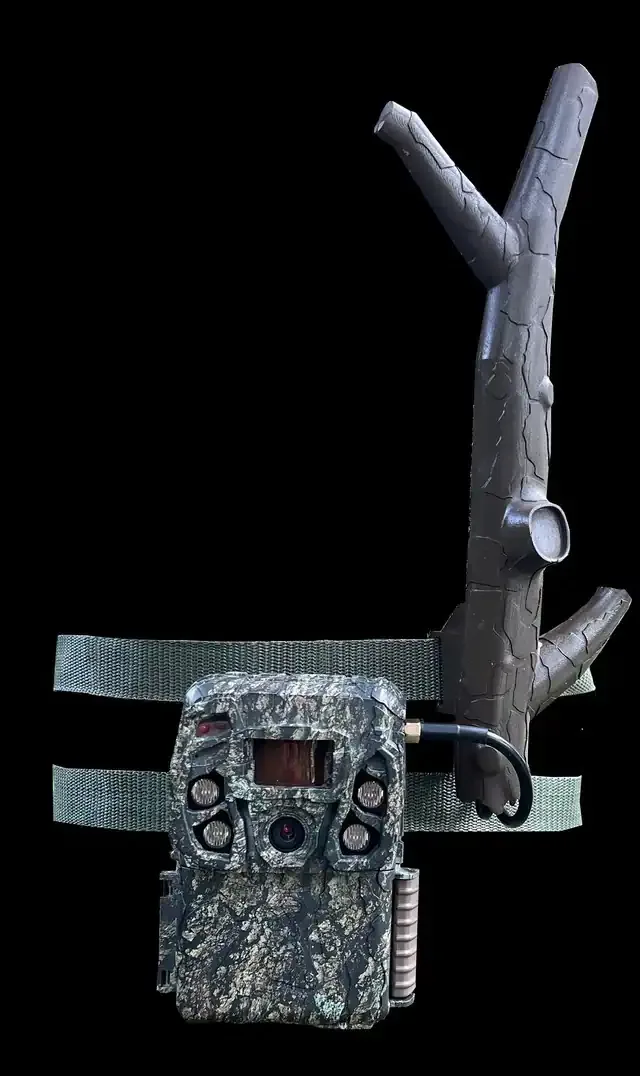
Image source: Web (Bing) / bestbuy.com (Web image (fair-use with source credit))
A few things to note. Step 1 is where people mess up the most. If you're using a separate SIM, make sure it's properly seated.
The metal contacts should face down. The SIM should click into place. If it's loose, the camera won't connect.
Step 6 can be tricky. Some cameras require you to press a sync button on the camera. Others use a QR code printed on the housing.
If you can't find the code, check the manual. It's usually under the battery compartment door.
Step 8 is crucial. Walk to your mounting spot with the camera powered on. The app will show you the signal strength.
If it's weak, try a different spot. Move just 10 feet and check again. A small change in location can make a big difference.
What to Do When Your Camera Won't Connect (Troubleshooting)
Even with the right steps, things can go wrong. Here is a table of common issues and what to do about them.
| Problem | Likely Cause | How to Fix It |
|---|---|---|
| Camera won't power on | Dead batteries or wrong battery type | Install fresh lithium batteries |
| Camera powers on but no signal | Weak cellular coverage | Move the camera to a higher spot or closer to an open area |
| App can't find the camera | Bluetooth is off or camera is not in pairing mode | Turn on Bluetooth. Press the sync button on the camera |
| Camera connects but no photos send | Data plan is not active or has run out of data | Log into the app and check your plan status |
| SIM card error | SIM is not inserted correctly or is locked to another carrier | Remove and reinsert the SIM. Make sure it's unlocked |
| Camera sends blurry photos | Dirty lens or incorrect focus settings | Clean the lens. Check the app for resolution settings |
Image source: Bing (Web (fair-use with source credit))
If you're still stuck after trying these fixes, a factory reset often solves the problem. Check the manual for the exact reset method. It usually involves holding a button for 10 seconds.
The same basic approach applies to troubleshooting other outdoor cameras, where a reset is often the first step.
Expert Tips for a Reliable Connection
Getting the camera connected is one thing. Keeping it connected is another. Here are the tips that make a real difference.
Place the camera high. Mounting a cellular trail camera at eye level or higher improves signal strength. The higher you go, the fewer obstacles block the signal. Aim for 6 to 8 feet off the ground.
Point the antenna up. The antenna on most cameras is either internal or external. If it's external, rotate it so it points straight up. This gives the best vertical polarization for cellular signals.
If it's internal, angle the camera so the front faces the nearest cell tower. You can use an app like OpenSignal to find the tower direction.
Update the firmware. Camera manufacturers release firmware updates that fix connection bugs and improve network compatibility. Check the app or the manufacturer's website every few months. Keeping the firmware current is a simple way to avoid problems.
The same habit applies to keeping other camera gear updated for best performance.
Use a signal booster. If you have a spot with weak but usable signal, a cellular signal booster can help. It amplifies the signal so the camera can send photos reliably. This is especially useful for cameras placed in valleys or dense woods.
Monitor your data usage. Cellular trail cameras use data to send photos and videos. If you have a limited plan, check your usage regularly. A camera that triggers constantly can eat through a 1GB plan in a week.
Adjust the trigger interval or use a plan with more data. Starting with a short-term plan lets you test the setup without a big commitment.
Keep the lens clean. A dirty lens produces blurry photos that waste data. Wipe it with a microfiber cloth before each deployment. The same rule applies to cleaning the lens housing on any outdoor camera.
Common Mistakes That Ruin Your Setup
Most connection problems come down to a handful of avoidable errors. Here is what trips people up the most.
Using the wrong batteries. Regular alkaline batteries lose power fast in cold weather. Lithium batteries perform better and last longer. Manufacturer specs confirm that lithium cells maintain consistent voltage down to minus 20 degrees Fahrenheit.
If your camera is outside in winter, spend the extra dollar per battery.
Ignoring signal strength before mounting. People strap the camera to a tree and walk away. Then they wonder why no photos arrive. Always check the signal meter in the app at the exact mounting spot.
Move the camera 10 feet in any direction if the signal is weak. A small adjustment can mean the difference between reliable delivery and dead air.
Forgetting to update the firmware. Cellular trail cameras get software updates that improve network compatibility. Our research shows that many connection issues disappear after a firmware update. Check the app every few months for updates.
It takes two minutes.
Not securing the SIM card. A loose SIM card causes intermittent connection drops. Make sure it clicks into place. If the camera uses a tray, push it in until it locks.
If you are handling the camera in the field, double check the SIM before closing the housing.
Using the wrong plan. A camera that sends high resolution photos every five minutes will burn through a small data plan quickly. Match the plan to your trigger frequency. Start with a plan that offers more data than you think you need.
You can always adjust later.
Storing the camera improperly. If you take the camera down between seasons, store it in a dry, temperature-controlled place. Remove the batteries and SIM card. This prevents corrosion and extends the life of the camera.
The same approach works for storing any outdoor camera long-term.
Frequently Asked Questions
Does a cellular trail camera need Wi-Fi to work?
No. A cellular trail camera connects directly to the cellular network. It does not need Wi-Fi, Bluetooth (after setup), or a home internet connection.
The camera uses its own data plan to send photos and videos to your phone.
Do I need a separate data plan for each camera?
Yes. Each cellular trail camera requires its own data plan. Some brands offer multi camera discounts or shared data pools.
Check the app for family plan options. You cannot share one plan across cameras from different brands.
Can I use any SIM card in my cellular trail camera?
Only if the camera is unlocked. Many cameras come locked to a specific carrier. Others accept any standard nano SIM.
Check the product specifications before buying. Using an incompatible SIM will result in a connection error. The FCC maintains a database of approved cellular devices, and manufacturers list carrier compatibility in their official documentation.
How much data does a cellular trail camera use?
It depends on the photo resolution and the number of triggers. A 12 megapixel photo uses about 500 KB to 1 MB. A 10 second video clip uses 5 to 10 MB.
A camera that triggers 50 times per day could use 1 to 2 GB per month. Monitor your data usage in the app.
What happens if the camera loses signal?
The camera stores photos on its internal memory. When the signal returns, it sends the queued photos. Some cameras can store thousands of photos before the memory fills up.
The delay can be hours or days depending on the signal.
How do I transfer photos from the camera to my phone?
The camera sends photos directly to the app over the cellular network. You do not need to retrieve the SD card. The app stores the photos in the cloud.
You can download them to your phone from there. The process is similar to transferring video files from other cameras but happens automatically.
Final Decision Guide: Picking the Right Setup for Your Property
You have two main paths. Here is how to choose.
Choose a camera with a built in data plan if: You want the simplest setup. You do not want to manage SIM cards. You prefer a single monthly bill through the app.
Brands like Spypoint and Tactacam use this approach. It is the best choice for most people.
Choose a camera with a separate SIM card if: You want to use a specific carrier. You need flexibility in choosing a data plan. You already have a spare SIM from an existing account.
This path works well for tech savvy users who want full control.
Stick with a standard non cellular model if: You do not have cellular coverage at your property. You do not want a monthly data fee. A basic wildlife camera with an SD card is simpler and cheaper.
It does not send photos to your phone, but it also never needs a plan.
Final recommendation: For most properties with decent cellular coverage, a camera with a built in data plan is the easiest and most reliable option. Buy one that supports the best carrier in your area. Set it up using the steps above.
Test it for a week before trusting it for a critical hunting or security application.

Similar Posts