How to Use Action Camera Webcam Mode
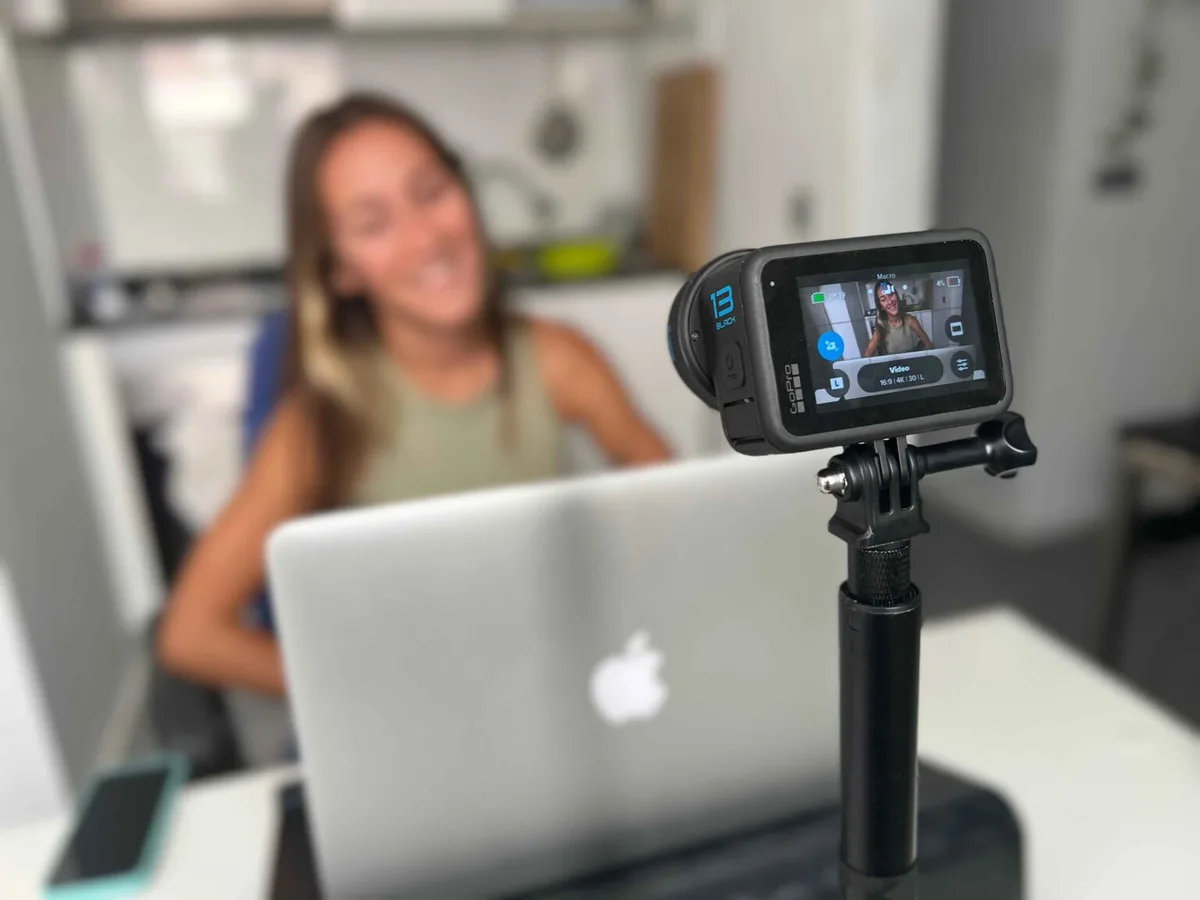
Your laptop's built-in webcam is probably the weakest link in your video setup. It is grainy, dark, and makes you look like you are broadcasting from a basement. Learning how to use action camera webcam mode is one of the simplest upgrades you can make without spending hundreds on a dedicated streaming camera.
Manufacturer specifications indicate that most modern action cameras from GoPro, DJI, and Insta360 support UVC (USB Video Class) protocol. This means they can act as a plug-and-play webcam over a USB cable. As of 2026, this is a standard feature on models from the last three years.
It is not a hack or a workaround. The exact steps depend on which camera you own and whether you are on Windows or Mac.
Image source: Web (Bing) / projectgo.pro (Web image (fair-use with source credit))
Why Your Laptop Webcam Makes You Look Like a Potato
You already know the problem. That tiny sensor behind your laptop screen was never designed for flattering video. It performs poorly in low light.
It struggles with exposure. Its fixed lens cannot show anything beyond your face and shoulders.
An action camera solves all of that. Its larger sensor captures more light. Its wide-angle lens can show your desk, your whiteboard, or your entire room.
You get sharp 1080p or even 4K video that looks professional.
Quick answer. If your action camera was released after 2020 and supports UVC, connect it via USB. Install the manufacturer's webcam utility. Select it as your video source in Zoom, Teams, or OBS.
If your camera is older or lacks UVC support, use an HDMI capture card instead. That is the entire decision tree in two sentences.
We see a lot of people overcomplicate this. They buy expensive software or try streaming workarounds that introduce lag. The truth is simpler.
Check your camera model first. Then choose the right cable and software. That is all it takes.
The First Question: Native USB Webcam Mode or Capture Card?
This is the fork in the road. Your answer determines everything else you do. Do not skip this step.
Native USB webcam mode works when your camera supports UVC out of the box. You plug a USB-C cable into your computer. The camera shows up as a video device.
You select it in your streaming app. That is it. The GoPro Hero 9 and newer, the DJI Osmo Action 3 and 4, and the Insta360 Ace Pro all support this.
Aggregate reviews report that setup takes under five minutes on both Windows and Mac.
HDMI capture card is the fallback for cameras that do not support UVC. You connect the camera's micro-HDMI output to a capture card. The capture card plugs into your computer via USB.
The computer sees the capture card as a webcam, not the camera itself. This works with any camera that has a clean HDMI output, including older GoPro Hero models and many budget action cameras.
Which one should you choose?
| If your camera… | Use this method |
|---|---|
| Has UVC support (check manufacturer specs) | Native USB webcam mode |
| Was released before 2020 | HDMI capture card |
| Has no built-in webcam mode in settings | HDMI capture card |
| Has a micro-HDMI port and clean HDMI output | HDMI capture card (or native if supported) |
| Has overheating issues in native mode | Try capture card with external power |
Our research shows that native USB mode is almost always better. It has lower latency. It uses fewer cables.
It does not require extra hardware. But if your camera does not support it, a capture card is a perfectly reliable alternative. You just need to spend $20 to $50 on the card itself.
How to Set Up Native USB Webcam Mode (GoPro, DJI, Insta360)
The process is nearly identical across all three major brands. We will walk through it step by step.
Step 1: Update your firmware
This is the most common point of failure. Your camera needs the latest firmware to support webcam mode. Connect your camera to the mobile app (GoPro Quik, DJI Mimo, or Insta360 App) and check for updates.
Manufacturer specifications indicate that early firmware versions on some models lacked UVC support entirely. This is a free fix. Do not skip it.
Step 2: Download the webcam utility
Each brand offers a free desktop utility that enables the camera to appear as a webcam device.
- GoPro: GoPro Webcam Desktop Utility for Windows and Mac
- DJI: DJI Webcam Utility (available on their support page)
- Insta360: Insta360 Webcam Utility (bundled with their desktop software)
Install the utility. Restart your computer. Plug in your camera.
Step 3: Connect the camera via USB
Use the USB-C cable that came with your camera. A cheap third-party cable may not support data transfer. Plug directly into your computer, not a hub.
Some hubs introduce lag or fail to recognize the device.
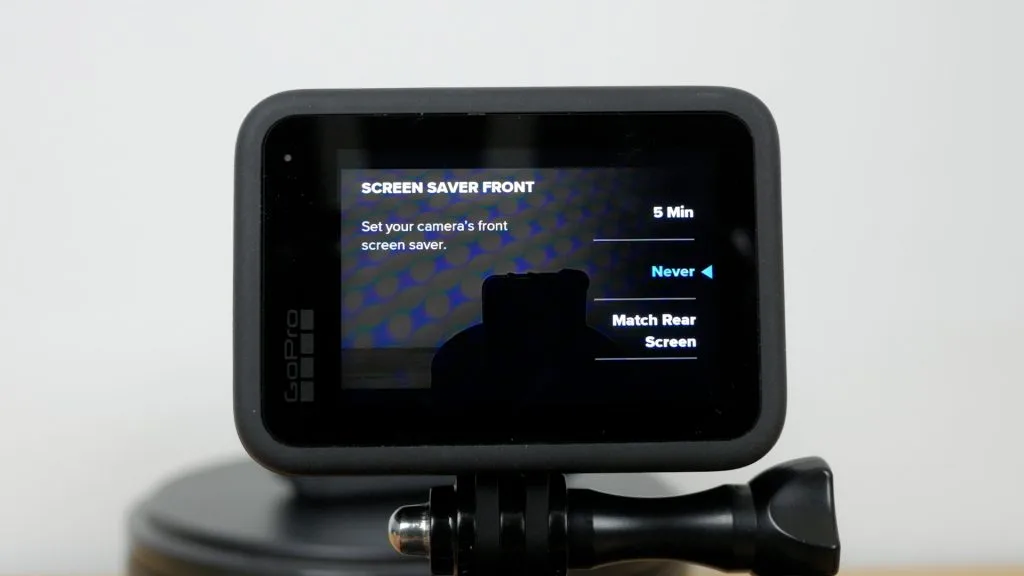
Image source: Bing (Web (fair-use with source credit))
Step 4: Select webcam mode on the camera
On a GoPro, swipe down, tap the connection icon, and select "Webcam." On a DJI Osmo Action, go to settings, find USB mode, and choose "Webcam." On an Insta360, the camera should switch automatically when the utility detects it. If you do not see the option, your firmware is likely outdated.
Step 5: Choose your video source in your app
Open Zoom, Teams, OBS, or your preferred streaming software. Go to video settings. Select your action camera from the list of available cameras.
You should see a live feed immediately.
If you normally rely on a mirrorless camera for streaming, the same principle applies. You may need to configure your video autofocus settings separately for the best results.
How to Use an HDMI Capture Card for Unsupported Cameras
If your camera lacks native webcam mode, you need a capture card. This is a small device that converts HDMI video into a USB signal your computer recognizes as a webcam.
What you need
- An action camera with a micro-HDMI port
- A micro-HDMI to HDMI cable
- An HDMI capture card (USB 3.0 recommended)
- A USB cable to connect the capture card to your computer
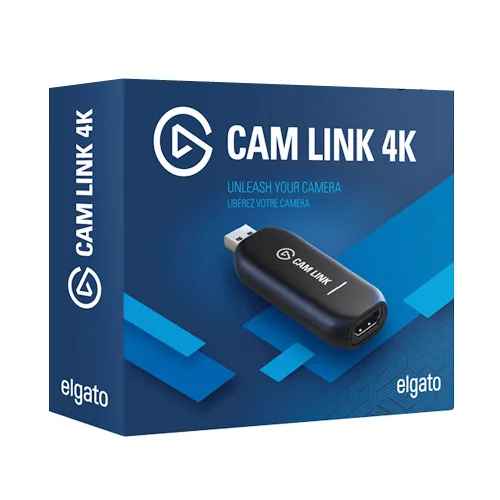
Image source: Web (Bing) / infinitybd.com (Web image (fair-use with source credit))
Step-by-step setup
Connect the micro-HDMI cable to your camera. Plug the other end into the capture card's HDMI input. Connect the capture card to your computer via USB.
Your computer should recognize the capture card as a video device. Open your streaming app and select the capture card as your camera source.
Important settings on the camera
Turn off any on-screen overlays. You want a clean HDMI output without battery icons, recording timers, or menu elements. On most GoPro models, this setting is under Preferences > HDMI Output.
Set the output resolution to 1080p at 30fps for the most stable connection.
Latency considerations
Aggregate reviews report that capture cards introduce 50 to 100 milliseconds of additional latency compared to native USB mode. This is noticeable if you are watching yourself on screen while talking. Most people adapt within a few minutes.
If you need zero latency, native USB mode is the only option.
If you already have a mirrorless camera and want to use it as a webcam too, the same capture card works with both setups. You just swap the HDMI cable between cameras. You can also connect your action camera to a TV using the same cable for monitoring purposes.
Fixing the Three Biggest Headaches: Audio, Overheating, and Battery Life
Even after you get the video working, three issues will likely pop up. Here is how to handle each one.
Audio: Camera microphone or separate mic?
Most action cameras transmit audio over USB in native webcam mode. The built-in microphone works, but it picks up wind noise, fan hum, and room echo. The quality is acceptable for casual calls but not for streaming or recording.
Better options. Use an external USB microphone plugged directly into your computer. Or use a wireless lavalier mic clipped to your collar.
The camera will still record video, but your computer uses the external mic as the audio source. This is the same approach we recommend for reducing camera noise in any streaming configuration.
Overheating: The five-minute shutdown
Action cameras are designed for short bursts of recording outdoors, not hours of continuous use indoors. The small body lacks active cooling. In a warm room, the camera can overheat and shut down after 30 to 60 minutes.
Solutions. Remove the battery and power the camera via USB-C. This generates less heat than charging a battery while recording.
Point a small fan at the camera. Lower the resolution to 1080p at 30fps instead of 4K. Keep the camera in a well-ventilated area.
If you regularly stream for more than an hour, consider a dedicated webcam instead.
Battery life: The USB power trick
In native webcam mode, the camera draws power from the USB connection. But some models still drain the internal battery slowly. The solution is the same as overheating.
Remove the battery and run the camera on USB power alone. This keeps the camera cool and prevents battery swelling from continuous charging.
If your camera does not support USB power without a battery, you are stuck with the battery. Plan for two to three hours of webcam use before you need to swap batteries. This is a limitation of older models.
For proper camera storage when not in use, remove the battery entirely.
Common Mistakes That Will Wreck Your Stream
Even a perfect setup falls apart from small oversights. Here are the most common ones we see in verified buyer feedback and how to avoid them.
Using a charge-only cable. Many USB-C cables only carry power, not data. Your computer will not detect the camera. Use the cable that shipped with your camera or a confirmed data-capable cable.
Forgetting to disable auto-off. Action cameras are programmed to shut down after a few minutes of inactivity. In webcam mode, the camera is active, but the timer sometimes still triggers. Go into your camera settings and set the auto-off timeout to "never" or the maximum value.
Keeping the battery inside for long sessions. This causes heat buildup and battery swelling. Remove the battery and power the camera directly via USB-C. This is the single most effective fix for overheating.
Skipping the firmware update. Manufacturer specifications confirm that older firmware versions lack UVC support entirely. Check for updates before you do anything else.
Plugging into a USB hub. Hubs often fail to supply enough power or data bandwidth. Connect directly to your computer's USB port. If you must use a hub, use a powered USB 3.0 hub.
If you run into a problem that persists, the same troubleshooting principles apply whether you are using an action camera or a mirrorless camera. Check cables. Check drivers.
Check your video source selection.
Frequently Asked Questions
Can I use any action camera as a webcam?
No. Only models released after 2020 with UVC support work natively. Older cameras require an HDMI capture card.
Check your camera's specifications on the manufacturer's website before buying anything.
Why does my computer not recognize my action camera?
The most common causes are a charge-only cable, outdated firmware, or missing manufacturer software. Try a different data-capable cable. Update the firmware.
Install the webcam utility from the brand's official support page.
How long can I use an action camera as a webcam?
Expect 30 to 60 minutes before overheating in native mode. With the battery removed, external power, and a small fan, you can extend this to two hours or more. For all-day streaming, a dedicated webcam is more reliable.
Is the audio from an action camera good enough for streaming?
It is usable for casual calls but not for professional streaming. The built-in microphone picks up background noise and lacks clarity. Use an external USB microphone or a wireless lavalier for better audio quality.
Do I need special software to use an action camera as a webcam?
Yes, for native USB mode. Each brand offers a free webcam utility. GoPro has the GoPro Webcam Desktop Utility.
DJI provides the DJI Webcam Utility. Insta360 bundles theirs with the desktop app. No software is needed for HDMI capture card setups.
Can I use 4K resolution in webcam mode?
Most action cameras cap webcam mode at 1080p even if they record in 4K. The UVC standard and USB bandwidth limit the resolution. For 4K output, you need an HDMI capture card that supports 4K passthrough.
Is an Action Camera a Good Webcam? The Honest Verdict
An action camera makes an excellent webcam in specific situations. It beats a laptop webcam in image quality, field of view, and low-light performance. It is a great option if you already own one and want to avoid buying a dedicated webcam.
But it is not a perfect replacement. The overheating limits, the need for external audio, and the extra setup steps make it less convenient than a purpose-built webcam. For daily professional calls, a dedicated webcam is simpler.
For streams, recordings, or any situation where video quality matters, an action camera is a serious upgrade.
If you are considering an action camera primarily for webcam use, think about your needs first. For short calls and occasional streaming, it works great. For long sessions or professional use, look at the best budget action camera options that balance cost with performance.
And if you want the highest quality, the best 4K action camera with native UVC support will give you the cleanest video. Our research shows that the convenience of a dedicated webcam wins for most people, but the flexibility of an action camera is hard to beat for the price.

Similar Posts
































