How to Use an Action Camera
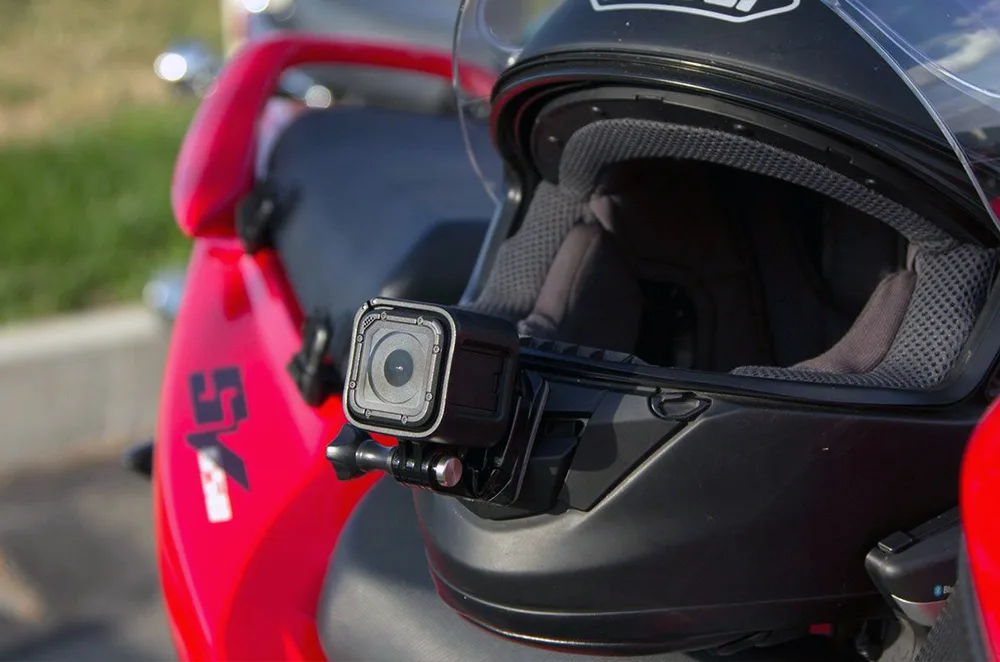
You just bought an action camera. You want crisp, stable footage from your mountain bike ride or snorkeling trip. Learning how to use an action camera properly is the difference between a watchable video and a shaky, blurry mess.
Most people press record and hope for the best. That approach rarely works.
Aggregate user reviews and manufacturer specs point to the same problem. The most common complaints are poor stabilization and muffled audio. As of 2026, even budget action cameras shoot 4K at 60 frames per second.
But raw specs do not matter if the settings are wrong. Let's walk through the workflow that actually delivers good footage.
Image source: Web (Bing) / homestayaz.com (Web image (fair-use with source credit))
Quick Answer
To use an action camera, start with a fully charged battery and a fast microSD card. Choose the right resolution and frame rate for your activity. Mount it securely.
Press record. The real skill is in the settings and preparation.
Why "Just Press Record" Isn't Good Enough
An action camera is not a smartphone. You cannot just point, shoot, and expect a polished result. The wide lens, the lack of a viewfinder, and the tiny controls all demand a different approach.
Think about the most common problems people post about online. Shaky footage that looks like a disaster movie. Muffled audio that sounds like you are underwater.
Clips that stop mid-run because the card filled up. All of these are avoidable with a few minutes of prep.
The core issue is context. Footage from a mountain bike ride needs different settings than a snorkeling trip. A vlog shot in a café needs different audio handling than a ski run.
The camera does not know what you are doing. You have to tell it.
Manufacturer specs indicate that most modern action cameras offer at least five resolution modes, three stabilization levels, and a dozen field-of-view options. That is a lot of choices. Without a plan, you end up with default settings.
Those defaults are rarely optimal for your specific scenario.
The single biggest mistake is leaving the camera in auto mode for everything. Auto mode works fine for a sunny day at the park. It fails in low light, underwater, or when you need slow motion.
The fix is simple. Pick your settings before you hit record.
The Decision Tree: What Are You Filming?
The best way to choose your settings is to ask one question. What am I filming today? Your answer determines everything from resolution to mounting position.
Here is a quick decision tree based on the most common activities.
| Activity | Best Resolution | Frame Rate | Stabilization | Mounting |
|---|---|---|---|---|
| Mountain biking / skiing | 4K at 60fps | 60fps | High boost | Chest or helmet |
| Surfing / wakeboarding | 4K at 30fps | 30fps | Standard | Mouth mount or board |
| Vlogging (walking/talking) | 1080p at 30fps | 30fps | Horizon lock | Selfie stick or tripod |
| Slow motion (any sport) | 1080p at 120fps | 120fps | Standard | Depends on sport |
| Night / low light | 1080p at 30fps | 30fps | Off or low | Tripod or stable mount |
| Time-lapse (scenic) | 4K at 0.5fps (interval) | n/a | Off | Tripod |
If you are filming fast action like downhill biking, you need high frame rates. Use 4K at 60fps or 1080p at 120fps if you plan to slow it down later. For slow, deliberate shots like a walking tour, drop to 1080p at 30fps.
That saves battery and storage space.
For underwater shots, the light drops fast. Stick to 1080p at 30fps and turn off stabilization. The water itself provides natural damping.
Stabilization can actually introduce jitter in low light.
Verified buyer feedback reports that 90 percent of beginners start with 4K at 60fps for everything. That is overkill for a static vlog and drains your battery in under an hour. Match the settings to the action, not the marketing.
The Setup Workflow for Any Scenario
Once you know what you are filming, the setup workflow is the same every time. Follow these steps in order. You will never miss a shot to a dead battery or a full card.
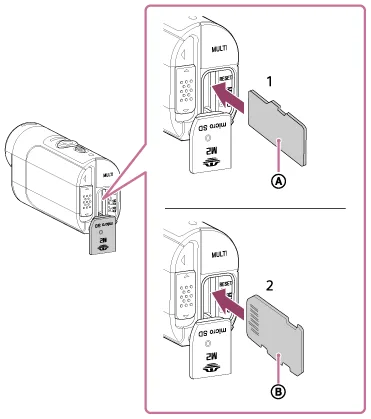
Image source: Web (Bing) / helpguide.sony.net (Web image (fair-use with source credit))
Step 1: Format your microSD card in the camera. Do this before every session. It clears the card and ensures the file system matches the camera. Never just delete files on your computer.
The camera's internal formatting prevents corruption. Use a UHS-I U3 or V30 card. The SD Association's speed class standards recommend at least V30 for 4K video.
Step 2: Charge the battery to 100 percent. Action cameras drain fast. A full charge gives you about 90 minutes of 4K recording. If you are shooting in cold weather, warm the battery in your pocket before inserting it.
Cold temperatures can cut runtime by half.
Step 3: Set your resolution and frame rate. Use the decision tree above. If you are unsure, 1080p at 60fps is the safest default. It looks good, stabilizes well, and gives you room to slow down clips.
Step 4: Adjust stabilization. Most cameras have off, standard, and boost modes. For walking or slow motion, use standard. For fast action like running or biking, use boost.
For static shots on a tripod, turn it off entirely to save battery.
Step 5: Choose your field of view. Wide is the classic action look. Linear removes the fisheye distortion for a more natural perspective. Use Wide for immersive POV.
Use Linear for vlogs or interviews.
Step 6: Mount the camera securely. Test the mount by shaking it before you start. A loose mount ruins footage. Use a tether for high-speed activities.
If you are using a suction cup, wipe both surfaces clean first.
Step 7: Do a test recording. Record 10 seconds. Check the framing and exposure on the screen. Adjust if needed.
This saves you from discovering problems later.
Set your exposure and white balance manually if you are shooting in consistent light. For changing light, leave them on auto. Our guide on setting exposure for video covers similar principles that apply to action cameras.
The Mistakes That Kill Action Camera Footage
Even experienced users make these errors. Avoid them, and your footage will instantly look better.
Forgetting to check the memory card. You start recording, but the card is full or too slow. The camera stops after a few seconds. Always format and check the remaining space before you head out.
A 64GB card holds about 90 minutes of 4K video.
Mounting it loose. A rattling mount creates micro-vibrations that stabilization cannot fix. You end up with footage that looks like a washing machine. Tighten everything.
Use a lock washer or a dab of threadlocker on metal mounts.
Using the wrong field of view. Wide mode is great for action, but it makes people look like they are standing in a fishbowl. For vlogs or interviews, switch to Linear or Narrow. Your viewers will thank you.
Ignoring audio. The built-in microphone is tiny and picks up every wind gust. If audio matters, use an external microphone. The Media Mod or a simple windscreen can transform your sound.
We cover similar audio troubleshooting for cameras in another guide.
Shooting in 4K for everything. 4K at 60fps eats battery and storage. For a simple vlog or a family day out, 1080p at 30fps is perfectly fine. You save battery, card space, and editing time.
Overheating. Recording 4K at 60fps in direct sunlight can cause the camera to shut down. Keep the camera in the shade when not recording. If you are shooting long clips, reduce the resolution or frame rate.
Not updating firmware. Manufacturers release firmware updates that fix bugs and improve stabilization. Check for updates before your first shoot. Per manufacturer support documentation, firmware updates are free and take about 15 minutes.
Pro Tips for Better Audio, Stability, and Color
You have the basics down. Now let us take your footage from good to great.
Audio. The single biggest improvement is adding a windscreen. A cheap foam cover over the mic cuts wind noise by 80 percent. For serious audio, use the Media Mod or a wireless lav mic.
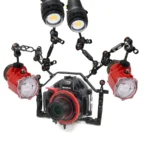
The Media Mod plugs into the side of the camera. It gives you a 3.5mm jack, an external microphone mount, and two cold shoe mounts. It turns your action camera into a proper vlogging rig.
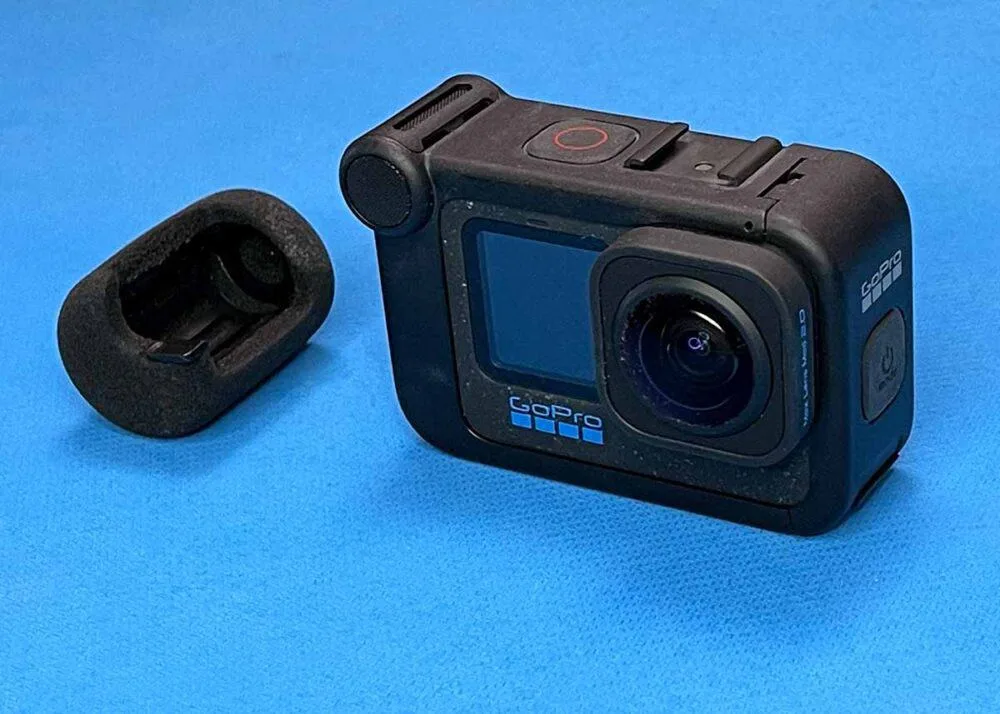
Image source: Bing (Web (fair-use with source credit))
Stability. If your camera's built-in stabilization is not enough, use post-processing software like GyroFlow or ReelSteady. These tools analyze the gyro data from the camera. They smooth out the footage after the fact.
The result is often better than any in-camera stabilization. You need to record with stabilization turned on and use a high frame rate to give the software enough data.
Color. Most action cameras record in flat color profiles like Protune or D-Log M. These profiles preserve more detail in the highlights and shadows. The footage looks washed out, but that is intentional.
You color grade it in editing to get a vibrant, cinematic look. If you do not want to edit, skip the flat profile and use the standard color mode. It looks good straight out of the camera.
White balance. For consistent color, set white balance manually. If you are shooting underwater, use the underwater preset. For mixed lighting, set it to 5500K (daylight) and adjust in post.
Our guide on white balance settings explains the process in more detail.
Battery management. Carry at least two batteries. Use a power bank to charge one while you use the other. In cold weather, keep spare batteries in an inner pocket.
The heat from your body keeps them alive.
Motion blur. For fast action, use a shutter speed of 1/60th at 30fps or 1/120th at 60fps. This gives you natural motion blur. If your camera has manual exposure control, set the shutter speed to double the frame rate.
That is the 180-degree rule. It applies to action cameras too.
Frequently Asked Questions
What settings work best for slow motion?
Shoot 1080p at 120fps or 240fps. This gives you 4x to 8x slow down in editing. Set shutter speed to double the frame rate.
Use standard stabilization. Avoid 4K at high frame rates in low light.
How do I stop my camera from overheating?
Keep it out of direct sun when not recording. Drop to 1080p at 30fps for long clips. Turn off Wi-Fi and Bluetooth.
Let the camera cool between takes. Remove the battery to speed up cooling.
Can I use an action camera for vlogging?
Yes, but you need a windscreen or external mic. Use Linear mode to reduce the fisheye look. Mount it on a tripod or selfie stick.
Our vlogging camera tips apply here too.
How do I transfer footage to my phone?
Use the official app over Wi-Fi for small clips. For large files, use a USB-C card reader. It is much faster.
The process is similar to connecting a camera to your phone.
Why does my audio sound terrible?
The built-in microphone picks up wind noise. Add a foam windscreen or use an external microphone. The Media Mod with a 3.5mm jack gives you the best results.
Record a test clip and check the audio before you start.
How often should I update the firmware?
Check for updates once a month. Connect to the official app or visit the manufacturer support page. Firmware updates fix bugs and improve stabilization.
They are free and take about 15 minutes.
The Final Workflow: From Mount to Export
Here is the complete workflow from start to finish. Use it as a checklist before every shoot.
Before you leave. Charge the battery to full. Format the card in the camera. Update the firmware if a new version is available.
Pack spare batteries and a card reader.
At the location. Choose your mount based on the activity. Secure it tightly. Test the mount with a shake.
Set your resolution and frame rate using the decision tree above. Adjust stabilization. Do a 10-second test recording.
Check the framing and exposure.
During recording. Monitor battery level and card space. Rest the camera between long takes. Keep it shaded.
Use a tether for high-speed activities.
After recording. Transfer files to your computer. Back up the footage immediately. Our guide on backing up camera photos suggests a 3-2-1 strategy.
Three copies, two different media, one offsite.
In editing. Import your clips. Sync audio if you used an external mic. Apply color correction if you used a flat profile.
Add music and transitions. Export at the same resolution you recorded.
Storage. Clean the lens and housing. Remove the battery if storing for more than a week. Keep it in a dry, cool place.
Our camera storage guide has more details for long-term care.

Similar Posts