How to Use Live View on DSLR Camera
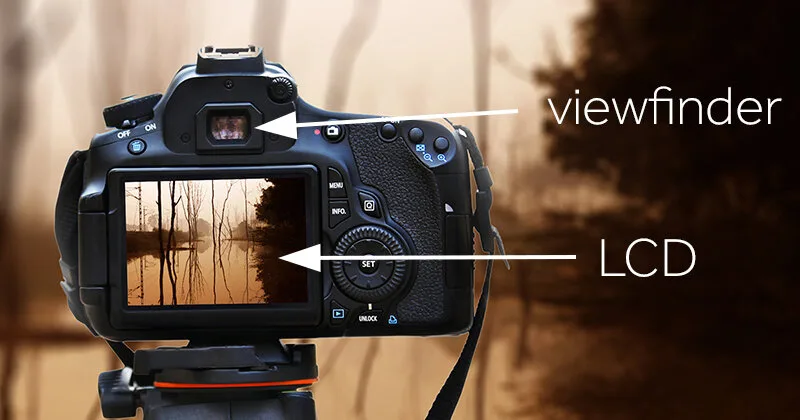
So you’ve got a DSLR and you’re staring at that optical viewfinder, wondering why everyone keeps talking about the LCD screen instead. The truth is, learning how to use live view on a DSLR camera completely changes the way you frame, focus, and expose your shots. It turns your camera into something that behaves more like a mirrorless body, at least for a moment.
Live view activates the sensor directly and shows you a real-time preview of exactly what your final image will look like. It’s not a new feature, DSLRs have had it for over a decade, but most photographers don’t use it well. Per CIPA battery life testing standards, a DSLR running in live view typically gets 30 to 50 percent fewer shots per charge than when using the optical viewfinder.
That trade-off is worth it when you know what you’re doing. Let’s walk through the process step by step.
Quick Answer
Press the Live View button on your camera body. The mirror flips up and the LCD screen turns on. Use the touchscreen or directional pad to move the focus point.
Magnify the view for manual focus. Enable exposure simulation so the screen matches your final shot. Press the shutter button halfway to focus, then fully to capture.
Why Use Live View (And When to Stick with the Viewfinder)
Live view gives you a live exposure preview. You see brightness, colour, and depth of field before you press the shutter. That’s a huge advantage over the optical viewfinder, which shows the scene through the lens but not the final exposure.
For landscape shooters, this alone saves time and prevents underexposed frames.
But live view drains the battery faster. Manufacturer specs confirm that live view cuts battery life by roughly half compared to using the viewfinder. A single battery may only last 350 shots in live view.
That matters if you’re shooting all day without a spare pack. Live view also introduces a slight lag, especially in low light. The sensor has to read data continuously, and that takes processing power.
So when should you use it? Stick with the optical viewfinder for fast action photography where split-second timing matters. For those scenarios, you want a reliable autofocus system and instant response.
Switch to live view for tripod-based work, macro shots, studio product photography, or any scene where you need precise composition. You can see the grid overlay, check the histogram, and zoom in to confirm focus. A dedicated landscape body handles live view especially well.
How to Get Live View Up and Running (And What You’ll See)
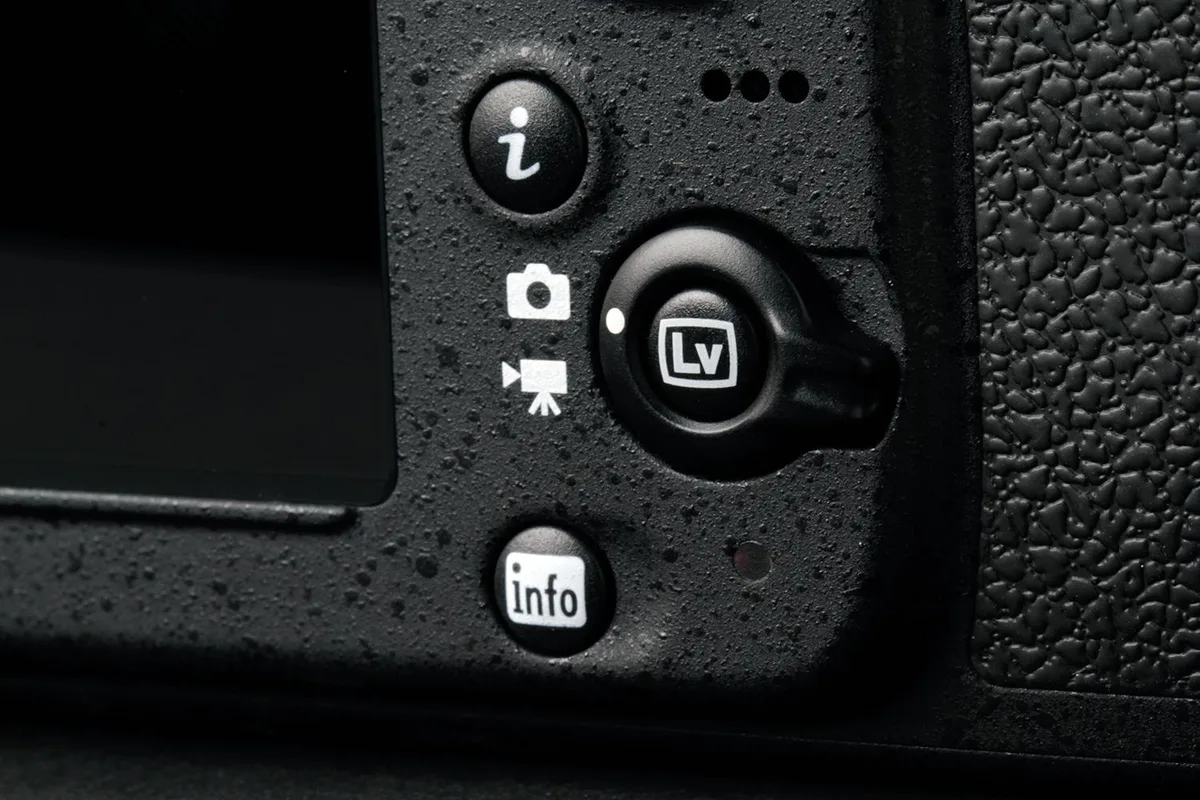
Find the Live View button on your camera. On Canon bodies, it’s usually a small camera icon with a circle around it near the top-right of the back panel. On Nikon cameras, look for the “LV” button next to the viewfinder.
Sony DSLTs and Pentax bodies have their own variations, but the icon is almost always a camera silhouette with a curved arrow.
Press it once. You’ll hear the mirror flip up inside the body. The optical viewfinder goes dark.
Your LCD screen lights up with a live feed straight from the sensor.
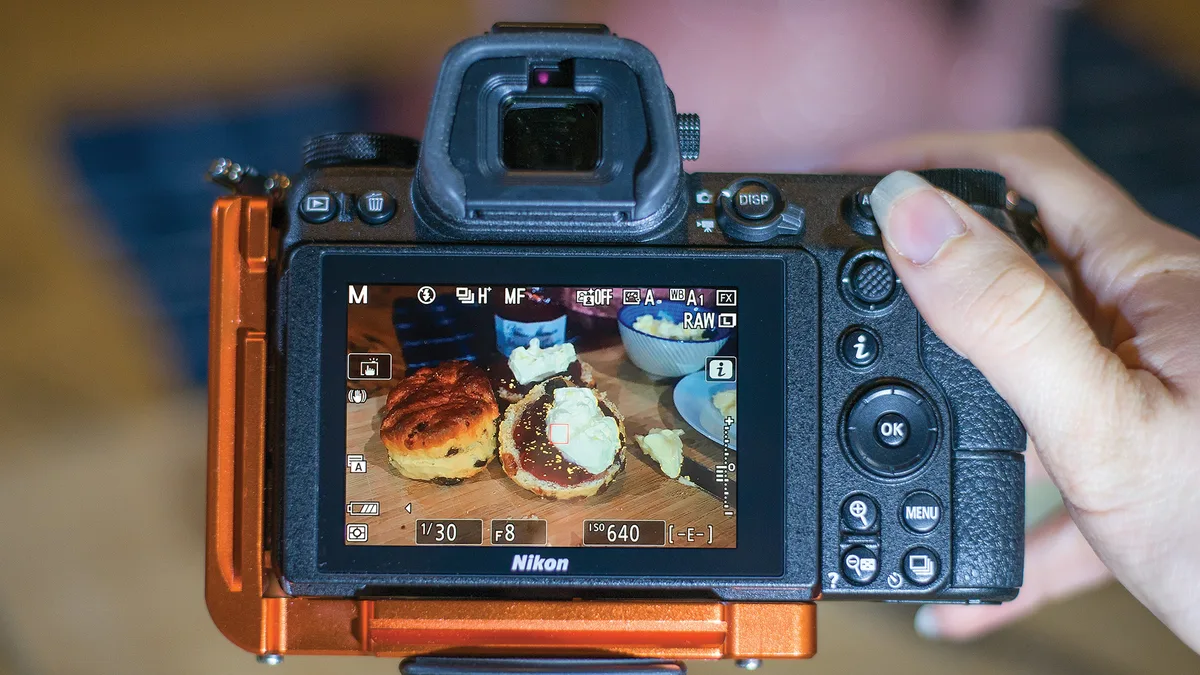
What you’ll see on screen varies by brand, but most cameras show these elements by default:
- A live histogram (usually in the corner)
- A grid overlay (rule of thirds or square grid)
- Exposure compensation scale
- Autofocus points or zones
- Battery level and shots remaining
Turn on exposure simulation if it isn’t already active. This setting makes the LCD brightness match the actual exposure. Without it, the screen may look bright even when the shot is underexposed.
Check your camera’s menu under “Live View Display” or “Exposure Simulation” and set it to Enable.
If your camera has a touchscreen, you can tap anywhere to focus. Pinch to zoom in on a specific area. Drag to reposition the focus point.
This makes live view far more intuitive than using buttons, especially for overhead or low-angle shots. If you’re starting out in landscape photography, these touch controls are a game changer.
Focusing in Live View: The Two Tools You Need to Master
Manual focus in live view is where the feature really shines. Use the magnified view to check critical sharpness. Press the zoom button to cycle through 5x and 10x magnification.
At 10x, you can see individual pixels and confirm that eyelashes, textures, or fine details are tack sharp.
Focus peaking is the second tool. It highlights areas of maximum contrast in a bright colour, usually red, yellow, or white. As you turn the focus ring, the peaking colour moves across the subject.
When it lines up with your intended focus point, you’re in focus. You can adjust peaking sensitivity in the menu. Low is good for general use.
High is better for precise work with wide apertures.
Autofocus in live view works differently than through the viewfinder. Most DSLRs use contrast-detection AF in live view, which hunts back and forth before locking. Newer models with on-sensor phase-detection, like Canon’s Dual Pixel CMOS AF, are much faster.
Face and eye tracking work well for portraits but can struggle in low light.
If your camera has slow autofocus in live view, switch to manual focus and use magnification. It’s slower but more reliable. Good low light autofocus is important if you shoot in dim conditions.
Common Live View Mistakes (And How to Fix Them on the Fly)
The biggest mistake is relying on autofocus in dim conditions. Live view AF needs contrast to lock on. In a dark room or at twilight, the lens will hunt for seconds.
The fix is simple: switch to manual focus, magnify the view to 10x, and focus by eye. Or use a focus assist light if your camera has one.
Another common error is forgetting to enable exposure simulation. You set your shot, check the LCD, and it looks fine. Then you import the image and it’s two stops underexposed.
That’s because the screen was set to a fixed brightness, not showing the actual exposure. Always check that exposure simulation is on before you shoot.
Battery drain catches everyone off guard. Live view uses the sensor, processor, and screen simultaneously. A fresh battery that lasts 800 shots through the viewfinder might only give you 350 in live view.
Carry a spare. Turn off live view between shots. Use the camera’s power-saving settings to dim the screen after a few seconds of inactivity.
Overheating is rare with stills but common with extended video recording in live view. Most DSLRs have a thermal limit that triggers an auto-shutdown after 20 to 30 minutes of continuous 4K recording. If you’re shooting video, monitor the camera body temperature.
Give it a break every 15 minutes.
Screen glare outdoors is frustrating. A bright LCD washes out in direct sunlight. Use a sun hood that attaches to the screen.
Increase the LCD brightness in the menu. Or use the optical viewfinder for framing and only switch to live view to check focus and exposure. Handling dark scenes works better with a body that has strong phase-detect AF.
Frequently Asked Questions About Live View
Can I use live view for video?
Yes. Live view is the only way to compose and shoot video on a DSLR. The optical viewfinder goes dark when recording, so the LCD is your primary display.
The same focusing tools work in video mode, including face detection, touch focus, and peaking.
Why is my live view image laggy or stuttering?
Lag happens when the camera’s processor can’t keep up with the sensor readout. Low light slows the frame rate. Older DSLRs with contrast-detect AF lag more than newer models with phase-detect.
Try increasing the ISO or adding light. If the lag persists, switch to the optical viewfinder.
Does live view drain the battery faster?
Significantly. Manufacturer testing shows a 30 to 50 percent reduction in battery life when using live view compared to the optical viewfinder. Always carry a spare battery if you plan to shoot in live view for extended periods, especially during a long day out.
Is live view safe for the sensor?
Live view itself is safe. The sensor is designed to be active for extended periods. However, pointing the camera directly at the sun or a bright laser while in live view can damage the sensor.
The same risk applies to the optical viewfinder, but the sensor is more vulnerable.
Can I use live view with a tripod and remote shutter?
Absolutely. This is one of the best use cases. Live view combined with a tripod eliminates camera shake.
Use a remote shutter or the camera’s self-timer to trigger the shot without touching the body. Magnify the view to confirm focus, then release the shutter hands-free.

Similar Posts




















[…] If you're already familiar with using live view for composing shots, you can adapt that same skill for reviewing your work on a bigger screen. The same principle applies when you want to review your images on an external monitor. […]