How to Connect Mirrorless Camera to TV
You've just spent a solid chunk of change on a mirrorless camera. The photos look incredible on the tiny back screen. You want to share them on the big TV with the family.
So you grab an HDMI cable, plug one end into the camera, the other into the TV, and … nothing. Maybe a "No Signal" message. Maybe a black screen.
Maybe you're staring at the camera's menu interface instead of your lovely photo. Welcome to the surprisingly frustrating world of how to connect mirrorless camera to TV.
This isn't a one-cable-fits-all situation. It's a decision tree. The right path depends on your specific camera model, the port it uses, and a handful of settings you might not know exist.
As of 2026, the vast majority of mirrorless cameras have moved away from full-size HDMI ports. That complicates things. And manufacturers don't include the adapter you'll likely need.
Let's map out the route so you never see that dreaded "No Signal" again.
Quick Answer
Connect mirrorless camera to TV using an HDMI cable. Check your camera's port type first. It's likely mini-HDMI or micro-HDMI.
Buy the correct adapter or cable. Plug cable into your camera and a free TV HDMI port. Turn on both devices.
Set your TV to the correct HDMI input. Put your camera in playback mode. Your photos should appear on screen.
The "No Signal" Nightmare: Why This Is Harder Than It Should Be
The process should be simple. Plug in a cable. See your pictures.
End of story.
But the electronics industry didn't design it that way. Mirrorless cameras are engineered to be compact. That means they don't have room for a full-size HDMI port.
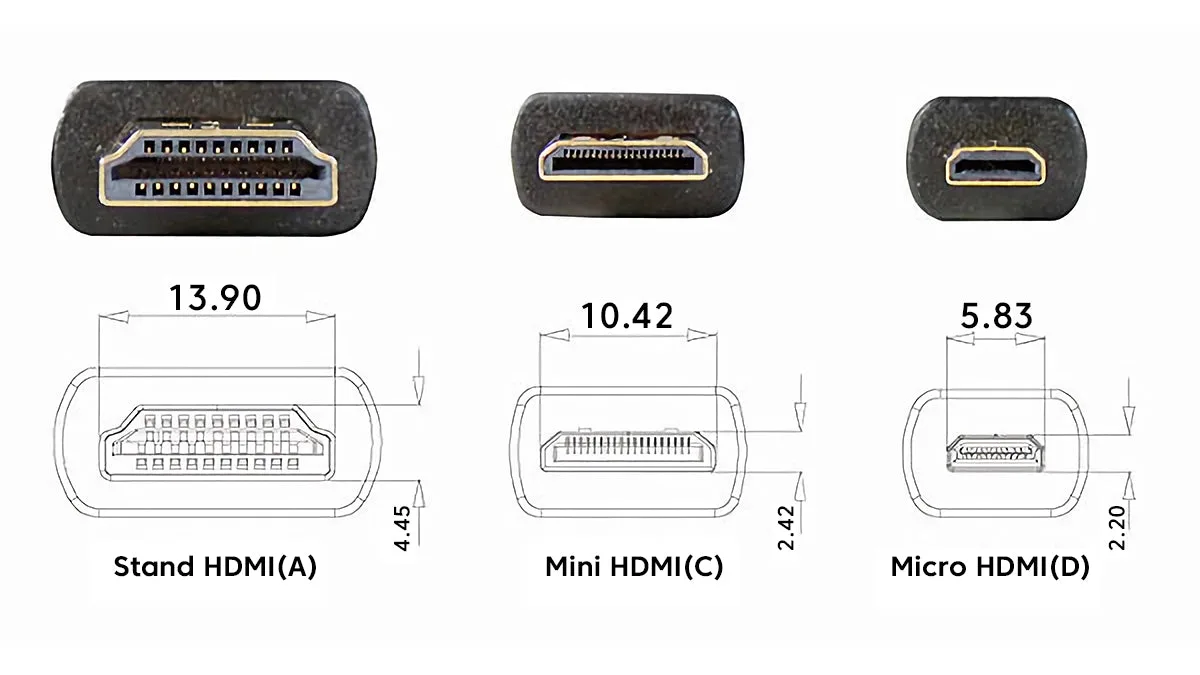
Instead, you'll find one of three smaller ports: mini-HDMI, micro-HDMI, or sometimes a USB-C port that can carry video. Your TV, on the other hand, almost certainly uses a full-size HDMI port.
This mismatch is the root of most problems. You need the right cable or adapter just to physically connect the two devices. And even then, the camera might not automatically send a signal to the TV.
You have to tell it to.
The "No Signal" message you're seeing is usually caused by one of these things:
- Wrong cable or adapter type
- TV set to the wrong input source
- Camera in the wrong mode (it needs to be in playback, not live view in some cases)
- HDMI output settings on the camera not configured correctly
Our research shows that the third issue, camera mode, trips up more people than you'd expect. Many cameras default to sending a live view video feed when you connect an HDMI cable. To see your photos, you need to switch to playback mode.
That's usually a button marked with a play icon or a dedicated mode dial setting.
If you're already familiar with using live view for composing shots, you can adapt that same skill for reviewing your work on a bigger screen. The same principle applies when you want to review your images on an external monitor.
The Two-Minute Answer: What You Need (and What You Don't)
Before we dive into the full decision tree, here's the short version of everything you need to make this work.
Hardware you need:
- An HDMI cable (full-size Type A on both ends)
- An adapter or cable that matches your camera's port
- Your mirrorless camera with a charged battery
- Your TV with a free HDMI port
Hardware you don't need:
- A computer
- A capture card
- Any special software
- Wireless dongles (unless you want wireless, which is a different topic)
The cable types by camera port:
| Camera Port Type | What You Need |
|---|---|
| Full-size HDMI | Standard HDMI to HDMI cable |
| Mini-HDMI (Type C) | Mini-HDMI to HDMI cable, or mini-HDMI to HDMI adapter + standard HDMI cable |
| Micro-HDMI (Type D) | Micro-HDMI to HDMI cable, or micro-HDMI to HDMI adapter + standard HDMI cable |
| USB-C (with DisplayPort Alt Mode) | USB-C to HDMI cable (must support video output) |
Most mirrorless cameras from Sony, Fujifilm, Nikon, Canon, Panasonic, and Olympus use mini-HDMI or micro-HDMI. If you're not sure, check the port on the side of your camera. It's usually labeled "HDMI" in very small text.
Or look up your model's specs on the manufacturer's website.
The setup process here is similar to what you'd do for a different camera type. If you've ever connected a DSLR to your television, the steps are nearly identical once you have the right cable.
Why Your Camera and TV Need a Translator (The Port Problem)
Image source: Web (Bing) / acemagic.com (Web image (fair-use with source credit))
Here's the physical reality. Your TV has a full-size HDMI port. It's the same size as the one on your game console or streaming stick.
That's the standard defined by the HDMI Licensing Administrator.
Your camera, being small and sleek, uses a smaller version. The HDMI standard defines two smaller form factors: mini-HDMI (Type C) and micro-HDMI (Type D). They look similar but are not interchangeable.
Trying to force the wrong one into the port can damage both the cable and the camera.
Think of it like this. You're trying to plug a European plug into a US outlet. The electricity is the same (the HDMI signal), but the physical connector is different.
You need a travel adapter.
The same principle applies here. You need a cable that has a small connector on one end (to fit your camera) and a full-size connector on the other end (to fit your TV). Or you can use a small adapter that plugs into your camera, then connect a standard HDMI cable to the adapter.
Which one should you buy?
- A single cable (mini-HDMI to HDMI, for example) is simpler. One cable, two ends, no extra pieces to lose.
- A cable plus adapter combo is more flexible. You can use any standard HDMI cable you already own and just swap the adapter for different cameras.
Our recommendation is to buy a dedicated cable that matches your camera's port. They're widely available and relatively inexpensive. Just make sure you get the right one for your specific camera model.
Check the port before you order.
The Decision Tree: Which Cable and Settings Work for Your Setup
This is where we figure out your exact situation. Follow the branch that matches your camera's port.
Branch 1: Your Camera Has a Full-Size HDMI Port
This is the easiest scenario. You're in luck.
What to do:
- Get a standard HDMI cable (any length you need, 3 to 6 feet is usually fine).
- Plug one end into the camera's HDMI port.
- Plug the other end into any free HDMI port on your TV.
- Turn on both devices.
- Set your TV's input source to the HDMI port you used.
- Put your camera in playback mode.
That's it. You should see your photos and videos on the big screen. If you don't, move to the settings section below.
Branch 2: Your Camera Has a Mini-HDMI Port
This is the most common port on mirrorless cameras as of 2026. It's smaller than a full-size HDMI, about the width of your pinky finger.
What to do:
- Buy a mini-HDMI to HDMI cable. Or get a mini-HDMI to HDMI adapter and use a standard HDMI cable.
- Connect the mini end to your camera.
- Connect the full-size end to your TV.
- Power everything on.
- Select the correct HDMI input on your TV.
- Switch your camera to playback mode.
This should work 90% of the time. The remaining 10% is where camera settings come into play.
Branch 3: Your Camera Has a Micro-HDMI Port
Micro-HDMI is even smaller than mini-HDMI. It's very thin, similar to a micro-USB port. Some compact mirrorless cameras use this.
What to do:
- Buy a micro-HDMI to HDMI cable. Or use a micro-HDMI to HDMI adapter with a standard cable.
- Be careful when inserting the micro connector. It's fragile. Don't force it.
- Connect to your TV.
- Select the correct input.
- Use playback mode on your camera.
A common issue with micro-HDMI is that the connector can be loose or wobbly. If your screen flickers or cuts out, try a different cable or a slightly different angle. Also, make sure the cable is fully inserted.
It can feel like it's in when it's not.
Branch 4: Your Camera Only Has USB-C
Some newer mirrorless cameras (like the Nikon Z30 or some Sony models) have a USB-C port that can output video. Not all USB-C ports do this. You need one that supports DisplayPort Alt Mode or USB-C video output.
What to do:
- Check your camera's manual to confirm it supports video output over USB-C.
- Buy a USB-C to HDMI cable. This is a specific cable, not a standard USB-C cable.
- Connect the USB-C end to your camera.
- Connect the HDMI end to your TV.
- Select the correct input.
- Put your camera in playback mode.
If you use a standard USB-C cable (like the one that charges your phone), it won't work. It needs to be a cable designed for video transmission. The manufacturer's website or support page will tell you if your camera supports this feature.
Step-by-Step: Connecting and Getting the Signal to Show
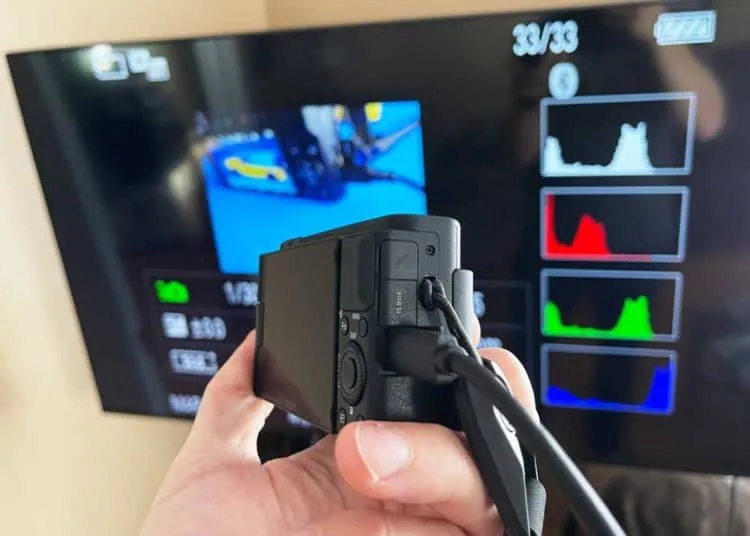
Image source: Bing (Web (fair-use with source credit))
Now that you know which branch you're on, here's the actual step-by-step process. Follow these in order.
Step 1: Identify your camera's port.
Look at the side of your camera. Find the port. Is it full-size, mini, micro, or USB-C?
If you can't tell, compare the size of the hole to the size of a standard HDMI plug. If it's much smaller, it's mini or micro.
Step 2: Get the right cable or adapter.
If you don't already have one, buy it now. Plug it into your camera. Make sure it clicks or seats firmly.
Don't force it.
Step 3: Connect to your TV.
Plug the other end of the cable into any free HDMI port on your TV. Note which number it is (HDMI 1, HDMI 2, etc.).
Step 4: Power on both devices.
Turn on your TV. Turn on your camera. Make sure your camera has enough battery charge.
A low battery can cause the signal to drop. If you find your camera drains quickly during this process, there are ways to extend your camera's battery life for longer sessions.
Step 5: Select the correct TV input.
Use your TV remote. Look for a button labeled "Input," "Source," or something similar. Scroll through the options until you find the HDMI port you used.
If you don't see anything, try each input one by one until you see the camera's screen.
Step 6: Set your camera to playback mode.
Press the playback button (usually a square with a play triangle inside). Your camera's screen should show your last photo. Now look at the TV.
You should see the same photo there.
If you see the photo on the TV, congratulations. You're done. If you don't, move to the next section.
Step 7: Check your camera's HDMI output settings.
This is a common hidden step. Different cameras handle this differently. Some have a menu option called "HDMI Output" or "HDMI Info Display." You might need to set it to send a clean signal or to output in the correct resolution.
We'll cover this in the next section.
Step 8: Troubleshoot if needed.
No signal? Try a different HDMI cable. Try a different HDMI port on the TV.
Restart both devices. Make sure the camera isn't in a power-saving mode that turns off the output. If you're still stuck, check the camera's manual or the manufacturer's support page for your specific model.
If you're dealing with a camera that's new to you, it helps to run through basic troubleshooting steps to rule out common issues before diving into the manual.

Similar Posts