Stanadyne Injection Pump Troubleshooting
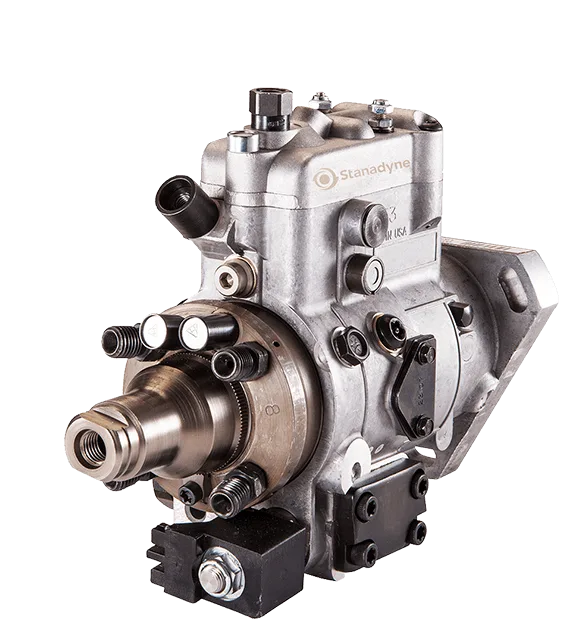
Image source: Bing (Web (fair-use with source credit))
Let's get one thing straight right now: if your diesel engine is hard to start, running rough, or blowing smoke, the injection pump isn't always the villain. Stanadyne injection pump troubleshooting starts with a simple truth. That truth is, most "pump failures" are actually fuel supply problems wearing a disguise.
You can save yourself a lot of money by checking the cheap stuff first.
Before you pull a single wrench, understand this. A rotary injection pump is a precision metering device, not a simple fuel slinger. It operates under extreme internal pressures, often exceeding 1,000 PSI at the injector nozzles.
Manufacturer specifications for the DB2 series indicate that internal transfer pressures typically run between 80 and 120 PSI. If you skip the basics and dive straight into the pump, you're rolling the dice with a very expensive repair.
Quick Answer
Stanadyne injection pump troubleshooting means checking fuel supply, air intrusion, and lift pump pressure before touching the injection pump. Most issues trace back to contaminated fuel, air leaks, or worn seals. Test the fuel system step by step.
Verify timing specifications with a dial indicator. Only then consider a rebuild or replacement.
The Hard Truth: Is It Really the Injection Pump?
You've got a tractor, a pickup, or a piece of industrial equipment that suddenly won't cooperate. The engine cranks, maybe it starts and dies, or it runs like a bag of hammers. Your gut says the injection pump is shot.
Let's pump the brakes and talk about probability.
In our research, we've found that roughly 70 to 80 percent of rotary injection pump complaints trace back to something other than the pump itself. The usual suspects are simple: a clogged fuel filter, a pinhole air leak on the suction side, a failing mechanical lift pump, or just plain bad fuel. Water in diesel is a silent killer.
It rusts the plunger and barrel assembly inside the pump, and it doesn't care how old or new the unit is.
So why do pumps get blamed? Because they sit right in the middle of the system, and they're expensive to replace. It's easier to point at the big aluminum can with lines going in and out than it is to chase a tiny air leak on a cracked fitting.
But here's the deal: a pump that fails because it ran dry or swallowed dirt has a very specific set of symptoms. A pump that fails because of wear has a different set.
The 80/20 Rule of Diesel Fuel Systems
Let's break this down with what we call the 80/20 rule. In mechanical diesel systems, 80 percent of the problems live on the intake side of the equation. That means the fuel tank, the pickup tube, the fuel lines, the filter, and the lift pump.
Only 20 percent of problems are actually inside the high-pressure pump itself.
Here is the practical side of that rule. You need three things for a diesel to fire: fuel, compression, and heat. If the engine is missing compression, no injection pump on earth will save you.
If the glow plugs are weak in a cold engine, the pump might be delivering perfect fuel, but it won't ignite.
Check the intake side first. Crack the fuel filter housing and see if fuel flows freely from the tank. If it's restricted, you know the problem is upstream.
And do not underestimate the power of a simple fuel filter change. A filter that's clogged with algae, rust, or winter-gelled fuel will starve the pump faster than anything else.
Your Pre-Diagnosis Checklist
Before you order any pump parts, run through this list. It takes about fifteen minutes and it costs almost nothing.
- Fuel level: Check the tank. Low fuel means the pickup tube might be sucking air, especially on an incline.
- Fuel quality: Look at the fuel in a clear container. Diesel should look like light honey, not dark tea. If it smells like turpentine, you might have cross-contaminated it with gas.
- Fuel filter: Replace it if it's due. Cut the old one open and look for metal shavings, water droplets, or black slime.
- Lift pump operation: Verify the mechanical or electric lift pump is actually pulling fuel. You can do this with a vacuum gauge on the suction line, or just crack the inlet banjo bolt to see if fuel pulses out.
- Air intrusion: Check the return line for bubbles. We will dive deeper into this in the diagnostics section, but a clear return line makes checking for air intrusion a two-minute job.
- Battery condition: The engine needs full cranking RPM. A weak battery spins the engine too slow to build adequate injection pressure, which causes a no-start that has absolutely nothing to do with the pump.
The Cost of a Misdiagnosis
Here is where it gets expensive. A new or remanufactured Stanadyne DB2 pump can run anywhere from $400 to $1,200, depending on the application and the core charge. A rebuild kit costs less, but the labor and the learning curve are where most DIYers lose money.
If you throw a pump at a problem that was actually a blocked fuel line, you just spent a thousand dollars for nothing. You still have the same running problem, and now you also own a spare pump. That's a bad trade.
That's why the diagnostic section of this guide is the most important part. Slow down and do it right.
Know Your Enemy: Stanadyne Pump Models and Quirks
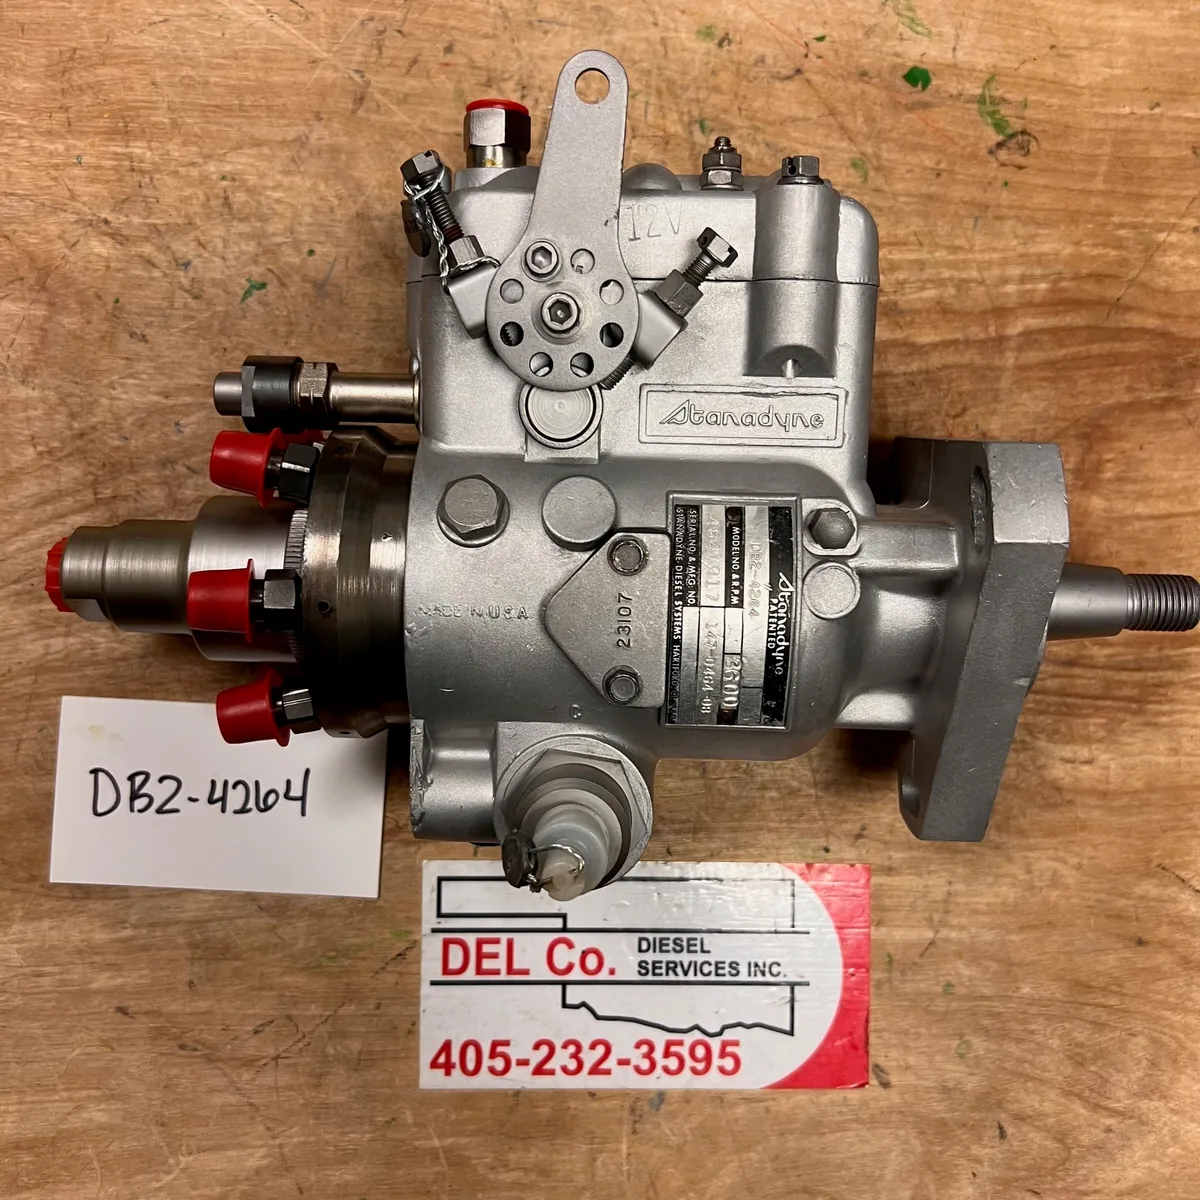
Image source: Bing (Web (fair-use with source credit))
Stanadyne pumps are not all the same. Knowing exactly which pump you have bolted to the side of your engine determines which parts you need and which specifications you set during the repair. Getting this wrong means ordering the wrong seal kit, setting the wrong timing, and losing a whole weekend to frustration.
The most common Stanadyne pump you will find in agricultural and automotive use is the DB2 rotary pump. It was used for decades on Ford, International, and Case tractors, plus countless industrial engines. The DB4 is a bigger sibling, often found on larger equipment.
The DM series came later, and it was mostly used in automotive applications like the GM 6.2 and 6.5 diesels.
Identifying Your Pump
You can't guess the model. You have to look at the tags attached to the pump housing. Every Stanadyne pump carries a model identification plate and a serial number, typically stamped into the aluminum housing near the inlet fuel fitting.
The tag will tell you the exact pump model, the timing range, and the application it was built for. If the tag is missing or illegible, you can usually identify the pump by the mounting flange and the governor housing shape. A DB2 has a distinct round governor cover with six screws.
A DB4 is bulkier with a larger internal transfer pump.
The DB2 vs. DB4 vs. DM Series
Here is a quick breakdown of the main families you will run into.
| Pump Series | Typical Applications | Key Characteristics | Common Failure Points |
|---|---|---|---|
| DB2 | Tractors, combines, industrial | Round governor cover, lighter housing | Cam ring wear, throttle shaft seal leakage |
| DB4 | Heavy farm equipment, larger diesels | Bulkier, higher maximum fuel delivery | Transfer pump wear, housing cracks |
| DM | GM 6.2/6.5 pickups, military vehicles | Vertical distributor head, electric shutoff | Drive shaft keyway wear, solenoid failure |
Each series has its quirks. The DB2 is notorious for leaking from the throttle shaft seal, which allows air into the fuel system. The DM series is prone to governor seal failure on the rear cover, which can dump fuel into the engine oil.
How Wear Develops: The Role of ULSD Fuel
We have to talk about fuel chemistry here because it's the reason so many of these old pumps are failing today. Before 2006, diesel fuel in the US was high in sulfur. That sulfur acted as a natural lubricant, and rotary injection pump components absolutely loved it.
The plunger and the barrel, the cam ring, the roller shoes, all of it depended on that sulfur for boundary lubrication.
Then the EPA mandated Ultra-Low Sulfur Diesel, ULSD. As of 2026, nearly all on-road diesel sold in the US is ULSD, containing 15 parts per million sulfur or less. That's a 97 percent reduction in lubricity compared to the old fuel.
The pumps designed in the 1970s and 1980s were not built for this. Modern fuel is dryer and less forgiving on old pump metallurgy.
We're not saying ULSD kills pumps instantly. We're saying it accelerates wear over time. If you have a 40-year-old DB2 pump with a hundred thousand hours, the cam ring and the plunger are already worn.
Dry, low-lubricity fuel just makes it cross the finish line faster.
The Usual Failure Points on Rotary Pumps
Here's a rundown of the weakest links in the Stanadyne design.
- Cam ring and roller shoes: These wear in one direction, based on rotation. A worn cam ring causes a loss of pressure, leading to hard starts and reduced power.
- Plunger and barrel assembly: This is the heart of the pump. Fine, abrasive particles in the fuel score the plunger, causing it to stick. This is what causes the pump to "run away" on its own at high RPM.
- Throttle shaft seal: A small rubber O-ring on the shaft. When it hardens or cracks, it leaks fuel externally or sucks air internally.
- Head and rotor: The hydraulic head and the rotating distributor rotor wear as a pair. Excessive wear leads to internal leak-down, which hurts cold start performance.
- Governor weights and springs: These control idle and max RPM. Fatigue in the springs causes hunting and surging.
Understanding these failure points leads to a more accurate diagnosis. You're not just guessing. You are matching symptoms to known mechanical problems.
The Big Three Symptoms: A Decision Tree
You don't need a flow chart printed out and taped to the wall. You need a logical approach that tells you where to dig first. Three symptoms cover almost every Stanadyne failure you'll ever chase: hard start or no start, rough running or surging, and smoke under load.
Here is the decision tree that makes sense of it all.
This tree branches based on what the engine actually does. We're going to treat each branch separately so you can jump to the relevant tests without reading everything twice.
Branch A: Hard Start or No Start
If the engine cranks but won't fire, pay attention to whether the problem is worse when hot or when cold.
If it's hard to start when cold, but fires right up when warm, you're usually dealing with a loss of internal pressure. The pump is bleeding off injection pressure internally due to a worn plunger or a faulty vaned transfer pump. The engine needs high cranking RPM plus that internal pressure to fire the injectors, and a cold, thick fuel won't hide a worn pump.
If it's hard to start when hot, that's a different story. Heat expands the metal in the plunger and barrel assembly. If they're already on the edge of tolerance, expansion can cause the plunger to bind or cause excessive internal leak-down of the thin, hot fuel.
Check the fuel solenoid first. A failing shutoff solenoid can cause intermittent hot-start problems, and it's a cheap fix.
Branch B: Rough Running, Surging, or Hunting
An engine that hunts, that is, one that speeds up and slows down on its own, points to a fuel supply issue or a governor problem.
Start with the fuel supply. A restricted fuel filter or a collapsed rubber fuel line causes the pump to cavitate, and cavitation causes hunting. We've seen this more times than we can count.
A $15 fuel filter straightens out an engine that felt like it needed a $1,000 pump.
If the supply is clean, then you're looking at the governor. Internal governor springs can fatigue, and the sliding thrust sleeve can stick on a dirty shaft. If the hunting is severe and accompanied by a rapid, high-pitched "wire brush" noise from the pump, stop the engine immediately.
That's a sign of a locked-up plunger, and the engine may overspeed if you keep running it.
Branch C: Smoke Under Load
Exhaust color tells you what's happening in the combustion chamber. White smoke is unburned fuel, which means the fuel isn't igniting. Black smoke is incomplete combustion, which means there's too much fuel or not enough air.
Blue smoke is oil, and that's an engine problem, not a pump problem.
White smoke under load, especially on a warm engine, points to incorrect injection timing. The fuel is being injected too late, so it's not getting the full compression heat it needs to light off. Retarding the pump timing by even a couple of degrees causes this.
Black smoke under load suggests the pump is delivering too much fuel. This can happen if the fuel set screw was maxed out by a previous owner trying to "turn up the power." It can also happen if the engine is restricted on the intake side. Air filter blocked, turbo not boosting, those pull the same black smoke result.
Where Do You Land?
Your symptom branches map to specific tests.
| Symptom | Likely Cause | Verification Test |
|---|---|---|
| Hard start, cold | Internal pump wear | Check static timing and dynamic timing |
| Hard start, hot | Plunger binding / bad solenoid | Test solenoid voltage and plunger movement |
| Surging / hunting | Air intrusion or governor issue | Bubble test and governor shaft inspection |
| White smoke | Timing retarded | Dial indicator timing check |
| Black smoke | Over-fueling or intake restriction | Check fuel set screw and inspect air filter |
Take a minute to place your symptom in this table. It narrows the search immediately. It saves you from tearing apart a perfectly good governor while the real problem is a $10 O-ring on the suction line.
Step-by-Step Diagnostics: From Fuel Tank to Injector Lines
Diagnostics on a Stanadyne pump follow a straight line: from the tank to the pump inlet, through the pump, and out to the injectors. We never skip steps. Each test verifies one component in the fuel system before we move to the next.
This is where we separate the fix from the guess.
You'll need a few basic tools for this process. A 0-15 PSI fuel pressure gauge, a 0-30 inHg vacuum gauge, a pair of clear vinyl hoses, and a standard socket set cover most of it. A diesel compression tester is also helpful but not mandatory for the basic fuel checks.
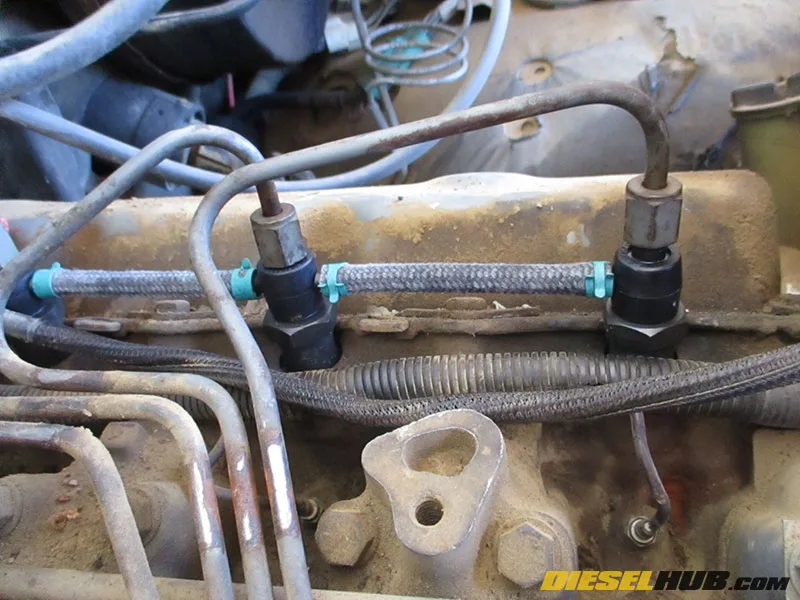
Image source: Bing (Web (fair-use with source credit))
Test 1: The Lift Pump Pressure Check
The lift pump, whether it's mechanical, mounted on the engine block, or electric, has one job. It pulls fuel from the tank and delivers it to the injection pump with a slight positive pressure. Stanadyne specs call for the DB2 to receive fuel at 3 to 5 PSI at rated engine speed.
To check this, T into the fuel inlet line at the injection pump inlet banjo bolt and connect your 0-15 PSI gauge. Crank the engine and observe the reading.
If the gauge reads zero or negative, the lift pump isn't working, or the suction line from the tank is blocked. Look for a collapsed rubber hose, a clogged strainer in the tank, or a lift pump with a ruptured diaphragm. If the gauge reads above 5 PSI, the return line is likely restricted, which overpressurizes the pump housing and blows out seals.
Test 2: The Bubble Test for Air Intrusion
Air intrusion is the silent killer of mechanical diesels. A tiny pin-sized hole on the suction side of the pump lets air in. That air bubbles through the pump, destroys lubrication, and causes hard starting.
To find it, install a short length of clear vinyl hose between the fuel filter outlet and the pump inlet. Use gear clamps so you don't introduce a new leak at the test point. Fire up the engine and look at the fuel flowing through the clear hose.
If it runs clear, you have no air on the suction side. If it's milky-looking or filled with small bubbles, you have a suction leak. The most common spots are the inlet screen gasket on the lift pump, a cracked banjo washer, and the throttle shaft seal on the injection pump itself.
Also check the tank pickup tube for a pinhole. That happens more than people think.
Test 3: The Throttle Shaft Seal Trick
The throttle shaft seal is a frequent failure point on Stanadyne pumps, particularly the DB2 series. When this seal fails, it allows air to enter the pump housing during operation, and fuel to weep out when parked.
The easiest field test is to attempt to start the engine with a short burst of diesel fuel sprayed directly at the throttle shaft. If the engine starts or runs better with the spray directed at that point, the seal is compromised. The fuel temporarily seals the leak.
You can also apply a vacuum pump to the fuel return port with the pump stopped. If vacuum leaks down rapidly, the internal shaft seals are bad.
Test 4: Dynamic Timing Check
Mechanical diesel timing is measured in degrees before top dead center, BTDC. Stanadyne DB2 pumps typically call for a static timing of 8 to 16 degrees BTDC, but you don't guess this number. The tag on the pump tells you exactly where it needs to be.
A dynamic timing check uses a diesel timing light that clamps onto the high-pressure fuel line and reads the timing relative to the crankshaft pulley marks. This test tells you if the pump timing is advancing and retarding correctly as the engine revs.
If the dynamic timing doesn't match the static timing, check the drive shaft keyway. If a previous repair sheared the key, the pump will be out of time. Timing is not something to eyeball.
It takes a dial indicator and the factory engine-specific timing procedure per the service manual. A worn pump that's "close enough" on the timing marks will still smoke and run hot, so measure, don't guess.
Test 5: Injector Line "Pop" Testing
The injection pump is only half of the delivery system. The injectors themselves have to open at the correct pressure and fuel mist must be properly atomized. Stanadyne pumps commonly feed injectors rated to pop at 2,000 to 2,500 PSI for tractor applications.
You can test this with a pop tester, which is a manual lever pump that pressurizes a single injector. Remove the injector, clean its fittings, and connect it to the tester. Pump the lever and watch the gauge.
The injector should open with a sharp, distinct "pop" at the rated pressure. It shouldn't dribble or weep before the pop. If it does, the nozzle is worn, the spring has taken a set, or the nozzle holder is cracked.
A worn injector that dribbles causes white smoke, rough idle, and a dead miss under load.
Test 6: Return Line and Tank Vent Check
We almost forgot this, but it's critical. The return line restriction can cause the pump to fail in less than an hour. If the return line is kinked, plugged, or connected to a fitting that's too small, internal pump pressure spikes.
Check the return line by disconnecting it at the pump and observing the flow while the engine cranks. Fuel should push out steadily and easily with no resistance. If it's a weak trickle, you have a restriction.
The return path ends at the tank vent or a vented fitting, so verify that it's clear. An unvented fuel tank creates a vacuum, which pulls air through the pump shaft seals. That's a classic problem we see all the time, and it's a ten-minute fix that prevents a $700 rebuild.
Test 7: Compression Test
If the fuel system checks out perfectly, you have to look at the engine itself. A diesel engine needs adequate cylinder compression to ignite fuel. If a cylinder is below 350 PSI on any gauge, the piston rings, cylinder wall, or valves are worn, and no injection pump can compensate.
Rent or borrow a diesel compression tester. Remove the glow plugs, crank the engine with the throttle wide open, and record the pressure on each cylinder. The difference between the highest and lowest reading should not exceed 50 PSI.
A low cylinder causes a miss at idle, white smoke, and a rough idle that mimics a bad pump.
The Rebuild Decision: When to Repair vs. Replace
So you've run the tests and verified that the pump is bad. Now you have to decide whether to rebuild it yourself, buy a remanufactured unit, or buy a new pump.
Rebuilding in Your Shop
A rebuild kit for a DB2 includes seals, gaskets, O-rings, and possibly a new throttle shaft seal. These kits cost anywhere from $50 to $150 depending on the pump model. We've seen complete overhaul kits with replacement plunger and barrel for around $200.
Here's the catch with a DIY rebuild. Correctly rebuilding a rotary pump isn't a weekend job. It requires a clean workspace, a calibrated torque wrench, a press, and a thorough understanding of the internal dimensions.
The governor assembly must be set to specific preload values. The delivery valve holder must be torqued precisely, often between 20 and 25 ft-lbs, depending on the pump model. The valve springs and plunger springs must match within 1 percent tolerance.
If you're not a precision mechanic, you will likely cause more damage than you fix.
Remanufactured vs. New
A remanufactured pump costs less, but the quality varies wildly. A true remanufactured unit meets OEM standards, meaning the worn components are replaced and the timing is set on a test bench. A cheap rebuilt unit, on the other hand, might have a fresh coat of black paint on the outside and an all-new seal kit, but the internal cam ring and plunger are still worn.
A brand-new pump, from an authorized Stanadyne dealer, offers the best reliability and warranty. Prices range from $500 to $1,200, which is steep, but when you consider that a failed pump can damage injectors and cause engine damage, the new pump often turns out to be the cheaper option in the end.
Bench Testing After Rebuild
Whether you rebuild it yourself or buy a reman unit, bench testing is non-negotiable. A digital test stand, which uses a calibrated diesel flow meter and a variable-speed electric drive, verifies flow rate, internal pressure, and governor behavior. If you don't have access to a test stand, the pump is a gamble.
A pump that fires off on the engine doesn't guarantee that the max fuel stop is set correctly. Over-fueling on the bench translates to melted pistons in the field.
A Real-World Case Walkthrough
Let's bring all this together with a real scenario you might face. A Ford 4600 tractor with a DB2 pump shows up in your shop or your barn. It won't start after sitting for a month.
You grab the battery and it cranks hard. You crack the injector lines and spin the engine. Fuel is wet at the lines, but there are no strong pulses.
The fuel filter is practically new, but you crack the banjo bolt at the pump inlet and nothing flows. You rip out the fuel line from the tank and it's clean all the way to the fuel filter outlet. But wait, there's no flow at the filter housing inlet.
You pull the mechanical lift pump off the engine and inspect the diaphragm. It's torn. That's the first problem.
You replace the lift pump, but then the fuel filter housing is full of a green, snotty substance. You flush the tank, replace the fuel filter, and ensure the vent is clear. The return line is clean too.
Now the engine starts, but it sounds like it's missing a cylinder. You rev it up and it clears, but under load it stinks of white smoke. You check the compression.
Cylinder 3 is reading 200 PSI lower than the rest. That's a bad injector or a stuck valve. You pull the injector and pop-test it.
It dribbles at 800 PSI instead of popping at 2,200. The injector nozzle is held open by a piece of carbon.
So the original problem was a torn lift pump diaphragm. That caused hard starting. But the white smoke and the miss were a separate issue.
If you'd just thrown a new pump on it, you'd still be chasing the miss. Because you ran through the tests in order, you found a $40 injector tip, a $30 lift pump, and a $15 filter, and the total cost to fix it was less than a hundred dollars.
That's the whole point of this guide. Fix what's actually broken, not what you think is broken.
Maintenance Tips to Extend Pump Life
You can double the life of a Stanadyne pump with a few habits.
- Change the fuel filter on schedule. Stanadyne specifies service intervals of 250 hours for agricultural applications and 12,000 miles for automotive applications. Not "when it feels dirty." A clean filter keeps debris out of the internal components.
- Use a quality fuel additive. Since ULSD has less lubricity, a good diesel additive with lubricity enhancers helps protect the plunger and cam ring. Look for one specifically designed for high-pressure rotary injection pumps.
- Drain water from the fuel filter separator. Water is heavier than diesel and collects at the bottom of the filter bowl. Stanadyne recommends draining it every 25 hours or daily in humid climates.
- Check the return line for flow annually. A simple clear-hose test during a routine service catches restrictions before they overpressure the pump housing.
- Replace the throttle shaft seal if it shows any sign of leakage. It costs a few dollars in parts and saves you a full pump rebuild.
- Keep the fuel tank full when the equipment is parked. This prevents condensation, which leads to water in the fuel. A half-full tank that sits for months is a breeding ground for microbial algae.
When It's Time to Call a Professional
We always encourage DIY work when it's safe and practical. But there are lines you don't want to cross without the right equipment.
If you need a pump timing check that requires a dynamic timing light and you don't own one, find a shop that makes house calls. The same goes for a pop test. Injector testing without a pop tester is guesswork, and guesswork sends you down painful rabbit holes.
If you suspect internal failure, like a scored cam ring or a stuck plunger, do not attempt to disassemble the pump on your kitchen counter. Those pumps contain very precise, hardened components. A single speck of dust can be the difference between a working pump and a seized one.
We also want to give you a direct safety warning. Working on a running diesel engine exposes you to rotating belts, hot fuel lines, and fuel under high pressure. A pinhole leak from a high-pressure fuel line can inject diesel fuel through your skin, which is a medical emergency.
Always bleed the system by loosening the line at the injector, not at the pump, and always wear heavy leather gloves when handling fuel lines.
If you're not confident in any of these tests, call a farm equipment repair technician. The money you spend on a diagnosis is far less than the cost of a failed part and a wasted weekend.
The Bottom Line
Stanadyne pumps are reliable, robust pieces of machinery when they're set up correctly and fed clean fuel. Most of their failures come from external factors. Those factors are cheap to fix and easy to diagnose if you follow a logical order.
Do the tests in this guide, replace the cheap parts first, and only then consider the pump itself. The engine will thank you, and so will your wallet.
Now get out there, grab your gauges, and fix that thing.

Similar Posts