Arzel Zoning Troubleshooting
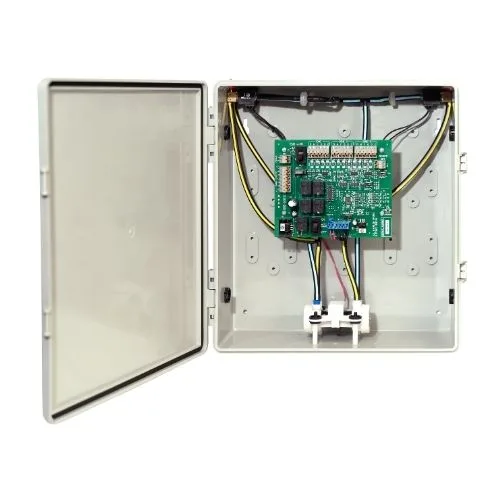
Image source: Bing (Web (fair-use with source credit))
Your Arzel zoning system is doing that thing again. One room is freezing while the rest of the house is comfortable, or a zone is blowing lukewarm air when the thermostat is begging for heat. The panels and dampers are supposed to handle this automatically, but when they don't, you're left standing in a hallway staring at a blinking light, wondering what to check next.
Arzel zoning troubleshooting doesn't have to be a guessing game. Roughly 80% of zone system failures trace back to airflow problems or basic electrical issues, not a dead main board. A typical residential HVAC blower moves between 400 and 450 cubic feet per minute per ton of cooling, and when your zoning dampers pinch that flow, the system reacts in predictable ways.
Once you understand the sequence of operation, you can walk through a logical checklist and pinpoint the culprit in under an hour.
Quick Answer: Start by verifying power at the zone panel. Check thermostat calls next. Listen for damper movement.
Measure static pressure if airflow seems weak. Most problems are stuck dampers, low transformer voltage, or a misconfigured bypass. Reset the panel and retest each zone.
Call a pro if you see error codes you cannot clear.
How Arzel Zoning Works: The 5-Minute Mental Model
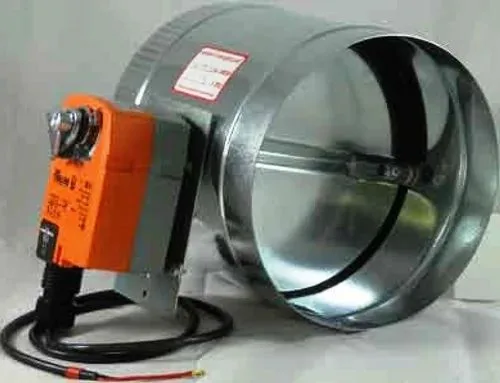
Image source: Bing (Web (fair-use with source credit))
Before you touch a single wire, you need to understand what the system is doing. Arzel uses a series of motorized dampers installed inside your ductwork. Each damper opens or closes based on signals from individual room thermostats.
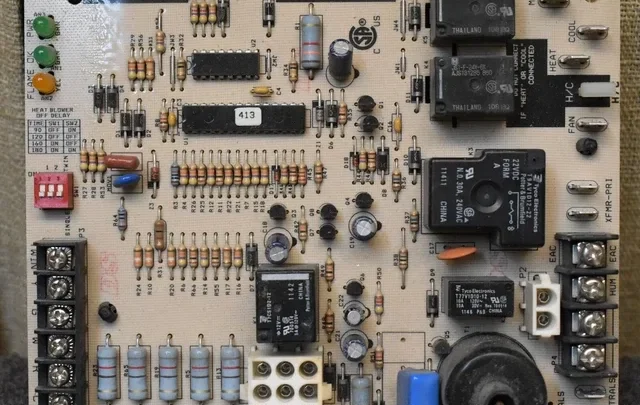
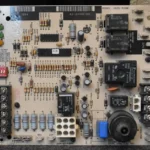
The zone panel is the brain. It reads which thermostats are calling for heating or cooling, then tells the dampers to open or shut so conditioned air goes where it's needed.
The equipment itself, usually a furnace or an air conditioner, only runs at one speed in a standard system. It doesn't know which rooms need air. That's the zoning panel's job.
When a thermostat calls for heat, the panel opens that zone's damper, then signals the furnace to fire. If other zones aren't calling, their dampers stay closed. This lets you heat just the bedrooms at night or cool just the living spaces during the day.
Most Arzel installations use what they call Retro-Round dampers, which are round units that fit directly into round duct runs. There's also a rectangular version for square duct, but the principle is the same. A small 24-volt motor rotates a blade inside the duct.
That blade either blocks the airflow completely or rotates 90 degrees to let it pass through freely.
What the Components Actually Do
The zone panel runs on 24 volts, standard HVAC control voltage. It has a transformer that steps down your house power to run the dampers and the thermostat circuits. Each damper has its own wiring run back to the panel, and each thermostat is connected to a specific zone input.
The panel also manages something called a bypass damper, which we'll dive into later, because that's where a lot of static pressure problems hide.
Here's the sequence of operation to keep in your head. A thermostat calls. The panel receives that call and opens the corresponding damper.
Then it sends a signal to the HVAC equipment to start. When the thermostat is satisfied, the panel closes that damper and tells the equipment to shut down. If more than one zone is calling, the panel opens all of them and runs the equipment until the last zone is satisfied.
Anything that breaks that chain causes a symptom. If the damper motor burns out, the panel opens it but the blade stays shut. You get no airflow.
If the transformer is weak, the damper might open, but then the furnace gets an unreliable signal. It cycles on and off rapidly. If the thermostat wire has a bad connection, the panel never receives the call, so the zone sits dead.
Why This Understanding Matters for Troubleshooting
The biggest mistake people make is assuming the equipment is broken. We see this constantly in service calls. A homeowner hears the furnace running but a room is cold, so they assume the furnace is weak or dying.
In reality, the dampers are doing exactly what the panel tells them, and the panel isn't getting the right signal. The furnace is just a victim of bad communication.
Once you understand the signal flow, you can trace the chain of command. You don't need to be an HVAC technician to follow the wiring logic. You need a multimeter, a few basic tools, and the patience to check one thing at a time.
Each test eliminates a variable. Once you know the panel is powered, the thermostat is calling, and the damper is moving, you've narrowed the problem to the equipment or the airflow itself.
Tools You'll Need Before Starting
Gather these before you begin. Most are cheap and worth having around the house.
- Multimeter, Set to AC voltage for transformer checks, resistance for damper motor testing
- Screwdrivers, Flathead and Phillips for panel covers and terminal blocks
- Needle-nose pliers, For removing and replacing wire terminals
- Thermometer, Infrared or probe type for checking supply air temperature
- Manometer, Optional, but useful for balancing airflow between zones
Step 1: Is the Zone Panel Powered?
Check the transformer. This is the first question because everything else depends on it. The panel needs clean 24-volt power.
The transformer itself is typically mounted to the side of the HVAC equipment cabinet or nearby. Look for a small box with two low-voltage wires going to the panel. Measure across those terminals with your multimeter set to AC voltage.
You should read between 24 and 28 volts.
If you read significantly less, say below 22 volts, you have a weak transformer. A common cause in older homes is another device sharing the same circuit. Zone panels are sensitive to voltage drop.
A failing transformer can also cause dampers to stall halfway. If the voltage is low, replace the transformer. It's a simple swap in most cases.
| Voltage Reading | Condition | Action |
|---|---|---|
| 24V to 28V AC | Healthy | Proceed to Step 2 |
| 20V to 23V AC | Weak | Replace transformer |
| Below 20V AC | Bad transformer | Replace transformer |
| 0V AC | No power | Check breaker, wiring |
Step 2: Is the Thermostat Actually Calling?
Set the thermostat to a heat or cool call, and confirm the panel LED turns on for that zone. A dead LED with a calling thermostat means you have a broken wire or a bad thermostat. Check the wire continuity with your multimeter.
If the wire is fine, the thermostat itself is suspect.
If the LED is lit but the damper isn't moving, you've isolated the fault to the damper motor or its wiring connection at the panel. Most Arzel dampers have a direct wire connection to the panel. Unplug it and test the motor windings for resistance.
A healthy motor shows a resistance reading in the range of 20 to 60 ohms, depending on the model. An open circuit means a dead motor. That damper needs replacing.
Step 3: Is the Damper Opening?
With power at the panel and a call active, place your hand on the damper housing. It should vibrate softly as the motor runs. If it vibrates but doesn't rotate, the motor is running, but the blade is stuck.
Turn off the system at the panel, remove the damper from the duct if accessible, and manually rotate the blade to check for free movement.
If the damper doesn't vibrate at all, re-check the wiring. A short in the wire from the panel to the damper can cause this. Also confirm that the panel is actually sending voltage to that zone output.
Measuring across the damper terminals while the call is active should show 24 volts. If you have 24 volts at the motor but no movement, replace the actuator assembly.
Step 4: Is Airflow Reaching the Zone?
Let's say the damper is open and the equipment is running. Air still isn't coming out of the register. Now it's a ductwork problem.
Check the outlet register itself for a closed damper or a block. Sometimes furniture slides in front, or kids stuff toys into vents. Confirm nothing is physically obstructing the path from the plenum to the room.
If the path is clear, suspect a collapsed duct run or a missing connection. In attic or crawlspace installations, flex duct can sag or get crushed, severely restricting airflow. Run your hand along the accessible duct looking for sharp kinks or crush points.
A kinked flex duct easily reduces airflow by 50% or more.
Step 5: Is the Equipment Operating Properly?
The equipment starts, the damper is open, airflow is good, but the room still doesn't reach temperature. Check the supply temperature. Use a cooking thermometer or a temperature probe at the register.
For heating, you want to see roughly a 30 to 40 degree rise above room temperature. A significantly lower rise indicates the heat exchanger isn't getting proper airflow or the burner isn't at full output.
For cooling, the supply should be 15 to 20 degrees cooler than the return air. If the temperature difference is marginal, the refrigerant charge might be low or the compressor is cycling on a pressure limit. At this point, you're moving into full HVAC diagnostic work.
Unless you're comfortable with refrigerant handling or gas components, this is where you call a licensed technician.
Common Arzel Problems and Fixes
Now that the basic troubleshooting tree is covered, let's look at specific scenarios you're likely to encounter. Each one has a distinct signature, and knowing what you're looking at saves time.
Zone Not Responding at All
A dead zone means the panel isn't communicating with either the thermostat or the damper. Start at the panel. Check the terminal connections for that zone.
Loose screws are the number one cause here. Tighten each terminal and gently tug on the wires to confirm they're seated.
If the wiring is solid, check the thermostat's batteries. Many zones are controlled by battery-powered thermostats. Low batteries can cause erratic signals or no signal at all.
Replace them with fresh alkaline cells and retest.
If the zone still doesn't respond, something in the wire run is broken. This calls for testing continuity. Disconnect the thermostat wire from both the panel and the thermostat.
Use your multimeter on the resistance setting to test for continuity between the two ends. Zero resistance means the wire is good. Infinite resistance means you have a break somewhere.
Fishing a new wire through finished walls is tedious, but it's the permanent fix.
Damper Actuator Humming But Not Moving
This is the second most common complaint. You hear a persistent buzz from the duct when a zone calls, but the air never flows. The motor is getting power and it's trying to turn, but the blade is jammed or the motor gear train has stripped.
Switch the system off before investigating.
Remove the damper from the duct line to inspect it. If you see debris or rust on the blade, clean it with a wire brush. Check that the blade rotates 90 degrees freely by hand.
If it does, remount it and test. If the blade barely moves or feels gritty, the actuator is failing internally. Replace the entire damper assembly.
They aren't expensive and they're easier to swap than to repair.
Short Cycling on One or More Zones
Short cycling means the equipment starts, runs for a minute or two, then shuts off before satisfying the thermostat. In Arzel systems, this is usually a static pressure problem. The bypass damper isn't set properly, or it's missing entirely.
When zones close, they block airflow. The blower pushes against closed dampers, pressure spikes, and the equipment's safety limits trip.
The fix is to check the bypass damper adjustment. On the panel, there's usually a rotary dial that sets the bypass opening percentage. If the dial is set too low, the airflow opens the bypass slightly, but not enough.
Increase the setting. You want just enough bypassed air to keep the pressure in a safe range. If you don't have a bypass at all, the zoning system was installed incorrectly.
System Runs Constantly But Never Satisfies
A system that runs non-stop without reaching the set point is usually an undersized duct issue. The zone is open, the damper is fine, but the volume of air delivered to that room isn't enough. This is common when a large room is zoned together with a small one.
The small room reaches temperature quickly and closes its damper, but the large room still needs air.
Check the duct run to the oversized zone. Is it appropriately sized for the room square footage? A typical rule of thumb is one ton of cooling per 400 to 600 square feet, and each ton needs about 400 to 450 CFM of airflow.
If the duct run feeding the room can only move 50% of the required CFM, the room will never satisfy the thermostat on a hot day.
Uneven Temperatures Between Zones
This is more of an infiltration and insulation problem than a zoning problem. If one zone is consistently colder in winter, even with the damper fully open, check the room's envelope first. Drafty windows, poor attic insulation, and unsealed exterior walls all make a room harder to condition.
The zoning system can only deliver the air; it can't overcome physics.
Once the envelope is ruled out, compare the static pressure readings between zones. A zone with a long, undersized duct run will deliver less air. Use a manometer at the register to compare airflow.
Lower static pressure at the register means less flow. Correcting this might mean upgrading the duct run or adding a booster fan.
Banging or Clunking Noises in the Ductwork
That distracting clunk you hear when a zone opens or closes is the damper blade seating against the stops. Some noise is normal, but a loud bang indicates the damper motor is slamming the blade open or shut. This typically means the damper mechanism is worn or the motor lacks its internal cushioning.
Check the damper for excessive play in the mounting screws. Tighten everything up. If the noise persists, lubricate the blade pivot points with a light silicone spray.
Do not use heavy grease; it attracts dust and gums up over time. For badly worn dampers, replacement is the clean solution. They're not hard to swap and the quiet operation is worth the effort.
Error Codes on the Zone Panel
The panel will flash error codes to signal specific faults. A common one is for a stuck damper or a communication failure on a specific zone. You can clear most of these by cycling power to the panel.
Turn off the HVAC system at the breaker, wait 60 seconds, then restore power. The panel resets and re-runs its initialization sequence.
If the error returns immediately, the fault is still active, usually a shorted wire or a failed damper. Trace the zone wiring methodically. Look for nicks in the wire insulation, especially where the wire passes through sharp duct edges or metal studs.
A staple pinched through the wire can cause a ground fault that triggers the error. Repair the wire and the code clears.
When to Call a Professional
You've worked through the entire checklist and the problem persists. Or you've found a fault that requires specialized tools. When is it time to wave the white flag and call a tech?
Call a professional if you encounter any of these:
- Refrigerant handling, Cooling system diagnostics require EPA certification. Don't touch the lines.
- Gas components, Burner issues, gas valve problems, and combustion testing need a licensed technician.
- Main control board failures, If the panel itself is dead and replacing fuses doesn't help, the board may need replacement.
- Structural duct modifications, Cutting new returns or enlarging supplies requires load calculations and sheet metal work.
- Communication with a smart thermostat, If the zoning system interfaces with a communicating HVAC platform, the setup is complex.
Preventative Maintenance Tips
A well-maintained zoning system runs for decades without major issues. Here's what you should do annually to keep it healthy.
Change Your Air Filter Regularly
Dirty filters restrict airflow across the heat exchanger or evaporator coil. In a zoned system, this is worse because the blower is already fighting closed dampers. A Dirty air filter pushes static pressure even higher, increasing the chance of short cycling and tripped limits.
Check your filter monthly and replace it when you can see dust buildup.
Clean the Damper Blades Seasonally
Twice a year, inspect the damper blades for dust and debris. Wipe them with a damp cloth and gently rotate the blade through its range of motion. This keeps the pivot points free and prevents the blade from sticking after months of inactivity.
Use a light coating of silicone spray on the pivots only.
Verify the Bypass Setting Once a Year
After spring and fall temperature changes, confirm the bypass dial is still set correctly. Some homeowners adjust it during extreme weather and forget to reset it for milder conditions. A properly set bypass prolongs equipment life and keeps the system efficient.
Check Thermostat Batteries
Low batteries in wireless or battery-powered thermostats cause intermittent signal loss. Replace them on a fixed schedule, ideally every six months. Daylight saving time changes are a natural reminder.
Listen for Unusual Sounds at Startup
When the system fires up for the first time each season, walk to each register. Listen for humming or ticking from the dampers. A quick response means the motor is healthy.
A delay or silence suggests a stuck blade that needs attention.
Final Checklist
Keep this list handy when a zone acts up. It's the entire troubleshooting process condensed into a quick reference.
- Panel powered?, Check transformer voltage (24, 28 VAC)
- Thermostat calling?, LED lit on panel for the zone
- Damper moving?, Vibration at the damper housing
- Airflow at register?, No kinks, no blockages
- Equipment operating?, Supply temperature within range
Work through these in order. Resist the urge to skip ahead. Ninety percent of the time, the fault lives somewhere in this chain.
The remaining ten percent requires equipment-level diagnostics. That's where a licensed technician earns their fee.
If this guide walks you to a stuck damper, a loose wire, or a bad transformer, you've just saved yourself a service call. Take the win. A little patience and a multimeter go a long way.

Similar Posts