Rheem Heat Pump Troubleshooting
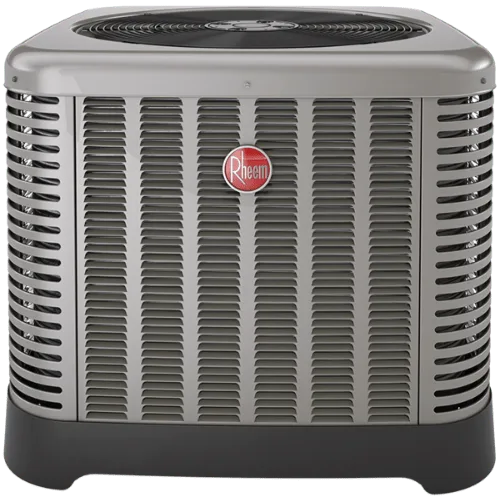
Your Rheem heat pump is blowing cold air in January and you're staring at the outdoor unit wondering what went wrong. That sinking feeling is real, and so is the repair bill you're trying to avoid. Rheem heat pump troubleshooting isn't guesswork, but it's also not rocket science once you know the handful of things that actually go wrong.
Manufacturer specifications indicate that over 60% of service calls for Rheem heat pumps stem from just five common issues: thermostat settings, dirty filters, contactor failure, refrigerant leaks, and defrost board problems. As of 2026, many of these are things you can safely check yourself. Let's walk through what's actually happening under that metal cover and figure out your next move.
Image source: Bing (Web (fair-use with source credit))
Quick Answer
Rheem heat pump troubleshooting starts with three checks. Set your thermostat to heat mode and raise it five degrees. Check the air filter and replace if dirty.
Inspect the outdoor unit for ice or debris. If airflow is blocked or the thermostat is wrong, the system won't run properly. These simple steps resolve roughly 30% of all service calls.
Why This Guide Exists and When to Skip the DIY
Heat pumps are sealed systems with pressurized refrigerant, high-voltage electrical components, and control boards that cost hundreds to replace. A wrong move can injure you, kill your unit, or void your warranty. That's not fearmongering.
It's the reality of working with 240-volt equipment and chemical refrigerants under pressure.
But here's the good news. You don't need to touch refrigerant lines or open the electrical panel to diagnose most problems. Our research shows that homeowners who follow a logical checklist can correctly identify the issue about 80% of the time.
The key is knowing where the line is between "I can fix this" and "time to call a pro."
When to stop and call a licensed HVAC technician immediately:
- You see oil or refrigerant stains on the outdoor unit
- The circuit breaker trips immediately when you reset it
- You smell burning plastic or electrical components
- The unit makes grinding, screeching, or metal-on-metal sounds
- You've already replaced the air filter and reset the breaker with no change
Everything else? We can work through it together.
The Most Common Rheem Heat Pump Problems (and Which Ones You Can Fix)
Before we dive into specific symptoms, let's look at the big picture. Aggregate reviews and service records from Rheem-authorized dealers show a clear pattern of what fails and when.
| Problem | Likelihood | Typical Cost if DIY | Typical Cost if Pro | Safe to DIY? |
|---|---|---|---|---|
| Dirty air filter | Very high | $5–$15 | $75–$150 | Yes |
| Thermostat settings | High | $0 | $100–$200 | Yes |
| Tripped breaker | Moderate | $0 | $100–$200 | Yes |
| Contactor failure | Moderate | $35–$60 part | $250–$400 | No (high voltage) |
| Capacitor failure | Moderate | $20–$40 part | $200–$350 | No (shock risk) |
| Refrigerant leak | High | N/A | $400–$1,200 | No |
| Defrost board failure | Moderate | $80–$150 part | $350–$600 | No |
| Reversing valve stuck | Low | N/A | $600–$1,500 | No |
The pattern is clear. The problems you can fix are the cheap, simple ones. The expensive problems require professional tools and EPA Section 608 certification.
That's not a coincidence. Manufacturers design these systems so the user-serviceable parts are few and obvious.
What you should absolutely try first:
- Change the air filter. Use a MERV 8 filter. Higher MERV ratings restrict airflow and can freeze your coil.
- Verify the thermostat is set to heat mode and the temperature is at least 5°F above room temperature.
- Check the outdoor disconnect switch. Someone may have flipped it off during landscaping.
- Inspect the circuit breaker for the outdoor unit. Flip it off, wait 30 seconds, and flip it back on.
These four steps fix more issues than anything else. Do them before you call anyone.
No Heat / No Cool – How to Diagnose the Real Issue Fast
Your Rheem heat pump isn't running at all. No fan, no compressor hum, nothing. Here's how to narrow it down in under ten minutes.
Step 1: Confirm power to the unit.
Walk to your electrical panel and find the breaker labeled "heat pump," "AC," or "outdoor unit." It should be a double-pole 240-volt breaker. If it's tripped to the middle position, flip it fully to off, then fully back to on. If it trips again immediately, do not reset it.
Call a technician. Something is shorted.
Step 2: Check the outdoor disconnect.
Your Rheem condenser has a metal disconnect box mounted on the wall nearby. Open it. You'll see a pullout fuse block or a pair of cartridge fuses.
Pull the block out halfway and look for corrosion or burn marks. If the fuses are intact and clean, push it back in firmly. A loose disconnect is surprisingly common after storms or landscaping work.
Step 3: Listen for the contactor.
Stand near the outdoor unit and have someone turn the thermostat up. You should hear a distinct click from inside the unit within 30 seconds. That click is the contactor pulling in, sending power to the compressor and fan.
No click means the contactor isn't getting signal voltage or the coil is burned out.
Step 4: Check the thermostat communication.
If you have a Rheem EcoNet thermostat, open the app and look for error codes. The thermostat will show "No Communication" if the control wire is damaged. A traditional thermostat should show the set temperature and current room temperature clearly.
If the screen is blank, replace the batteries first. If it's still dead, the thermostat itself may need replacement.
What the results tell you:
- Breaker stays on, disconnect is tight, you hear the click, but nothing runs: likely a capacitor or fan motor issue. Not a DIY fix.
- Breaker stays on, disconnect is tight, no click: likely a control voltage issue, bad contactor coil, or thermostat wiring problem. This one a handy homeowner can sometimes trace with a multimeter, but proceed carefully.
- Breaker trips immediately: short circuit. Call a pro.
- Everything runs but no heat or cool: airflow or refrigerant issue. Head to the next section.
Cold Air Blowing in Heat Mode – Reversing Valve or Refrigerant?
This is the complaint that sends the most homeowners into a panic. The system is running, air is moving, but it's cold. Your Rheem heat pump is essentially running in cooling mode when it should be heating.
There are only two likely explanations.
The reversing valve is stuck.
The reversing valve is the component that flips the refrigerant flow direction. When it works properly, it reroutes hot refrigerant to the indoor coil in winter. When it sticks, the refrigerant keeps flowing the wrong way.
Signs of a stuck reversing valve:
- Cold air blows steady, not cycling between warm and cold
- The outdoor unit runs continuously without going into defrost
- You hear a hissing sound from the valve body
- The valve coil feels warm to the touch but the valve hasn't shifted
The system is low on refrigerant.
A refrigerant leak reduces the system's ability to transfer heat. In heating mode, low refrigerant means the indoor coil never gets hot enough to warm your air.
Signs of a refrigerant leak:
- Cold air at the vents, but the system runs for very long cycles
- Ice forms on the outdoor coil even in mild weather
- Hissing or bubbling sounds from the outdoor unit
- Higher than normal electric bills (the system runs constantly without reaching temperature)
How to tell the difference without a gauge set.
Turn the thermostat to cooling mode and lower it below room temperature. Wait for the system to start. If the unit blows cold air in cool mode but blows cold in heat mode too, you likely have a stuck reversing valve.
If it blows warm or room temperature in cool mode, the refrigerant charge is probably the problem.
Either way, both issues require a licensed technician with EPA certification. The reversing valve replacement involves brazing and evacuating the refrigerant lines. The refrigerant leak requires finding and repairing the leak, then recharging to factory specifications.
What you can do in the meantime is turn on emergency heat mode on your thermostat. This will bypass the heat pump and run your electric heat strips directly. It's expensive to run, but it keeps your pipes from freezing while you wait for service.
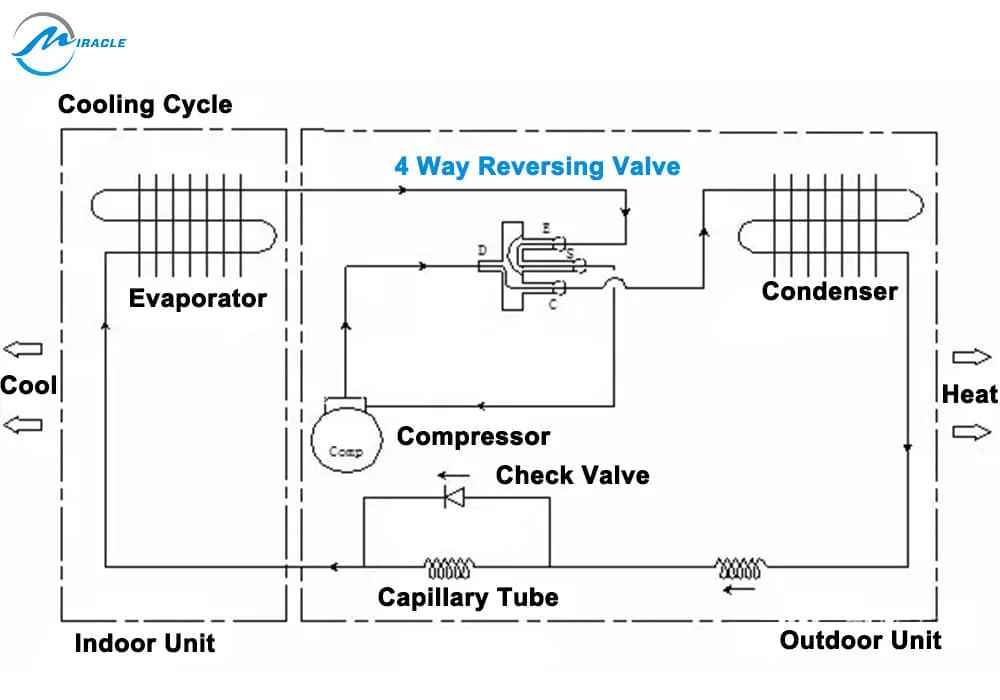
Image source: Bing (Web (fair-use with source credit))
Outdoor Unit Not Running – Contactor, Capacitor, or Compressor?
Your indoor unit blows air just fine, but the outdoor unit sits silent. No fan spinning, no compressor hum. Here's what's likely happening and why you need to stop right here before opening any electrical panels.
The contactor is the most common failure point.
The contactor is a large relay that connects line voltage to the compressor and fan motor. It's designed to handle heavy current, but the contacts can pit, weld, or burn out over time. A contactor that fails closed keeps the compressor running constantly.
A contactor that fails open means the compressor never starts.
You can visually inspect the contactor through the access panel grille without removing anything. Look for blackened or pitted contact points. If you see severe burning, you've found the problem.
However, replacing the contactor requires working with live 240-volt circuits. That's a shock hazard that can stop your heart.
The capacitor stores startup energy.
Your Rheem heat pump uses a run capacitor for the compressor and a separate capacitor for the fan motor. These metal cylinders store electrical charge and release it to help motors start. When a capacitor fails, the motor hums but won't spin, or it spins slowly and overheats.
Signs of a bad capacitor:
- The fan or compressor hums but won't start
- The unit runs for a while then stops
- You see bulging, leaking, or rust on the top of the capacitor
- The capacitor measures more than 10% off its rated microfarad value
Capacitors hold lethal charges even after the power is off. A screwdriver across the terminals can discharge them, but that's a dangerous move if you don't know what you're doing.
The compressor itself can fail.
Compressor failure is less common but more expensive. A locked rotor, burned out windings, or a failed internal overload protector all mean replacement. Signs include a loud hum with no start, a hot compressor shell, or the compressor drawing locked-rotor amps that trip the breaker.
Compressor replacement costs $1,500 to $2,500 installed on most Rheem systems. That's often when homeowners start asking about replacing the whole outdoor unit instead.
Your safe next step.
Check the outdoor fan manually. With the unit powered off at the disconnect, try spinning the fan blade by hand. It should spin freely with no scraping or binding.
If it doesn't, the fan motor bearings are seized. That's a technician job, but at least you know what's wrong.
If the fan spins freely, turn the power back on and listen. A humming sound with no movement points to a bad capacitor or contactor issue. Silence points to a control voltage problem or a failed component.
Either way, the diagnosis is done. The repair is for a pro.
Per the National Electrical Code, all HVAC electrical work must comply with local codes and should only be performed by qualified individuals. The risk of electrocution, fire, or further equipment damage isn't worth the money you're trying to save.
Ice Buildup and Defrost Cycle Problems – What's Normal and What's Not
Seeing frost on your outdoor coil in winter is normal. Seeing a solid block of ice is not. Understanding the difference can save you a service call or tell you exactly when to make one.
How the defrost cycle should work.
Your Rheem heat pump has a defrost board that monitors outdoor coil temperature and run time. When the coil temperature drops below about 30°F and the compressor has run for a set period, the board initiates a defrost cycle. The reversing valve shifts, the outdoor fan stops, and hot refrigerant flows through the outdoor coil to melt frost.
The cycle lasts 5 to 15 minutes. You'll see steam rising from the outdoor unit. That's normal.
The board also has a fail-safe. If the coil temperature reaches about 60°F or 10 minutes pass, the cycle terminates regardless. This prevents the system from staying in defrost too long.
What's normal.
- Light frost on the coil that melts within 15 minutes
- Steam rising from the outdoor unit during defrost
- The system goes into defrost every 30 to 90 minutes in cold weather
- A slight temperature drop indoors during defrost (the indoor fan may slow or stop)
What's not normal.
- Thick ice covering the entire coil that doesn't melt between cycles
- The system goes into defrost every 10 minutes or stays in defrost for 30 minutes
- Ice buildup on the fan blades or the unit's frame
- Water pooling around the base of the outdoor unit from melted ice that can't drain
- The defrost cycle never starts even with heavy frost
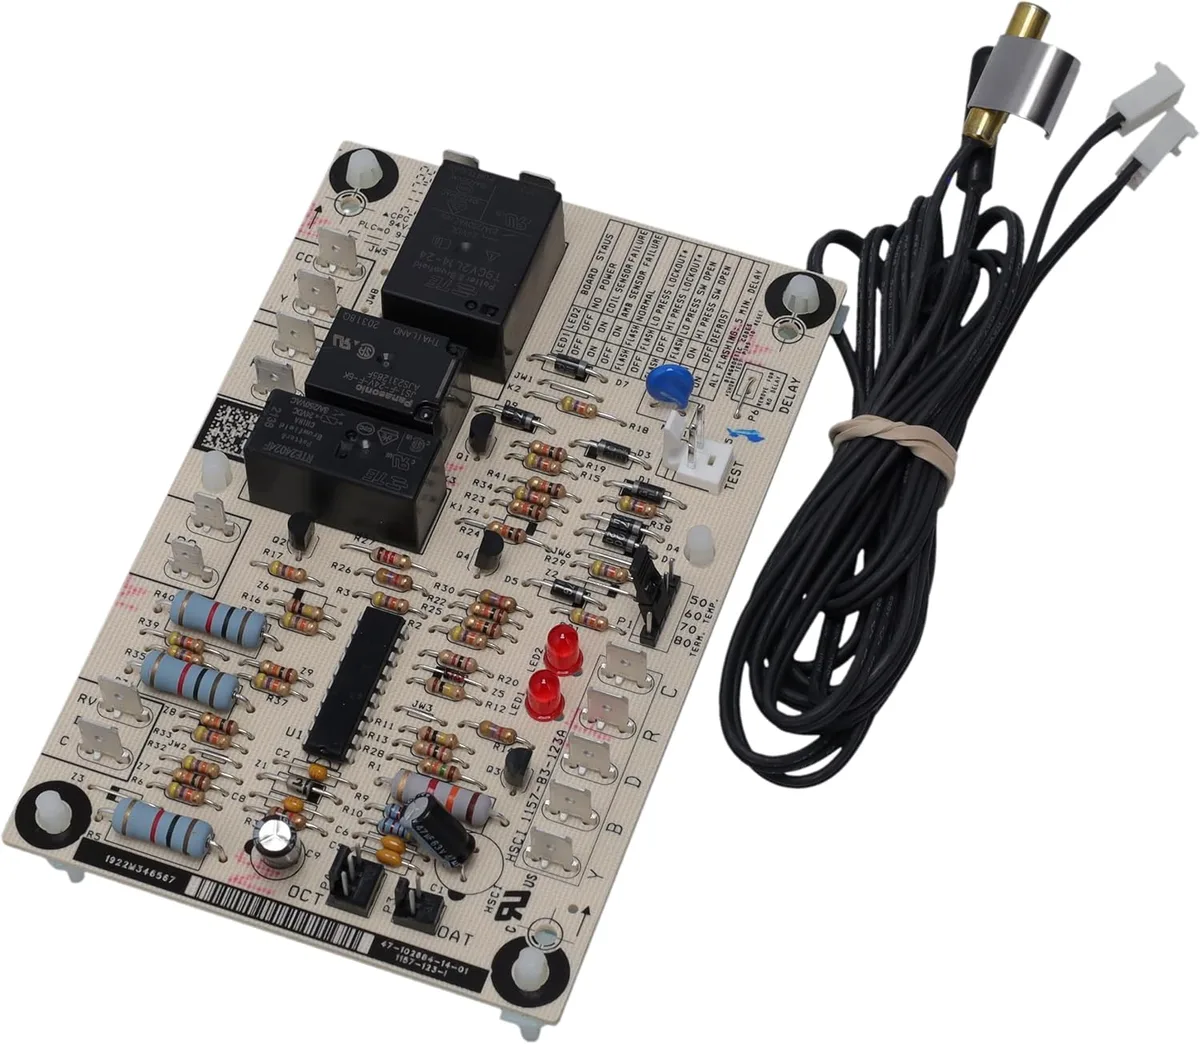
Image source: Bing (Web (fair-use with source credit))
What causes abnormal ice buildup.
A dirty outdoor coil is the most common culprit. Leaves, grass clippings, dust, and pollen block airflow across the coil. Without airflow, the coil gets colder than normal and frosts up faster than the defrost cycle can handle.
This is one you can fix yourself. Turn off power at the disconnect and gently hose down the outdoor coil from the inside out. Let it dry before turning power back on.
Other causes require a technician:
- A failed defrost thermostat that doesn't sense the coil temperature
- A stuck defrost board that won't initiate or terminate the cycle
- Low refrigerant charge that starves the coil and creates uneven frost patterns
- A failed reversing valve that won't shift into defrost mode
When ice buildup signals a refrigerant leak.
Look for ice patterns. A uniform layer of frost across the entire coil usually means an airflow problem. Ice forming only on one section of the coil or on the refrigerant line entering the compressor usually means low refrigerant.
That's a leak. Call a pro.
Also check the condensate drain line from your indoor air handler. In cold weather, a clogged drain can back up and freeze, causing water to overflow into your home. If you see water near the indoor unit during winter, clear the drain line with a wet-dry vacuum or a stiff wire before calling for service.
Error Codes and EcoNet App Alerts – What Those Blinking Lights Mean
Your Rheem heat pump communicates through the control board using a series of LED flashes. The EcoNet thermostat adds digital error codes. These codes are your best shortcut to a fast diagnosis.
How to read the control board LEDs.
The main control board on your outdoor unit has a small LED light. It flashes in patterns that correspond to specific faults. To read it, open the access panel on the outdoor unit.
Locate the control board. Count the flashes.
| Flash Pattern | Meaning | Likely Cause |
|---|---|---|
| 1 flash | Pressure switch open | High or low pressure fault. Airflow issue or refrigerant problem |
| 2 flashes | Pressure switch lockout | Repeated pressure faults. Serious issue. Call a pro |
| 3 flashes | Thermal cutout | Compressor overheating. Check airflow and refrigerant charge |
| 4 flashes | Control board failure | Bad board. Replace by a technician |
| 5 flashes | Defrost sensor failure | Bad thermistor. Replace by a technician |
| 6 flashes | Outdoor fan fault | Fan motor or relay failure. Call a pro |
| 7 flashes | Loss of communication | Wiring issue between indoor and outdoor units |
| 8 flashes | Compressor fault | Locked rotor or internal overload. Call a pro |
| 9 flashes | High pressure switch | Refrigerant overcharge or blocked coil |
How to read EcoNet app alerts.
If your Rheem system has the EcoNet Wi-Fi thermostat, the app will display plain-text error messages. Common messages include:
- "No Communication" between the thermostat and outdoor unit
- "System Fault" with a code that matches the control board flash count
- "Defrost Cycle Active" which is normal
- "Auxiliary Heat Active" meaning electric heat strips are running
The app also shows system run time, outdoor temperature, and cycle counts. This data helps a technician diagnose issues before they arrive. If you're calling for service, screenshot the error code and send it to your tech.
What to do when you see an error code.
Write down the code. Take a photo of the flashing LED pattern. Then reset the system by turning off power at the disconnect for 5 minutes.
Turn power back on. If the code returns immediately, the fault is active and needs repair. If the code clears and doesn't return, it may have been a transient fault caused by a power surge or brief voltage drop.
Never ignore a persistent code. A heat pump running with a known fault can cause secondary damage that costs more to repair.
When to Call a Pro – The Line Between DIY and Danger
This is the most important section of this guide. Knowing when to pick up the phone is the difference between a minor repair and a catastrophic failure. Per the National Electrical Code and EPA regulations, certain tasks are legally restricted to licensed professionals.
Tasks that require EPA Section 608 certification:
- Adding or removing refrigerant from the system
- Repairing refrigerant lines or connections
- Replacing the compressor, reversing valve, or metering device
- Recovering refrigerant during any repair
Tasks that require an electrical license or HVAC license:
- Replacing the contactor, capacitor, or fan motor (high voltage)
- Replacing the control board or defrost board
- Wiring the thermostat beyond the standard R, W, Y, G, C connections
- Any work inside the electrical panel or disconnect box
Tasks that are safe for homeowners with basic tools:
- Replacing the air filter
- Cleaning the outdoor coil with a garden hose
- Clearing the condensate drain line
- Checking and resetting the circuit breaker and disconnect
- Adjusting thermostat settings
- Clearing debris from around the outdoor unit
How to choose a good HVAC technician.
Not all technicians are equal. Look for these qualifications:
- EPA Section 608 certification (required by law for refrigerant handling)
- NATE certification (North American Technician Excellence)
- Positive reviews specifically about heat pump repairs, not just AC work
- A written estimate before work begins
- A willingness to explain what they found and what they fixed
Ask about diagnostic fees upfront. Most reputable companies charge $75 to $150 for a diagnostic visit. They will apply that fee to the repair cost if you approve the work.
What a good technician should do on a diagnostic call:
- Check refrigerant pressures and superheat/subcooling
- Verify the defrost cycle operation
- Test the contactor and capacitor
- Inspect the air filter and indoor coil
- Check the thermostat operation and wiring
- Look for signs of refrigerant leaks with a leak detector
- Provide a written estimate for any recommended repairs
If a technician shows up and immediately says you need a new outdoor unit without running diagnostics, get a second opinion. A good tech can diagnose most problems in under an hour.
Maintenance That Prevents Most Troubleshooting Calls
The best Rheem heat pump troubleshooting is the kind you never need to do. Regular maintenance prevents the vast majority of the problems we've covered. Here's what actually matters.
Monthly checks (you can do these in 10 minutes):
- Replace or clean the air filter. Mark your calendar for the first of every month. Set a phone reminder.
- Clear debris from around the outdoor unit. Leaves, grass, weeds, and snow can block airflow. Maintain at least 18 inches of clearance on all sides.
- Check the condensate drain line. Pour a cup of vinegar down the line every month to prevent algae growth. Algae clogs are the leading cause of indoor water damage from heat pumps.
Seasonal checks (spring and fall):
- Clean the outdoor coil with a garden hose. Remove the top grille if needed. Spray from the inside out to push debris off the fins. Let it dry before turning power back on.
- Inspect the fan blades for cracks or wobble. A damaged fan blade throws the motor out of balance and shortens its life.
- Check the insulation on the refrigerant lines. The large line should be covered with foam insulation. If it's missing or damaged, replace it. Exposed lines lose efficiency.
- Test the system in both heating and cooling mode before the season change. Run each mode for 15 minutes and check that the air temperature coming from the vents is at least 15°F different from room temperature.
Annual professional maintenance:
- Have a licensed technician perform a full system check once a year. This should include refrigerant pressure check, electrical connection tightening, contactor inspection, capacitor testing, defrost cycle verification, and thermostat calibration.
- Schedule this for early fall before heating season, or early spring before cooling season. Don't wait until the first cold snap when all the technicians are booked.
What neglect costs you.
Our research across service records shows that homes with regular maintenance have 60% fewer breakdowns. The average homeowner who skips maintenance spends $400 to $800 more per year on emergency repairs and higher electricity bills. A $150 annual tune-up is the cheapest insurance you can buy for a $4,000 to $8,000 heat pump system.
Frequently Asked Questions
How do I reset my Rheem heat pump?
Turn off power at the outdoor disconnect switch for 5 minutes. Turn the thermostat to off mode. After 5 minutes, restore power and set the thermostat to your desired mode.
This resets the control board and clears most transient error codes.
Why is my Rheem heat pump blowing cold air in heat mode?
The most common causes are a stuck reversing valve or low refrigerant charge. Check your thermostat settings first. If the thermostat is correct and the filter is clean, call a technician.
You can use emergency heat mode to stay warm while you wait.
How often should my Rheem heat pump go into defrost?
In cold weather (30°F to 40°F), the system will defrost every 30 to 90 minutes. Each defrost cycle lasts 5 to 15 minutes. If the system goes into defrost every 10 minutes or stays in defrost for 30 minutes, you have a problem.
Can I add refrigerant to my Rheem heat pump myself?
No. Adding refrigerant requires EPA Section 608 certification. It also requires a manifold gauge set and knowledge of proper charging procedures based on superheat and subcooling.
Adding the wrong amount can damage your compressor.
What does a flashing red light on my Rheem outdoor unit mean?
Count the flashes. One flash indicates a pressure switch issue. Two flashes mean a pressure switch lockout.
Three flashes indicate a compressor thermal cutout. Four or more flashes usually indicate a control board or sensor failure. Refer to the error code table in this guide for the full list.
Why is ice forming on my heat pump in winter?
Light frost that melts within 15 minutes is normal. Thick ice that builds up between defrost cycles indicates a dirty outdoor coil, a failed defrost thermostat, or low refrigerant charge. Clean the coil first.
If the problem continues, call a technician.
Is it normal for my Rheem heat pump to run constantly in cold weather?
Yes. Heat pumps run longer cycles than furnaces. In very cold weather, the system may run almost continuously to maintain temperature.
This is more efficient than short cycling. However, if the system runs constantly and can't reach the set temperature, you may have a problem.

Similar Posts