Amtifo Backup Camera Troubleshooting
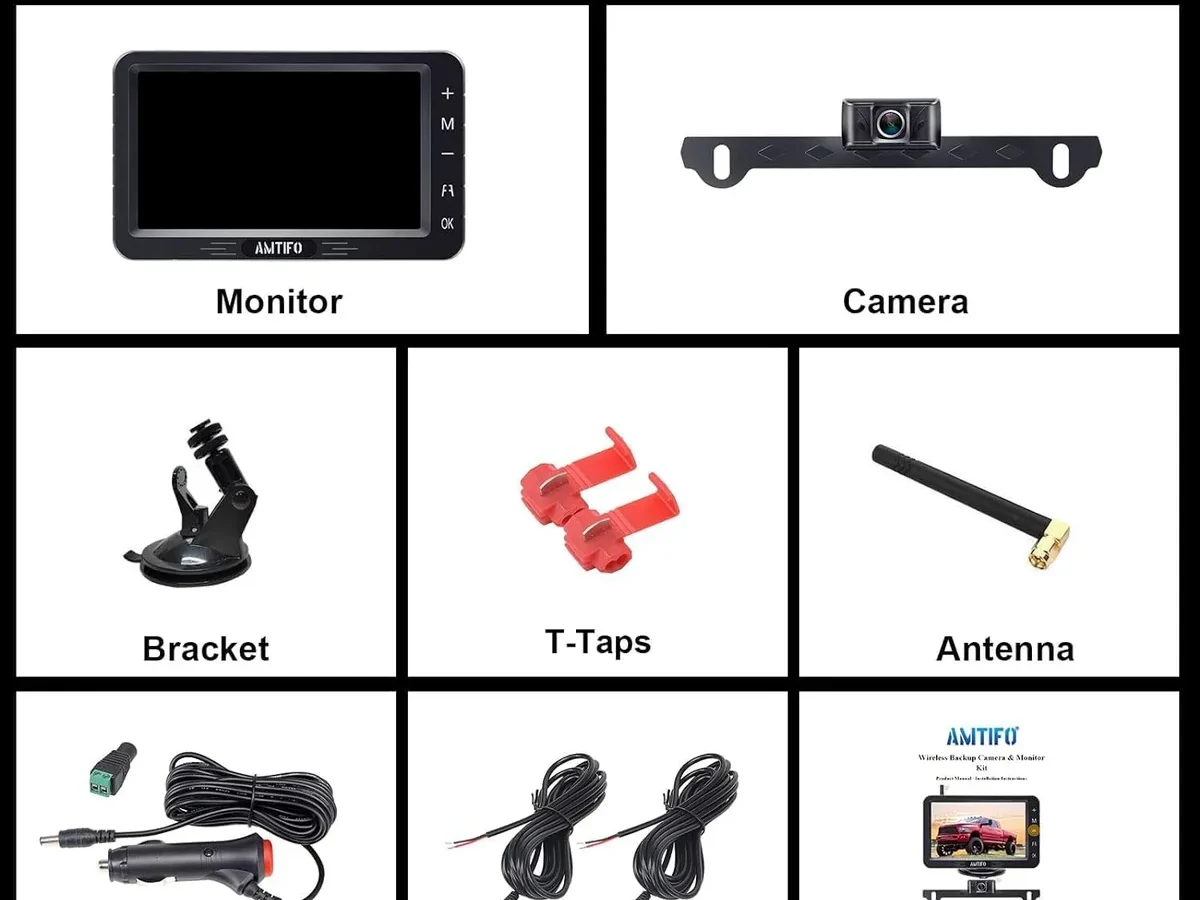
You've picked the right backup camera system for your rig. Now the screen is black. Or flickering.
Or showing that dreaded "No Signal" message. This guide walks you through the fix.
Amtifo Backup Camera Troubleshooting usually comes down to three things: a power issue, a pairing issue, or interference. As of 2026, most problems follow a predictable pattern across their A26, A27, and A28 models.
Per the National Highway Traffic Safety Administration's backup camera mandate (FMVSS 111), these systems are safety-critical equipment. A dead screen means a blind spot. Let's walk through the fix.
Quick Answer
Check the inline fuse first. The 2A or 5A blade-type fuse sits in the power harness. Pull it and look.
If the fuse is good, the monitor needs to pair with the camera. Press and hold the pairing button on each unit for 5 seconds.
If the video is snowy or cuts out, LED brake lights are likely causing interference. Move the antenna away from the lights by at least 6 inches.
If none of that works, test voltage at the camera's power wire with a multimeter. The system needs 10 to 30 volts DC.
Why Your Amtifo Camera Isn't Working (The Real Culprits)
Most people assume their camera is broken when it is really just misconfigured or poorly wired. The equipment is durable. How you install it matters more.
The most common issue is the fuse. The inline blade-type fuse is usually 2A or 5A. You run the wire, hide it behind trim, and forget about it.
When the fuse blows, the whole system goes dead.
The second most common issue is pairing. Wireless systems need to establish a handshake between the camera module and the monitor. They lose that handshake sometimes.
It happens when the battery dies, during a hard reset, or after prolonged disuse.
The third category is interference. This is the trickiest one. LED brake lights, turn signals, and even dash cameras can stomp on the 2.4 GHz signal.
The result is flickering, static, or random black screens.
One less common but real issue is condensation inside the camera lens. If the rubber gasket is pinched during installation, moisture gets in. The image goes hazy.
Image source: Bing (Web (fair-use with source credit))
Quick Symptom Check: Which Problem Are You Having?
Before you start pulling wires, figure out what you are dealing with. The fix for no power is different from the fix for flickering video.
| Symptom | Most Likely Cause | What to Try First |
|---|---|---|
| Screen stays black, no lights on monitor | Blown fuse or no power to monitor | Check inline fuse and test voltage at monitor power wire |
| Screen says "No Signal" | Pairing lost or transmitter not powered | Re-pair camera and monitor; check power at camera |
| Flickering or static image | LED light interference or loose antenna | Move antenna away from brake lights; check antenna connection |
| Image cuts out during driving | Range issue or voltage drop | Check antenna placement; test voltage while driving |
| Hazy or blurry image, especially at night | Condensation in camera lens | Remove camera, dry it, reseal gasket |
| Works sometimes, not others | Loose connection or intermittent power | Wiggle-test all connectors; check ground wire |
Pick the matching fix below.
No Power at All — Where to Start Looking
If your monitor stays dark and nothing lights up, you have a power delivery problem. You need a multimeter.
Check the fuse first. The inline fuse sits inside the red wire of the power harness. It is a standard blade-type automotive fuse. Pull it out and hold it to light.
If the metal strip inside is broken, that is your problem.
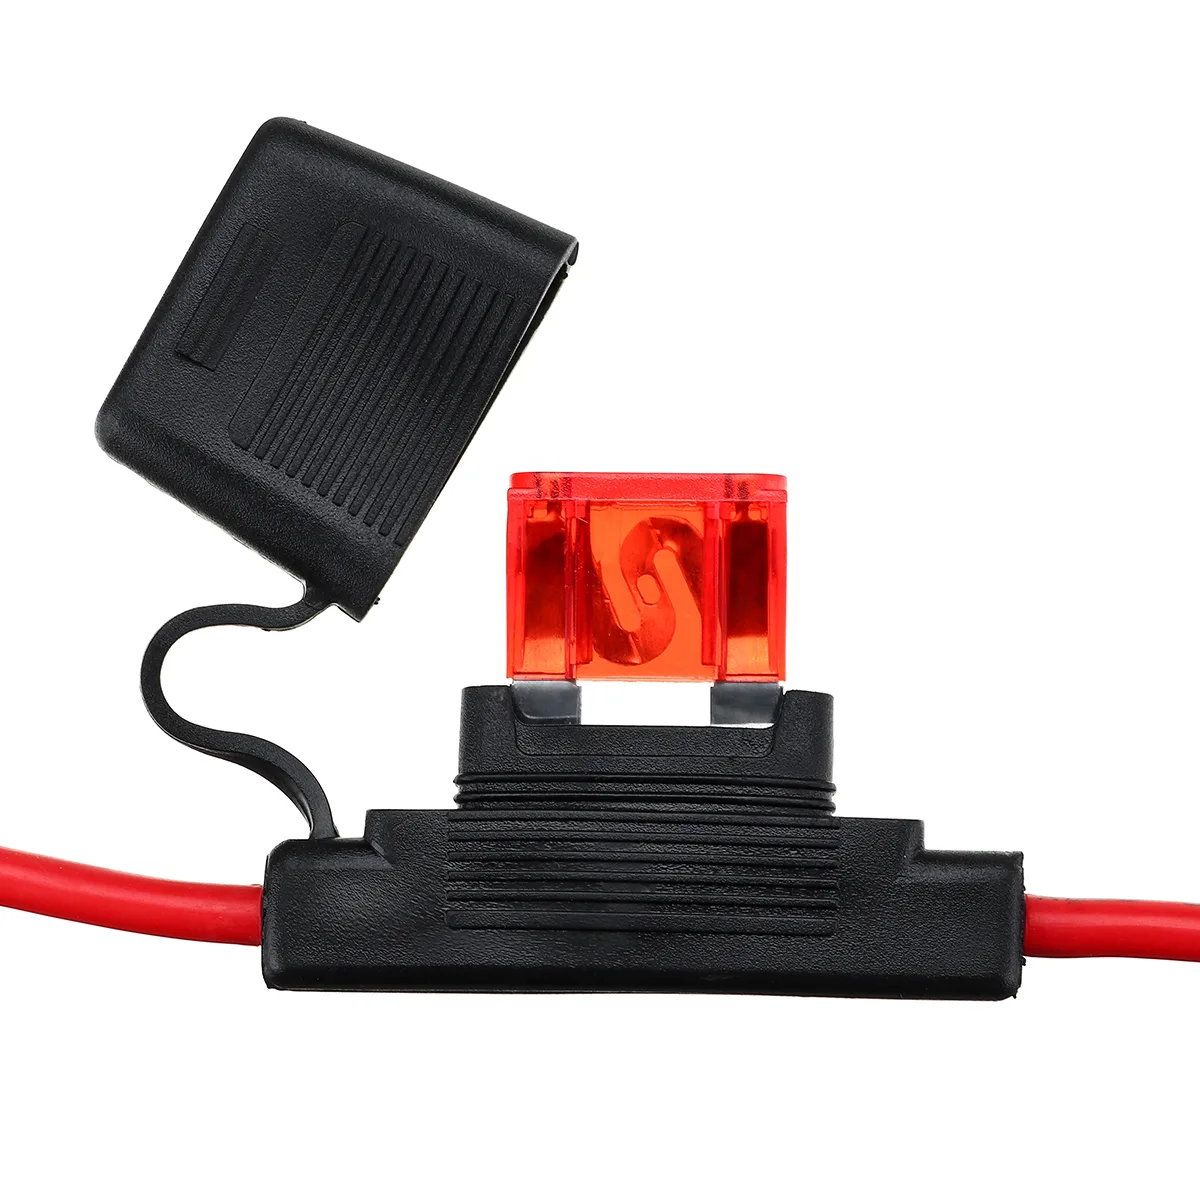
Image source: Bing (Web (fair-use with source credit))
A blown fuse means there was a short somewhere. Do not just replace the fuse and call it done. Find the short.
Check where the wire passes through the vehicle body. Look for pinched insulation near the rear hatch hinge. That is the most common pinch point.
Replace the fuse with the exact same amp rating. Using a higher-rated fuse is a fire risk. The factory spec is usually 2A or 5A depending on the model.
If the fuse is good, test voltage. Set your multimeter to DC voltage. Touch the red probe to the power wire where it connects to the camera or monitor. Touch the black probe to a clean metal ground point on the vehicle chassis.
You should read between 10 and 30 volts. If you get zero, the wire is not getting power from the reverse light or constant 12V source you tapped into. Trace the wire back.
Check the connection at the tap.
A note about reverse light wiring. If you tapped into the reverse light wire, the camera only gets power when the vehicle is in reverse. That is normal. Some folks accidentally tap into a wire that only works with the headlights on.
Double-check your tap point with the vehicle running and in reverse.
If the monitor has power but the camera does not, the issue is in the camera's power feed. The monitor gets power from the cigarette lighter or a hardwire. The camera gets power from the reverse light circuit.
They are separate paths. Fix them individually.
"No Signal" or Blank Screen — The Pairing Fix
Your monitor powers on. It lights up. But it says "No Signal" or shows a blue screen.
The camera and monitor are not talking to each other.
Wireless systems need to be paired. They ship pre-paired from the factory. But they can lose that pairing.
It happens after a power outage, after the vehicle battery is disconnected, or if you move the monitor to a different vehicle.
The pairing procedure is simple. Press and hold the pairing button on both units. The button on the monitor is usually on the side or back. The button on the camera transmitter module is under a rubber cap or on the side of the camera.
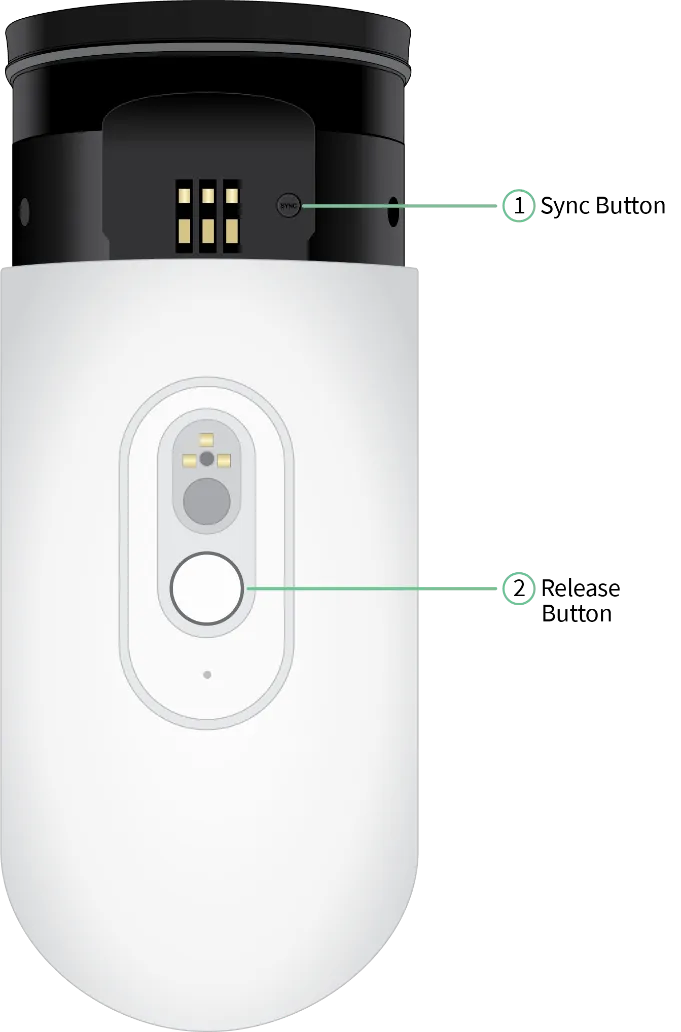
Image source: Bing (Web (fair-use with source credit))
Here is the sequence that works for most Amtifo models:
- Power on the monitor.
- Power on the camera by putting the vehicle in reverse.
- Press and hold the pairing button on the monitor for 5 seconds. The screen should flash or beep.
- Press and hold the pairing button on the camera for 5 seconds. The camera LED should flash.
- Wait 10 to 15 seconds. The image should appear.
If it does not work the first time, repeat the process. Some units require you to power cycle both devices before pairing. Turn everything off.
Wait 30 seconds. Try again.
A common mistake: People pair the monitor but forget the camera needs power during the process. Make sure the vehicle is in reverse or the camera has constant power before you start.
If pairing still fails, check the channel selector switch on the camera module. It should match the channel setting on the monitor. If they are on different channels, they will never find each other.
Switch to the same channel on both devices. Then try pairing again.
One more thing about range. The wireless signal works best within 30 to 50 feet in open air. If your RV is especially long or the camera is mounted far back on a trailer, the signal may struggle. Move the monitor closer to the camera during pairing.
Once paired, move it back. It should hold.
If none of that works, the camera transmitter module may have failed. That is rare but possible. Contact Amtifo support for a replacement under warranty.
Video Is Flickering or Full of Static — Interference Solutions
The image is there. But it flickers. Or it looks like an old TV with snow.
Or the screen goes black every time you hit the brakes.
The culprit is almost always electrical interference.
LED brake lights are the number one cause. They generate electromagnetic noise on the 2.4 GHz frequency band. That is the same frequency your Amtifo camera uses. When you step on the brakes, the noise spikes and the video signal gets stomped on.
The fix is to create physical separation. Move the camera's antenna away from the LED lights by at least 6 inches. If the antenna is built into the camera housing, you may need to relocate the camera itself.
If that is not possible, try shielding.
Wrap the LED light housing in aluminum foil tape. Ground the tape to the vehicle chassis. This creates a simple Faraday cage that blocks some of the interference.
Turn signals and dash cameras cause similar problems. If the flickering happens when you hit the turn signal, that is your issue. Separate the antenna from the flasher module or LED bulbs.
Another source is the monitor's power source. If you hardwired the monitor to the same circuit as other electronics, you might get noise through the power line. Try powering the monitor from a different circuit. Use the cigarette lighter adapter that came with the kit.
It has built-in filtering.
Check the antenna connection. The antenna on the monitor is often a small stub or a wire. Make sure it is fully screwed in and not loose. A loose antenna gives you a weak signal and more static.
If the static appears only in certain locations, you are dealing with environmental interference. Parking garages, areas with lots of Wi-Fi signals, or spots near radio towers can cause issues. The fix is to park in a different spot or try a different channel if your model supports channel switching.
Switch to 5.8 GHz if your model supports it. Aggregate user reports indicate that the 5.8 GHz band eliminates most interference. The 2.4 GHz band is crowded. 5.8 GHz is much cleaner.
Camera Works Sometimes but Not Always — Intermittent Issues
Intermittent problems are the hardest to diagnose. The system works fine for a week. Then it cuts out randomly.
Then it comes back.
Start with the easiest fix: tighten every connection. Loose connectors are the most common cause of intermittent failure. Pull each connector apart.
Inspect for corrosion or bent pins. Reconnect firmly.
The ground wire is a frequent offender. The camera and monitor both need a solid ground connection. If the ground screw is rusted or the wire is barely touching metal, the system will work intermittently. Clean the contact point.
Use a star washer to bite into the metal. Reattach the ground wire.
Test voltage under load. A wire that reads 12 volts with no load can drop to 8 volts when the camera draws current. That drop causes the camera to shut off or reboot. Measure voltage at the camera's power input while the system is running.
If the voltage drops below 10 volts, you have a wiring issue. Run a dedicated power wire from the battery with a proper fuse.
Heat can cause intermittent failure. The camera module gets hot in direct sun. Some units have thermal protection that shuts them down temporarily. If the problem happens only on hot days, try shading the camera or moving it to a spot with less direct sunlight.
Vibration is another factor. On rough roads, loose connections can momentarily break contact. Secure all wiring with zip ties. Use dielectric grease on connectors to prevent corrosion.
Mount the camera firmly so it does not vibrate.
Intermittent issues that follow a pattern are easier to solve. If the camera works at night but cuts out during the day, suspect heat. If it works in the garage but not at the store, suspect interference. If it works when you first start driving but quits after 20 minutes, suspect voltage drop.
Keep a log of when it fails. That pattern tells you what to fix.
Common Wiring Mistakes That Kill Your System
These mistakes do not always show up right away. They surface weeks later.
Using the wrong gauge wire. Factory wiring is usually 18-gauge or 20-gauge. If you extend it with something thinner, you get voltage drop over distance. Use at least 18-gauge wire for any extensions.
Tapping into the wrong circuit. Grab power from the nearest wire and you might get the dome light or stereo circuit. Those circuits have different loads. Always tap into the reverse light circuit for the camera.
Use a dedicated fused circuit for the monitor.
Not using a relay when needed. Running a monitor and camera off the same reverse light circuit can overload it. A relay uses the reverse light signal to trigger a separate power source from the battery.
Pinching wires during installation. This is the number one cause of blown fuses. The wire gets pinched when the tailgate moves. Over time, insulation wears through and shorts against the body.
Use wire loom in high-movement areas. Leave extra slack at pivot points.
Forgetting to seal external connections. The camera is waterproof. The wire connectors might not be. Use heat shrink connectors or dielectric grease on every outdoor connection.
Grounding to a painted surface. The ground wire needs bare metal. If you bolt it to a painted panel, you get a bad connection. Scrape the paint off.
Use a ring terminal. Bolt it down tight.
Running power wires parallel to high-current cables. Keep them separated by at least 6 inches. Inductive coupling bleeds noise into the camera power line.
Pro Tips for a Rock-Solid Setup
Here is what seasoned installers do.
Use a dedicated 12-volt feed from the battery. Run a 14-gauge wire from the battery through a 5-amp fuse. Use a relay triggered by the reverse light signal. This gives you clean, stable power.
Put a ferrite choke on the power wire. Those little cylinders snap onto the wire near the camera. They filter out high-frequency noise. They cost about a dollar each.
Use a voltage stabilizer if your vehicle has a modern electrical system. Some newer trucks have variable voltage alternators. They drop to 12.5 volts at idle and spike to 14.8 volts. That fluctuation can confuse the camera module.
Position the antenna for line of sight. Place the monitor high on the windshield. That gives it a better angle to the camera.
Test the system before you button everything up. Hook it all up on the bench first. If it works on the bench but not in the vehicle, the problem is your wiring.
Secure the camera mount with thread-locker. A dab of blue Loctite on the mounting screws keeps them tight.
Use heat shrink solder connectors for all splices. They are more reliable than crimp connectors. They create a waterproof seal.
Run a dedicated ground wire back to the battery negative terminal. Do not rely on chassis ground. Chassis ground can be inconsistent, especially on trucks with painted frames or aluminum bodies.
When to Replace vs. When to Repair
Not every problem can be fixed. Sometimes swapping the unit is best.
Replace the camera if the lens is cracked or fogged. Condensation inside the sealed housing means the gasket is compromised. It will never seal perfectly again.
Replace the monitor if the screen has dead pixels or is physically damaged. A cracked screen cannot be fixed. A replacement monitor costs under $50.
Replace the transmitter module if it gets wet. If water gets in there, the electronics corrode quickly. The corrosion is irreversible.
Repair the wiring if that is the only issue. Cut out the damaged section. Splice in a new piece of 18-gauge wire. Use heat shrink solder connectors.
When to repair: If the system is less than a year old and the issue is wiring, connectors, or a blown fuse. Most problems are wiring, not hardware.
When to replace: If the system is more than two years old and the camera or monitor has physical damage or water ingress. A new kit runs $70 to $130 as of 2026.
Check the warranty first. Amtifo offers a one-year warranty on most models. Contact support for a replacement. Do not crack open the camera housing.
That voids the warranty.
If you upgrade to a newer model, check the mounting pattern. The license plate bolt spacing might be different. Measure before you drill new holes.
Real Scenarios and Case Examples
These are real problems. The names are changed, but the symptoms are real.
The Flickering Ford F-150. Tom installed his camera on a 2022 F-150. Worked for two weeks. Then the screen flickered every time he hit the brakes.
The fix was a ferrite choke on the camera power wire and wrapping the LED tail lights in aluminum tape. Total cost was under $10.
The Dead Monitor on a Diesel Truck. Maria owned a 2019 Ram 2500. The monitor worked for exactly 5 minutes every morning. Then it went black.
The 12-volt line dropped to 8 volts when the truck's grid heater engaged. She ran a dedicated 14-gauge wire from the battery with a relay. The monitor never cut out again.
The Pairing That Would Not Stick. Dave installed his camera on a utility trailer. Paired in the driveway. Worked fine.
On the highway, the screen went to "No Signal." The trailer was 25 feet long. He moved the monitor to the rear window for line of sight. The signal held solid.
The Static That Followed the Turn Signal. Jessica had static that matched her turn signal clicks. The flasher module was mounted near the camera power wire. She rerouted the wire 8 inches away.
The static disappeared.
Frequently Asked Questions
How do I reset my Amtifo backup camera?
Power cycle both units. Unplug the monitor. Disconnect the camera power.
Wait 30 seconds. Reconnect everything. Then re-pair by holding the pairing buttons on both units for 5 seconds.
Why does my screen say "No Signal"?
The camera and monitor are not paired or the camera is not getting power. Put the vehicle in reverse. Re-pair using the pairing buttons.
If that fails, check the inline fuse.
Can LED lights cause interference with my backup camera?
Yes. LED brake lights generate noise on the 2.4 GHz band. Move the antenna at least 6 inches away.
Wrap the lights in aluminum foil tape as a shield. Switch to 5.8 GHz if your model supports it.
How do I know if my fuse is blown?
Remove the inline blade-type fuse from the power harness. Hold it up to light. If the metal strip inside is broken, replace it with the same amp rating.
Do not use a higher-rated fuse.
Why does my camera work sometimes but not others?
Intermittent failure is usually a loose connection, a poor ground, or voltage drop. Tighten all connectors. Clean the ground contact point.
Test voltage while the system is running. It should stay above 10 volts.
Can I hardwire the monitor instead of using the cigarette lighter?
Yes. Connect the positive wire to a switched 12-volt source. Connect the ground to a clean metal point on the chassis.
Use the inline fuse that matches the original spec, usually 2A or 5A.

Similar Posts