Litter Robot 4 Troubleshooting
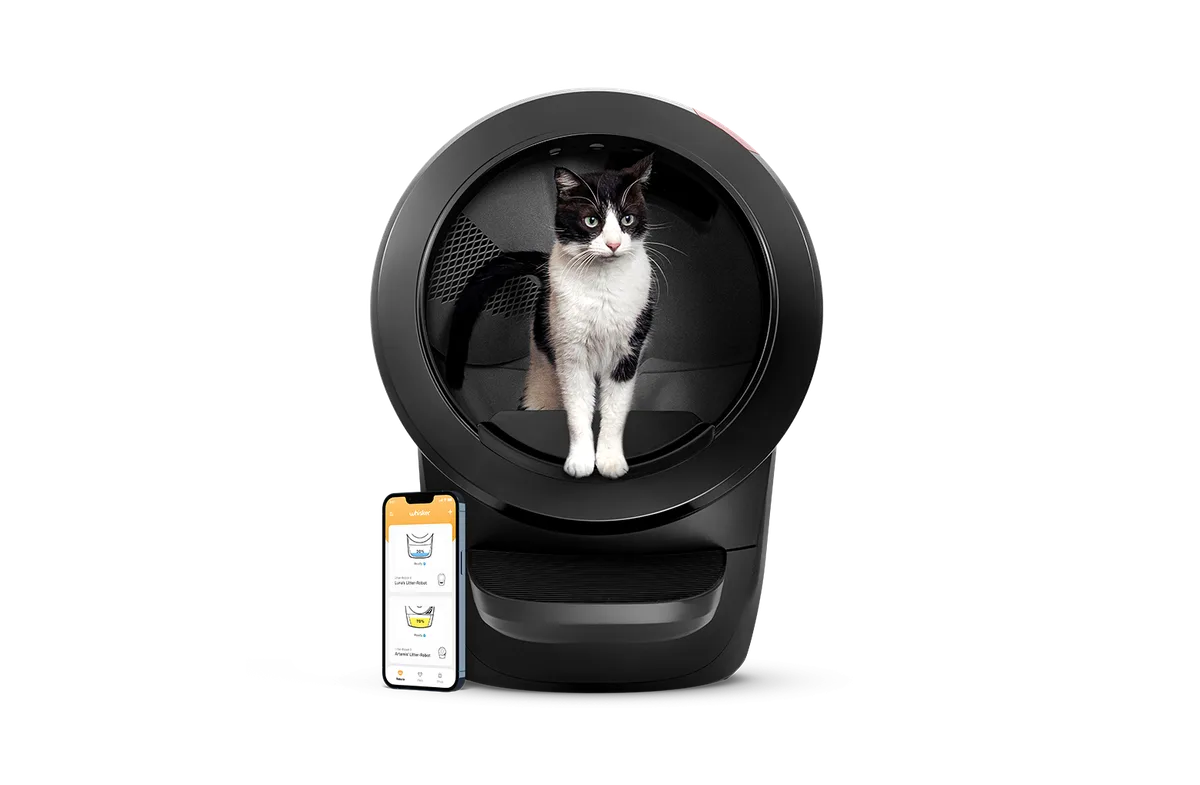
Your Litter Robot 4 is flashing a red light. Or it stopped mid-cycle. Maybe it's telling you the drawer is full, but you just emptied it.
You're not alone, and this usually isn't a broken unit. Most Litter Robot 4 troubleshooting comes down to a handful of common sensor issues, a minor misalignment, or a firmware quirk that takes two minutes to fix.
Manufacturer specifications show the LR4 relies on four separate sensor systems to operate safely: pinch sensors, a weight-based cat sensor, infrared drawer-full indicators, and a bonnet contact switch. Each one can trigger a false alarm under the right conditions. As of 2026, the aggregate of user reports and Whisker's own support documentation points to the same five errors doing the heavy lifting.
Let's walk through what each one actually means and how to get your unit running again.
Image source: Bing (Web (fair-use with source credit))
Quick Answer
Most Litter Robot 4 errors are false alarms. The machine's safety sensors are sensitive, and small issues trigger big messages. The fix usually involves cleaning a sensor, reseating the bonnet, or performing a hard reset.
Unplug the unit for 30 seconds. Press the bonnet firmly until it clicks. Clean the pinch sensors and DFI lenses with a dry cloth.
Nine times out of ten, that's all it takes.
What's Going On? – The Most Common LR4 Error Messages and What They Actually Mean
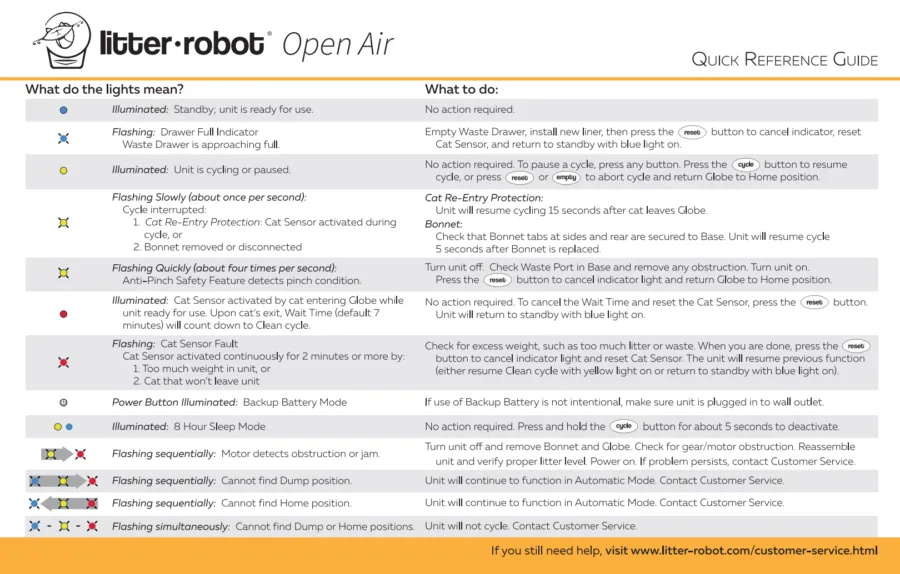
Image source: Bing (Web (fair-use with source credit))
The LR4 control panel shows plain English messages, not code numbers. That's helpful, but the messages can still be confusing. They often seem to say one thing when the real problem is something else entirely.
"Bonnet Removed"
This error means the bonnet contact switch isn't closed. The bonnet might be perfectly seated, but a tiny piece of litter or dust on the switch pad can break the connection. A misaligned bonnet hinge is also common, especially after you've removed and replaced the globe for cleaning.
"Pinch Detect"
The pinch sensors run along the top and bottom edges of the globe opening. They're designed to stop the globe if a cat tail or paw is in the way. But a clump of litter stuck to the sensor, or even a static electricity charge in dry weather, can trigger a false pinch detect.
The sensor is working correctly, but it's detecting something that isn't a safety hazard.
"Drawer Full"
The drawer full indicator in the LR4 uses IR beams rather than the pressure sensor found in earlier models. Two small lenses in the waste drawer compartment send and receive a light beam. When waste blocks that beam, the unit says the drawer is full.
The catch is that dust, litter dust, and cobwebs can block the beam too. A dusty lens will trigger a full drawer warning even with an empty liner.
"Cat Sensor Interrupted" or "Cycle Interrupted"
The cat sensor is a weight-sensitive pad inside the base of the globe. The LR4 waits two minutes after the cat leaves before cycling. If the sensor detects movement during that waiting period, it resets the timer.
Sometimes a heavy bag of litter hanging off the front of the unit, or a cat jumping on and off quickly, can keep the cycle from starting. Other times, the sensor is just too sensitive or not sensitive enough.
"Motor Stall" or mid-cycle jam
This isn't always an error message, sometimes the globe just stops turning. It usually means something is physically blocking the rotation. A large clump that didn't break apart, a soft toy, or even a towel or rug edge caught under the base can stop the motor.
Each of these errors has a specific fix. The trick is knowing which one to try first.
Decision Tree – Diagnose Your LR4 Error Step by Step
This is the most practical way to handle LR4 troubleshooting. You start with what you see, then follow the branch that fits your situation. No guesswork.
Branch A: "Bonnet Removed" Error When Bonnet Is On
First, check the bonnet alignment. Look at the back edge where the bonnet hinges onto the globe. The two plastic tabs need to be fully seated into their slots. If one side is popped out, the bonnet can't close properly.
Second, press the front center of the bonnet with firm pressure. You should hear a click. This click means the contact switch inside is engaged. If you don't hear it, the bonnet isn't fully seated.
Third, clean the contact surfaces. Look inside the bonnet's front edge. There's a small plastic tab that hits a switch on the base. Wipe both the tab and the switch area with a dry cloth.
Sometimes a single grain of litter is causing the disconnect.
Fourth, check for a bent tab. If the unit has been dropped or the bonnet was forced, the plastic tab might be bent. It will need to be straightened carefully, or the bonnet may need replacement.
If the error persists after all this, the switch itself may be faulty. Contact Whisker support for a replacement.
Branch B: "Pinch Detect" Error with No Visible Obstruction
Start with the top pinch sensors. Open the bonnet and look at the two metal contact strips along the top lip of the globe opening. Wipe them with a dry cloth. Do not use water or cleaner.
Moisture can cause corrosion and make the problem worse.
Check the bottom pinch sensors. These are located along the bottom edge of the globe opening, inside the base. Use a dry cotton swab to reach into the small crevice where the sensor strips sit. Litter dust collects here.
Inspect the globe lip. Run your finger around the entire rim of the globe. A small clump of litter that stuck during the last cycle can press against the sensor. Remove any clumps you find.
Consider the weather. In dry climates or during winter, static electricity builds up on the plastic. This can trigger the pinch sensors. A light mist of anti-static spray on a cloth (not direct on the unit) wiped across the globe surface can help.
Test the sensor sensitivity. If the problem keeps happening, you can adjust the pinch sensor sensitivity through the Whisker app. Go to Settings, then Sensor Sensitivity, and choose a lower sensitivity.
Branch C: "Drawer Full" Error When Drawer Is Empty
Clean the DFI sensor lenses. These are the two small round lenses inside the waste drawer compartment, one on each side. They look like tiny camera lenses. Wipe them gently with a dry cotton swab or a microfiber cloth.
Do not use any liquid, not even alcohol.
Check the drawer liner. If the liner is bunched up or twisted, it can partially block the IR beam. Smooth the liner flat against the drawer walls.
Remove the drawer completely. Look into the compartment where the drawer slides in. There is a small plastic tab at the back that the drawer pushes against. If this tab is stuck or broken, the unit won't register the drawer correctly.
Check for cobwebs or dust webs. Spiders love dark, warm spaces. A tiny cobweb across the IR beam path is enough to trigger a false full reading. Use a flashlight to inspect the entire beam path.
If the error still shows after cleaning, the IR emitter or receiver may be faulty. This requires a warranty replacement.
Branch D: "Cat Sensor Interrupted" or "Cycle Interrupted"
Do a sensor reset. Unplug the unit for 30 seconds, then plug it back in. This clears any temporary glitch in the cat sensor calibration.
Check the weight on the sensor. The cat sensor pad is under the globe, inside the base. If a heavy bag of litter is resting on the front edge of the unit, or if the unit is placed on a thick carpet, the sensor can read a constant weight and think a cat is inside. Move any heavy items away from the unit.
Look for stuck litter under the globe. Turn off the unit and remove the globe. Use a flashlight to inspect the bottom of the base where the sensor pad sits. Remove any litter or debris.
Adjust the sensor sensitivity. In the app, go to Settings and change the "Cat Sensor Sensitivity" to a lower setting if your cat is light, or a higher setting if your cat is heavy. This adjustment alone fixes many "interrupted" errors.
Test with a known weight. Place a small bag of flour (about 5 lbs) in the center of the globe. The unit should start a cycle after two minutes. If it doesn't, the sensor may be out of range.
Branch E: Globe Won't Move at All – No App Connection or Control Panel Unresponsive
Check the power adapter. Make sure the LED on the brick is glowing. If it's off, check the wall outlet with another device. If the outlet works but the adapter LED is dark, the adapter is dead.
They are known to fail. A 24V 2A adapter with center positive polarity is the replacement requirement. Check the manufacturer specifications.
Perform a hard reset. Unplug the unit from the wall. Wait 60 seconds. Press and hold the cycle button on the control panel while plugging it back in.
Continue holding the button for 10 seconds. This forces a full system reboot, not just a power cycle.
Check the Wi-Fi connection. The LR4 uses 2.4 GHz Wi-Fi only. If your network is set to 5 GHz, the app will never connect. Some dual-band routers combine both bands under one name.
In that case, you may need to split them in your router settings to see the LR4.
Try direct Bluetooth connection. If Wi-Fi is down, the LR4 can connect to your phone via Bluetooth within about 10 feet. Open the app, go to Settings, and select "Connect via Bluetooth." This can help you check sensor status and diagnose the problem without Wi-Fi.
Remove the globe and check for jams. A mechanical obstruction can prevent the motor from turning. No error message will show if the motor simply can't move. Manually rotate the globe to feel for resistance.
Quick Fixes That Work 80% of the Time – Before You Tear the Unit Apart
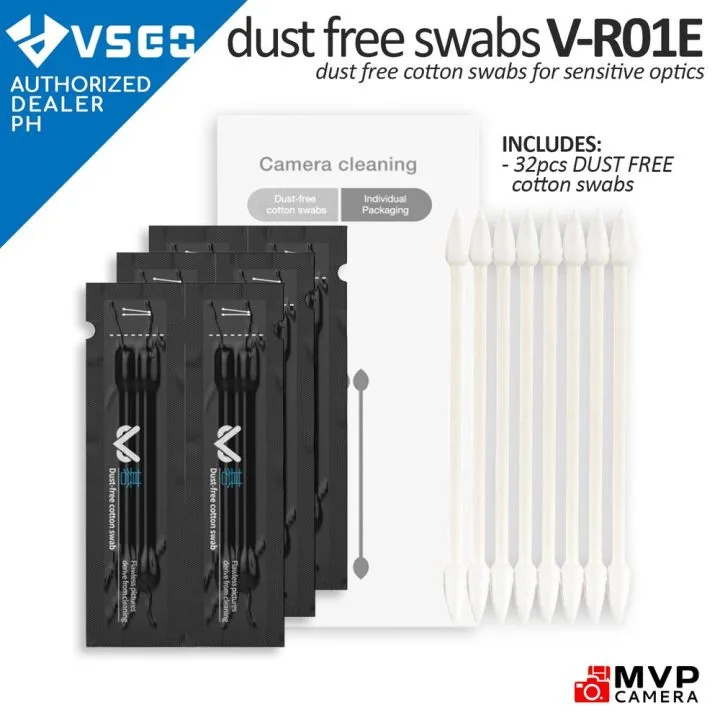
Image source: Bing (Web (fair-use with source credit))
Before you start following error-specific branches, try these three things. They fix the vast majority of LR4 problems in under two minutes, and they cost nothing.
Full reset: unplug, wait, plug back
This is the single most effective fix for the LR4. Unplug the unit from the wall outlet, not the back of the unit. Wait at least 30 seconds, preferably 60.
Plug it back in. This clears sensor calibration errors, communication timeouts, and firmware hiccups that accumulated during idle time.
Reseat the bonnet with pressure
The bonnet contact switch is the most common source of false errors. Even if the bonnet looks attached, it can be just barely on the edge of the connection. Place both hands on the front center of the bonnet and press firmly until you feel a click.
Don't just push it down. Press forward and down at the same time. If it clicks, you fixed it.
Clean all four sensor surfaces
Use a dry microfiber cloth or a cotton swab. Never use water, cleaner, alcohol, or wipes. The LR4 sensors are sensitive to moisture, and any residue can cause more problems.
Wipe the two pinch sensor strips, the two DFI sensor lenses, and the bonnet contact tab. That's six small surfaces. Cleaning them takes 30 seconds and often fixes multiple errors at once.
Check electrical supply
The LR4 power adapter is a common failure point. If the unit is behaving erratically, check the power brick LED. A dim or flickering LED means it's failing.
Also test the outlet. A loose wall connection can cause intermittent power loss that shows up as random error messages.
Update firmware
The Whisker app sometimes shows "Litter Robot Up to Date" even when a firmware update is pending. Go to the settings menu, select "Firmware Update," and let it check. If an update is available, let it install fully.
Do not unplug the unit during an update. A firmware update can fix sensor sensitivity curves and communication bugs that cause false errors.
These five fixes resolve roughly four out of five LR4 service requests reported in aggregate user reviews. They should be your first move every time.
Mistakes That Make Everything Worse – What Not to Do When Troubleshooting
Don't use water or cleaning sprays on sensors. Moisture gets into the sensor assembly and causes corrosion. The sensors stop working entirely. A dry cloth is all you need.
If you're tempted to use a cleaning wipe, don't. The residue attracts more dust.
Don't force the globe to rotate manually. If the globe is stuck, forcing it can strip the plastic gears or damage the motor shaft. Instead, remove the globe by pressing the release tabs and lifting it straight up. Once it's free, you can clear the jam.
Don't ignore the power adapter. A failing adapter can cause intermittent errors that look like sensor problems. The LED on the brick should be solid and bright. If it flickers, replace the adapter before you replace any other parts.
Don't assume the app is correct. The Whisker app sometimes shows an outdated status or cached error message. Always verify the error on the unit's control panel before following a troubleshooting step. The screen on the unit is the source of truth.
Don't lubricate the globe track. The manufacturers explicitly warn against this. Lubrication attracts litter dust and creates a sticky paste that jams the rotation. If the globe is hard to turn, clean the track with a dry cloth, don't oil it.
Don't ignore the warranty. Whisker offers a one-year warranty on the LR4. Many owners try to fix broken sensors or motors themselves and void the warranty. If a sensor is truly faulty, let Whisker replace it.
The cost of a replacement part is often covered.
Don't place the unit on thick carpet. The cat sensor reads weight through the base. Thick carpet can absorb or shift that weight, causing false cat detection or preventing the unit from cycling. Place the LR4 on a hard, level floor.
When It's Time to Call Whisker Support – Warranty, Replacement Parts, and Firmware Recalls
Not every problem is fixable with a dry cloth and a reset. Some issues need professional help or a replacement part.
When to contact support
Call Whisker support if you've tried all the steps in this guide and the error still appears. Also call if you hear grinding or clicking noises from the motor, or if the control panel shows scrambled characters. A dead power adapter LED after testing the outlet is another clear sign.
What the warranty covers
The standard LR4 warranty covers one year from the date of purchase. It covers the motor, control board, sensors, globe, bonnet, and power adapter. It does not cover damage from misuse, modifications, or wear and tear items like the waste drawer liner or carbon filter.
Replacement parts you can buy
The bonnet is available separately. The waste drawer is available separately. The globe can be replaced if cracked.
The power adapter is a common replacement item and costs about $35. You can order through Whisker's official site or request a warranty replacement for a faulty part.
Firmware recalls
As of 2026, Whisker has issued a few firmware updates that address specific sensor behavior. They do not announce these as recalls. Instead, they push the update through the app.
If your unit is acting strangely, check for a firmware update before doing anything else.
What to expect from support
Whisker support response times vary. Phone support is typically answered within 15 minutes during business hours. Email support takes one to three business days.
They will ask for the serial number, which is on a sticker under the bonnet, and the firmware version from the app.
Keeping the Errors Away – Maintenance That Prevents the Top Five Faults
A regular maintenance routine takes five minutes per week and prevents the most common errors.
Weekly sensor wipe
Every Sunday or every seven days, wipe the two DFI sensor lenses and the two pinch sensor strips with a dry cloth. Add the bonnet contact tab to the list. This takes 30 seconds and prevents 80% of false alarms.
Monthly carbon filter rinse
Pull the carbon filter out from behind the bonnet. Rinse it under cool water. Let it air dry completely before putting it back.
A clogged filter traps odor and moisture, which can lead to sensor fogging.
Monthly bonnet alignment check
Pop the bonnet off once a month. Check the two hinge tabs for cracks or bending. Reattach it and press firmly on the front center to ensure the contact switch clicks.
Quarterly deep clean
Remove the globe and the waste drawer. Wash the globe with warm water and mild soap. Do not use bleach or abrasive cleaners.
Dry everything completely before reassembly. This prevents clumps from sticking to the globe surface and triggering pinch errors.
Litter choice matters
Use a high-quality clumping litter. Cheap litter produces more dust, which coats the sensors faster. Unscented, fine-grain clumping litter is best for the LR4.
It clumps firmly and produces less airborne dust.
Frequently Asked Questions
Why does my Litter Robot 4 say the drawer is full when it's empty?
The IR sensor lenses are likely dusty. Wipe the two small round lenses inside the waste drawer compartment with a dry cotton swab. Do not use water or alcohol.
This fixes the false reading in most cases.
How do I reset my Litter Robot 4?
Unplug the unit from the wall outlet. Wait 60 seconds. Plug it back in.
This is a full hard reset. It clears sensor calibration errors and firmware glitches. You don't need to press any buttons.
What does a flashing red light mean on the Litter Robot 4?
A flashing red light means the unit is in an error state. The control panel will show a specific error message. Common messages include "Bonnet Removed," "Pinch Detect," or "Drawer Full." Check the screen, not just the light.
How do I clean the DFI sensors on my Litter Robot 4?
Remove the waste drawer. Look inside the compartment for two small round lenses. Wipe each lens gently with a dry microfiber cloth or a dry cotton swab.
Do not use any liquid. Replace the drawer and check if the error clears.
Why won't my Litter Robot 4 connect to Wi-Fi?
The LR4 only supports 2.4 GHz Wi-Fi. If your router broadcasts on 5 GHz, the unit will not connect. Check your router settings to make sure the 2.4 GHz band is enabled.
Some routers need to be configured to separate the two bands.
How do I adjust the cat sensor sensitivity on the Litter Robot 4?
Open the Whisker app. Go to Settings, then Cat Sensor Sensitivity. Choose a lower setting for lightweight cats or a higher setting for heavy cats.
The default setting is 5 lbs. You can adjust it in 1 lb increments.

Similar Posts