Built In Vacuum Troubleshooting
Your central vacuum worked fine yesterday. Today, you plug in the hose, flip the switch, and nothing happens. Or the motor runs but the brush head won't spin.
Or the suction feels like a gentle breeze instead of the tornado you remember.
Built In Vacuum Troubleshooting does not mean you have to call a service tech and pay $150 before they even touch the unit. Most problems have a simple root cause you can find in under 15 minutes with basic tools.
Aggregate reviews from thousands of homeowners show that roughly 70 percent of central vacuum service calls are for issues the owner could fix themselves. A clogged hose. A full bag.
A dirty exhaust filter. Manufacturer specs for systems from Beam, Vacuflo, and Electrolux confirm that routine maintenance keeps these units running 15 to 20 years. Let's walk through exactly where to look first.
Quick Answer
Check the bag first. A full bag kills suction fast. Inspect the hose for holes or clogs.
Test each wall inlet valve. If the motor runs but stops after a few seconds, let it cool for 30 minutes. Replace the exhaust filter if it looks dirty.
Most central vac problems are clogs, full bags, or tripped thermal overloads.
Image source: Bing (Web (fair-use with source credit))
The First Thing to Check (and What Most People Miss)
Is the Bag Full or Torn?
Open the canister compartment and pull the bag out. Hold it up to a light. If light barely passes through, it is full.
Replace it.
But here is what people miss: check for tears. A small rip in a cloth bag lets dust blow straight into the motor housing. That dust cakes onto the impeller and exhaust filter.
The motor works harder, runs hotter, and eventually trips the thermal overload.
Disposable paper bags fail differently. They burst along the seam when overstuffed. You will not see the tear until you pull the bag out and inspect every edge.
If you find a torn bag, vacuum the canister compartment thoroughly before installing a new one. Leftover debris clogs the new bag fast.
Exhaust HEPA Filter Clogged
The exhaust filter sits between the canister and the motor. On most Beam, Vacuflo, and NuTone units, it is a rectangular foam or pleated panel. Pull it out and hold it to the light.
If you cannot see through it, or if it is coated with fine dust, replace it.
A clogged exhaust filter makes the motor sound strained. The pitch rises. The motor runs but the suction feels weak.
Many homeowners replace the bag and check the hose but still have low suction. The exhaust filter was the culprit the whole time.
Beam documentation recommends replacing the exhaust filter every six to twelve months. If you have pets or a large house, lean toward every six months.
Thermal Overload Tripped
This confuses people more than almost any other symptom. The motor runs for two to five minutes. Then it stops.
You wait a minute and try again. It runs for thirty seconds and shuts off again. That is the thermal overload protecting the motor from damage.
Three things cause thermal overload: a clogged exhaust filter, a blocked hose or pipe, or a motor that ran too long without a break. Let the unit cool for 30 to 60 minutes. Reset the breaker if there is one.
Then address the root cause. If you skip that step, it will trip again as soon as the motor warms up.
Loss of Suction – Hose and Pipe Blockages
Hose Inspection
Loss of suction is the number one complaint among central vacuum owners. Before you assume the motor is dying, check the hose. Hoses get stepped on, pinched behind furniture, and dragged over sharp edges.
A crushed section or a small hole can cut suction by 40 percent or more.
Run your hand along the entire length of the hose. Feel for soft spots, kinks, or cuts. Look at the ends closely.
The rubber cuffs wear out after a few years. If the connection at the wall inlet or the power head is loose, air leaks in and suction drops. Replace the cuffs if they are cracked or stretched.
Wall Inlet Valve Stuck Open
Each wall inlet has a flap or a spring-loaded door. When the hose is plugged in, that door should open fully. When the hose is removed, it should snap shut.
If the door is stuck partially open, you lose suction at every other inlet because air bleeds in through the broken one.
Test each inlet by placing your palm over it while the system is running. Strong suction means that inlet is fine. Weak suction or no suction means the flap may be stuck or the spring may be broken.
Replacement inlet valves cost $10 to $25 and install in about five minutes.
Pipe Clog Detection
This is where the decision tree really works. Go to the farthest inlet from the power unit. Plug in the hose and check suction.
Move to the next closest inlet. Check again. Work your way toward the power unit.
Weak suction at every inlet means the clog is in the main trunk line or at the canister. Strong suction at some inlets and weak at others means the clog is between the weak inlets and the power unit. That narrows your search to a specific section of pipe.
Most central vacuum pipe systems use 2 inch PVC, so a standard plumber's snake fits perfectly.
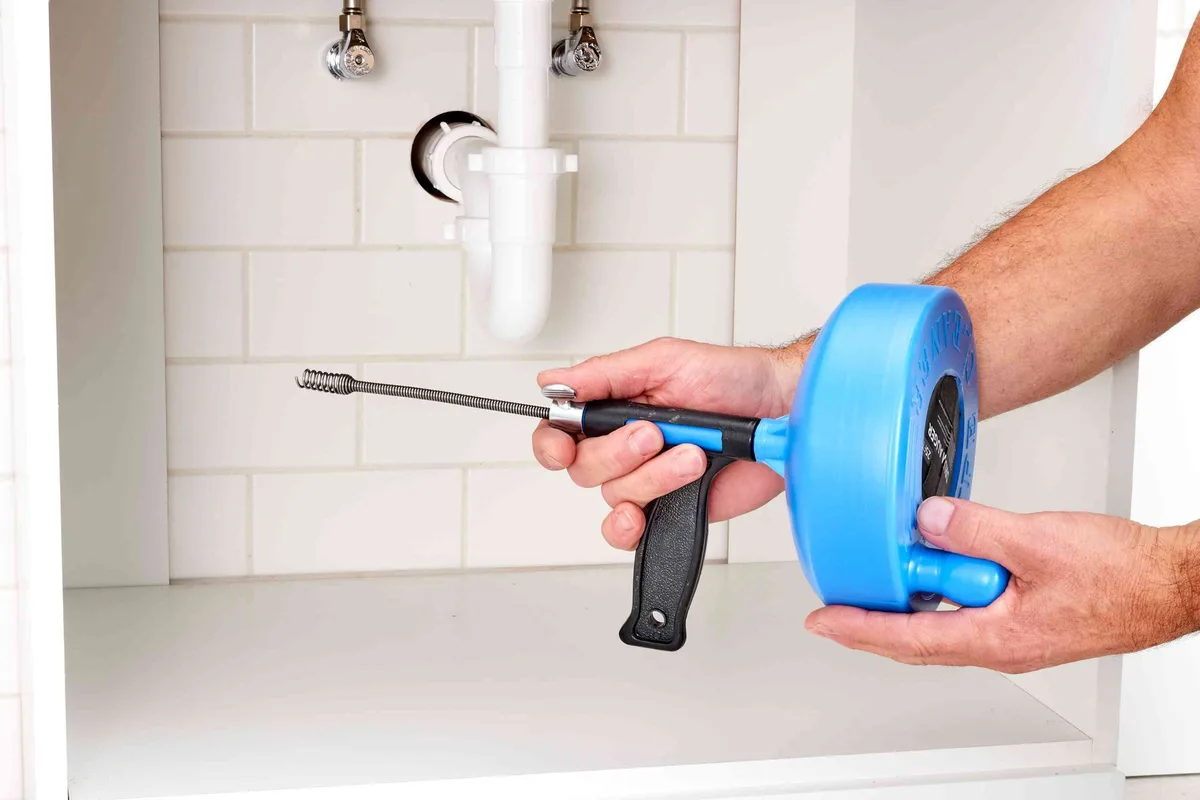
Image source: Bing (Web (fair-use with source credit))
Clearing Blockages
Start with the hose. Disconnect it from both ends and look through it. If you see a blockage, push it out with a broom handle or a plumber's snake.
Do not use a metal coat hanger. It scratches the inside of the hose and creates rough spots that catch debris later.
If the clog is in the wall piping, disconnect the hose from the farthest inlet. Feed a plumber's snake into the pipe opening. Push gently.
If you hit resistance, rotate the snake to break up the clog.
A wet dry vacuum also helps. Attach it to the pipe at the power unit end and set it to blow. That pushes air backward through the system and often dislodges clogs.
Per manufacturer technical recommendations, never use a power drill with a rotating snake attachment on central vacuum pipes. The PVC can crack.
Brush Head Not Spinning – Electric Hose and Wiring Diagnosis
Power Head Won't Spin
This is one of the most frustrating problems. The motor runs great. The suction feels normal.
But the brush roll on the floor tool sits dead. You push it across the carpet and nothing happens.
The brush head on a central vacuum is powered by a small electric motor inside the head itself. That motor gets power through the hose. Two or four electrical contacts carry low voltage, usually 12 to 24 volts DC, from the power unit through the hose and into the brush head.
If any connection in that chain breaks, the brush stops spinning.
Check the Hose Electrical Contacts
This is the fastest way to diagnose the problem without buying parts you do not need. Set your multimeter to continuity or resistance mode. Touch one probe to each of the two electrical prongs on the hose end.
You should see a reading of 2 to 10 ohms. If you get infinite resistance, the wire inside the hose is broken.
Electric hoses fail most often at the ends. The wire flexes every time you plug and unplug. Over years of use, the wire fatigues and snaps inside the rubber jacket.
If the hose fails the continuity test, replacement is the only fix. A new electric hose costs $80 to $150 depending on length and brand. That is much cheaper than replacing the brush head or power unit.
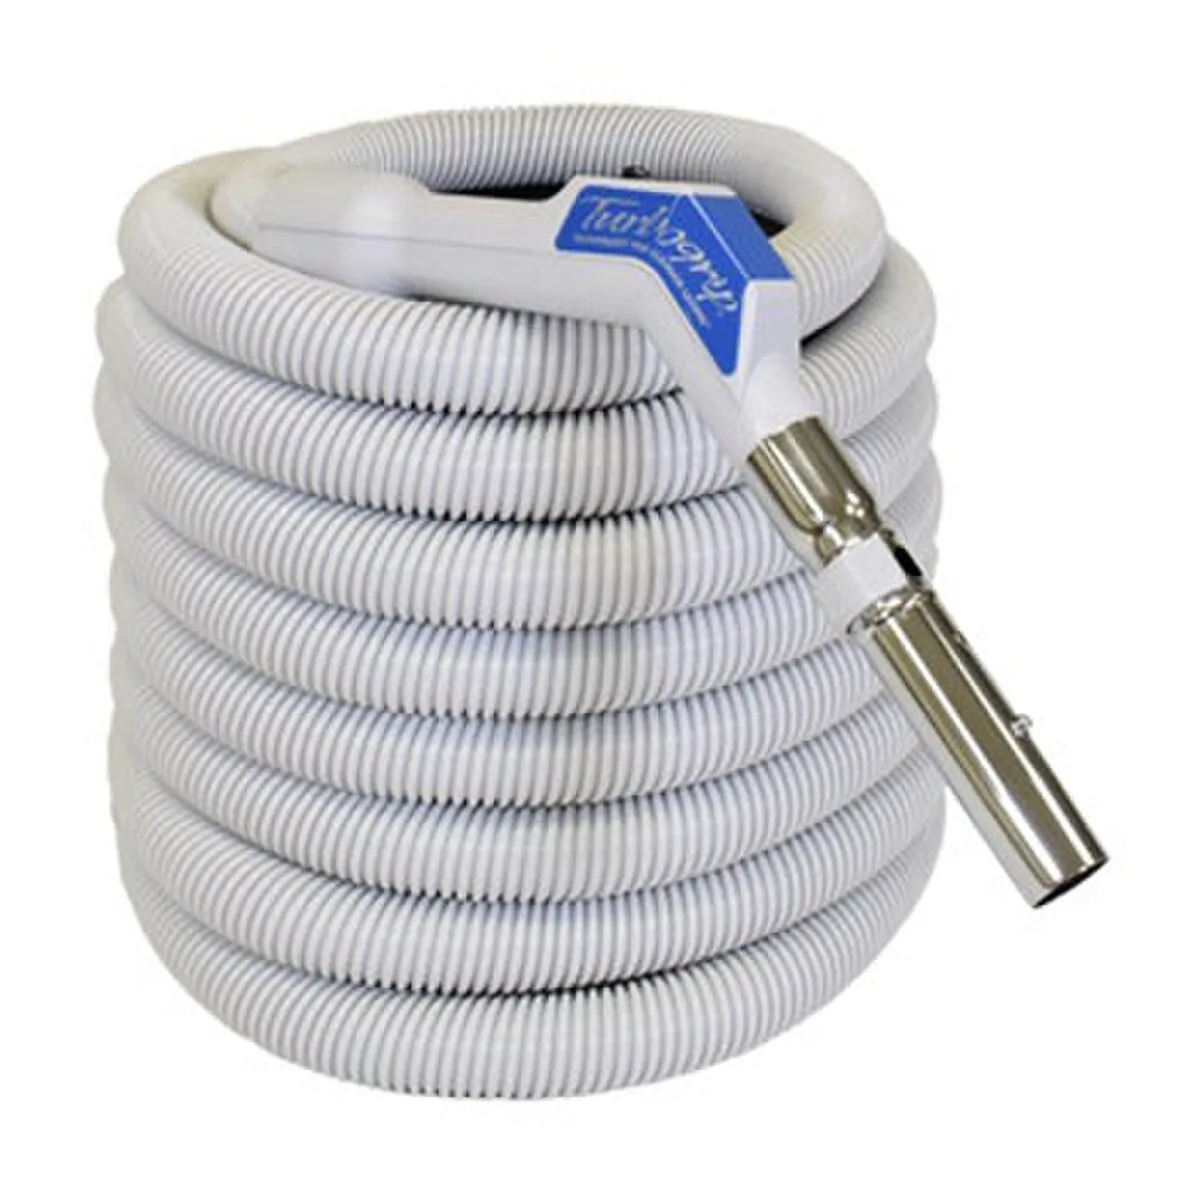
Image source: Bing (Web (fair-use with source credit))
Inlet Valve Low Voltage Switch
Some central vacuum systems use a low voltage switch inside each wall inlet. When you plug in the hose, pins on the hose push a tiny switch that tells the power unit to send power to the hose. If that switch fails, the brush head gets no power.
Test this by plugging the hose into a different inlet. If the brush works on one inlet but not on another, the switch in the broken inlet is the problem. Replacement switches cost about $10 to $15 and require basic wire splicing.
Brush Roll Jammed, Broken Belt, or Dead Motor
If the hose tests fine and the switch works, the problem is in the brush head itself. Flip the head over. Look at the brush roll end caps.
Hair wraps around the ends and jams the brush against the housing. This is incredibly common in homes with pets.
Remove the brush roll from the housing. Cut away any hair or string wrapped around the ends. Check the belt that connects the motor to the brush roll.
If the belt is stretched, cracked, or broken, replace it. If the belt is fine and the brush roll spins freely by hand, the motor inside the head is dead. Replacement motors for most brush heads cost $30 to $60 and install with a screwdriver.
Motor Problems – Won't Start, Runs Then Stops, or Sounds Wrong
Motor Hums but No Suction
You plug in the hose and flip the switch. The motor hums. But there is zero suction at the inlet.
This means the motor is getting power, but something is preventing the impeller from spinning.
Turn off the power and unplug the unit. Open the canister compartment. Look at the impeller housing.
A foreign object like a sock, a toy, or a large chunk of debris can jam the impeller. Use a flashlight to check. If you see something stuck, remove it carefully.
Do not use a metal tool inside the impeller housing. The blades are delicate and bend easily. If the impeller itself is broken or has a missing blade, the motor needs professional service.
Motor Runs Then Stops After a Few Seconds
We covered thermal overload earlier. But there is another possibility. Some central vacuum power units have a built in circuit breaker.
If the motor draws too much current, the breaker trips. The motor stops immediately. It will not restart until you manually reset the breaker.
Find the breaker on the power unit. It is usually a small red or black button labeled "reset." Push it firmly. If it trips again immediately, the motor is drawing excessive current.
That points to a bad motor or a seized bearing. Both need professional repair.
Motor Won't Start at All
No hum. No sound. No suction.
The unit is completely dead. Start with the obvious. Check the breaker on the main electrical panel.
If it tripped, reset it. If it stays tripped, you have a short in the wiring. That is a job for a licensed electrician.
If the panel breaker is fine, check the power unit's own power cord for damage. Rodents sometimes chew through the cord in garages. If the cord looks fine, the problem is likely a failed capacitor or a burned out motor winding.
Capacitors cost $10 to $20 and are easy to replace. A burned out motor winding means a new power unit or a motor rebuild.
Strange Noises
Squealing sounds usually mean the motor bearings are dry or failing. A grinding sound means something is rubbing against the impeller. A rattling sound means debris is bouncing around inside the canister or impeller housing.
Each sound points to a different part of the machine. For squealing bearings, you can sometimes extend motor life by adding a drop of electric motor oil to the bearing ports. For grinding or rattling, open the canister and remove anything that does not belong there.
If the noise comes from inside the motor itself, that motor is nearing the end of its life. Start budgeting for a replacement power unit.
Common Mistakes That Waste Time and Money
Replacing the Power Unit When Only a Cheap Hose Repair Was Needed
This happens more than you would think. A homeowner loses suction. They call a repair company.
The repair company diagnoses it as a bad motor and sells them a new power unit for $600 or more. A few weeks later they find a sock stuck in the pipe. The original motor was fine.
Always rule out clogs, bag issues, and hose problems before you assume the motor is dead. That simple rule saves hundreds of dollars.
Ignoring the Exhaust Filter and Blaming the Motor
The exhaust filter is the most overlooked component in central vacuum maintenance. A clogged filter makes the motor run hotter, draw more current, and eventually trip the thermal overload. Many homeowners hear the motor stop and assume it needs replacement.
A $15 filter fixed the problem.
Using a Non Standard Bag That Tears
Generic bags may fit the canister, but they are often made from thinner material. They tear more easily. When they tear, fine dust bypasses the bag and coats the impeller and exhaust filter.
That dust buildup reduces suction and causes the motor to overheat. Stick with bags recommended by the manufacturer.
Testing Suction with an Uncovered Wall Inlet
People remove the cover plate from a wall inlet and stick their hand over the opening to feel for suction. If the system is running, the open inlet can pull in small objects and dust. Keep the inlet covered when not in use.
Test suction by plugging in the hose, not by covering the hole with your hand.
When to Call a Pro (and When You Can Fix It Yourself)
DIY If the Problem Is Simple
A full bag, clogged exhaust filter, tripped thermal overload, or a hose blockage are all jobs you can handle in under an hour. Same goes for hair wrapped around the brush roll or a broken belt in the power head. These fixes need no special skills.
Just a screwdriver, a multimeter, and maybe a plumber's snake.
If the system works after you clear the clog or replace the filter, you are done. No need to call anyone.
Call a Technician for These Issues
Some problems are beyond a homeowner's toolbox. A seized motor, a burned out winding, or a broken impeller blade all need professional service. So do electrical issues inside the walls.
If you suspect damaged low voltage wiring between the inlet and the power unit, that is not a DIY job unless you are comfortable fishing wire through walls.
| Problem | DIY or Pro? | Typical Cost |
|---|---|---|
| Full or torn bag | DIY | $10–$25 |
| Dirty exhaust filter | DIY | $15–$25 |
| Hose hole or kink | DIY | $10–$30 if patched |
| Clog in visible pipe | DIY | Free |
| Brush roll jam | DIY | Free |
| Broken belt in power head | DIY | $10–$15 |
| Electric hose wire broken | DIY | $80–$150 new hose |
| Failed inlet valve switch | DIY | $10–$15 |
| Motor hums, no suction | Pro | $150–$400 |
| Motor seized or burned out | Pro | $300–$700 |
| Wall wiring short | Pro | $200–$500 |
Cost Comparison
A standard central vacuum service call runs $125 to $250 just for the technician to show up. Most basic repairs cost under $30 in parts. That is a massive difference.
If you are not comfortable opening the power unit, that is fine. Know your limits. But at least run through the checklist first.
Many homeowners pay for a service visit only to have the tech replace a clogged filter they could have swapped in two minutes.
The Decision Guide
Follow this simple logic. If the motor runs but suction is weak, start with the bag and filter. If the motor stops after a few seconds, let it cool and check for clogs.
If the brush head does not spin, test the hose continuity. If the motor will not start at all, check the breaker and the power cord.
Work through each branch in order. The cheap fixes come first. The expensive ones are almost always last.
Simple Maintenance That Keeps Your Central Vac Running for Years
Monthly Checks
Once a month, check the bag level. You do not need to replace it on a schedule. Just peek at it.
If the bag is more than two thirds full, swap it before your next big cleaning session. A fuller bag means weaker suction and more strain on the motor.
Also look at the exhaust filter. Hold it up to a light. If it looks gray or dusty, replace it.
This single habit prevents most motor overheating issues.
Every Three Months
Inspect the hose from end to end. Run your fingers along the entire length. Feel for soft spots, cuts, or crushed areas.
Check the rubber cuffs at both ends. If they are cracked or loose, replace them before they fail mid clean.
Clean the brush roll on your power head too. Remove hair and string from the end caps. Lubricate the bearings with a drop of light machine oil if your model has serviceable bearings.
Yearly Maintenance
Once a year, do a deeper service. Pull the canister compartment open and vacuum out any dust that has settled around the bag area. Wipe down the inside with a damp cloth.
Check the hose electrical contacts for corrosion. A little rubbing alcohol on a cotton swab cleans them nicely.
Inspect the power unit intake. If you see dust caked around the fan housing, gently brush it away. Blocked airflow is the number one killer of central vacuum motors.
Per manufacturer recommendations, yearly maintenance extends motor life to 20 years or more.
Seasonal Tips
In garages and basements, condensation can form inside the power unit during winter. That moisture mixes with dust and causes clumping inside the canister. Keep the area around the unit dry.
If your power unit sits on a cold concrete floor, place it on a small platform or a piece of plywood to reduce condensation.
In warmer months, check for insect nests near the exhaust vent. Wasps love to build in warm, sheltered openings. A blocked exhaust vent causes overheating and poor suction.
Frequently Asked Questions
Why does my central vac lose suction midway through cleaning?
A bag fills as you clean. When it gets over two thirds full, airflow drops noticeably. The same thing happens when the exhaust filter loads up with fine dust.
Check both before assuming a clog or motor problem.
Can I use a wet/dry vac to suck out a clog from the pipe?
Yes. Attach the wet dry vac to the power unit end of the pipe. Set it to blow instead of suck.
That pushes air backward through the line to dislodge the clog. Make sure the central vac system is off first.
How do I test if the wall inlet is the problem?
Plug the hose into the inlet and feel for suction. Then move the hose to a different inlet. If one inlet is weak but others are strong, the flap or spring inside the weak inlet is stuck.
Replace the inlet valve assembly.
Why does the motor smell like burning rubber?
That is almost always a jammed brush roll or a seized motor bearing. The belt slips and heats up, producing a rubber smell. Turn everything off immediately.
Inspect the brush head for obstructions and check the motor for unusual heat.
Is it worth fixing a 15 year old central vacuum?
Usually yes. Brand new power units cost $500 to $1,200. A professional repair runs $150 to $400.
If the motor is still healthy, replacing a hose, bag, filter, or brush head gives you many more years of service. Only consider full replacement if the motor itself has failed.

Similar Posts