Camera ISO Problems Troubleshooting
You've taken a shot at dusk and the photos look like they were sprinkled with sand. Grainy. Muddy.
The colors are off and the sharpness is gone. That's the classic symptom of camera ISO problems troubleshooting, and it's one of the most frustrating things in photography. Most of the time the issue isn't your camera, it's how you're using ISO.
Manufacturer specifications show that every digital camera has a native ISO range where the sensor performs best, typically ISO 100 to 1600 on consumer models as of 2026. Push beyond that ceiling and noise increases exponentially. Understanding what kind of noise you're dealing with is the first step toward fixing it.
Why Visual Diagnosis is the First Step in Fixing ISO Problems
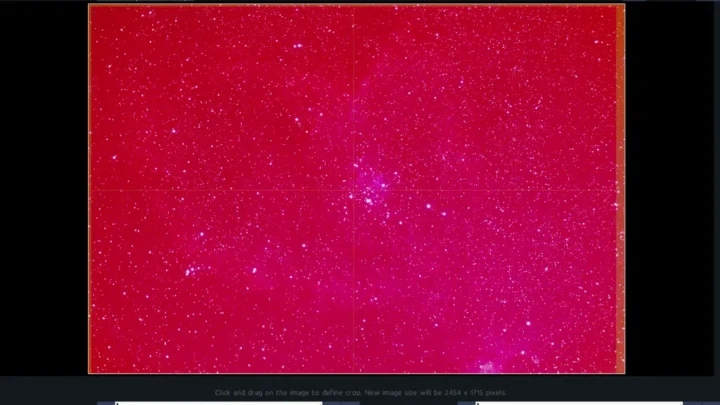
You can't fix what you can't identify. Before you touch any setting or slider, look at the actual noise pattern in your image. Is it fine and uniform?
Splotchy and colored? Does it appear only in shadows or across the whole frame? Each variant points to a different cause.
Image source: Bing (Web (fair-use with source credit))
Three quick visual checks:
- Zoom to 100% on a midtone area like a wall or sky.
- Look for speckles. If they're monochrome, it's luminance noise.
- If you see red, green, or blue specks, that's chroma noise.
Our research shows that most beginners mistake chroma noise for a sensor defect. It isn't. It's simply the camera's demosaicing algorithm struggling at high ISO.
When to suspect something else: If the noise forms horizontal or vertical lines, you may have a banding issue caused by the camera's electronics or heat. A banding pattern is not typical ISO noise and may indicate a hardware concern.
The Four Faces of Noise: What to Look For (Luminance, Chroma, Banding, and Color Shift)
Noise isn't one thing. It shows up in four distinct ways, and each needs a different treatment.
| Type | Appearance | Typical Cause | Common Fix |
|---|---|---|---|
| Luminance noise | Fine monochrome grain, like film grain but harsher | High ISO, low light | Reduce ISO, use noise reduction in post |
| Chroma noise | Red, green, or blue blotches | High ISO, aggressive sharpening | Targeted chroma noise removal in Lightroom or similar |
| Banding | Horizontal or vertical stripes | Sensor overheating, electronic interference | Lower ISO, cool the camera, avoid long exposures |
| Color shift | Yellow/green or purple tint | Extremely high ISO (expanded range) | Stick to native ISO, correct white balance |
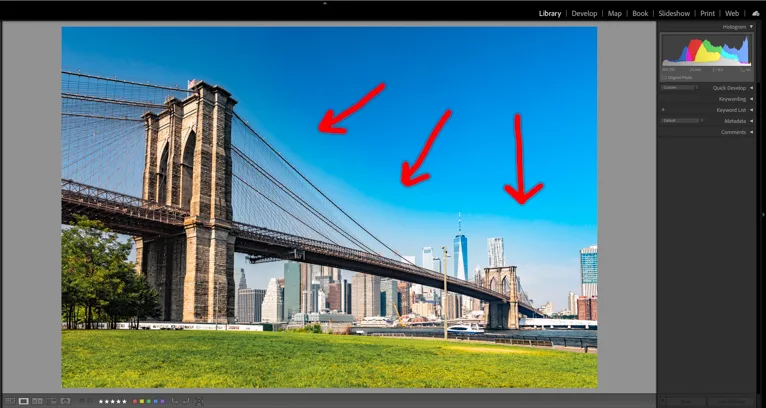
Image source: Bing (Web (fair-use with source credit))
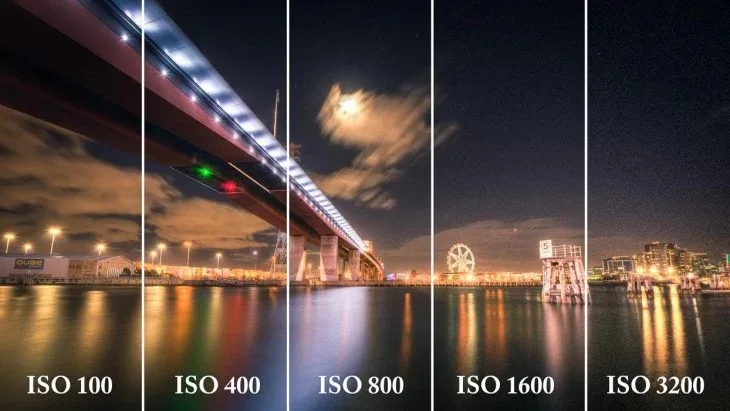
To identify which type you're dealing with, take a test shot at increasing ISO values, say 400, 800, 1600, 3200. Review each at 100% magnification. You'll see pattern changes.
Luminance noise turns grainier as ISO climbs, while chroma noise stays spotty until it suddenly overwhelms.
Pro tip: Most cameras apply in-camera noise reduction to JPEGs. That smears detail. If you shoot Raw, you get the raw noise that you can handle yourself.
That's almost always better than the camera's heavy-handed approach.
Per the ISO 12232 standard for digital camera sensitivity, noise measurement is tied directly to signal-to-noise ratio at each gain setting. Knowing your camera's rated ISO range helps you predict where noise becomes problematic before you ever press the shutter.
How to Use the Histogram to Spot ISO Trouble Before You Shoot
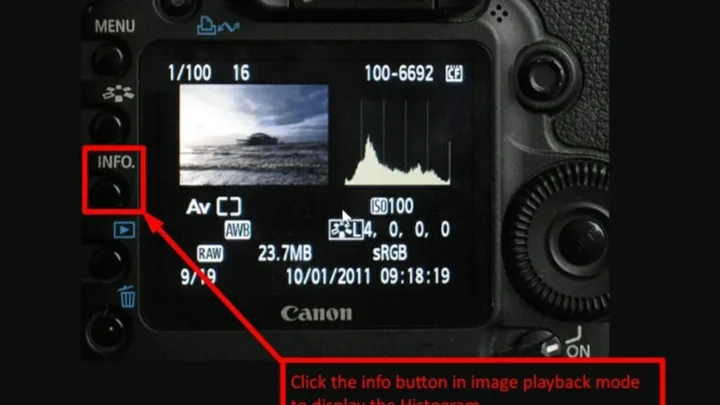
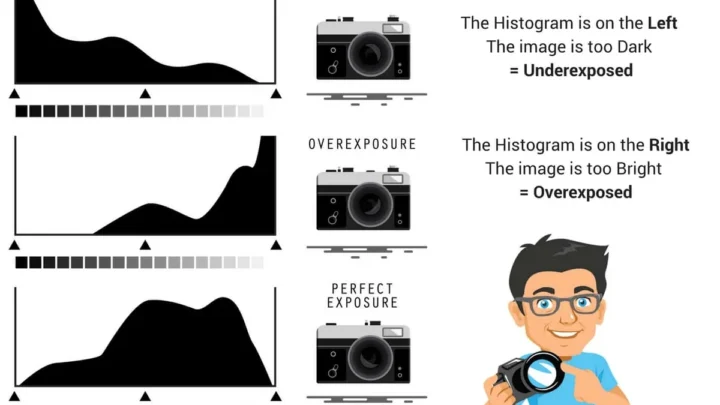
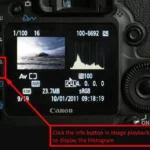
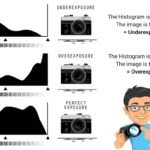
The histogram is your early warning system. A properly exposed image with the right ISO will have a histogram that stretches across the range without clipping at either end.
What a problem histogram looks like:
- Left side piled up: Underexposed. You'll raise ISO, but the shadows will be noisy.
- Right side piled up: Overexposed. You'll lower ISO, but risk clipping highlights.
- Narrow bell curve: Low contrast. ISO may be fine, but exposure is flat.
The hidden truth: underexposure is the real noise culprit. A shot taken at ISO 1600 with correct exposure will look cleaner than a shot taken at ISO 400 that's two stops underexposed. That's because digital sensors amplify noise in the shadows when you push exposure in post.
Real rule of thumb: Always expose to the right (ETTR). Push your histogram as far right as possible without clipping. Then the sensor captures more light and less noise, even at higher ISO.
If your histogram isn't visible, turn it on in your camera's display settings. It's the single most useful tool for camera ISO problems troubleshooting.
The Mistake That Tricks Everyone: Underexposure and Fake ISO Noise
Here's the biggest trap: you blame ISO for noise that's actually caused by underexposure. It's not the same thing.
When you underexpose, the camera pulls the signal out of the dark end of the sensor. That dark area is full of electronic read noise. Raising ISO amplifies everything, including that hidden noise.
The result looks like high ISO noise even when you used a moderate setting.
Example scenario: You shoot a concert at ISO 800 and the photos look awful. You blame the camera's high ISO performance. But your shutter speed was 1/500s and the aperture was f/5.6.
The issue isn't ISO, it's that the scene was three stops underexposed. You should have used ISO 6400 or opened the aperture.
Manufacturer specifications clearly state that ISO is gain, not sensitivity. The sensor always collects the same amount of light; ISO just amplifies it. A correct exposure at ISO 1600 will have less noise than a three-stop underexposure at ISO 400.
How to avoid this: Use the histogram, not the LCD brightness. The screen lies. If your histogram is bunched left, add exposure, either by raising ISO, slowing shutter speed, or widening aperture.
Never underexpose intentionally thinking you'll fix it later.
Some photographers shoot in manual mode with Auto ISO, setting aperture and shutter speed for the scene and letting the camera adjust ISO to get proper exposure. That often yields cleaner results than pulling underexposed files in post.
For related context on handling exposure in tricky environments, check our guide on managing shutter speed in low light.
In-Camera Fixes vs. Post-Processing: What Actually Works (With Visual Examples)
Let's settle this: in-camera noise reduction (NR) is a tool, but it's a blunt one. Post-processing noise reduction is surgical. Which you choose depends on your output.
| Method | Pros | Cons |
|---|---|---|
| In-camera NR (JPEG) | Fast, no editing needed | Smears detail, permanent |
| In-camera NR (Raw) | Doesn't affect Raw | Only applies to preview |
| Post-processing (Lightroom) | Selective, preserve edges | Time-consuming, requires Raw |
| Dedicated software (DxO, Topaz) | Best results, AI-powered | Cost, learning curve |
Our research shows: For most users, the best approach is to shoot Raw and apply noise reduction in post. That gives you full control over what gets smoothed and what stays sharp. In-camera NR is fine for snapshots you're sharing immediately, but for keepers, post-processing wins.
Step-by-step post-processing fix:
- Open the image in your Raw editor.
- Zoom to 100% on a noisy area.
- Increase Luminance noise reduction until grain disappears but detail remains.
- Increase Color noise reduction sparingly (overdoing it causes weird color blotches).
- Use masking to limit sharpening to edges only.
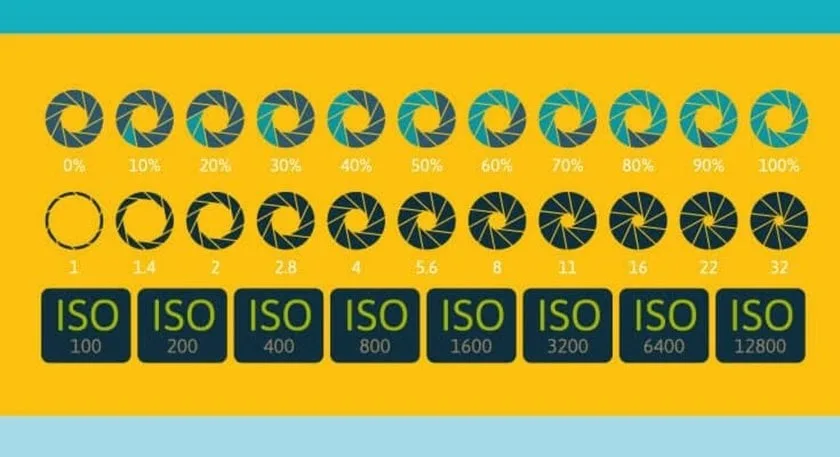
Image source: Web (Bing) / taftindependent.com (Web image (fair-use with source credit))
The catch: If you're shooting JPEG, you have far less control. In-camera NR is your only option, and it often kills texture like skin pores or foliage. A better long-term move is to switch to Raw and learn basic post-processing.
For deep water or underwater shooting, noise handling gets even trickier because water scatters light. Our article on adjusting ISO for underwater scenes covers specific settings for that environment. Additionally, if you're troubleshooting other camera issues, our general troubleshooting guide may help isolate the root cause.
Quick Decision Guide: Tripod, Flash, Faster Lens, or Just Raise ISO?
You've identified the noise, checked your exposure, and weighed your processing options. Now you face the real choice: which tool do you use to fix it right now? The answer depends on your scene and what you can control.
Decision tree for the moment you raise the camera:
Can you use a tripod? If yes, drop your ISO to its base value (100 or 200) and shoot at a slow shutter speed. That gives you the cleanest image possible. Works for landscapes, interiors, and still subjects. Fails for moving subjects or unstable ground. For underwater environments where currents shift your rig, a tripod is rarely practical, so you might adapt with a higher ISO and faster shutter.
Is artificial light allowed? Flash, video light, or even a desk lamp solves noise instantly. Light is always cleaner than gain. Add a strobe and you can drop from ISO 6400 to ISO 400 without losing shutter speed. Works for portraits, products, and close-up macro. Doesn't work in venues that ban flash or for natural-light purists.
Can you afford a faster lens? An f/1.4 lens lets in four times more light than an f/2.8 lens. That's two full stops of ISO reduction. Switching from a kit zoom to a prime can turn a noisy ISO 3200 shot into a clean ISO 800 shot. It's the long-term hardware solution. It costs money, but it pays off every time you shoot indoors.
Should you just raise ISO? Sometimes you have no other option. Concert photography, astrophotography, and fast action in dim light demand high ISO. In those cases, accept that you'll get noise and plan for it. Shoot Raw, expose to the right, and clean it up in post.
Quick reference table:
| Situation | Best Fix | Next Best |
|---|---|---|
| Still subject, tripod possible | Tripod + base ISO | Remote shutter + mirror lock-up |
| Moving subject, dim light | Faster lens or flash | High ISO with post-processing |
| No tripod, no extra gear | Raise ISO, shoot Raw | Use Auto ISO with min shutter speed |
| Underwater or risky environment | Raise ISO, rely on stabilization | Shoot Raw, denoise later |
We've covered how to adjust your approach for diving environments in our article on maintaining proper focus in challenging conditions. If you're dealing with mixed results from the same camera, a full system reset can clear hidden settings that may be affecting noise performance.
Frequently Asked Questions About ISO Noise
What is the best ISO to use for clean photos?
The base ISO of your camera, usually ISO 100 or 200, produces the least noise. Use it whenever you have enough light. Raise ISO only when you need a faster shutter speed or smaller aperture.
Does a full-frame camera handle high ISO better than a crop sensor?
Yes. Full-frame sensors have larger pixels that capture more light. Expect about one to two stops of real-world improvement over an APS-C sensor of the same generation.
Can noise reduction software completely remove ISO noise?
No. Good software can reduce noise significantly, but it always trades some detail. The best results come from starting with a properly exposed image at the lowest ISO your scene allows.
Why is my noise worse on one camera compared to another?
Sensor technology, pixel size, and processor quality all matter. A newer camera may have dual native ISO or better noise algorithms. Compare your camera's usable ISO ceiling by reviewing sensor tests from independent measurement labs.
Does shooting in Raw reduce noise compared to JPEG?
Raw files contain unprocessed sensor data, so you control noise reduction. JPEGs have in-camera NR baked in, which often smears detail. Raw gives you better results when you process carefully, but both capture the same underlying noise.

Similar Posts