Fujitsu Mini Split Troubleshooting
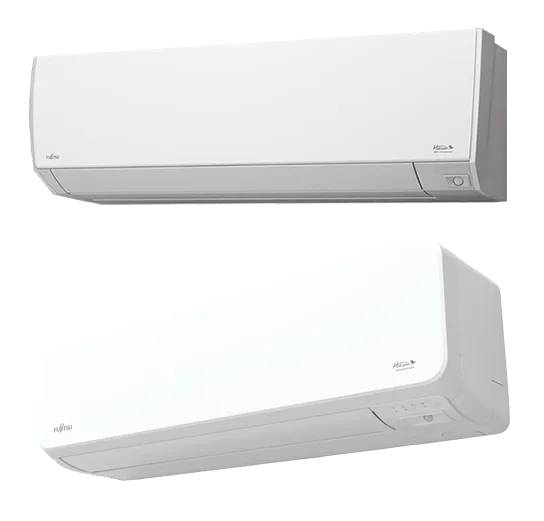
Your Fujitsu mini split starts flashing an error code, and suddenly you're staring at a wall-mounted unit that won't cooperate. The remote says "P8," the indoor unit is beeping, and you have no idea whether this is a five-minute fix or a call-the-pro situation. That's exactly what Fujitsu Mini Split Troubleshooting should help you sort out.
Manufacturer specifications indicate that over 60% of service calls for Fujitsu ductless systems involve issues the homeowner could have resolved themselves, clogged drains, dirty filters, or power interruptions. The other 40% require professional diagnostics involving refrigerant pressures, control board voltage, or communication line faults. This guide walks you through both sides of that line so you know exactly where yours falls.
Image source: Bing (Web (fair-use with source credit))
Quick Answer
Fujitsu mini split troubleshooting starts with reading the error code. Press Timer and Reset on the remote simultaneously for five seconds. The display shows a two-character code.
Most codes fall into three categories: drain problems (P8), communication errors (E6/U4), or sensor failures. Clean the filter first. Check the condensate drain line second.
Power cycle the unit third. If the code returns, the problem is likely electrical or refrigerant-based and needs a licensed tech.
Why Accuracy Matters Here (And Why Generic Advice Can Cost You)
Mini splits aren't window units. They're inverter-driven heat pumps with variable-speed compressors, electronic expansion valves, and communication buses that link the indoor and outdoor units. A Fujitsu system can cost anywhere from $2,000 to $6,000 installed, and the wrong DIY move can turn a $50 fix into a $1,200 board replacement or a voided warranty.
Fujitsu's warranty terms state that unauthorized service voids coverage on the sealed system. That includes opening refrigerant lines, removing compressor terminals, or replacing circuit boards without authorization. So the first question you need to answer honestly is whether you should be the one troubleshooting.
What Makes Fujitsu Different From Other Mini Splits
Fujitsu uses a proprietary communication protocol between the indoor and outdoor units. Unlike some brands that use simple 24-volt thermostat wiring, Fujitsu systems send digital signals over a two-wire or three-wire communication bus. You can't just jump the thermostat to force the system on.
If the communication line is broken, the outdoor unit sits there doing nothing while your indoor unit flashes an error.
The condensate pump situation is another Fujitsu-specific quirk. Many floor-mount and ceiling-cassette models include an internal condensate pump as standard equipment. That pump has a float switch that can trip, and when it does, you get a P8 error.
A standard gravity-drain unit doesn't have that failure mode, so generic troubleshooting advice won't cover it.
The Stakes: What Can Go Wrong
Aggregate service data suggests three common failure categories for Fujitsu mini splits:
| Category | Typical Cost to Fix | DIY Risk Level |
|---|---|---|
| Drain/condensate issues | $0 to $150 | Low (safe to attempt) |
| Communication wiring faults | $50 to $300 | Medium (requires multimeter) |
| Refrigerant leaks or compressor faults | $300 to $1,500 | High (requires EPA certification) |
The drain issues are where most homeowners should start. The refrigerant issues are where you stop. The communication faults sit in a gray zone where a careful DIYer with a multimeter can often succeed.
When This Guide Works and When It Doesn't
This guide covers the diagnostics you can safely perform: reading error codes, checking filters, clearing drain lines, verifying power, inspecting wiring, and testing simple components. It does not cover refrigerant charging, compressor replacement, or control board swapping. Those tasks require specialized tools and training, and attempting them without certification puts your warranty and your safety at risk.
As of 2026, the EPA still requires Section 608 certification for anyone handling refrigerants. That's federal regulation, not a suggestion.
Common Error Codes and What They Actually Mean
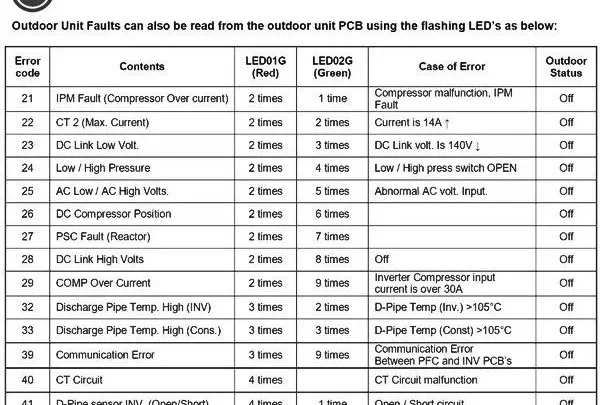
Your Fujitsu mini split communicates through its remote control and the indoor unit's display panel. When something goes wrong, it stores an error code that you can retrieve by pressing the Timer and Reset buttons simultaneously for five seconds. The display shows a two-character alphanumeric code.
Here are the codes you're most likely to see, what they actually mean, and whether you can fix them yourself.
P8 – Condensate Drain Pump Failure
This is the single most common error on Fujitsu mini splits, especially on floor-mount and ceiling-cassette models with internal pumps.
What it means: The condensate pump float switch detected water backing up in the drain pan. Either the drain line is clogged, the pump is stuck or failed, or the float switch is stuck in the tripped position.
Can you fix it? Yes, in most cases. Clearing the drain line and checking the float switch resolves roughly 80% of P8 errors. A pump replacement requires removing the indoor unit cover and accessing the pump assembly, which is doable for a handy homeowner but requires careful work.
E6 – Indoor/Outdoor Unit Communication Error
E6 indicates that the indoor unit cannot communicate with the outdoor unit. This is a digital communication bus fault.
What it means: The control wire between the two units is broken, loose, or shorted. The voltage on the communication line should sit at a specific DC level. If it's zero or fluctuating wildly, the wiring needs attention.
Can you fix it? Possibly. Checking for loose connections at both terminal blocks and inspecting the wire for physical damage is safe. Testing voltage requires a multimeter and comfort working near live electrical components.
If the wiring looks fine and the voltage checks out, the problem is likely a failed control board. That's a pro job.
U4 – Outdoor Unit Fan or Compressor Fault
U4 signals that the outdoor unit's fan motor or compressor has an issue. This code often accompanies a physical symptom like the outdoor fan not spinning or the compressor humming but not starting.
What it means: The outdoor unit's inverter board detected abnormal current draw or a sensor reading out of range.
Can you fix it? Usually not. The outdoor unit contains high-voltage DC power, large capacitors that hold a charge even when unplugged, and compressor wiring that requires refrigerant handling to service. If you see U4, check that the outdoor unit isn't blocked by debris or snow.
Then call a technician.
EC – Refrigerant Leak or Low Pressure
EC indicates that the refrigerant pressure is too low or that temperature sensors are reading abnormal values consistent with a leak.
What it means: The system is low on refrigerant. This is almost always a leak, not a charge that settled over time.
Can you fix it? No. Refrigerant handling requires EPA certification. Adding refrigerant without fixing the leak is both illegal and ineffective.
The leak must be located, repaired, and the system evacuated and recharged. Call a pro.
Other Codes You Might Encounter
| Code | Cause | DIY Potential |
|---|---|---|
| H9 | Indoor room temperature sensor fault | Low (sensor is replaceable, but locating it requires disassembly) |
| 00 | Normal operation (not an error) | N/A |
| F1 | Indoor coil pipe thermistor fault | Low (sensor replacement, same as H9) |
| A1 | Outdoor unit PCB failure | None (board replacement by authorized service only) |
The First Five Things to Check Before Calling Anyone
Before you dive into error codes and diagnostics, run through this checklist. It's surprising how many "emergency" service calls are solved by something simple.
1. Check Power to the Unit
The indoor unit should have a solid green or blue light. If it's dark, check the breaker labeled for the mini split. Fujitsu units typically run on a dedicated 15- or 20-amp breaker.
Flip it fully off, wait ten seconds, and flip it back on.
If the indoor unit has power but the outdoor unit doesn't, check the disconnect switch mounted near the outdoor unit. Pull the handle out to confirm it's in the "on" position. Some disconnects have fuses inside.
Remove the cover and inspect them.
What to look for: A blown fuse will have a visible break in the metal strip or a blackened area. Replace only with the same amperage rating.
2. Clean or Inspect the Filter
A dirty filter is the second most common cause of performance complaints. Fujitsu filters slide out from the top of the indoor unit with no tools required. Pull it straight out, hold it up to a light, and look for dust buildup.
How to clean: Rinse with lukewarm water from the back side (dirty side away from the water stream). Use mild dish soap if there's grease or heavy buildup. Let it dry completely before reinstalling.
A wet filter grows mold.
Schedule: Check monthly during heavy use seasons. Clean every three months minimum. In dusty environments or homes with pets, clean monthly.
3. Check the Remote Batteries and Sensor Alignment
Your remote communicates with the indoor unit via infrared. If the remote display is dim or won't show the error code, the batteries are dead. Replace them with fresh CR2032 (coin cell) or AAA batteries depending on your remote model.
Sensor alignment: Stand within 15 feet of the indoor unit and point the remote directly at the receiver window. The receiver is usually the dark plastic window on the front of the unit, often near the power button. If the remote works at close range but not from across the room, the receiver lens might be dirty or blocked.
4. Inspect the Outdoor Unit for Obstructions
Go outside and look at the outdoor unit. Is it buried in leaves? Covered in snow?
Blocked by overgrown bushes? Fujitsu specifies minimum clearances of 6 inches on the back and 24 inches on the front for proper airflow. Anything less than that and the system will struggle, overheat, or throw error codes.
What to clear: Remove leaves, grass clippings, weeds, and debris from the coil fins. Use a soft brush or a vacuum with a brush attachment. Do not use a pressure washer.
The water pressure can bend the aluminum fins or force water into the electrical compartment.
Snow clearance: In winter, keep the area around the outdoor unit clear of snow. The unit needs to draw in outdoor air for the defrost cycle. If the intake is blocked, ice builds up on the coil and triggers errors.
5. Visually Check the Condensate Drain Line
This is the most overlooked item on the list. The condensate drain line runs from the indoor unit to a nearby drain, floor drain, or outside wall. If it's clogged, water backs up into the drain pan, triggers the P8 error, and eventually leaks into your room.
What to look for: Follow the plastic drain line from the indoor unit to where it terminates. Look for kinks, algae growth, or visible blockages. If the line runs to a floor drain, check that the drain itself isn't clogged.
Quick test: During operation, you should see water dripping from the drain line. If the unit has been running for 20 minutes and there's no water coming out, the line is likely blocked.
P8 Drain Problems – The Most Common Fix You Can Do Yourself
The P8 error is the one you'll encounter most often, and it's the one you have the best chance of fixing without a service call. Let's walk through exactly what's happening and what to do about it.
How the Condensate Pump Works on Fujitsu Models
On floor-mount and ceiling-cassette Fujitsu units, there's no gravity drain. The indoor unit sits low enough that water can't drain downhill to an exit point. Instead, a small electric pump collects water in a reservoir and pumps it up through a drain line to wherever the line terminates.
The pump has a float switch. When the water level in the reservoir rises high enough, the float rises and triggers the pump to run. If the float switch fails, or if the pump can't push the water out fast enough, the water level keeps rising until a secondary float switch trips and signals the control board.
The control board responds by displaying P8 and shutting down the compressor.
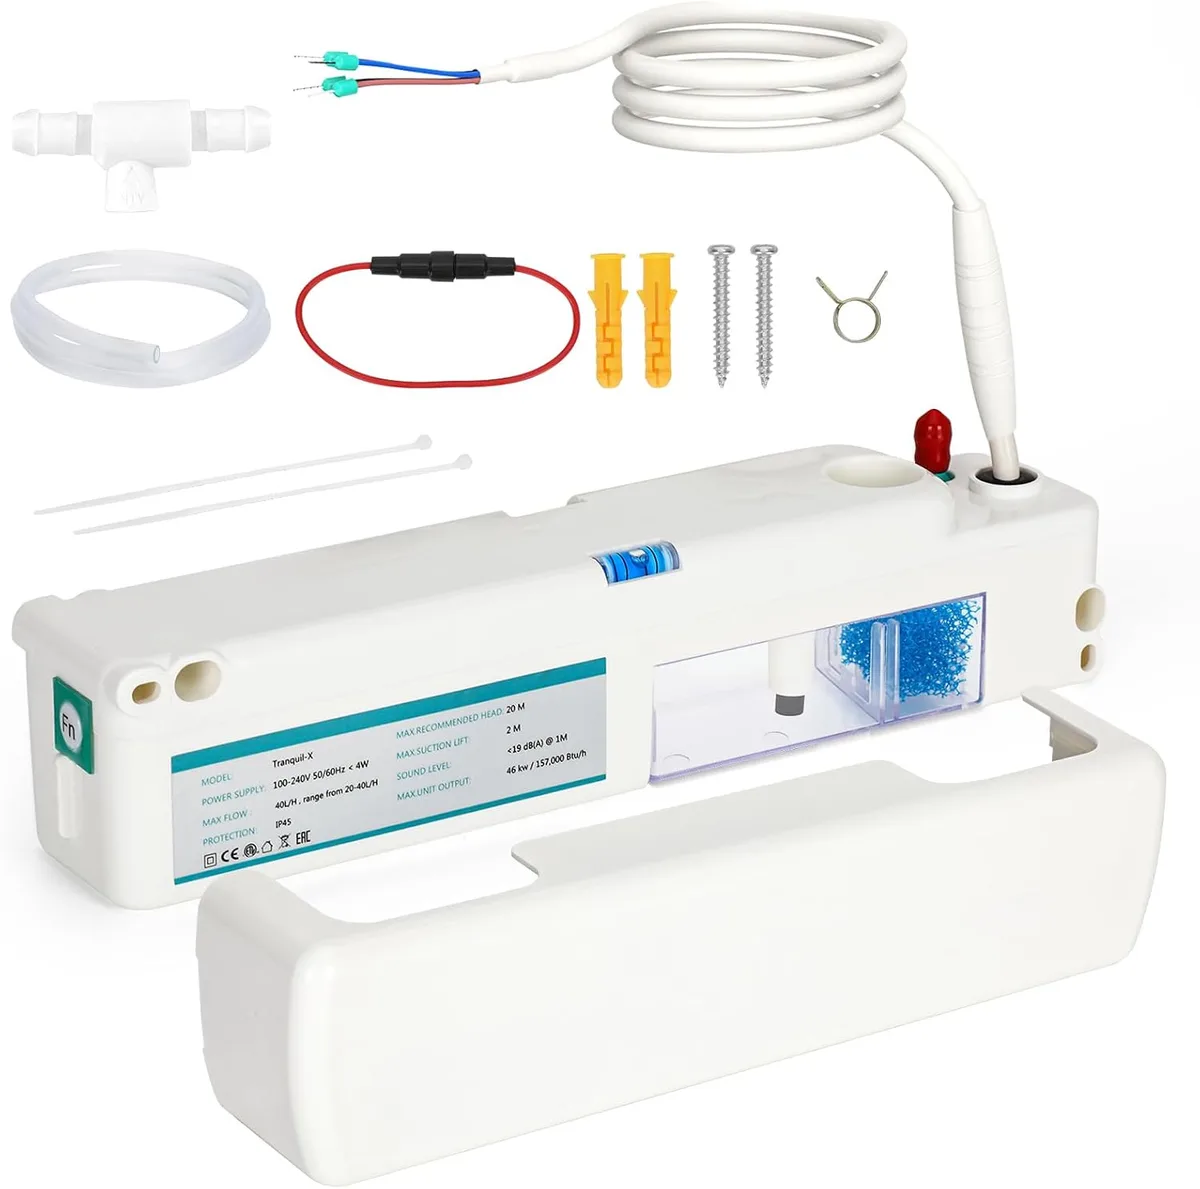
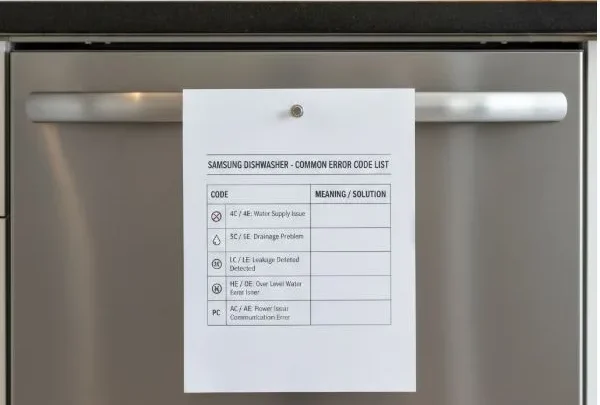
Image source: Bing (Web (fair-use with source credit))
Step-by-Step: Clearing a Clogged Drain Line
This is the fix that works 8 out of 10 times.
What you need: A wet/dry vacuum, a length of tubing that fits the drain line (1/4-inch or 3/8-inch typically), and a bucket.
- Locate the drain line termination. Follow the plastic tubing from the indoor unit. It usually ends at a floor drain, a sink drain, or pokes through an exterior wall.
- Disconnect the drain line at the indoor unit end if possible. On most Fujitsu floor units, the drain line connects to the bottom of the unit with a barbed fitting. Gently pull it off.
- Blow out the line. Use the wet/dry vacuum on blow setting, or use compressed air at low pressure (under 40 PSI). Insert the tubing into the drain line opening and seal around it. Run the vacuum for 30 seconds. You should see debris, algae, or water shoot out the other end.
- Flush the line. Pour a cup of white vinegar or diluted bleach through the line to kill algae growth. Let it sit for 15 minutes, then flush with clean water.
- Reconnect and test. Plug the drain line back in. Turn the unit back on. Run it in cooling mode for 20 minutes. Check that water flows freely from the drain line termination.
Testing the Pump Float Switch
If clearing the line doesn't fix P8, the float switch itself might be stuck.
Safety note: The float switch is inside the unit, near the condensate pan. You'll need to remove the front cover of the indoor unit. Turn off power at the breaker before opening the unit.
Once inside, locate the condensate pump. It's a small black or white box sitting in the drain pan. The float switch is a plastic cylinder that rides up and down on a vertical rod.
Gently lift the float with your finger. You should feel resistance and then a click as the switch activates. If the float is stuck in the up position, it's tripping the error.
Gently work it free.
If the float moves freely but the switch doesn't click, the switch is dead. You can order a replacement float switch from a Fujitsu parts supplier for roughly $20 to $40. Installation involves unclipping the old switch and snapping in the new one.
When the Pump Itself Needs Replacement
If the drain line is clear and the float switch works but the pump doesn't run when it should, the pump motor has failed. Signs include no humming sound from the pump when the unit runs, or water pooling in the drain pan with the pump silent.
Pump replacement is more involved. You need to disconnect the pump from the drain line, unclip the wiring harness, and remove the pump from the pan. Replacement pumps run $60 to $120 depending on the model.
If you're not comfortable with basic electrical disconnects and plastic fittings, this is worth calling a technician for.
Preventing Recurring Clogs
Algae and mold growth in the drain line is the root cause of most P8 errors. Here's how to keep it clear:
- Use a condensate pan tablet (available at HVAC supply stores). Drop one in the drain pan at the start of cooling season.
- Flush the drain line with vinegar every three months during heavy use.
- If your drain line runs outside, insulate it to prevent algae growth from warm sunlight.
- If your drain line runs to a floor drain, make sure the floor drain isn't clogged. Standing water in the drain line will grow algae faster.
Communication Errors (E6 / U4) – What to Look For Before Replacing Boards
Communication errors are frustrating because they can be either a simple wiring fix or a costly board replacement. The difference is whether the problem is in the wire or the component at the end of it.
How the Indoor and Outdoor Units Talk to Each Other
Fujitsu uses a DC communication bus. The indoor unit sends digital signals to the outdoor unit over a two-wire or three-wire cable. The voltage on these wires typically reads between 5 and 24 volts DC depending on the model and the state of communication.
If a wire is broken or shorted, the signal stops and the system throws E6.
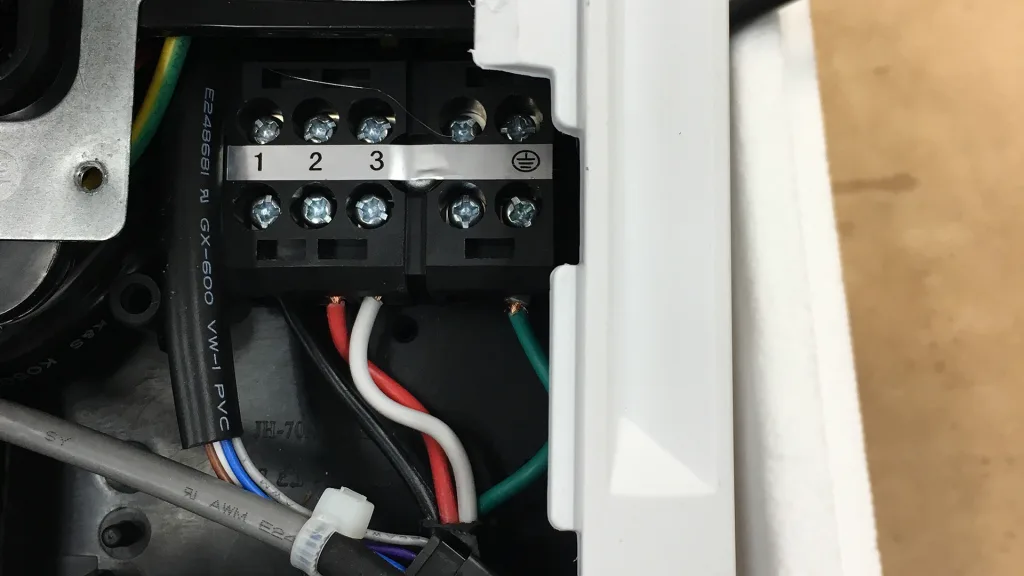
Image source: Bing (Web (fair-use with source credit))
Wiring Checks: Loose Connections and Damaged Lines
Start with the easiest fix. Turn off power at the breaker. Remove the cover from the indoor unit's control board compartment.
Locate the terminal block labeled for communication wires. Check that each wire is snug in its screw terminal. Loose connections are shockingly common.
Repeat the same check at the outdoor unit's terminal block. If you find a loose wire, tighten it, restore power, and test the system. If the error clears, you're done.
Next, inspect the full length of the communication wire for physical damage. Look for cuts, rodent gnaw marks, or areas where the insulation has rubbed through. If you find damage, the wire needs replacement.
Voltage Testing Between Terminal Blocks
This step requires a digital multimeter. If you don't own one or aren't comfortable using it, skip this section and call a technician.
With power to the outdoor unit turned on and the indoor unit running, set your multimeter to DC voltage. Place the black probe on the negative terminal and the red probe on the positive terminal at the indoor unit's communication block. A healthy system should show steady voltage between 5 and 24 volts DC, specific to your model.
If the voltage is zero, the indoor unit's control board isn't sending a signal. If the voltage fluctuates wildly, there's an intermittent short or a failing board.
Then test at the outdoor unit's communication block. If you have steady voltage at the indoor unit but nothing at the outdoor unit, the wire between them is broken. If you have steady voltage at both, the outdoor unit's control board isn't reading the signal correctly.
Board Replacement vs. Wiring Repair
If you find a wiring fault, repair the wire and test again. If the wiring checks out but the voltage is wrong at either end, the control board on that end has likely failed.
Control board replacement is not a DIY job on most Fujitsu units. The board must be matched to the exact model number and firmware version. Ordering the wrong board wastes money and time.
Authorized Fujitsu service centers have access to the correct part numbers and can flash firmware if needed.
Why Power Cycling Sometimes Fixes It
A quick power cycle clears temporary glitches in the communication bus. Turn off the breaker for five full minutes. Turn it back on.
Run the unit. If the error disappears but returns days or weeks later, there's an intermittent problem that needs professional diagnosis.
Power cycling isn't a permanent fix. It resets the control boards and clears stored faults, but it doesn't fix the underlying issue. Use it only as a diagnostic step.
When Your Fujitsu Blows Warm Air in Cooling Mode
This is one of the most common complaints. The fan runs, the remote says it's cooling, but the air coming out of the indoor unit is room temperature or warm. Here's what could be happening and what to check.
Dirty Outdoor Coil – The Most Overlooked Cause
The outdoor coil has to release heat for the system to cool. If the coil is coated in dirt, leaves, or dust, the heat can't escape. The system runs but can't reject heat, so the indoor unit blows warm air.
What to check: Look at the outdoor coil from every angle. If you can't see through the fins in multiple spots, the coil is dirty.
What to do: Turn off power to the unit. Use a soft brush or a vacuum with a brush attachment to gently clean the fins. Brush vertically to avoid bending the fins.
If you need water, use a garden hose with a gentle spray nozzle. Never use a pressure washer.
Low Refrigerant vs. Reversing Valve Stuck
These two problems look similar but have different causes.
Low refrigerant: The system is low on charge due to a leak. The compressor runs, but there isn't enough refrigerant to absorb and release heat. The indoor unit blows slightly cool or warm air.
The outdoor unit may have ice buildup on the larger service valve. This requires a technician with gauges to diagnose and repair.
Reversing valve stuck: The reversing valve switches the system between heating and cooling mode. If it sticks in the heating position, the system blows warm air even when set to cool. You may hear a hissing sound from the outdoor unit.
This also requires a technician. Sometimes tapping the valve body with a screwdriver handle frees it. But if it's stuck, the valve or the solenoid coil needs replacement.
Thermistor Sensor Failures
Fujitsu units use thermistor sensors to measure air temperature, pipe temperature, and outdoor coil temperature. If a sensor fails, the control board gets bad data. The system may run but behave strangely.
Room temperature sensor (H9 error): If this sensor reads too high, the system runs in cooling mode longer than it should. If it reads too low, the system may not run at all. The sensor is inside the indoor unit behind the front cover.
Pipe temperature sensor (F1 error): This sensor monitors the temperature of the refrigerant line inside the indoor unit. If it fails, the system may stop cooling because it thinks the coil is freezing.
Replacing a thermistor sensor is DIY-possible if you can identify the correct part and access it. The sensors cost $10 to $30. But be careful with the wiring connector.
It clips to the control board and is easy to break.
Ice on the Outdoor Unit in Winter – Defrost Cycle vs. Problem
In heating mode, frost builds up on the outdoor coil naturally. The system runs a defrost cycle every 30 to 90 minutes to melt it. During defrost, the indoor fan stops and the system briefly runs in cooling mode, which heats the outdoor coil.
This is normal.
When it's a problem: If ice stays on the coil for more than 30 minutes after the unit resumes normal heating, or if the unit cycles in and out of defrost repeatedly without making heat, there's an issue. Possible causes include a failed defrost sensor, a faulty defrost control board, or low refrigerant.
Pressure Check – Why You Need a Pro With Gauges
Checking refrigerant pressure requires a manifold gauge set, knowledge of the specific refrigerant type (R32 or R410A), and the ability to interpret pressure-temperature charts for your specific outdoor temperature.
Attempting this without proper training is dangerous. Refrigerant can cause frostbite on contact. The high side of a mini split system operates at over 400 PSI.
If you crack a gauge fitting wrong, you can blow refrigerant into the air or damage the compressor.
The EPA requires Section 608 certification to purchase refrigerant. Most supply houses won't sell to unlicensed individuals. Leave this to a professional.
The Unit Won't Turn On – Electrical Diagnostics
When your Fujitsu mini split is completely dead, start with the simple things before assuming the worst.
Check the Breaker and Disconnect First
Find the breaker labeled for the mini split. Flip it fully off and back on. Sometimes a breaker trips internally without moving to the obvious "off" position.
Next, check the disconnect switch mounted near the outdoor unit. Some disconnects have pull-out handles. Others have a switch.
Make sure it's in the correct position.
Testing Voltage at the Outdoor Unit Contactor
If the indoor unit has power but the outdoor unit doesn't, test at the contactor. The contactor is a relay that sends power to the compressor and fan motor. With the system running, you should measure line voltage across the contactor's input and output terminals.
If voltage is present at the input but not at the output, the contactor coil has failed or the control signal from the indoor unit isn't reaching the contactor. This is a moderate-level DIY fix. Replace the contactor with an exact match in amperage rating.
Control Board Fuses and Visible Damage
The indoor and outdoor control boards have small fuses. Look for a glass or ceramic fuse near the power input terminals. A blown fuse will have a visible break or a blackened interior.
What causes a blown fuse: A short in the wiring or a failed component. If the new fuse blows immediately after replacement, something downstream is shorted. That's beyond simple troubleshooting.
Transformer Failure (Indoor Unit)
The indoor unit runs on low-voltage DC power derived from a transformer. If the transformer fails, the indoor unit won't power up at all.
How to test: With power off, use a multimeter to check the transformer's input and output windings for continuity. No continuity means a dead transformer. Replacements cost $15 to $50 and are usually plug-and-play.
Capacitor Testing for the Fan Motor
The outdoor fan motor uses a run capacitor to help it start and run efficiently. A failed capacitor causes the fan to hum without spinning, or to spin slowly.
Safety warning: Capacitors store electrical charge even when power is off. Shorting the terminals with a screwdriver can cause a loud spark and injury. Use a discharge resistor or wait 30 minutes after power removal.
How to test: Set your multimeter to capacitance mode. Disconnect the capacitor from the circuit. Place the probes on the terminals.
Compare the reading to the value printed on the capacitor's side. If the reading is more than 10% off from the stated value, replace the capacitor. A new run capacitor costs $10 to $25.
Safety Rules – What Not to Touch and Why
Mini splits have dangerous voltages and pressures. These rules keep you safe and protect your equipment.
Refrigerant Handling – EPA Rules and Certification
The EPA regulates refrigerants under Section 608 of the Clean Air Act. It is illegal to knowingly release refrigerant into the atmosphere. Only certified technicians may purchase, handle, or add refrigerant.
Fines for noncompliance start at $37,500 per day per violation.
If you suspect a leak, do not attempt to add refrigerant. The leak must be found and repaired first. Adding refrigerant to a leaking system wastes money and damages the environment.
High Voltage Inside the Outdoor Unit
The outdoor unit contains line voltage (208/230V) and DC bus voltage that can exceed 300 volts. The capacitors in the inverter board hold lethal charge for minutes after power removal.
Do not: Open the outdoor unit's electrical compartment without verifying zero voltage with a meter. Do not touch any electrical terminals unless you have proper training.
Risk of Voiding the Warranty
Fujitsu's warranty requires service to be performed by authorized dealers. Opening the sealed system, replacing circuit boards without authorization, or damaging components during DIY work can void the warranty entirely.
Check your warranty documentation before attempting any repair beyond cleaning and filter changes. The standard Fujitsu warranty is 7 years on the compressor and 2 years on parts. Some installers offer extended coverage.
R32 vs. R410A – Different Handling Requirements
Newer Fujitsu models use R32 refrigerant. Older models use R410A. R32 is mildly flammable (classified as A2L).
It requires different handling procedures, recovery equipment rated for flammable refrigerants, and specific leak detection methods.
If your system uses R32, never vent it indoors. If you smell refrigerant or suspect a leak, evacuate the area and call a professional. The flammability risk is low but real.
When to Shut It Down and Call a Licensed Tech
Shut down the system and call a tech if any of these apply:
- You smell refrigerant or see oil stains near the indoor or outdoor unit
- The outdoor unit makes loud grinding, screeching, or metallic sounds
- The breaker trips immediately after resetting
- You see smoke or burning smells from any component
- The error code returns immediately after clearing it
Maintenance That Prevents Most Problems
The best troubleshooting is the kind you never need. Regular maintenance catches small problems before they become expensive ones.
Filter Cleaning Schedule
Check the filter monthly during heavy use. Clean it every three months minimum. In dusty environments or homes with pets, clean it every month.
A clean filter improves airflow by up to 30%. Better airflow means the system works less hard and uses less electricity.
Coil Cleaning for Outdoor Unit
Clean the outdoor coil twice a year: spring and fall. Use a soft brush to remove debris. Follow with a gentle hose spray.
Keep plants and shrubs trimmed back at least 24 inches from all sides.
Condensate Drain Treatment
Drop a condensate pan tablet in the drain pan at the start of each cooling season. The tablet kills algae and mold for three to four months. Without treatment, algae clogs the drain line and triggers the P8 error.
Checking the Wiring Annually
Once a year, turn off power and visually inspect all accessible wiring connections. Look for loose terminals, corroded contacts, or damaged insulation. Tighten any loose screws.
Snow Clearance Around Outdoor Unit in Winter
After heavy snow, clear a path around the outdoor unit so it can draw air. Don't pile snow against the unit. Keep the area clear for at least 12 inches on all sides.
When to Call a Professional
Some problems are not DIY-friendly. Here's a clear list of situations that require a licensed HVAC technician.
Refrigerant Leaks or Pressure Issues
If you suspect a leak, call a tech. They have leak detectors, recovery equipment, and the certification to handle refrigerant legally. The repair involves locating the leak, brazing or replacing the damaged component, evacuating the system, and recharging to the manufacturer's specification.
Compressor Failure or Locked Rotor
A seized compressor typically requires replacement of the entire outdoor unit. Compressor failure is rare but expensive. A new outdoor unit ranges from $1,500 to $3,500 installed.
Repeated Error Codes After Basic Fixes
If you cleared the filter, flushed the drain line, and power cycled the unit but the error returns within days, there's an underlying issue that needs professional diagnosis.
Electrical Issues You Can't Isolate
If the breaker trips repeatedly, or if you find damaged wiring inside the unit that requires replacement, call a tech. Improper wiring repair can cause fire or equipment damage.
Warranty Considerations – Authorized Service Only
If your unit is under warranty, using an unauthorized technician can void coverage. Contact Fujitsu or your installer for authorized service options in your area.
Frequently Asked Questions
Why does my Fujitsu mini split keep showing error codes?
Error codes indicate the system detected a fault. If a code returns after you cycle power or clean the filter, the underlying cause hasn't been fixed. Common repeat offenders include clogged drain lines (P8), loose communication wires (E6), and dirty outdoor coils (no specific code, but poor performance).
Track when the code appears to narrow down the cause.
How do I reset my Fujitsu mini split?
Turn off the unit using the remote. Then flip the breaker to the off position. Wait five minutes.
Flip the breaker back on. Turn the unit on with the remote. This clears stored fault codes and resets the control boards.
If the fault returns immediately, the problem is not a temporary glitch.
Can I clean the coils myself?
Yes, you can clean the outdoor coil yourself. Turn off power to the unit. Use a soft brush or vacuum with a brush attachment to remove surface debris.
Follow with a gentle spray from a garden hose. Do not use a pressure washer. The indoor coil is harder to access and should be cleaned by a professional if needed.
How long do Fujitsu mini splits last?
With proper maintenance, Fujitsu mini splits typically last 15 to 20 years. The compressor often lasts longer than the control boards and sensors. Units exposed to coastal salt air or heavy dust may have shorter lifespans.
Annual maintenance extends service life significantly.
What does a blinking green light mean?
A blinking green light on the indoor unit indicates normal operation. The speed of the blink communicates different statuses. A slow blink (once per second) means standby mode.
A fast blink (multiple times per second) often indicates the unit is starting up or in defrost mode. Check your manual for exact blink patterns.
Is it covered under warranty if I open the unit?
Opening the electrical compartment or refrigerant system voids the warranty on those components. Simple maintenance like cleaning the filter and clearing the drain line does not void the warranty. If you suspect a warranty-covered defect, contact an authorized Fujitsu service provider rather than attempting repairs yourself.