Hatco Booster Heater Troubleshooting
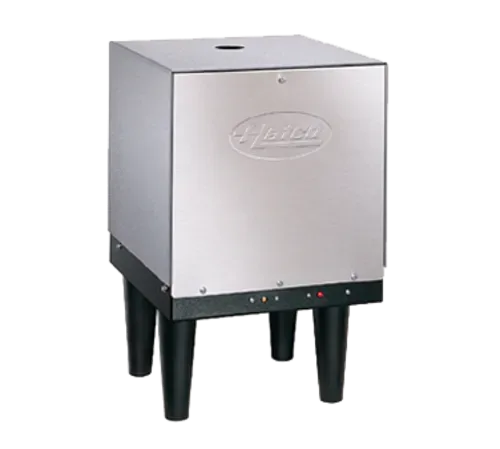
Image source: Bing (Web (fair-use with source credit))
Your Hatco booster heater is supposed to deliver that scalding 180°F final rinse water that keeps your dish machine health-code compliant. When it stops doing that, you have a kitchen full of greasy plates and a health inspector who is not going to cut you any slack. Hatco Booster Heater Troubleshooting does not have to mean replacing the whole unit or calling an expensive tech every time.
Most problems come down to just a few components that are easy to test and fix yourself.
Per NSF/ANSI Standard 4, commercial dish machines must deliver a final rinse at a minimum of 180°F (82°C) for stationary rack machines and 165°F (74°C) for conveyor machines. When your Hatco booster is not hitting those numbers, it is usually because of a tripped safety switch, a failed heating element, or a thermostat that has lost its calibration. Let us walk through exactly how to figure out which one, step by step.
Quick Answer
Most Hatco booster heater problems trace back to three things. A tripped high limit safety switch kills all heat. A failed heating element produces lukewarm water.
A scaled element or bad thermostat causes short cycling. Check the high limit button first. Test element continuity next.
Clean or replace the element last. Always disconnect power before touching anything inside.
When Your Hatco Booster Heater Won't Heat (or Gets Lukewarm)
This is the most common complaint by a long shot. You fire up the dish machine, run a rack through, and the water barely takes the grease off. The first thing to understand is that "not heating" and "not getting hot enough" are two different problems that point to different faulty parts.
The "Dead" Heater (No Heat at All)
If the unit is completely cold, the water coming out of the rinse nozzle feels like tap temperature, and the heater is not making any sound at all, you are dealing with a power interruption somewhere. This is the easiest problem to diagnose because you can trace the circuit from the breaker to the element with a multimeter.
Start at the electrical panel. If the breaker is tripped, do not just reset it and walk away. A tripped breaker means something caused an overload or a short.
The most likely suspects are a shorted heating element where the internal coil has melted and contacted the metal sheath, or a dead short at the terminal block where a wire has vibrated loose and touched ground.
If the breaker is fine, the next stop is the high limit safety switch. Every Hatco booster heater has at least one temperature-sensitive switch mounted to the tank wall. These switches kill power if the tank gets too hot, which can happen if the thermostat fails in the closed position.
Most models use a manual reset switch that pops a red button out when it trips. Push that button back in. If it trips again soon after, you have a thermostat or element problem causing the overheating.
The Lukewarm Heater (Not Reaching 180°F)
This one is trickier because the unit is working, just not well enough. The water might hit 140°F or 160°F, but it cannot climb to that 180°F benchmark. The problem here is almost always insufficient heat output, which points to either a scaled-up heating element or a partial failure of the element.
When a heating element gets coated with calcium and lime scale, that layer of mineral crust acts like an insulator. The element is still drawing power, but the heat cannot transfer into the water efficiently. The water gets warm, but the element itself gets dangerously hot, which is what causes the high limit switch to trip.
In our research, this is the single most common reason for lukewarm performance in hard water areas. The fix is descaling the element or replacing it if the scale is too thick to clean.
What's Inside: Key Parts That Cause Most Problems
Before you start poking around with a multimeter, it helps to know what you are looking at. Hatco booster heaters are simple machines. They have a stainless steel tank, one or two heating elements, a thermostat, a high limit safety switch, and a contactor that switches the heavy current.
Understanding these five components will cover 95% of troubleshooting scenarios.
The Heating Element
This is exactly what it sounds like. A resistive heating element, usually rated between 4.5 kW and 18 kW depending on the model, sits inside the tank and gets red hot when electricity flows through it. It transfers that heat directly into the water.
Elements fail in two ways: they either short out (which trips the breaker) or they open up (which kills all heat). You can test it for continuity with a multimeter from the outside.
Manufacturer specifications indicate that a healthy element should show a resistance reading between 10 and 20 ohms, depending on the wattage and voltage. An open element reads infinite resistance. A shorted element reads zero or near-zero ohms.
Both need replacement.
The Thermostat
The thermostat is a mechanical switch that turns the element on and off to maintain the set water temperature. Hatco uses a bulb-and-capillary type thermostat. A long copper tube filled with temperature-sensitive fluid runs from the thermostat body down to a sensing bulb mounted on the tank wall.
When the tank heats up, the fluid expands inside the bulb, pushes against a diaphragm, and opens the switch. When the tank cools, the fluid contracts and the switch closes again.
Thermostats fail in two ways: they stick closed (heater runs continuously until the high limit trips) or they stick open (heater never turns on). A sticky thermostat often gives you water that is either too hot or not hot enough. You can test it with a multimeter on the continuity setting while warming the bulb with a hairdryer.
The High Limit Safety Switch
This is your backup safety device. It is a separate switch, usually mounted on the same tank wall as the thermostat bulb but set to trip at a higher temperature, typically around 200°F to 210°F. If the thermostat fails and the tank keeps climbing, the high limit switch kills the power before the water boils or pressure builds dangerously.
Most Hatco high limit switches are manual reset. A red button pops out when the switch trips, and you have to physically push it back in to restore power. If you find this button popped out, something caused the tank to overheat.
Do not just reset it and walk away. You need to figure out why it tripped.
The Contactor
The contactor is a heavy-duty relay that handles the high current going to the heating element. The thermostat controls the contactor's coil, and the contactor's contacts switch the element on and off. Contactors fail when the contacts weld together (heater runs constantly) or when the coil burns out (heater never turns on).
A chattering contactor is also a bad sign, usually caused by a dying coil or low voltage at the coil terminals.
The Terminal Block and Wiring
This is where power enters the unit from the circuit breaker. Loose connections at the terminal block are a common source of problems. A loose wire creates high resistance, which generates heat, which melts the terminal block, which eventually causes a dead short.
Check every screw terminal during your troubleshooting. Tighten them to the manufacturer's specified torque, usually 20 to 30 inch-pounds.
The Quick Diagnosis: Is It Power, Water, or the Element?
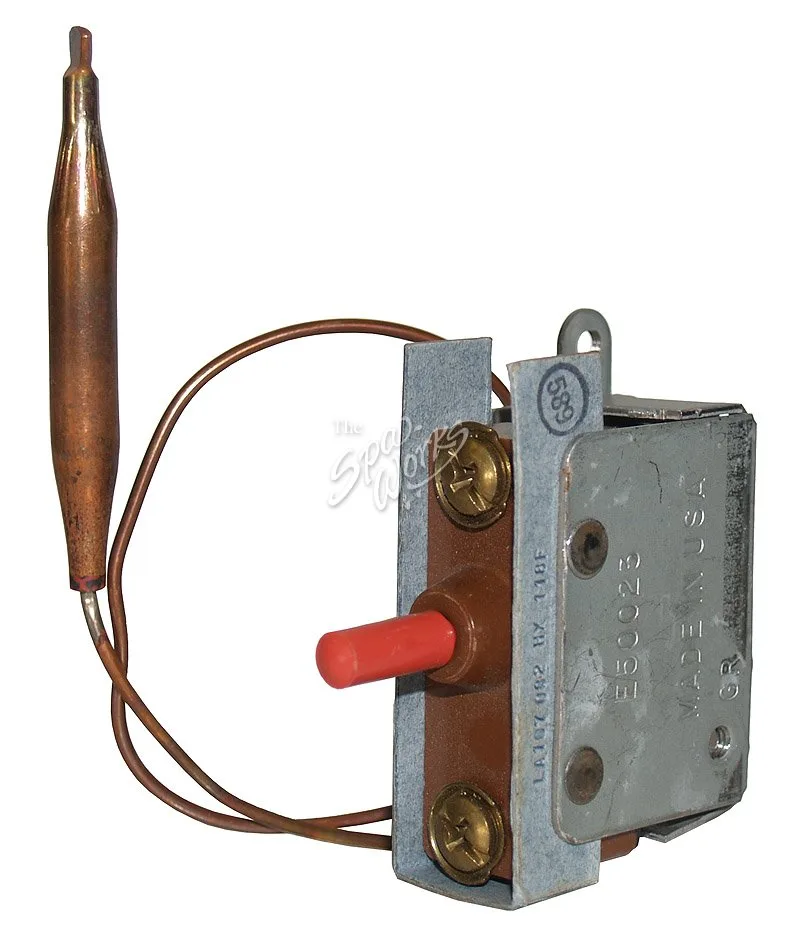
Image source: Bing (Web (fair-use with source credit))
Before you dive into detailed testing, you can narrow down the problem with three quick checks that take about five minutes total. These will tell you whether your issue is electrical, water-related, or element-related.
The Power Check
Open the access panel on the front of the booster heater. With the power on, use a multimeter set to AC voltage to check for 208 or 240 volts (depending on your model) between the incoming line terminals at the block. If you have voltage there, the power is fine.
If you do not, the problem is upstream at the breaker or the disconnect switch.
The Water Flow Check
Turn on the dish machine and run a rinse cycle. Open the drain valve on the booster heater slightly. You should get a steady stream of water.
If the water trickles or sputters, you have a flow problem. That could be a clogged inlet strainer, a partially closed shutoff valve, or a supply line that is too small. Low flow means the tank is not filling properly, and an unfilled tank means a burned-out element.
Manufacturer specs indicate the booster heater requires a minimum flow rate of 5 gallons per minute at 40 psi for proper operation.
The Element Continuity Check
With the power disconnected, remove the wires from the element terminals. Set your multimeter to ohms. Touch one probe to each terminal.
A good element reads between 10 and 20 ohms. An open element reads OL (infinite resistance). Then touch one probe to a terminal and the other to the metal tank body.
You should read infinite resistance. If you get any reading, the element is shorted to ground and must be replaced.
These three checks alone will tell you exactly where to focus your time. Power problem? Look at the breaker or wiring.
Flow problem? Clean the strainer or check the supply. Element problem?
Descale or replace.
The Decision Tree: Step-by-Step Troubleshooting by Symptom
Now we get into the real diagnostic logic. Each symptom points to a specific branch in the decision tree. Follow the path that matches what your heater is doing, and do not skip steps.
Every skipped step is a chance to misdiagnose and waste time.
No Power at All
If the heater is completely dead, no lights, no sounds, no warmth at all, follow this branch in order.
Step 1: Check the circuit breaker. Is it tripped? If yes, reset it once.
If it trips again immediately, you have a short circuit. Do not keep resetting it. Disconnect the element wires at the terminal block and try resetting the breaker.
If it holds now, the element is shorted. Replace it. If the breaker still trips with the element disconnected, the short is in the wiring or the contactor.
Inspect the terminal block for melt damage and check the contactor for welded contacts.
Step 2: If the breaker is fine, check the high limit safety switch. Find the red button sticking out of the small switch mounted on the tank. Push it until it clicks in.
If the heater fires up, you found the problem. Now find out why it tripped. Run the heater and monitor the water temperature with a thermometer.
If it climbs past 190°F, the thermostat is stuck closed and needs replacement.
Step 3: If the high limit is not tripped, check for voltage at the contactor coil terminals. You should see line voltage when the thermostat is calling for heat. If you have voltage at the coil but the contactor is not clicking, the contactor coil is bad.
Replace the contactor. If you have no voltage at the coil, the thermostat is open and not sending power. Test the thermostat with a multimeter.
Water Gets Warm but Not Hot Enough
This branch is for situations where the dishwasher is producing warm water, say 120°F to 160°F, but not the 180°F you need to sanitize.
Step 1: Verify the thermostat setting. Someone might have bumped the dial. The factory setting is typically around 185°F to 195°F.
Use a small flathead screwdriver to turn the adjustment screw clockwise a few degrees. If the water temperature climbs, you just needed a recalibration. If it does not, move to step 2.
Step 2: Check the element for scale buildup. If you live in a hard water area, this is almost certainly your problem. Shut off power and water.
Drain the tank. Remove the element from its port and inspect it. If it looks like a coral reef, it needs to be descaled or replaced.
You can soak it in a descaling solution, but if the scale is more than 1/8 inch thick, replacement is faster and more reliable.
Step 3: Measure the voltage at the element terminals while the heater is running. If you have 208V on a 240V rated element, the element will only produce about 75% of its rated wattage. This is a common issue when a 240V unit gets installed on a 208V circuit without adjusting the element.
You need a 208V rated element to get full power from a 208V supply.
Heater Cycles On and Off Too Fast
Short cycling is when the element turns on for a minute or two, shuts off for a minute, then turns on again. This wastes energy, wears out the contactor, and does not deliver consistent water temperature.
Step 1: Check the high limit switch. If it is tripping and resetting on its own, you have an automatic reset type that is cycling due to overheating. The most common cause is a thermostat bulb that has slipped out of its mounting bracket.
The bulb must be firmly pressed against the tank wall with the bracket tight. If the bulb is just dangling, it reads ambient air temperature, not tank temperature. The heater runs too long, the tank overheats, the high limit trips, then the tank cools and the limit resets.
Chase the bulb and resecure it.
Step 2: Check the thermostat itself. A worn-out thermostat can lose its differential, meaning it turns on and off within a very narrow temperature band. This creates rapid cycling.
If the thermostat bulb is properly mounted and the unit is still short cycling, replace the thermostat.
Step 3: Check the element for scale. As scale builds up, the element gets hotter than the water around it. The thermostat reads the tank wall temperature, not the element temperature.
But if the scaling is severe, the tank wall may heat up faster than the water, confusing the thermostat. Clean or replace the element.
Water Leaking from the Tank or Fittings
Leaks are usually straightforward, but they can also be the first sign of a bigger problem.
Step 1: Identify the source of the leak. Is it coming from the drain valve? Tighten the valve handle or replace the rubber washer.
Is it coming from the temperature and pressure (T&P) relief valve? A T&P valve that weeps or drips could mean the tank pressure is too high, or the valve itself has failed from age. Manufacturer specifications indicate the T&P valve should be set to open at 150 psi and 210°F.
If the valve is dripping and the tank temperature is below 200°F, the valve is likely bad. Replace it.
Step 2: If the leak is coming from the element port, the element gasket has dried out. Replace the gasket when you replace or clean the element. Use a thin layer of food-grade silicone grease on the new gasket to help it seal.
Step 3: If the leak is from a hairline crack in the tank itself, you have a bigger problem. Tank cracks are usually caused by freezing or by repeated overheating from a failed thermostat. A cracked tank cannot be welded reliably.
The unit must be replaced.
Relief Valve Dumping Water Constantly
A T&P valve that is dumping water continuously is not the same as a weep. This is a steady stream that floods your floor and wastes hot water.
Step 1: Check the water pressure. If the incoming water pressure is above 80 psi, it can force the T&P valve open. Install a pressure reducing valve on the cold water supply line to the booster heater.
Most commercial kitchens should have one already, but many do not.
Step 2: Check the water temperature. If the tank is overheating, the T&P valve will open to relieve the excess pressure. Measure the water temperature at the drain valve with a thermometer.
If it is above 210°F, the thermostat is stuck closed. Replace the thermostat and the T&P valve. Once a T&P valve has discharged, it can become weakened and may not reseat properly.
Replace it as a pair.
Step 3: If the water pressure and temperature are both normal, the T&P valve has failed. Replace it.
Loud Noises (Rumbling, Popping, Hissing)
These are almost always related to scale buildup on the heating element. As the element heats up, trapped water under the scale layer flashes into steam, causing a popping or rumbling sound. This is called steam hammer in the industry.
Step 1: Drain the tank and inspect the element. If it is heavily scaled, remove it and clean or replace it. After cleaning, flush the tank to remove any loose scale debris that could clog the drain valve or inlet strainer.
Step 2: If the element is clean and the noise persists, check for air trapped in the system. Air in the tank can cause hissing sounds. Bleed the air by cracking open the drain valve while the unit is filling until a steady stream of water comes out.
Step 3: Rumbling noises can also come from a failing heating element that is arcing internally. If the element tests fine for continuity but the noise continues, replace the element anyway. A failing element can take out a contactor or a circuit breaker when it finally shorts.
The Biggest Mistakes I See Techs Make (And How to Avoid Them)
Over the years, watching people troubleshoot these units, the same three mistakes keep coming up. Avoiding them will save you hours of wasted time and prevent you from damaging parts that were fine when you started.
Mistake 1: Resetting the high limit without investigating why. This is the number one error. You push the red button, the heater kicks on, and you call it fixed. Two hours later, the phone rings because the heater is dead again.
The high limit trips for a reason. Either the thermostat is stuck, the element is scaled, or the tank is low on water. Find the root cause before you reset.
Mistake 2: Replacing the element without checking the voltage. I have seen this more times than I can count. A tech slaps a 240V element into a unit running on 208V and wonders why the water is lukewarm. The element works, but at reduced wattage.
Always measure the line voltage and verify you are installing the right element for that voltage. Hatco elements are stamped with their voltage and wattage. Read the stamp before you buy.
Mistake 3: Skipping the strainer cleanout. Every Hatco booster heater has an inlet strainer. It is usually located where the cold water supply enters the unit. If that strainer is clogged, the tank will not fill properly, and the element will burn out from dry firing.
You have to change a burned-out element anyway, so you might as well check the strainer while you are there. Clean it every six months as a rule.
Safety First: When to Shut It Down and Call a Pro
Some problems are DIY. Some are not. Knowing the difference keeps you safe and prevents you from making a bad situation worse.
Let us be clear about when you should stop troubleshooting and call a licensed electrician or Hatco authorized service technician.
The Shock Risk Is Real
These units run on 208 to 480 volts. That is not a friendly voltage. A mistake here can stop your heart.
Always disconnect power at the breaker before opening the access panel. Verify the power is off with a multimeter before touching any terminals. Never work on a live unit just because you want to see if it clicks.
If you are not comfortable using a multimeter, do not open the panel.
When to Call a Professional
Call a pro if the breaker trips repeatedly and you have already disconnected the element. That means the short is in the wiring, the contactor, or the control circuit. Tracing a hidden short requires experience and the right tools.
Call a pro if you find a cracked tank. There is no repair for a cracked tank. The unit must be replaced.
Call a pro if the unit is still under warranty. Hatco warrants their booster heaters for one year from installation date. Tampering with internal components can void that warranty.
Call a pro if you smell burning plastic. That is a sign of melting insulation inside the unit, which usually means immediate replacement of the wiring harness or terminal block.
Lockout/Tagout Is Not Optional
The Occupational Safety and Health Administration (OSHA) requires lockout/tagout procedures for servicing equipment where unexpected startup could cause injury. That applies to commercial kitchen equipment. Use a padlock on the electrical disconnect.
Put a tag on it that says the unit is being serviced. Make sure no one else can flip the breaker back on while you have your hands inside. This is not bureaucracy.
It is how people stay alive. You can find official lockout/tagout guidance at osha.gov.
Keeping It Running: Simple Maintenance That Prevents Callbacks
Most Hatco booster heater failures are preventable. A little regular maintenance goes a long way. Build these tasks into your monthly or quarterly kitchen routine, and you will dramatically reduce the number of emergency service calls.
Monthly Tasks
Clean the inlet strainer every month. Pop it out, rinse it under hot water, scrub it with a small brush if needed, and put it back. A clogged strainer is the single most common cause of element burnouts.
It takes two minutes. Check the T&P valve for signs of weeping or dripping. If it is wet, note it and plan to replace it soon.
Listen to the heater during operation. If you hear popping or rumbling, descale sooner rather than later.
Quarterly Tasks
Test the high limit safety switch. With the power on, push the red test button if your model has one, or simulate an overtemp by running the heater with a blocked thermostat bulb. The switch should trip and kill power.
Reset it and confirm the heater restarts. If the switch fails to trip, replace it immediately. Verify the thermostat calibration.
Measure the water temperature at the drain valve with a thermometer. If it is more than 10 degrees off from the dial setting, adjust or replace the thermostat.
Annual Tasks
Replace the heating element gasket. Even if the element looks fine, the gasket dries out over time. A dried gasket will leak eventually.
Better to replace it on your schedule than discover it on a Saturday night during dinner service. Flush the tank. Drain the tank completely and flush it with fresh water to remove sediment that has settled at the bottom.
Sediment insulates the tank floor and creates hot spots. Replace the T&P valve every five years, even if it looks fine. Valves fail internally without visible signs.
The Hard Water Factor
If your water hardness is above 3 grains per gallon, you need to be more aggressive with descaling. Install a water softener on the cold water supply line to the booster heater. Softened water drastically reduces scale buildup.
If a softener is not possible, descale the element every three to six months. Use a commercial descaling solution designed for food service equipment. Follow the manufacturer's dilution instructions.
Do not use muriatic acid unless you absolutely have to, and never mix descaling chemicals.
Frequently Asked Questions
How do I reset the high limit switch on my Hatco booster heater?
Locate the small switch mounted on the tank wall. Look for a red button sticking out. Push that button in until it clicks and stays flush.
If the button pops back out immediately, you have an underlying problem causing overheating. Do not keep resetting it. Investigate the thermostat and element first.
Why is my Hatco booster heater tripping the breaker?
A tripped breaker usually means a shorted heating element. Disconnect the element wires and reset the breaker. If it holds, replace the element.
If it still trips, the short is in the wiring or contactor. Call an electrician at that point.
What temperature should my Hatco booster heater be set to?
The factory setting is typically between 185°F and 195°F. That ensures the final rinse water reaches at least 180°F at the dish machine nozzle. Check your local health code requirements.
Some jurisdictions require 180°F at the nozzle, which may need a slightly higher tank setting.
How often should I clean the inlet strainer on my Hatco booster heater?
Clean it monthly. If you have hard water or heavy sediment in your supply, clean it every two weeks. A clogged strainer restricts water flow, which causes the tank to run low on water and the element to burn out.
This is the cheapest maintenance task you can do.
Can I replace the heating element myself?
Yes, if you are comfortable with basic electrical work. Disconnect power first. Drain the tank.
Remove the element from its port. Install the new element with a fresh gasket. Reconnect the wires.
Fill the tank before restoring power. Never energize a dry element. It will burn out in seconds.
Why is water leaking from the pressure relief valve on my Hatco booster?
Either the water pressure is too high, the water temperature is too high, or the valve itself has failed. Check the incoming water pressure first. Install a pressure reducing valve if it exceeds 80 psi.
Check the water temperature next. If it is above 210°F, replace the thermostat. If both are normal, replace the T&P valve.
Your Troubleshooting Cheat Sheet (Final Decision Guide)
Here is the condensed version. Print this out and keep it near the unit. If you run through these steps in order, you will solve 9 out of 10 problems.
| Symptom | Most Likely Cause | Next Step |
|---|---|---|
| No heat, no sound | High limit tripped | Reset it. If it trips again, check thermostat. |
| No heat, breaker trips | Shorted element | Disconnect element. If breaker holds, replace element. |
| Lukewarm water | Scaled element or wrong voltage | Descale or replace element. Verify voltage. |
| Short cycling | Thermostat bulb loose or bad thermostat | Secure bulb. Replace thermostat if cycling persists. |
| Water leaking | Bad gasket or cracked tank | Replace gasket. Replace unit if tank is cracked. |
| Relief valve dumping | Overheating or high pressure | Check temp and pressure. Replace valve if needed. |
| Popping or rumbling | Scale on element | Descale or replace element. |
Final rule of thumb. If the unit is completely dead and the high limit is not tripped, test for voltage at the terminal block. If you have voltage there, test the thermostat. If the thermostat is closed, test the contactor coil.
If the coil has voltage and the contactor does not click, the contactor is bad. If the contactor clicks but the element does not heat, the element is open. That is the whole chain.
Start at one end. Work your way to the other. You will find the break every time.

Similar Posts