How to Mount Action Camera on Helmet
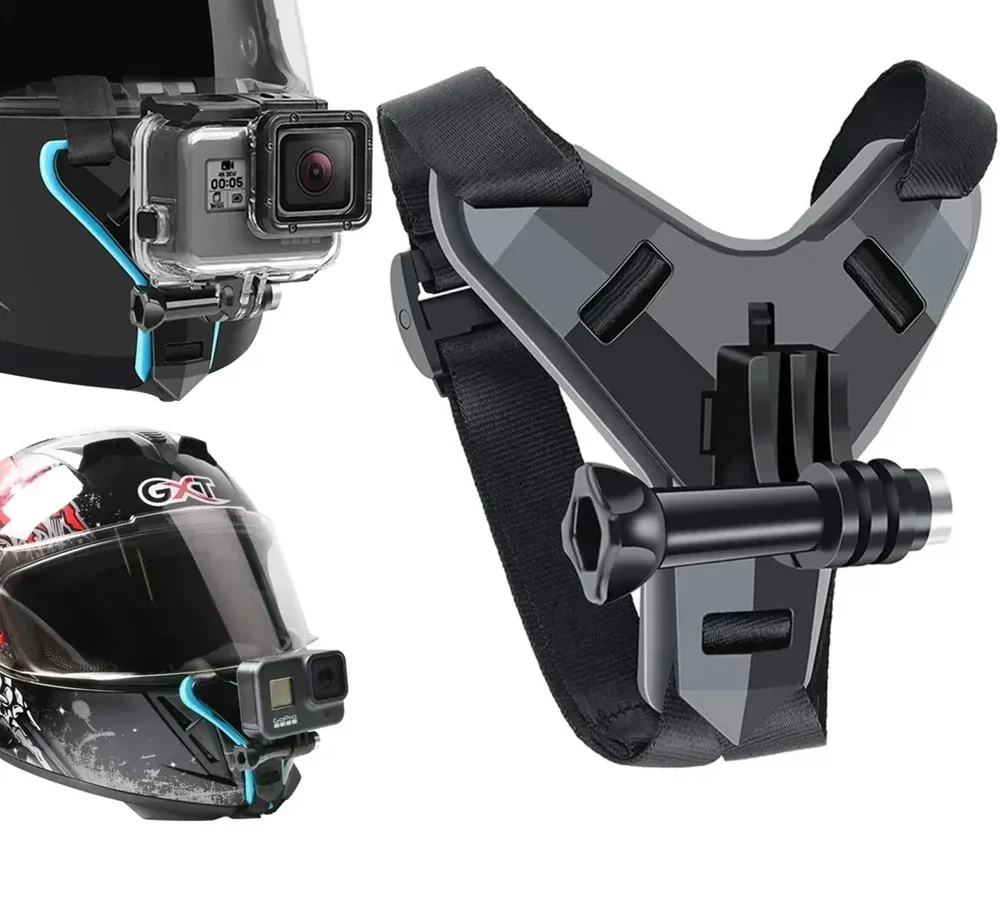
You’ve got a new action camera and a helmet, and you’re ready to capture that first-person POV footage. But sticking a mount onto a curved, vented, or slippery helmet surface isn’t as simple as pressing down and hoping for the best. Get the placement wrong, and you’ll end up with shaky footage or a camera that flies off at speed.
That’s why learning how to mount action camera on helmet the right way matters.
3M’s technical specifications for VHB adhesive pads indicate they need a full 24-hour cure at room temperature to reach maximum bond strength. Rushing that step is the number one reason mounts fail. Let’s walk through what it takes to get a secure, long-lasting mount that survives your next ride.
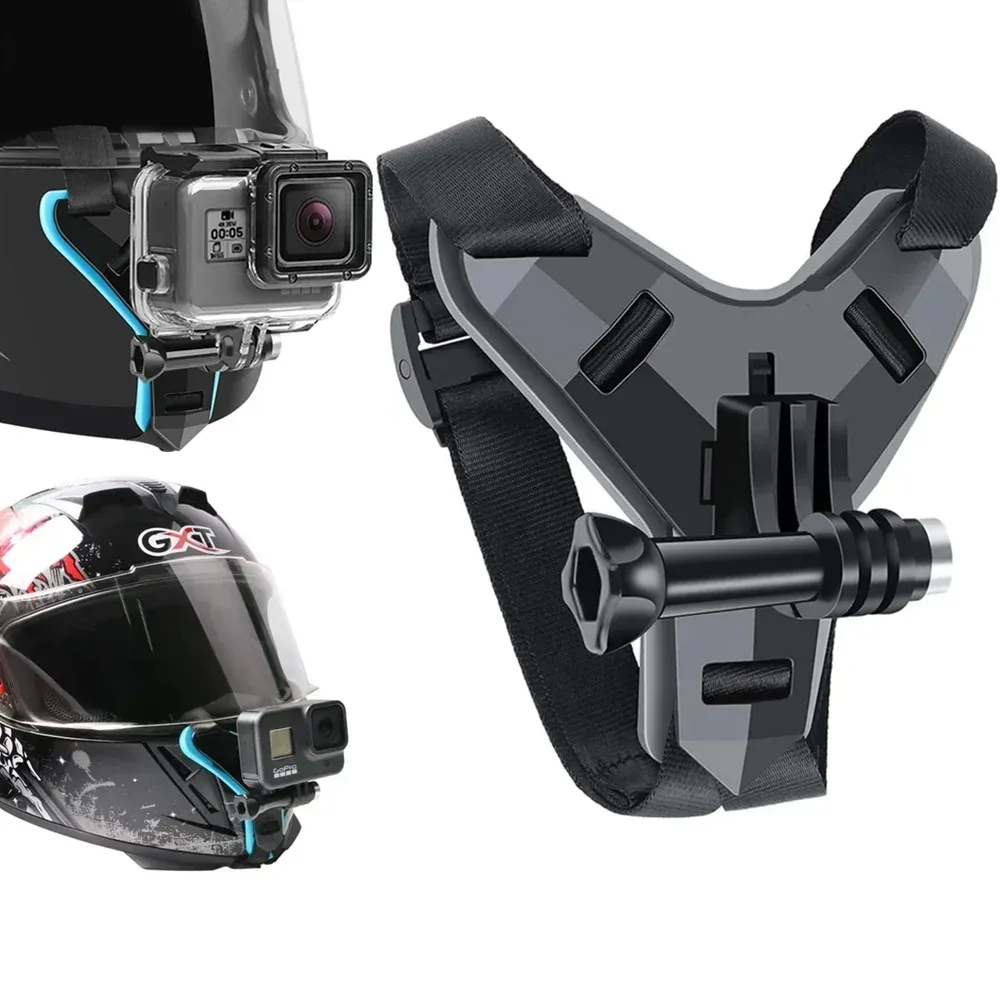
Image source: Bing (Web (fair-use with source credit))
Why Getting the Mount Right Is Tougher Than It Looks
Helmets are designed to protect your head, not to hold cameras. That means rounded shells, deep vents, and slippery surfaces. Every shape and material choice that makes a helmet safe also makes mounting a camera tricky.
The biggest challenge is finding a flat spot. Most adhesive mounts need a smooth, flat surface about the size of a quarter. On a typical motorcycle or bicycle helmet, that’s harder to find than you’d think.
Vents, ridges, and seams break up the shell. If you place the mount over a curved area, the adhesive won’t make full contact. That leaves a weak bond that can fail under wind or vibration.
3M VHB is the gold standard for adhesive pads, but it needs a clean, dry surface at room temperature. Cold weather stiffens the adhesive. Heat can soften it.
If you ride in extreme conditions, you need to account for that.
Helmet certification is also a concern. Drilling into a helmet voids its safety rating. DOT, ECE, and SNELL all require the shell to remain intact.
So adhesive mounts are the only safe option for most riders.
Rider forum feedback consistently shows that improper placement is the root cause of most mount failures, not the adhesive itself. Take the time to read your helmet’s shape, and you’ll save yourself a lost camera.
Chin Mount, Side Mount, or Top Mount? (Reading Your Helmet's Shape)
Where you put the mount changes the footage you get. It also affects stability and comfort. The best spot depends on your helmet type and what you’re filming.
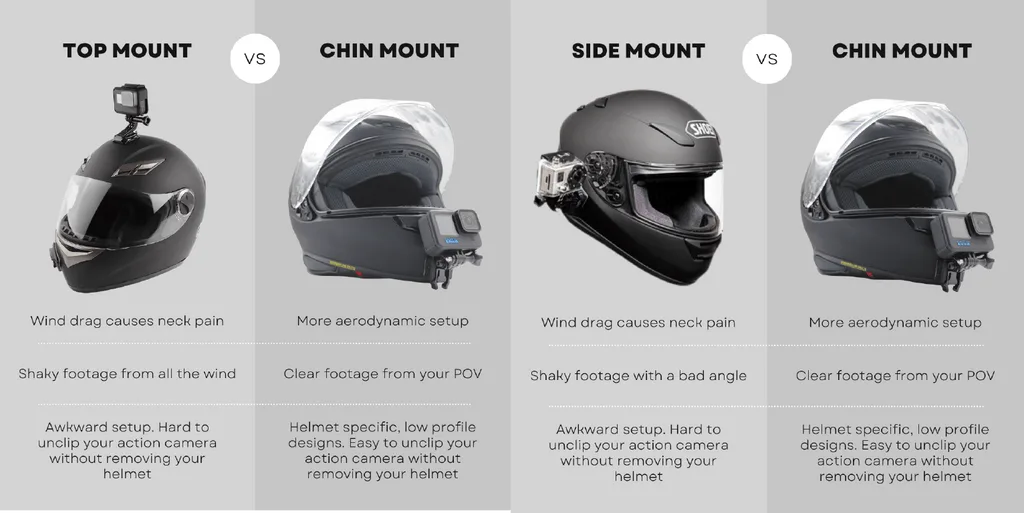
Image source: Bing (Web (fair-use with source credit))
Full-Face Motorcycle Helmets
The chin bar is the most popular position for motorcycle riders. It puts the camera at eye level, which gives a natural POV. You can see the rider’s hands, the dash, and the road ahead.
The chin area is usually flat enough for an adhesive mount. Just avoid the visor mechanism and any vents. Some riders use a bolt-on chin mount that screws into the visor pivot points.
That’s a solid option if your helmet has exposed screws, but it requires careful installation.
Half-Shell / Open-Face Helmets
These helmets are tricky because they have less flat surface area. The best spot is usually the side, just above the temple. That gives a slightly off-center POV, which is fine for vlogging.
You can also mount on top, but that raises the camera high and catches more wind noise. Avoid the forehead area because it’s too curved for a good adhesive bond.
Bicycle / MTB Helmets
Mountain bike helmets have lots of vents and a visor. The top mount, just behind the visor, is a common choice. It gives a forward-facing POV that shows the trail.
But you have to check that the mount doesn’t block airflow. Many riders prefer a chin mount using a strap that wraps around the helmet. That’s especially useful for full-face MTB helmets.
Ski / Snowboard Helmets
Ski helmets are usually smooth with few vents. The top or side mount works well. The main risk is that the adhesive gets cold and brittle.
Apply the mount indoors and let it cure at room temperature before hitting the slopes. A strap mount can also work, but it might slip on the smooth shell.
The 4-Step Process for a Rock-Solid Mount
Once you’ve chosen the spot, follow this process. Rushing any step reduces the bond strength.
Step 1: Find the Flattest Spot
Look at your helmet from all angles. The ideal surface is flat and smooth, with no vents within an inch of the mount. Place the mount against the helmet and check for gaps.
If you see light under the adhesive pad, the surface is too curved. Move to a different spot. Sometimes the side of the helmet near the ear is flatter than the top.
Step 2: Clean and Prep the Surface
Use isopropyl alcohol (70% or higher) and a lint-free cloth. Wipe the area thoroughly to remove oils, wax, and dust. Let it dry completely.
Do not touch the surface with your fingers after cleaning. Oils from your skin can weaken the adhesive. Some riders also use a prep pad that comes with 3M VHB mounts.
Step 3: Apply and Cure the Adhesive Pad
Peel the liner from the adhesive pad. Press the mount firmly onto the helmet. Hold it with steady pressure for 30 to 60 seconds.
Then leave it alone for 24 hours. Do not attach the camera during this time. The adhesive needs time to flow into the microscopic pores of the helmet shell.
If you’re in a cold climate, keep the helmet indoors at room temperature during curing.
Step 4: Attach the Camera and Adjust the Angle
After 24 hours, clip the camera onto the mount. Tighten any locking mechanism. Put the helmet on and check the angle.
You want the horizon to be level. Adjust the tilt of the mount arm if needed. Record a short test clip to confirm the field of view.
If you’re planning to vlog, dialing in your video settings will help you get the right look.
The 5 Most Common Mounting Mistakes (And How to Spot Them)
1. Mounting on a curved surface. If the adhesive pad doesn’t make full contact, the bond will fail. The fix is to test the fit before peeling the liner.
Use a dry mount to check for gaps.
2. Skipping the cleaning step. Dust or oils under the pad create weak spots. If you see bubbles under the adhesive after a few days, you didn’t clean well enough.
3. Rushing the cure time. Attaching the camera too early puts stress on the adhesive. If your mount wobbles after a few rides, you probably didn’t wait 24 hours.
4. Blocking vents. A mount placed over a vent reduces airflow and can cause overheating. If you feel more heat than usual, reposition the mount.
5. Using a cheap adhesive pad. Not all pads are 3M VHB. Generic pads can fail in heat or cold.
If your mount fell off on a warm day, that’s likely the cause.
Adhesive vs. Strap vs. Bolt-On: Which Mount Wins?
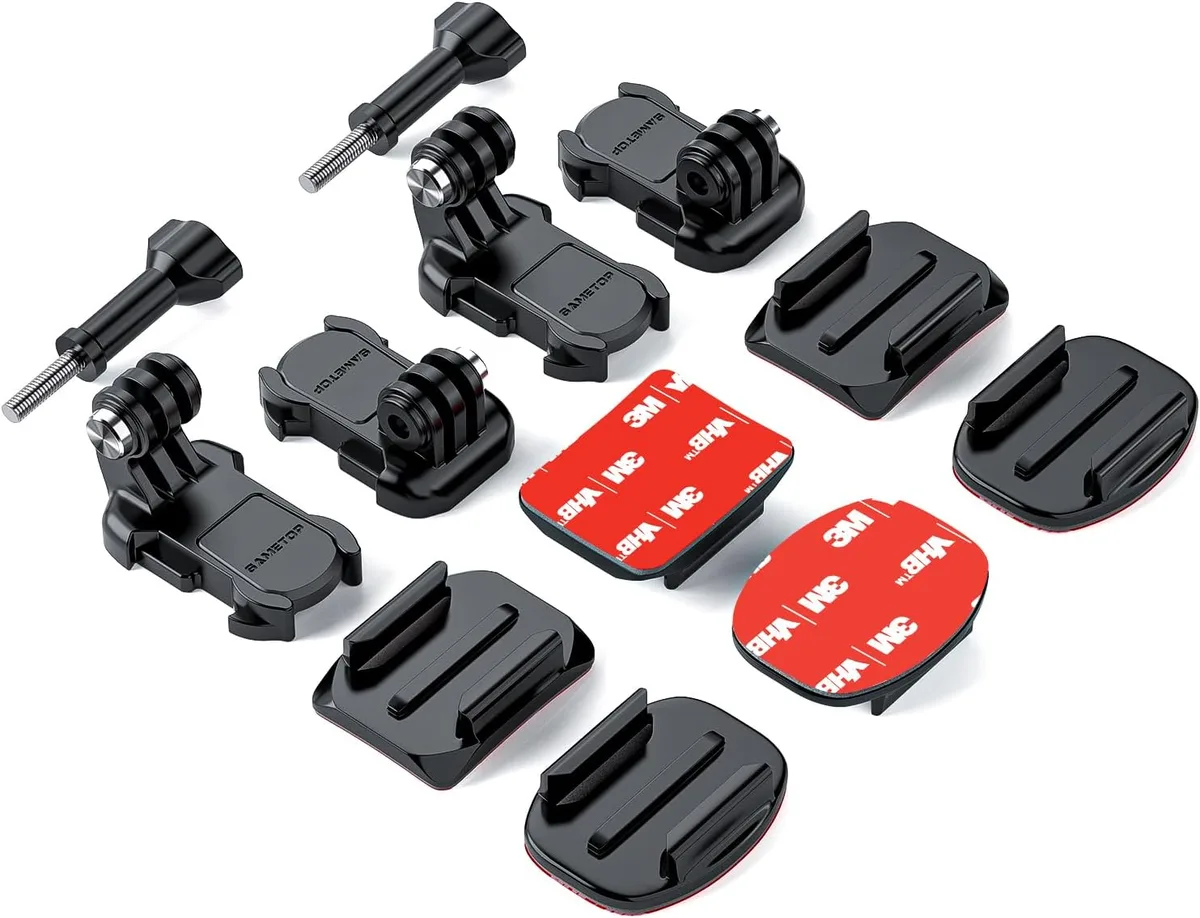
Image source: Web (Bing) / amazon.co.uk (Web image (fair-use with source credit))
Adhesive mounts are the most common. They’re lightweight, low profile, and safe for all helmet types. The 3M VHB pads are strong enough to hold the camera at high speeds.
The downside is that you need to wait 24 hours for the cure. They’re also permanent unless you heat them to remove them. Best for riders who stick with one helmet.
Strap mounts use a nylon strap that wraps around the helmet. They’re great for helmets with lots of vents or irregular shapes. You can install them in seconds and move them between helmets.
The drawback is that they can slip on smooth shells. They also add bulk. Best for riders who share helmets or want a quick setup.
Bolt-on mounts attach to the visor screws of full-face helmets. They’re rock solid and don’t rely on adhesive. But they require exposed screws, which not all helmets have.
They also add weight and can interfere with the visor mechanism. Best for riders who want the most secure mount possible.
If you’re still learning the basics of your camera’s operation, a guide on getting the focus right can help you dial in the details. And if you plan to store the camera when not in use, keeping your camera safe in storage applies to action cameras as well.
For most riders, an adhesive mount on a clean, flat surface is the best balance of simplicity and security. A strap mount is a good backup for helmets where adhesive won’t stick.
How to Maintain, Remove, and Safely Check Your Mount
A helmet mount isn’t a set-and-forget accessory. It needs periodic checks to stay secure. The adhesive degrades over time, especially if you ride in extreme temperatures or wet conditions.
Check the bond before every ride. Give the mount a firm tug. If it shifts or lifts at the edges, it’s time to replace the adhesive pad. A camera flying off at 40 mph is dangerous for you and for anyone behind you.
Clean the mount and camera regularly. Dirt and grime can work their way under the adhesive. Use a damp cloth to wipe the area around the mount. Avoid spraying water directly at the adhesive joint.
Moisture can weaken the bond over time.
When to remove the mount. If you sell your helmet, or if the mount is damaged, you’ll need to remove it. Don’t pry it off with a screwdriver. That can damage the shell.
Use a heat gun or a hair dryer on low heat. Warm the adhesive for 30 to 60 seconds until it softens. Then use dental floss or fishing line to gently saw through the adhesive.
Peel the mount off slowly.
Clean the residue. The adhesive will leave a sticky patch. Use isopropyl alcohol or Goo Gone to remove it. Rub gently with a soft cloth.
Avoid harsh solvents that could damage the helmet’s outer shell. If the surface is scratched, that’s cosmetic only. It won’t affect the helmet’s safety rating.
Replace the adhesive pad. If you want to reuse the mount on a new helmet, buy a fresh 3M VHB pad. Do not reuse the old one. The adhesive loses its holding power after removal.
A fresh pad costs a few dollars and gives you full bond strength.
Temperature affects the bond. If you ride in winter, let the helmet warm up indoors before attaching the camera. Cold adhesive becomes brittle. If you ride in summer, park in the shade when possible.
Prolonged direct sunlight can soften the adhesive. A properly cured mount typically lasts 6 to 12 months with regular use. Replace the pad proactively after that.
Frequently Asked Questions
Can I mount an action camera on a carbon fiber helmet?
Yes, but carbon fiber shells are often slippery. Use a 3M VHB pad and ensure the surface is extremely clean. Some riders use a primer pad that comes with the mount.
The bond is still strong, but it’s harder to remove later without scratching the clear coat.
Will the adhesive damage my helmet’s paint?
No, if you remove it correctly. Using heat and gentle pressure leaves the paint intact. If you peel the mount cold, you might lift the paint.
Always warm the adhesive before removal. The helmet shell itself is never damaged by adhesive.
Can I use a strap mount on a ski helmet?
Yes, strap mounts work well on ski helmets. The smooth shell can cause the strap to slip, so tighten it firmly. A chin strap mount is also popular for ski helmets.
Make sure the buckle doesn’t press against your face. Some riders add a rubber pad under the strap for grip.
How do I fix vibration in my helmet camera footage?
Vibration usually comes from a loose mount or a heavy camera. Check that the mount is fully tightened. If the camera is heavy, consider a lighter model.
You can also add a rubber vibration dampener between the mount and the camera. Avoid mounting the camera on the top of the helmet where wind drag is highest.
Is it safe to mount a camera on a motorcycle helmet?
Yes, if you use an adhesive mount. Do not drill into the helmet. Drilling voids DOT and ECE certifications.
The adhesive mount adds minimal weight and does not affect the helmet’s impact performance. Always use a tether for high-speed riding. A tether prevents the camera from flying off if the adhesive fails.
How long does the adhesive last before I need to replace it?
With proper installation and care, a 3M VHB mount lasts 6 to 12 months. Check the mount monthly. If you see the edges lifting, replace the pad immediately.
Heat and UV exposure shorten the lifespan. If you ride daily in hot climates, replace the pad every six months.
The One Rule That Never Changes
Never do anything that compromises your helmet’s integrity. That’s the single rule that governs every decision about mounting a camera.
Adhesive mounts are safe. Strap mounts are safe. Bolt-on mounts that use existing screws are safe.
Drilling, cutting, or gluing anything to the EPS foam liner is not safe. Your helmet is designed to absorb impact in a specific way. Any modification changes that behavior.
The best mount is the one that stays secure, gives you the footage you want, and doesn’t put your head at risk. Take the time to do it right. Clean the surface.
Wait for the cure. Check the bond before every ride. Replace the pad when it wears out.
If you need to transfer footage, moving files quickly is simple with the right method. And if you want to upgrade, budget-friendly options that still deliver solid performance are worth checking out.
Ride safe. Film smart. Your helmet is your most important piece of gear.
Treat it that way.

Similar Posts
































