How to Protect Trail Camera From Weather
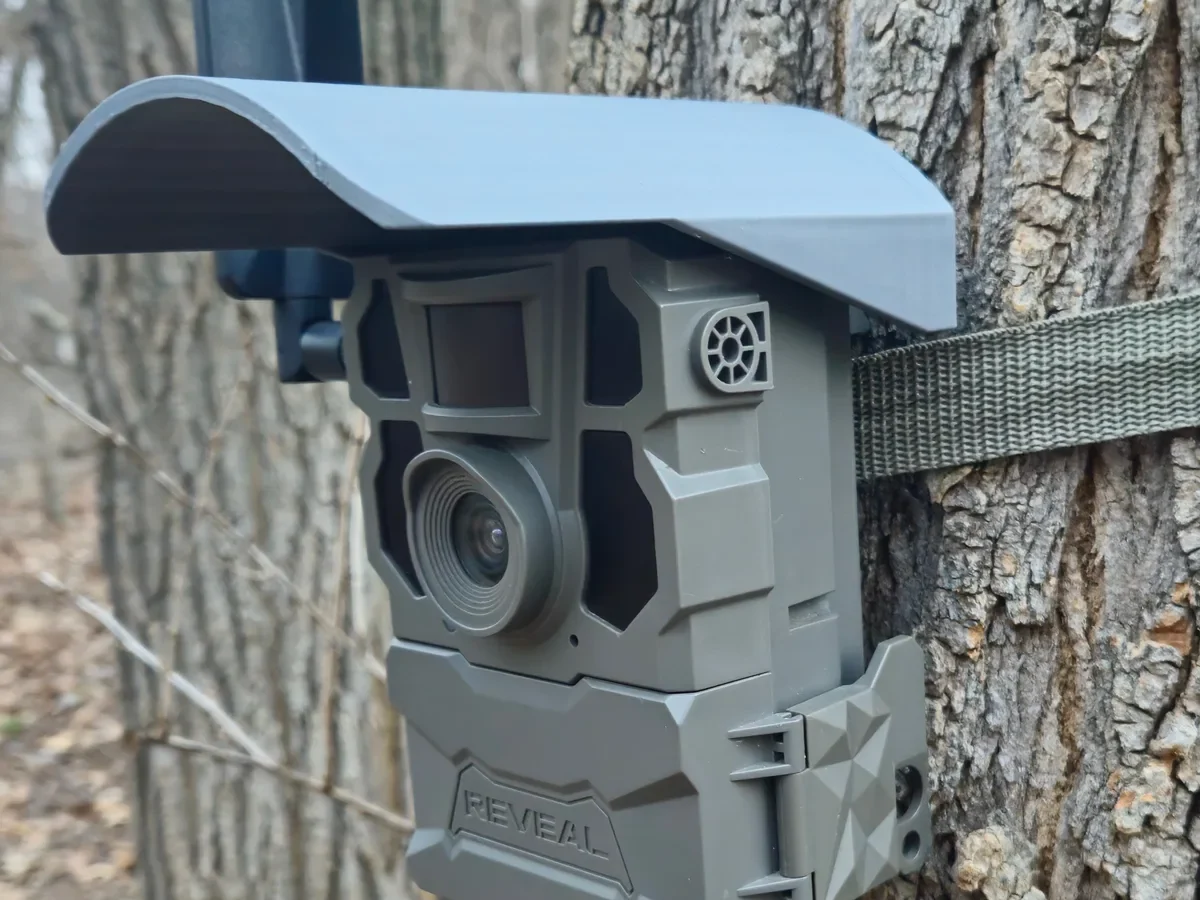
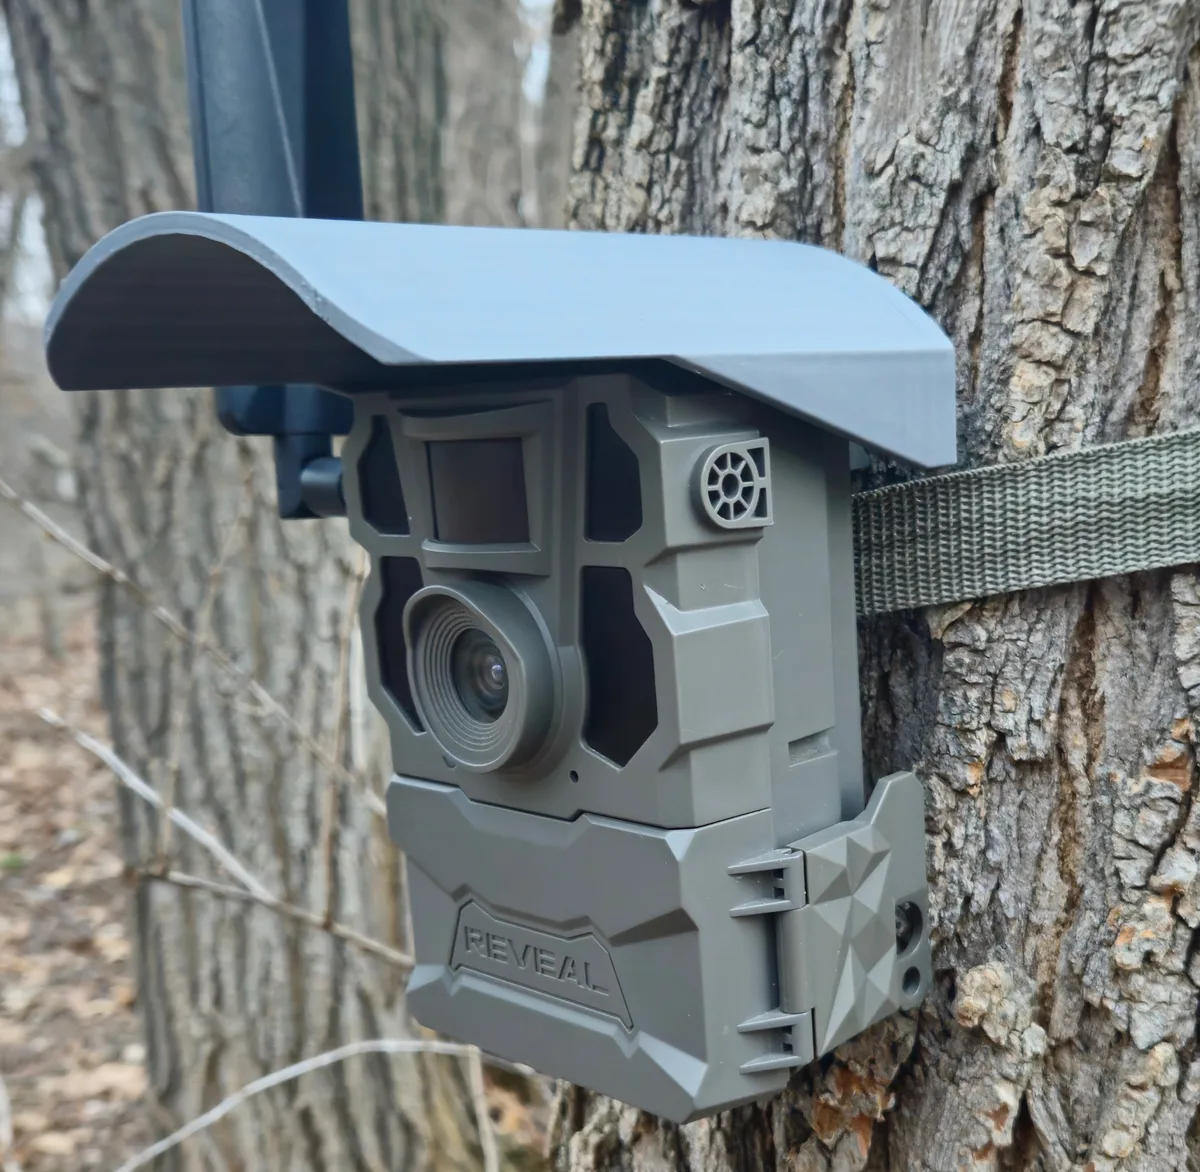
Image source: Web (Bing) / trailcamcap.com (Web image (fair-use with source credit))
You've spent good money on a trail camera, and you've got high hopes for the shots it'll capture. But here's the hard truth that most people learn the expensive way: a single season of rain, snow, or humidity can turn that camera into a paperweight. That's why learning how to protect trail camera from weather is the most important thing you can do for your gear.
Manufacturer specifications vary widely on what counts as weatherproof. Some cameras claim an IP65 rating, meaning they can handle water jets from any direction per IEC 60529 standards. Others offer only basic weather resistance with no formal certification.
An IP65 rating does not mean the camera is sealed against condensation or submersion. That distinction matters more than most buyers realize. Let's break down exactly what you're up against.
Quick Answer
Protect your trail camera by sealing every potential entry point. Apply silicone sealant to screw holes and the battery compartment edge. Use dielectric grease on battery terminals.
Add a silica gel pack inside the housing. Install a rain shield above the camera. Mount it under tree cover with the lens angled slightly downward.
Check gaskets every season and replace them when they crack.
Why Weather Is the #1 Killer of Trail Cameras
Trail cameras sit outside 24/7 for months at a time. They face rain, snow, direct sun, dust, and dramatic temperature swings. That's a brutal environment for any electronic device, especially one with a battery compartment, a memory card slot, and a sensitive lens.
Most trail camera failures are not sudden. They happen slowly. A tiny crack in the housing gasket lets in a few drops of moisture.
That moisture causes corrosion on the battery terminals. The corrosion creates resistance, which drains power faster. You swap in fresh batteries, but the damage is already done.
The camera eventually stops working, and you blame the brand.
But the real culprit is improper protection. The same camera that dies in a wet cedar forest might last years under a rain shield on a dry oak tree. The difference is preparation.
Temperature swings add another layer of danger. As of 2026, many trail cameras still use plastic housings that expand and contract with heat and cold. Warm air inside the camera holds moisture.
When the temperature drops overnight, that moisture condenses on the lens and the sensor board. You get fogged photos, then no photos at all.
Moisture also attacks the SD card slot. A corroded card reader means you lose every image you worked so hard to capture. That's a gut punch you can avoid with a few simple steps.
If you've had to recover from similar issues with other outdoor electronics, you know the frustration. The same principles apply here. The fix is always easier when you prevent the problem in the first place.
The 4 Ways Moisture Destroys Your Camera (and How to Spot Them Early)
Moisture attacks your trail camera through four distinct paths. Each one causes different symptoms. Catching them early makes all the difference.
1. Battery corrosion. This is the most common killer. Alkaline batteries leak when they sit in a cold, damp environment.
The leaked acid eats through the battery terminals and the contact springs. You'll notice the camera suddenly stops working even with fresh batteries. The fix is to switch to lithium batteries and apply dielectric grease to every terminal.
2. Internal condensation. Warm moist air gets trapped inside the camera during the day. When the temperature drops at night, that moisture condenses on the lens and the sensor.
Your photos will look foggy or completely white. In severe cases, the moisture shorts out the circuit board. You can prevent this with a silica gel desiccant pack inside the housing.
3. Gasket failure. The rubber or foam gasket that seals the camera body dries out over time. UV exposure makes it crack.
Once it cracks, water seeps in directly. You'll see water droplets inside the camera when you open it. Replace the gasket at the first sign of cracking.
Some manufacturers sell replacement gaskets for a few dollars.
4. SD card slot damage. The memory card slot is often the least sealed part of the camera. Moisture can get in through the slot and corrode the pins.
You'll get card errors, corrupted files, or the camera will refuse to write new images. Seal the card slot with a small piece of electrical tape or a silicone plug.
Catching these issues early means you can fix them. Check your camera every 30 to 60 days in wet conditions. Open it in a dry environment, inspect the gasket, and check for any signs of moisture inside.
What You Actually Need to Weatherproof a Trail Camera
You do not need a $200 weatherproof housing. You can protect a $60 trail camera just as well as a $300 one with the right supplies. Here is exactly what you need and what each item costs.
| Item | Purpose | Approximate Cost |
|---|---|---|
| Silicone sealant (clear) | Seals screw holes and housing seams | $5 to $10 |
| Dielectric grease | Protects battery terminals from corrosion | $5 to $8 |
| Silica gel desiccant packs | Absorbs internal moisture | $10 to $15 for a 50-pack |
| 10-gauge electrical tape | Seals SD card slot and battery compartment edge | $3 to $5 |
| Weatherproof rain shield | Keeps direct rain off the camera housing | $15 to $30 |
| Lithium AA batteries | Performs better in cold and resists leaking | $12 to $20 for a 12-pack |
| Replacement gasket (if needed) | Restores factory sealing | $5 to $15 |
That is roughly $55 to $100 for a full weatherproofing kit. Compare that to replacing a $150 camera every season. The math is simple.
The rain shield is worth special attention. You can buy a purpose-made metal or plastic shield that mounts above the camera. Or you can make your own from a piece of treated wood or a plastic cutting board.
The key is that the shield extends at least 4 to 6 inches past the camera on all sides. That keeps rain from hitting the camera directly and also protects it from snow and falling debris.
For the silicone sealant, choose a clear outdoor-grade formula. Avoid anything labeled "paintable" or "latex." You want a pure silicone that stays flexible after curing. It should say "mildew resistant" and "for outdoor use" on the label.
The same principle of using the right gear for the environment applies here. You wouldn't take a camera underwater without a proper housing. Don't put a trail camera in a swamp without a rain shield.
Step-by-Step: How to Weatherproof Your Trail Camera
Follow these steps in order. Each one builds on the last. Skip one, and you leave a weak point for moisture to exploit.
Step 1: Inspect the gasket. Open the camera and remove the battery tray. Look at the rubber or foam gasket that runs around the inside of the housing. Run your finger along it.
If it feels hard, brittle, or cracked, replace it. A bad gasket defeats every other protection measure.
Step 2: Apply silicone sealant to screw holes. Trail cameras have small screw holes on the back or bottom for mounting. These are direct paths for water to enter. Apply a small bead of silicone sealant to each screw hole from the inside.
Let it cure for 24 hours before you close the camera. Do not seal the camera shut. You need to be able to open it for battery changes.
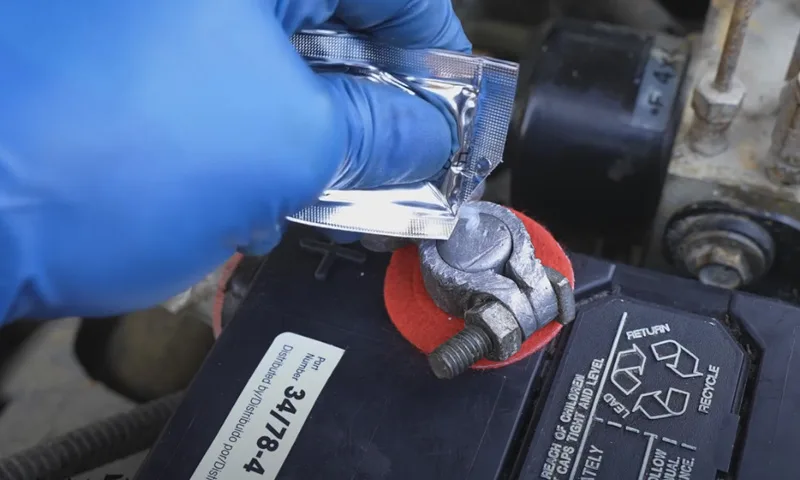
Step 3: Apply dielectric grease to battery terminals. Put a tiny dab of dielectric grease on each battery terminal contact inside the camera. Also apply a thin coat to the positive and negative ends of each battery before you load them. The grease prevents corrosion and improves electrical contact.
Do not use petroleum jelly. It can degrade plastic over time.
Step 4: Add a silica gel desiccant pack. Place one or two small silica gel packs inside the housing, away from the lens and sensor. These absorb any moisture that gets trapped inside. Replace them when the color indicator changes from blue to pink or from orange to green, depending on the brand.
Step 5: Seal the SD card slot. Apply a small piece of electrical tape over the SD card slot when the card is inserted. Press it down firmly. This stops moisture from seeping in through the slot opening.
Step 6: Mount under cover. Choose a tree with a wide canopy. Mount the camera on the north side of the trunk. That side gets the least direct sun and stays cooler.
The camera will also face away from the sun, which produces better photos.
Step 7: Install a rain shield. Mount the rain shield 4 to 6 inches above the camera. Angle it slightly downward so water runs off the front edge. Secure it with a tree strap or a screw mount.
Step 8: Angle the camera downward. Tilt the camera about 5 to 10 degrees below horizontal. This lets rain run off the lens rather than pooling on it. It also helps prevent false triggers from blowing leaves or tall grass.
3 Common Weatherproofing Mistakes That Cost You Time and Money
Even experienced users make these mistakes. Avoid them and you will save yourself a lot of frustration.
Mistake 1: Sealing the camera completely airtight. A completely sealed camera traps warm, moist air inside. When the temperature drops, that moisture condenses on the lens. You need a small vent or a desiccant pack to manage internal humidity.
Do not fill every gap with silicone. Leave the battery compartment access open and use a desiccant pack instead.
Mistake 2: Using alkaline batteries in cold weather. Alkaline batteries lose power fast in temperatures below freezing. They also leak more often than lithium batteries. Alkaline batteries in a wet trail camera are a disaster waiting to happen.
Use lithium batteries for any camera that will see temperatures below 40 degrees Fahrenheit.
Mistake 3: Mounting in a low spot or open area. Water pools in low spots. Fog settles in valleys. Direct sun on an open hillside causes rapid temperature swings inside the camera.
Mount your camera on a slight slope, under tree cover, and on the north side of the trunk. These conditions reduce condensation and keep the camera dry.
The same careful approach to keeping electronics clean and dry applies to trail cameras. A clean camera is a dry camera.
The most common mistake of all is thinking weatherproofing is a one-time task. It is not. Gaskets degrade.
Desiccant packs saturate. Silicone sealant can crack over time. Check your camera every 30 to 60 days during the wet season.
Replace the desiccant packs. Reapply grease if needed. That 10-minute inspection saves you a hundred-dollar replacement.
Long-Term Maintenance: What to Check Every Season
Weatherproofing is not a one-time job. It is a seasonal habit. The same camera that survives a dry summer can fail in a wet autumn if you ignore the basics.
Spring. Replace the desiccant packs. The humidity from winter may have saturated them. Inspect the gasket for cracks.
The freeze-thaw cycle of winter can make rubber brittle. Reapply dielectric grease to the battery terminals. Corrosion builds up slowly, and a fresh coat stops it before it starts.
Summer. Check the rain shield for damage. UV rays degrade plastic and metal over time. A cracked shield lets water through.
Clean the lens with a microfiber cloth. Pollen and dust can scratch the lens if you wipe them dry. Use a lens cleaning solution or a drop of water.
Autumn. This is the busiest season for most trail camera users. Swap to fresh lithium batteries. Verify the silicone sealant is intact around the screw holes.
The sealant can shrink or crack after six months in the sun. If it looks thin, add a new bead and let it cure for 24 hours.
Winter. If you store the camera indoors, do not seal it in a plastic bag. Moisture can get trapped and cause mold. Store it in a dry, ventilated area with the battery compartment open.
If you leave it in the field, use extra desiccant packs. Cold air holds less moisture, but condensation from temperature swings is still a threat.
Most manufacturers recommend checking the camera every 30 to 60 days. Our research shows that users who follow a seasonal maintenance schedule get two to three times more life from their cameras. A 10-minute inspection four times a year saves you a replacement cycle.
Frequently Asked Questions
Can I use a plastic bag to protect my trail camera?
A plastic bag traps moisture inside. Condensation forms on the lens and the sensor. You will get fogged photos and possible circuit damage.
Use a rain shield or a purpose-built weatherproof housing instead.
How often should I replace the silica gel packs?
Replace them when the color indicator changes. Most packs turn from blue to pink or from orange to green when saturated. In high humidity, that can happen in two to four weeks.
In dry conditions, they can last two to three months.
Is it safe to spray silicone lubricant on the gasket?
No. Silicone spray can degrade the rubber gasket over time. It also leaves a residue that attracts dust and dirt.
Use a dry cloth to clean the gasket. Apply a thin layer of silicone grease if you need lubrication, but use only a food-grade or dielectric silicone grease.
What is the best battery for cold weather?
Lithium AA batteries are the best choice. They maintain voltage down to -40 degrees Fahrenheit. Alkaline batteries lose power fast below 40 degrees and leak more often.
Rechargeable NiMH batteries also lose capacity in cold weather, so lithium is the safest option for winter.
Can I use a tree stand rain cover instead of a proper shield?
A tree stand rain cover offers some protection, but it is not designed for electronics. It can trap heat and moisture inside. A proper rain shield is rigid, ventilated, and angled to shed water.
It is worth the extra cost.
How do I know if moisture has already damaged my camera?
Look for these signs: fogged lens, white residue on the circuit board, rust on the battery terminals, or SD card errors. If you see any of these, open the camera immediately. Let it dry in a warm, ventilated space for 48 hours.
Clean the terminals with isopropyl alcohol. Replace the desiccant packs. If the camera still does not work, the board may be shorted.
At that point, replacement is often cheaper than repair.

Similar Posts
































