How to Use Manual Mode on Mirrorless Camera
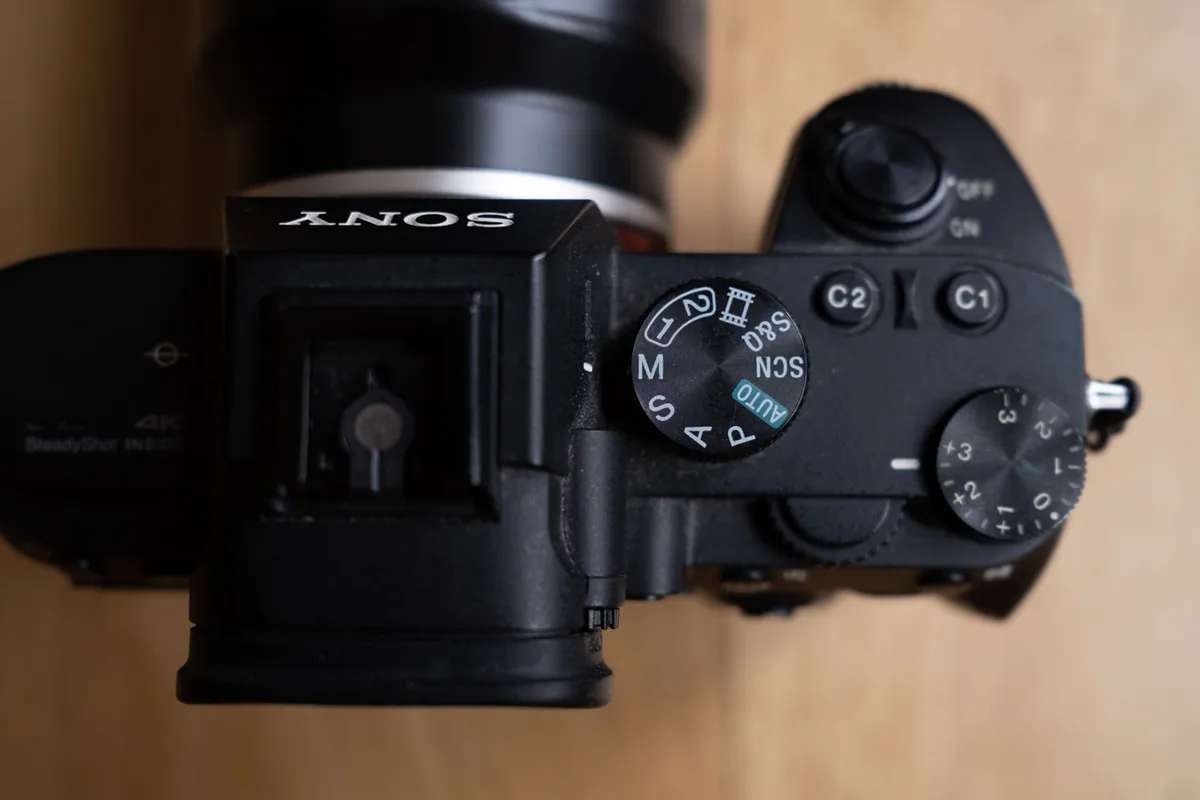
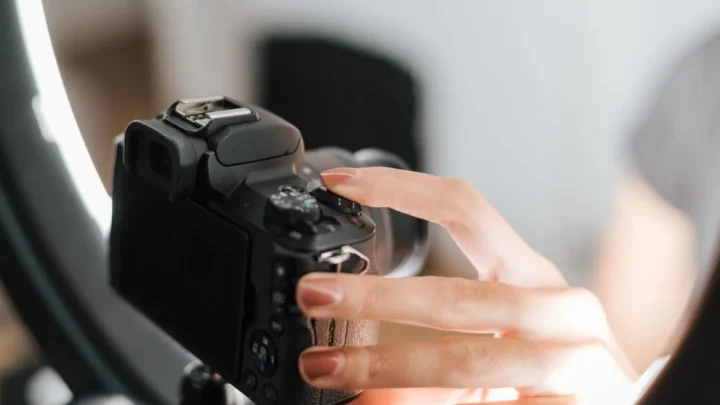
Image source: Web (Bing) / bensoniam.com (Web image (fair-use with source credit))
Why Manual Mode is Different on a Mirrorless Camera
Mirrorless cameras give you a what-you-see-is-what-you-get (WYSIWYG) viewfinder. That changes everything. On a DSLR, you look through an optical viewfinder that shows a bright scene regardless of your settings.
You have to take a test shot, check the LCD, and adjust. With mirrorless, the electronic viewfinder (EVF) shows you the actual exposure before you shoot. Darken the exposure by stopping down the aperture, and the viewfinder gets darker.
Speed up the shutter, and the EVF updates instantly.
This live preview is powered by the camera's image sensor. The sensor reads the light continuously and displays the result on the EVF or rear LCD. That means you can see the exact effect of your settings in real time.
If you're shooting in very low light, the EVF may get grainy or noisy. That's the sensor showing you what the final image will look like.
The exposure triangle still works the same way. Aperture controls depth of field. Shutter speed controls motion blur.
ISO controls sensor sensitivity. The difference is you can see the trade-offs immediately. You don't need to do math in your head.
You just turn a dial and watch the scene change. This is a major improvement over the older DSLR workflow.
Quick Answer
Set the mode dial to M. Choose your aperture to control depth of field. Set your shutter speed to control motion blur.
Adjust your ISO after the other two. Watch the live view exposure preview. Use the histogram and zebra stripes to avoid clipping.
That's the whole process. Practice it in good light first.
The Exposure Triangle: What You See vs. What You Get
The exposure triangle is the foundation of manual mode. Three variables. One goal.
You balance them against each other, and every change affects the picture in a visible way.
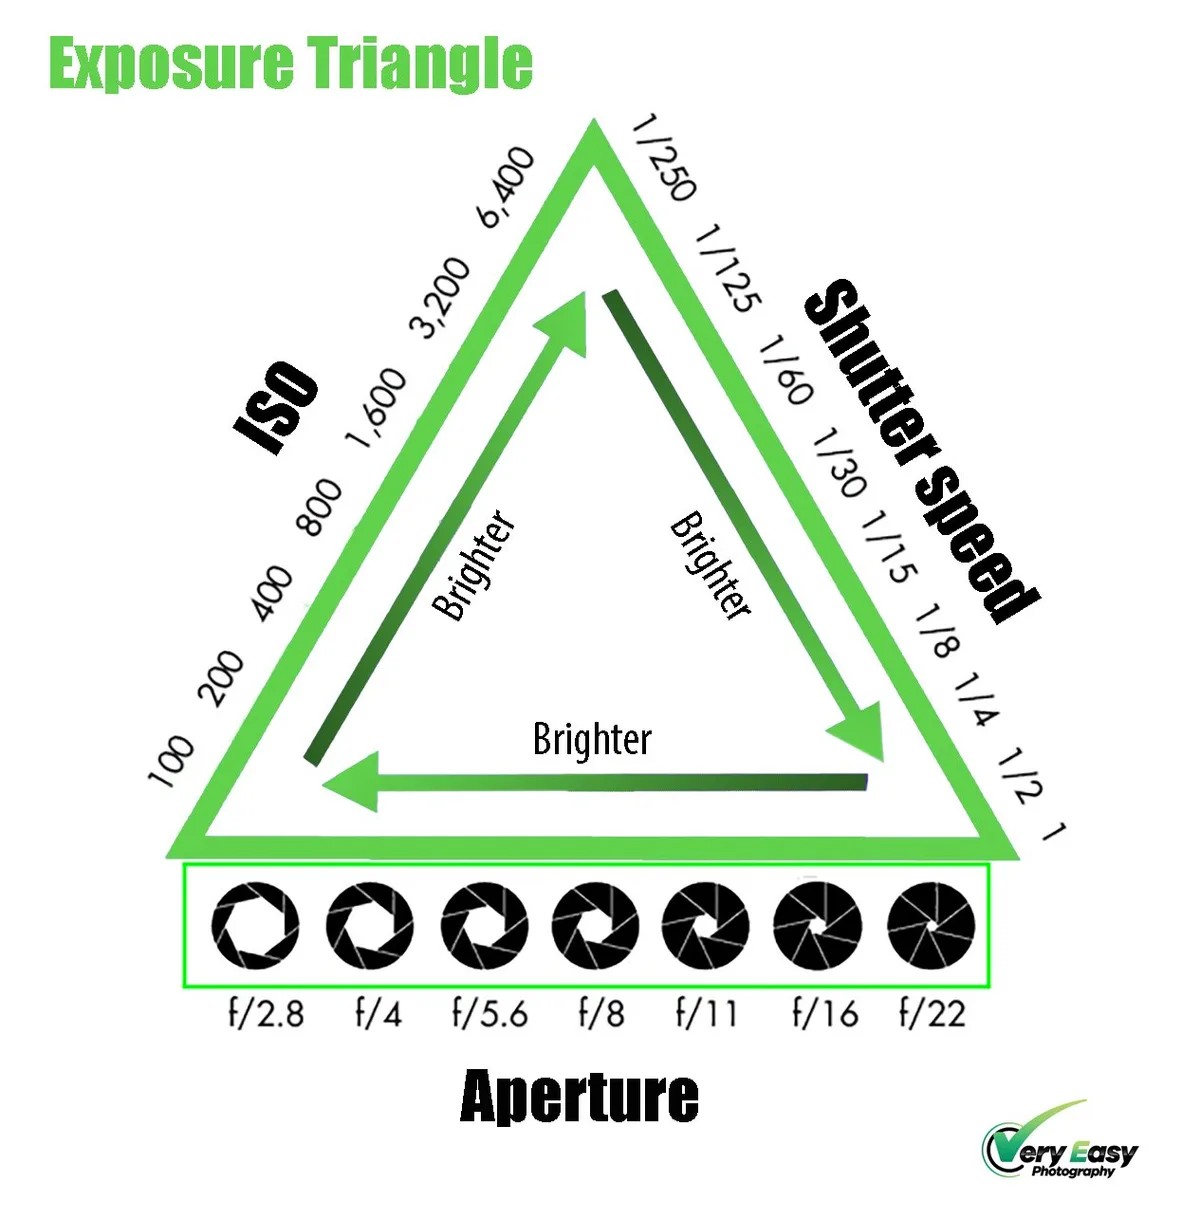
Image source: Web (Bing) / veryeasyphotography.com (Web image (fair-use with source credit))
Aperture is the opening in the lens. A wider aperture (smaller f-number, like f/1.8) lets in more light and creates a shallow depth of field. A narrower aperture (larger f-number, like f/11) lets in less light and keeps more of the scene in focus.
On a mirrorless camera, you can see the depth of field change in the EVF as you adjust the aperture ring or control dial.
Shutter speed controls how long the sensor is exposed to light. A fast shutter speed (1/1000 of a second) freezes motion. A slow shutter speed (1/30 of a second) blurs motion.
The EVF shows you the brightness change, but it can't fully simulate motion blur. You have to take a test shot or use the live view simulation if your camera supports it.
ISO adjusts the sensor's sensitivity to light. Lower ISO (100 to 400) gives you clean, noise-free images. Higher ISO (1600 and above) makes the sensor more sensitive but introduces digital noise.
The EVF will show you the noise level in real time. That's a huge advantage over DSLRs where you couldn't see noise until you reviewed the shot.
Your camera's light meter shows a scale at the bottom of the viewfinder. It ranges from -3 to +3 EV. Center the indicator for a standard exposure.
But remember, the camera's meter is just a suggestion. You might want to overexpose for a bright, airy look. Or underexpose to preserve highlights.
The histogram is a better tool for locking in the correct exposure consistently.
Step-by-Step: Setting Up Manual Mode for the First Time
You don't need to memorize a dozen settings. Just follow this sequence. It works for any scene, from portraits to landscapes.
| Step | Action | What to Look For |
|---|---|---|
| 1 | Set the mode dial to M | The display shows M, and the exposure scale appears |
| 2 | Choose your aperture | Turn the front dial. Watch depth of field in the EVF |
| 3 | Set your shutter speed | Turn the rear dial. Keep it above 1/60 for handheld shots |
| 4 | Adjust ISO | Set it to 100 or 200. Raise only if the image is too dark |
| 5 | Center the light meter | Use the scale at the bottom. Aim for 0 EV |
| 6 | Check the histogram | Make sure the graph isn't touching the right or left edge |
| 7 | Take a test shot | Review the image. Check for blown highlights or blocked shadows |
Start with aperture priority mode if full manual feels overwhelming. Aperture priority lets you control the aperture while the camera picks the shutter speed. That's a good middle step.
But if you're ready for full control, manual mode is where you learn the most.
For your first attempts, go outside in good daylight. Set your aperture to f/5.6 or f/8. That's a safe starting point for most lenses.
Set your shutter speed to 1/125 of a second. That's fast enough to avoid camera shake with most lenses. Set your ISO to 100.
If the EVF shows the scene is too dark, slow down the shutter speed or open up the aperture. If it's too bright, speed up the shutter or close the aperture. The same logic applies to starting out in manual mode, though the feedback is faster on mirrorless.
How to Read Your Camera's Visual Tools (Histogram, Zebra, Light Meter, Focus Peaking)
Your mirrorless camera has built-in tools that make manual mode easier. These are not optional extras. They are the core of the workflow.
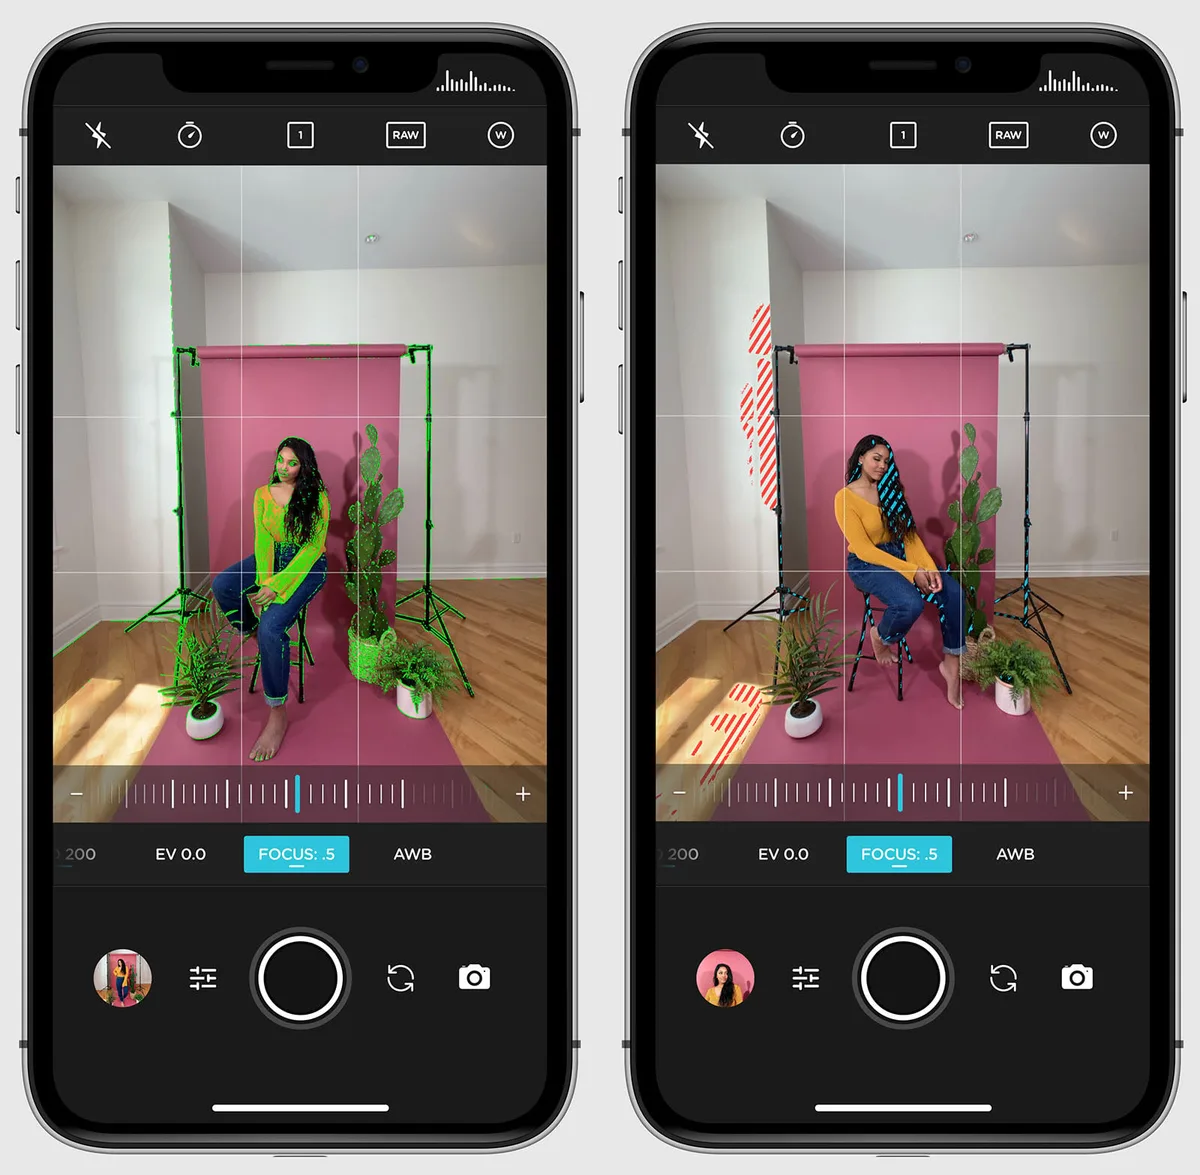
Image source: Web (Bing) / petapixel.com (Web image (fair-use with source credit))
The histogram is a graph that shows the distribution of tones in your image. The left side represents shadows. The right side represents highlights.
A tall peak on the left means the image is dark. A tall peak on the right means it's bright. The goal is to spread the graph across the middle without clipping on either side.
Clipping on the right means you've lost detail in the highlights. Clipping on the left means you've lost detail in the shadows. You can enable the histogram in the display settings menu.
It's a tiny graph, but it's more accurate than your eyes, especially in bright sunlight.
Zebra stripes are diagonal lines that appear over the brightest parts of the image. They indicate areas that are overexposed and likely to clip. You can set the threshold in the menu. 100% zebra shows only areas that are pure white. 95% zebra shows areas that are near clipping.
Start with 95% for a safety margin. If you see zebra stripes on a face or a key detail, reduce the exposure by stopping down the aperture, speeding up the shutter, or lowering the ISO.
The light meter is the scale at the bottom of the EVF. It shows a moving indicator from -3 to +3 EV. Center it for a standard exposure.
But don't treat it as a rule. If you're shooting a dark moody scene, let the meter sit at -1 or -2 EV. If you're shooting a bright snow scene, let it sit at +1 or +2 EV.
The meter doesn't know your creative intent. You do.
Focus peaking is a visual aid for manual focus. It highlights the edges of in-focus areas with a colored outline, usually red, yellow, or blue. When you turn the focus ring, the peaking color moves across the subject.
The more peaking you see, the more of the scene is in focus. This is useful for portrait photography or landscape work where you need precise focus. You can enable focus peaking in the menu and adjust the sensitivity.
High sensitivity shows more peaking but may be noisy. Low sensitivity is more precise but shows less color.
Common Visual Mistakes and How to Fix Them
Even experienced photographers make mistakes in manual mode. The good news is mirrorless cameras give you instant feedback. You can catch errors before you take the shot.
| Mistake | What You See | How to Fix It |
|---|---|---|
| Blown highlights | Zebra stripes on bright areas | Reduce exposure by 1/3 or 2/3 stop |
| Blocked shadows | Histogram touches the left edge | Increase exposure or raise ISO |
| Camera shake | Blurry image, no motion blur | Shutter speed too slow. Use 1/focal length rule |
| Shallow depth of field | Only the subject's nose is in focus | Stop down to f/5.6 or f/8 |
| High ISO noise | Grainy image in EVF or review | Lower ISO. Use a tripod or faster lens |
The most common mistake is relying on the light meter instead of the histogram. The meter tells you what the camera thinks is correct. The histogram tells you what the sensor actually captured.
Trust the histogram. If you're shooting in a high contrast scene, expose for the highlights. You can recover shadow detail in post-processing.
You cannot recover blown highlights.
Another frequent error is forgetting to adjust settings when the light changes. You walk from shade into sunlight, and your exposure stays the same. The result is a wildly overexposed image.
Get in the habit of checking your exposure every time you move. The EVF will show you the change immediately. If the image looks too bright, speed up the shutter or close the aperture.
If it looks too dark, slow down the shutter or open the aperture.
Manufacturer specifications from Nikon confirm that live view exposure simulation is accurate within 1/3 of a stop for most lighting conditions. That means you can trust what you see in the EVF. If it looks right, it probably is right.
If you are still running into trouble, a general troubleshooting guide can help you isolate the issue.
Pro Tips for Real-World Shooting (Portrait, Landscape, Low Light, Video)
Manual mode adapts to different scenarios. Each one demands a slightly different approach. Here is how experienced shooters handle the four most common situations.
| Scenario | Key Settings | Pro Tip |
|---|---|---|
| Portrait | Aperture f/1.8 to f/2.8, shutter 1/125s or faster, ISO 100 to 400 | Use focus peaking for critical eye focus. Keep the shutter above 1/125s to avoid motion blur from the subject. |
| Landscape | Aperture f/8 to f/16, shutter varies, ISO 100 | Use the histogram to protect highlights in the sky. A tripod lets you use lower ISO for cleaner images. |
| Low light | Aperture wide open, shutter 1/30s to 1/60s, ISO 1600 to 6400 | Enable zebra stripes at 95% to avoid clipping street lights. Accept some noise rather than blurry images. |
| Video | Aperture f/2.8 to f/5.6, shutter 1/50s (24fps), ISO as needed | Use the 180-degree shutter rule. Double your frame rate for the shutter speed. Keep ISO below 3200 for clean footage. |
Portrait shooting benefits from the live preview. You can see exactly how much background blur you get before you press the shutter. Set your aperture wide and use the EVF to check that both eyes are in focus.
Focus peaking will highlight the sharp edges. Adjust if one eye falls out of the depth of field. For flattering results, keep the shutter speed above 1/125s to avoid motion blur from your subject.
Landscape work rewards patience. Set your aperture to f/8 or f/11 for maximum sharpness. Then set your shutter speed based on the light.
Use the histogram to keep the highlights from clipping in the sky. If you see a spike on the right edge, close the aperture slightly or speed up the shutter. For vast scenic shots, a tripod is essential.
Slower shutter speeds are common at small apertures.
Low light situations push your camera to its limits. Wide open aperture is the priority. Then set a shutter speed that is fast enough to avoid camera shake.
The general rule is 1 divided by your focal length. A 50mm lens needs at least 1/50s. Push your ISO only after you have hit that minimum shutter speed.
The EVF will show you the noise level, so you can decide if it is acceptable.
Video in manual mode requires a different mindset. You cannot change shutter speed mid-shot without ruining the motion cadence. Set your shutter to 1/50s for 24fps video.
Then adjust aperture and ISO to control exposure. Most mirrorless cameras can hold a steady exposure as long as the light does not change drastically. If you need to adjust during a take, change the aperture or ISO gradually.
Frequently Asked Questions
How do I set the exposure correctly in manual mode on a mirrorless camera?
Use the exposure meter scale at the bottom of the viewfinder. Center the indicator for a standard exposure. Then check the histogram to confirm no highlights are clipping.
Adjust aperture, shutter speed, or ISO until the graph is balanced without touching either edge.
Should I use auto ISO in manual mode?
Yes, in many situations. Auto ISO lets you control aperture and shutter speed while the camera adjusts sensitivity. This is useful for events or fast-changing light.
For full control, set ISO manually at its base value and raise it only when needed.
Why does my mirrorless viewfinder look different from the final image?
The EVF shows a simulated exposure based on your settings. If you have exposure simulation turned off, the viewfinder will always be bright regardless of your settings. Check your camera menu for live view or exposure simulation and enable it for an accurate preview.
What is the best shutter speed for handheld shooting in manual mode?
The general rule is 1 divided by your focal length. A 50mm lens needs at least 1/50s. With image stabilization, you can go two to three stops slower.
For moving subjects, use at least 1/125s to freeze basic motion.
How do I use manual mode for video without exposure changes?
Set your shutter speed to double your frame rate (1/50s for 24fps). Then use aperture and ISO to control exposure. Avoid changing settings during a take.
Stop the recording, adjust, and start again. This prevents sudden brightness jumps in your footage.

Similar Posts