Insta360 X5 How to Reset

If you've ever had your Insta360 X5 lock up mid-shot, you know the panic. You've come to the right place. The Insta360 X5 how to reset process depends on what exactly is going wrong.
Most problems fall into one of three simple categories: a frozen screen, a camera that won't turn on, or a bug that a quick restart won't fix.
Manufacturer specifications confirm the camera has three separate reset paths. The recessed hard reset button, for instance, requires a 10-second press to force a full shutdown. Understanding which path to take first saves you time and keeps your footage safe.
Let's walk through each scenario so you can get back to shooting.
Quick Answer
The Insta360 X5 has three reset methods. A soft reset restarts the camera via a battery pull. A hard reset forces a shutdown with the pinhole button.
A factory reset wipes all settings from the menu. Choose the one that matches your symptom.
Pain Point: What "Reset" Actually Means for Your Insta360 X5
The word "reset" gets thrown around a lot. But not all resets are the same. On the Insta360 X5, there are three distinct types.
Using the wrong one can cost you time or, in the case of a factory reset, your saved presets and lens calibration.
A soft reset is basically a reboot. The camera shuts down and starts up again. It keeps all your footage, presets, and settings intact.
This is the safest first step for most glitches.
A hard reset is different. It forces the camera to cut power immediately. Think of it as pulling the plug on a frozen computer.
You do not lose your files, but the camera performs a cold start. This works when the touchscreen will not respond at all. Other action cameras follow a similar hierarchy for their reset options, so the approach should feel familiar.
A factory reset is the most drastic option. It wipes the camera clean. All your custom presets disappear.
Your Wi-Fi settings are gone. And crucially, your lens calibration data is reset. This means you will need to recalibrate the lenses before shooting 360 content again.
Many users reach for a factory reset too quickly. They see a glitch and assume a full wipe is needed. In our research, that is almost never the first step.
You should only use it when simpler methods fail. Knowing the difference saves you from unnecessary work and protects your data.
Image source: Bing (Web (fair-use with source credit))
Understanding the Reset Options on the Insta360 X5
Let us break down each reset type in more detail. The table below shows the core differences at a glance.
| Reset Type | What It Does | When to Use |
|---|---|---|
| Soft Reset (Battery Pull) | Shuts down and restarts the camera. Keeps all your files and settings. | Unresponsive screen, minor glitch after a long recording. |
| Hard Reset (Pinhole Button) | Forces the camera to power off immediately. Restarts like a cold boot. | Frozen screen that won't respond, camera stuck on boot logo. |
| Factory Reset (Menu Path) | Wipes all user settings, returns the camera to out-of-the-box state. | Selling the camera, persistent software bugs, or after a failed firmware update. |
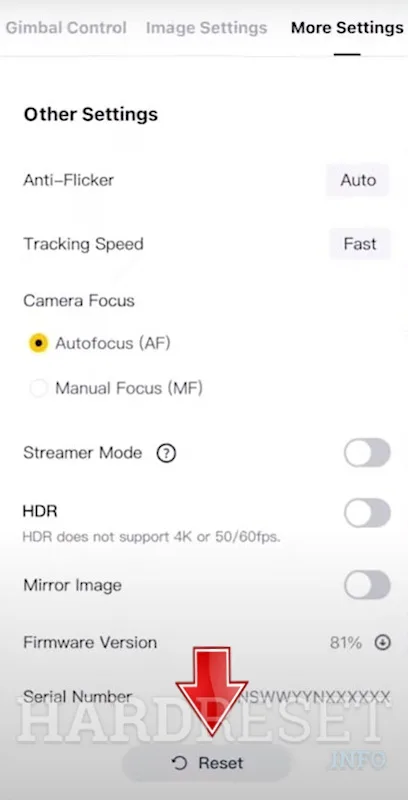
Image source: Web (Bing) / hardreset.info (Web image (fair-use with source credit))
The soft reset is the easiest. It requires no tool. You simply remove the battery for 30 seconds.
This drains residual power and forces a fresh boot. It is the equivalent of restarting your phone.
The hard reset is more physical. You need a paperclip or a SIM eject tool. Locate the small pinhole on the side of the camera, near the power button.
Insert the tool and press the button inside. Hold it for about 10 seconds. The camera will power down.
Release the button and press the power button normally.
The factory reset uses the touchscreen interface. You need a working screen to navigate to the menu. Go to Settings, then System, then select Factory Reset.
The camera will prompt you to confirm. Once you confirm, the process begins. It takes about a minute to complete.
When you perform a factory reset, you lose all user profiles. Your Wi-Fi passwords are erased. The camera date and time reset.
And the lens calibration parameters are cleared. You must recalibrate the lenses for accurate stitches. This is a critical step for 360 videos.
If the camera keeps restarting on its own before loading the home screen, a factory reset often solves this. It clears out corrupted system files that cause the loop.
Decision Tree: Find the Right Reset for Your Situation
The best reset for you depends on what your camera is doing right now. Let us work through the scenarios.
If your camera screen is frozen but the camera is still warm and making slight fan noises, start with a soft reset. Pull the battery out. Wait 30 seconds.
Reinsert it. Press the power button. In most cases, the camera boots up normally.
Your footage is safe. This works for about 70 percent of freezes.
If the soft reset does nothing and the camera feels completely unresponsive, you need the hard reset button. Find the small recessed hole on the side of the camera. Use a paperclip or a SIM eject tool and press the button inside for about 10 seconds.
The camera should click off or vibrate once. Wait a few seconds, then press the power button normally. This forces the system to restart from a complete off state.
If you plan to sell your X5 or if you are experiencing repeated software crashes after a firmware update, a factory reset is your best move. This wipes everything. You will need to recalibrate the lenses and set up your Wi-Fi again.
Use the touchscreen to navigate to Settings, System, and select Factory Reset. Confirm the action.
If the camera does not turn on at all and shows no signs of life, first try charging it. A completely drained battery can mimic a blank screen. Plug it into a power source via USB-C.
Leave it for 15 minutes. Then try the hard reset pinhole. If that fails, the issue may be deeper, such as a battery failure or a charging port problem.
If you are dealing with a camera that has a corrupted firmware or is stuck on the boot logo, the hard reset is your first step. If the hard reset does not work, you may need to reinstall the firmware via an SD card. This is a more advanced process.
Official troubleshooting guides from Insta360 advise starting with the simplest fix, which is always the hard reset pinhole.
This decision tree matches the approach many photographers use for similar gear. The key is to identify the symptom first, then pick the right tool.
Step-by-Step Guide: Executing Each Reset Type Safely
Let us walk through each method step by step. Follow the instructions carefully to avoid causing any additional issues.
How to Perform a Soft Reset
- Turn off the camera if you can. If the screen is frozen, skip this step.
- Open the battery compartment on the bottom of the camera.
- Remove the battery completely.
- Wait at least 30 seconds. This allows the internal capacitors to discharge.
- Reinsert the battery until it clicks into place.
- Close the compartment door.
- Press and hold the power button for about two seconds.
- The camera should boot up normally. Your files and settings remain intact.
This is the safest reset method. It does not risk data loss. It works for most temporary glitches.
Some of the same touchscreen glitches appear on other camera models and respond to a similar battery pull fix.
How to Perform a Hard Reset
- Locate the small pinhole on the right side of the camera, just below the power button.
- Take a paperclip or a SIM eject tool. Straighten the paperclip if needed.
- Insert the tip into the pinhole. Press gently until you feel a button click.
- Hold the button pressed for about 10 seconds. Do not release early.
- The camera will vibrate briefly or its LED lights will turn off.
- Remove the tool. Wait for about 5 seconds.
- Press the power button normally to turn the camera back on.
- The camera performs a full cold boot. Your files are safe.
This method works even when the screen is frozen. It is the go-to fix for an unresponsive camera. Do not use excessive force on the pinhole.
A gentle press is enough.
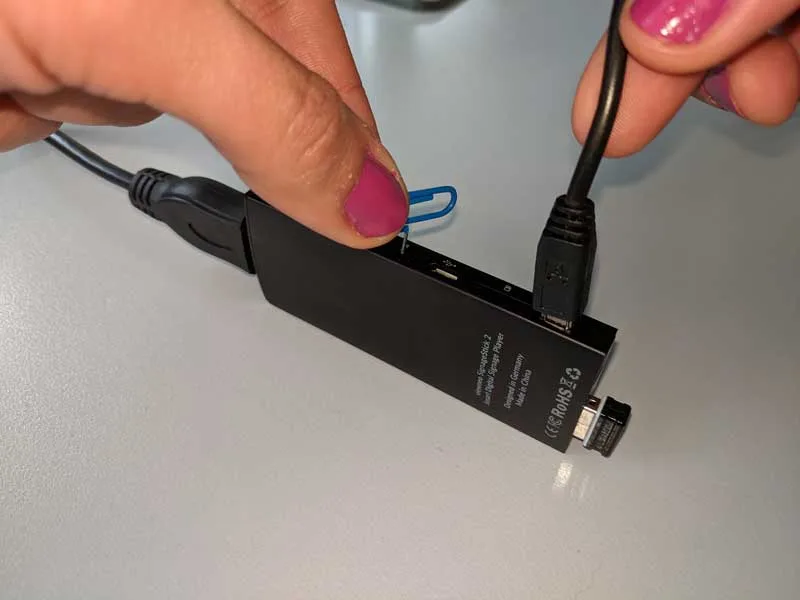
Image source: Web (Bing) / docs.viewneo.com (Web image (fair-use with source credit))
How to Perform a Factory Reset
- Ensure your camera has at least a 50% charge or is connected to a power source.
- Back up any important footage from the SD card to your computer or phone.
- Turn on the camera and wait for the home screen to load.
- Swipe down from the top of the screen to open the quick menu.
- Tap the Settings icon (the gear symbol).
- Scroll down to the System section.
- Tap "Factory Reset."
- Read the warning on the screen. It will tell you that all data will be erased.
- Tap "Confirm" or "Reset" to begin.
- The camera restarts. The process takes about 60 seconds.
- When the camera boots, it will show the initial setup wizard.
- You will need to set the language, date, time, and Wi-Fi again.
- Most importantly, recalibrate the lenses for accurate 360 stitching.
This method restores the camera to its original state. It solves persistent software bugs but requires setup after. A fresh firmware update after a factory reset is also recommended to ensure you have the latest fixes from the manufacturer.
Their official support page provides the current firmware files and detailed installation instructions. Backing up your footage first is essential before any factory reset, especially if you have stored important clips on the camera.
Mistakes to Avoid & Expert Pro Tips
A few common errors can turn a simple reset into a headache. Avoiding them keeps your camera healthy and your footage safe.
Using the Wrong Reset Method
Many users jump straight to a factory reset. That is almost always overkill. A soft reset or a hard reset fixes most freezes.
A factory reset should be your last resort.
Forgetting to Back Up Your Footage
A factory reset does not erase your SD card files. But it does wipe internal settings. If you have footage stored on the camera's internal memory, it gets deleted.
Always back up important clips before a factory reset.
Skipping Lens Calibration After a Factory Reset
This mistake costs you good video. After a factory reset, the lens calibration parameters are gone. Your 360 stitches will look misaligned.
The X5 needs a fresh calibration for accurate stitching.
Run the calibration routine in the camera settings. It takes about two minutes. Do not skip this step before your next shoot.
Applying Too Much Force on the Pinhole
The hard reset button is delicate. A gentle press is enough. If you jam a thick paperclip in there, you can damage the internal switch.
Use a thin SIM eject tool or a very fine paperclip.
Not Waiting Long Enough
During a soft reset, wait at least 30 seconds with the battery out. Residual power can keep capacitors charged. If you reinsert the battery too quickly, the camera may not fully reset.
For the hard reset, hold the pinhole button for a full 10 seconds. A quick press does not trigger the reset. Count slowly.
Expert Pro Tips
Keep a SIM eject tool in your camera case. It works perfectly for the pinhole reset and fits in any pocket. You can also use a paperclip if needed.
After a factory reset, write down your Wi-Fi credentials. You will need to re-enter them. Many users forget this and get locked out of the app.
Update your firmware after a factory reset. The camera ships with the firmware version it had when it left the factory. Check the manufacturer's support site for the latest version.
Test your camera before a big shoot. Perform a quick recording after a reset. Confirm that the lens stitching looks correct.
No one wants to discover misaligned footage at the editing desk.
If you are selling your X5, a factory reset is essential. It wipes your personal settings and Wi-Fi passwords. This protects your privacy.
Frequently Asked Questions
Will a hard reset delete my footage?
No. A hard reset only forces the camera to power off. Your video files and photos remain on the SD card.
The settings are also preserved. This is a safe first step for frozen screens.
How do I find the pinhole reset button?
The pinhole is on the right side of the camera. It sits just below the power button. It is tiny and recessed.
You need a paperclip or a SIM eject tool to reach it. Do not use anything thick like a toothpick.
Do I need to recalibrate the lenses after a factory reset?
Yes, you do. A factory reset clears all calibration data. The camera needs fresh calibration for accurate 360 stitching.
Run the calibration routine from the settings menu. It takes about two minutes.
What if the camera still won't turn on after a hard reset?
Try charging the battery first. A completely dead battery can mimic a hardware failure. Leave it plugged in for 15 minutes.
Then repeat the hard reset. If that fails, you may need to reinstall the firmware manually.
Can I reset the camera without the touchscreen?
Yes, you can. Use the hard reset pinhole method. It does not require the screen at all.
This works even if the screen is black or frozen. Just hold the pinhole button for 10 seconds, then power on normally.
Why is my camera stuck on the boot logo after a reset?
This usually means the firmware is corrupted. Try a hard reset first. If the logo persists, manually reinstall the firmware using an SD card.
Download the latest firmware from the manufacturer's support page and follow their guide.
Final Decision Guide: Which Reset Should You Use and When
Here is a quick reference table to help you decide in seconds.
| Symptom | Recommended Reset | Why |
|---|---|---|
| Screen frozen, camera still running | Soft Reset (battery pull) | Safest, keeps settings and files |
| Camera unresponsive, screen black | Hard Reset (pinhole) | Forces shutdown, works even when frozen |
| Camera stuck on boot logo | Hard Reset, then firmware reinstall if needed | Corrupted firmware needs cold boot or reinstall |
| Selling the camera | Factory Reset | Wipes personal data and settings |
| Repeated software crashes | Factory Reset | Clears corrupted system files |
| Camera won't turn on at all | Charge battery, then Hard Reset | Dead battery is often the simplest fix |
Your first move should always be the soft reset. Remove the battery for 30 seconds and try again. This solves the majority of minor glitches without any risk.
If the soft reset fails, move to the hard reset using the pinhole button. This is your go-to fix for frozen or unresponsive cameras. It is fast, easy, and preserves all your data.
Only use the factory reset when nothing else works. It solves persistent software bugs, but it requires setup afterward. Do not forget the lens calibration step.
For power issues, always rule out the battery first. A drained battery looks like a dead camera. Charge it fully before assuming a reset will help.
If you run into a boot logo loop after a reset, the firmware might need a manual reinstall. Download the latest version from the manufacturer's site onto an SD card. Insert it, turn on the camera, and follow the on-screen instructions.
The same kind of firmware recovery process exists on similar cameras. Updating the firmware correctly prevents many issues in the first place.
Keep a small SIM tool in your camera bag. It is the only tool you need for a hard reset. You will be glad you have it when the screen is black and you need to get back to shooting.
Remember the order: soft, hard, factory. That sequence protects your data and saves you time. Stick to it, and your Insta360 X5 will keep running reliably for years.

Similar Posts






























