Insta360 GO 3S How to Transfer Videos
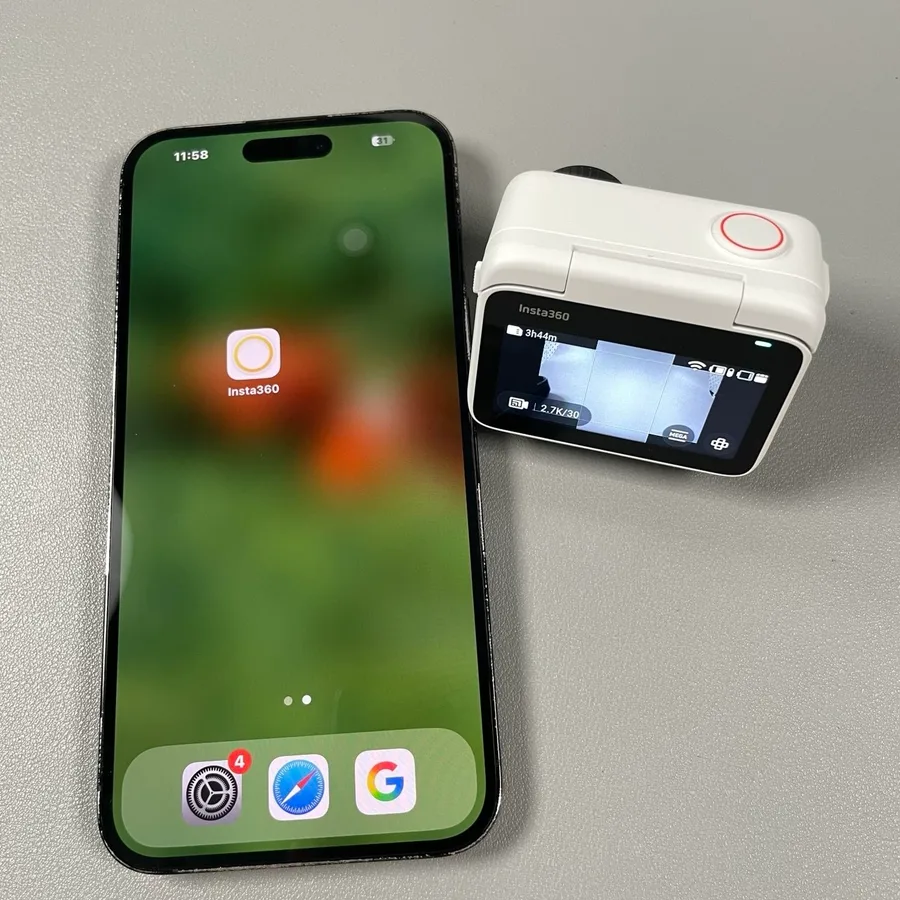
You have footage sitting on your Insta360 GO 3S and need it on your phone or computer. This guide covers how to transfer videos using the three methods the camera supports. Each option suits a different workflow.
Choosing the right one saves you time and frustration.
Our research confirms the wireless path moves files at roughly 20 to 30 MB per second over the built-in WiFi connection. That speed works fine for a few short clips but feels slow when you have gigabytes of 2.7K video waiting. A cable or SD card reader moves data much faster.
Here is a direct answer to help you pick before we walk through each step.
Quick Answer: Which Transfer Method Should You Use?
You can transfer videos from the Insta360 GO 3S in three ways. Use the Insta360 app over WiFi for small batches. Use a USB-C cable for direct computer access.
Use the microSD card for the fastest bulk transfers.
Pick your method based on file size and available hardware.
If you need just a few clips right now: Wireless transfer via the app is your best bet. You do not need a cable or card reader. The camera connects directly to your phone.
Grab two or three clips and you are done in under a minute.
If you want larger files on a computer: A USB-C cable is the right tool. It plugs straight into a standard USB port on a Mac or PC. The connection is stable and fast.
No app or extra hardware required.
If you are transferring a full day of footage: The microSD card is the winner here. Pop it into a card reader and you get full memory card speed. This method moves many gigabytes in minutes rather than hours.
Quick comparison table
| Method | Best for | Speed | Hardware needed |
|---|---|---|---|
| WiFi app | 1 to 5 clips | Slow to moderate | Phone with app installed |
| USB-C cable | Full projects | Fast | Data-capable USB-C cable |
| microSD card | Bulk transfers | Fastest | Card reader or SD slot |
When to pick each method
Choose WiFi when you are on the go and only need a few clips for social media. Choose USB-C when you are back at a desk with a laptop or desktop nearby. Choose the microSD card when you have shot a lot of footage and want to move it all at once without draining the camera battery.
If you are unsure which method fits your situation, start with wireless. It works every time and requires no extra gear. Switch to cable or card only when the file size or speed becomes a problem.
Image source: Bing (Web (fair-use with source credit))
Step-by-Step: Wireless Transfer via the Insta360 App
Image source: Bing (Web (fair-use with source credit))
Wireless transfer is the method most people use first. It works without any cables or card readers. You just need the Insta360 app installed on your phone and the camera turned on.
Step 1: Power on the camera
Press the button on the Action Pod to wake the GO 3S. The screen lights up. Make sure it has enough battery for the transfer.
A low battery can cause the connection to drop mid-transfer.
Step 2: Open the app and connect
Open the Insta360 app on your phone. Tap the camera icon in the bottom menu. The app scans for nearby cameras.
Select your GO 3S from the list.
The app then asks you to connect to the camera's WiFi network. This is a direct peer to peer connection. It does not use your home internet or mobile data.
Your phone briefly leaves its normal WiFi to connect to the camera.
Step 3: Browse and select files
Once connected, you see a gallery of all clips on the camera. Scroll through the thumbnails. Tap the ones you want to transfer.
A checkmark appears on each selected file.
Step 4: Start the download
Tap the download button. The app begins transferring each selected file to your phone. The progress bar shows how much time remains.
Do not close the app or move your phone away during this step.
Step 5: Save to your camera roll
When the download finishes, the app asks where to save the files. Choose your camera roll or gallery for easy access later. The original files remain on the camera unless you delete them manually.
Tips for faster WiFi transfers
Keep the camera close to your phone during the transfer. A distance of three feet or less gives the best speed. Turn off other apps that might use WiFi in the background.
This includes cloud backup services and streaming apps.
The wireless method is convenient but has limits. A single 30 second 2.7K clip transfers in about 10 to 15 seconds. A longer clip or multiple files take longer.
The same wireless pairing process applies to most action cameras, and similar problems can show up as app connection failures.
Approximate transfer times (WiFi)
| Clip length | File size | Transfer time |
|---|---|---|
| 15 seconds | ~50 MB | 5 to 8 seconds |
| 30 seconds | ~100 MB | 10 to 15 seconds |
| 2 minutes | ~400 MB | 40 to 50 seconds |
| 10 minutes | ~2 GB | 5 to 7 minutes |
If you have many files, the next method might serve you better.
Step-by-Step: Transferring to a Computer with a USB-C Cable
Cable transfer is faster than WiFi and does not drain the camera battery. It works with any computer that has a USB port. You just need a USB-C cable that supports data transfer, not just charging.
Step 1: Find the right cable
The GO 3S uses a USB-C port on the Action Pod. Many USB-C cables sold for charging phones are charge only. They lack the data pins needed for file transfer.
Use the cable that came with the camera. If you lost it, buy a cable labeled as data sync or data transfer capable.
Not all USB-C cables are the same. According to USB.org, a cable must include SuperSpeed data lines to support file transfer.
Step 2: Connect the camera to the computer
Plug the USB-C end into the Action Pod. Plug the other end into your computer. A USB A to C cable or a C to C cable both work.
The camera screen shows a connected icon.
Step 3: Access the camera storage
On a Mac, the camera appears as a drive in Finder. On Windows, it shows up in File Explorer under This PC. Double click the drive to open it.
Step 4: Locate the video files
The camera stores videos inside a folder named DCIM. Open that folder. Inside you see subfolders named by date.
Each subfolder contains the video files from that recording session. The files use an MP4 format for standard video and INSV for 360 content.
Step 5: Copy the files to your computer
Drag the files or folders from the camera window to a folder on your computer. A folder on your desktop works well. Let the transfer finish before disconnecting the cable.
Large files take a few seconds to a few minutes depending on their size.
Step 6: Safely eject the camera
When the copy finishes, eject the camera drive from your computer. On Mac, click the eject icon next to the drive name. On Windows, right click the drive and select Eject.
Disconnect the cable only after the computer confirms it is safe.
Notes for Mac users
Macs sometimes show a message saying the disk was not ejected properly. This happens if you disconnect without ejecting first. It rarely causes data loss but is worth avoiding.
Always eject the drive before pulling the cable.
If your computer does not recognize the camera, the issue is usually the cable. Similar USB connectivity problems can happen with other devices, so the troubleshooting steps are worth knowing. The official Insta360 support documentation recommends using a cable that supports data sync.
This avoids most connection problems.
Step-by-Step: Using the MicroSD Card for Fastest Bulk Transfers
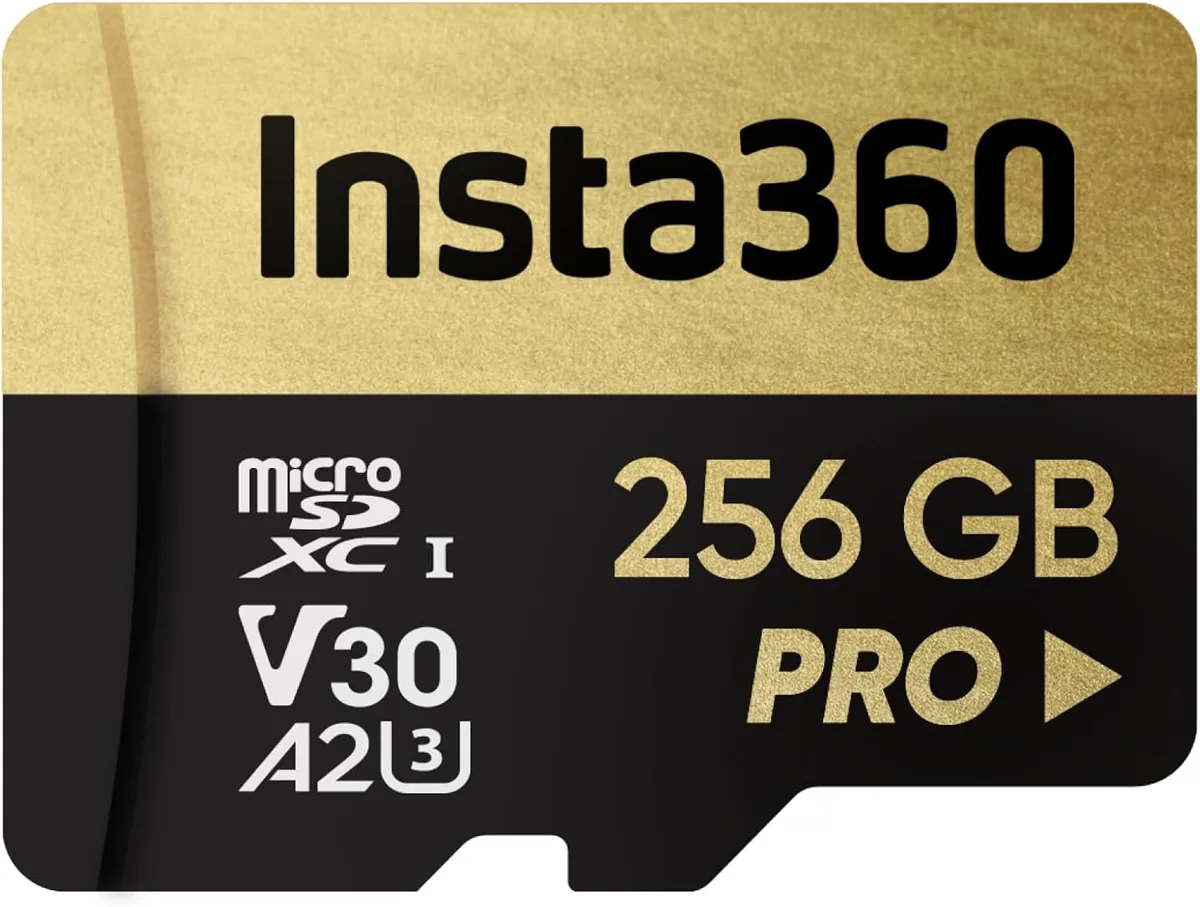
Image source: Web (Bing) / amazon.ca (Web image (fair-use with source credit))
The microSD card method is the fastest way to move video files off the GO 3S. It bypasses WiFi and cables entirely. The card itself becomes a portable hard drive that works with any card reader.
Step 1: Remove the microSD card from the camera
The GO 3S stores files on a microSD card inside the Action Pod. Turn off the camera first. Open the side flap and press the card gently so it pops out.
Pull it free with your fingers or tweezers if it is tight.
Step 2: Insert the card into a reader
Put the microSD card into a card reader. Many laptops have a built in SD card slot. If your laptop does not have one, a USB card reader costs very little and works with any computer.
Make sure the reader supports microSD cards. Some readers need an adapter tray.
Step 3: Locate the files on the card
The card appears as a removable drive on your computer. Open it and navigate to the DCIM folder. The file structure is the same as the cable method.
All your video files are there.
Step 4: Copy the files to your computer
Drag the entire DCIM folder or individual subfolders to your computer. The card reader gives you the full speed of the memory card. A class 10 or U3 card reads at 80 to 100 MB per second.
That means a 10 minute clip downloads in about 20 seconds.
Step 5: Eject the card
When the transfer finishes, eject the drive from your computer. Then remove the card from the reader. Reinsert it into the camera.
The camera recognizes the card and you can continue recording.
When to use this method
Use the microSD card method when you have shot a lot of footage. It is the best choice for a full day of recording or a multi day trip. The card method also saves the camera battery because the camera stays off during the entire transfer.
A warning about formatting
Do not format the card on your computer. The camera uses a specific file system. Formatting on a computer can make the card unreadable in the camera.
Always format the card inside the camera itself using the settings menu. Standard practice for memory cards is to format them inside the device that uses them. This avoids the memory card issues that appear when file systems do not match.
As of 2026, the GO 3S supports microSD cards up to 256GB in capacity. The card method remains the fastest path for getting your footage onto a computer.
Common Transfer Problems and How to Fix Them
No transfer method is perfect. Each one has quirks that can trip you up. Here are the most common problems and how to solve them quickly.
Camera not showing up in the app
The most common problem with wireless transfer is the app not finding the camera. First check that the camera is powered on and awake. The screen should be on.
If the camera went to sleep, press the button to wake it.
Next check that your phone has WiFi turned on. The app connects to the camera directly, so airplane mode or WiFi off blocks the connection. If both are fine, restart the app.
Force close it and reopen. The app usually finds the camera on the second try.
Transfer keeps stopping or failing
A weak WiFi signal causes the transfer to drop. Move the camera closer to your phone. Keep them within three feet and avoid putting your body or furniture between them.
Also turn off other apps that use WiFi, like streaming or backup services.
If the problem continues, the camera battery might be low. Charge the camera and try again. A battery below 20 percent can cause unstable WiFi performance.
Computer does not recognize the camera via cable
This is almost always a cable problem. The USB-C cable must support data transfer. Many charging cables lack the data pins.
Try a different cable, ideally the one that came with the camera.
If the cable is correct, check the computer port. Try a different USB port. On a desktop, use a port on the back of the tower rather than the front.
The front ports sometimes have lower power output.
Computer does not recognize the microSD card
If your computer does not see the card, try a different reader. Some built in card readers are slow or picky about card types. A USB adapter card reader is a reliable fallback.
If the card is recognized but shows no files, the card file system might be corrupted. This is rare. Try reinserting the card and checking again.
Files appear corrupted or cannot be opened
A file that was interrupted during transfer can appear corrupt. Delete the partial file on your computer and transfer it again. Make sure the camera battery is full and the connection is stable before retrying.
If the file was transferred correctly but still will not open, the original file on the camera might be corrupt. This can happen if the camera ran out of battery during recording or if the card was ejected while recording was in progress.
The key is to identify which part of the chain is failing: the camera, the cable, the card, or the computer. Work through each link one at a time and you will find the culprit fast.
Pro Tips for a Faster, Smoother Transfer Workflow
A few small habits make the whole transfer process faster and more reliable. These tips come from patterns we see in user feedback and official documentation. They help you avoid slowdowns and lost files.
Trim clips before you transfer
The Insta360 app lets you trim video length before downloading. This is a huge time saver. A 10 minute clip might contain only 30 seconds of usable footage.
Trim it in the app and download only the highlight.
This cuts transfer time by a factor of 20. The original file stays on the camera untouched. You can always go back and grab the full version later.
Keep a dedicated card reader
A cheap USB card reader is one of the best investments you can make. Built in SD slots on laptops are often slow. They also break over time.
A USB 3.0 card reader costs very little and transfers files at full card speed.
Keep one in your camera bag. You never know when you will need to dump footage quickly. It also works as a backup if your cable fails.
Label your SD cards
If you use multiple microSD cards, label them with a permanent marker. Write a number or date on each one. This helps you track which card holds which footage.
It also prevents the common mistake of reformatting the wrong card. A quick glance at the label tells you which card is ready for reuse and which still has unbacked footage.
Build a consistent folder structure
Create a folder on your computer for each shoot date. Name it with the date and a short description. For example, 2026-04-12_Park_Shoot.
When you transfer files, drop the DCIM folder into that project folder. This keeps everything organized. It also makes finding old footage easy months later.
Check your card speed rating
The GO 3S records 2.7K video at a high bitrate. A slow card can cause recording errors. It can also slow down transfers.
Use a card rated U3 or V30. These cards handle sustained write and read speeds. They cost a bit more but save you time on every transfer.
Common card related problems often come down to speed ratings.
Update the camera firmware
Insta360 releases firmware updates that improve performance. Some updates address WiFi stability and transfer speeds. Check for updates in the app settings.
A firmware update can fix a transfer problem that you thought was a hardware issue. It takes two minutes and costs nothing. Routine firmware maintenance prevents many issues before they start.
Use the batch download feature
The app lets you select multiple clips at once. Tap select all or tick several thumbnails. The app queues them and downloads one after another.
This is faster than downloading each clip individually. You start the batch and walk away. All clips arrive on your phone without any further input.
Keep your phone storage clear
The app downloads files to your phone's internal storage. If your phone is nearly full, the transfer can stall. Free up at least a few gigabytes before starting a large transfer.
This is especially important if you are transferring multiple long clips. A full phone storage error mid-transfer means starting over from scratch.
Frequently Asked Questions
Can I transfer videos from the GO 3S without using the app?
Yes. You can use a USB-C cable to connect the camera directly to a computer. The camera appears as an external drive.
You copy files using Finder or File Explorer. The microSD card method also bypasses the app entirely.
Why does my computer not recognize the GO 3S when I plug it in?
The most common cause is a charge only USB-C cable. These cables lack the data pins needed for file transfer. Use the cable that came with the camera.
If that does not work, try a different USB port on your computer.
How do I transfer 360 videos from the GO 3S?
360 videos transfer the same way as standard videos. The files use an INSV format instead of MP4. The app handles both file types.
On a computer, you copy the INSV files just like any other video file. You need Insta360 Studio software to edit them.
Can I use any microSD card reader with the GO 3S card?
Yes. Any standard microSD card reader works. The card itself is a standard microSD card.
A USB 3.0 reader gives faster transfer speeds. A USB 2.0 reader works but is slower. The reader does not need to be from Insta360.
Do I need to format the microSD card inside the camera?
Yes. Always format the card inside the GO 3S using the camera settings menu. Formatting on a computer can create an incompatible file system.
The camera might not recognize the card. Stick with in-camera formatting to keep things reliable.
Can I transfer videos while the camera is charging?
Yes. You can charge the GO 3S through the Action Pod and transfer files at the same time. This works with both WiFi and cable methods.
It is useful when the battery is low and you need to move footage urgently.
Final Verdict: Choosing the Best Method for Your Workflow
You now have three clear paths to move footage off the GO 3S. Each one exists for a reason. The right choice depends on where you are, what gear you have, and how much time you want to spend.
Use the app when you are out and about. Wireless transfer is the most portable option. You carry your phone everywhere. The camera connects directly.
No cables, no card readers. Use this for quick social media clips or when you need to send a single file to someone.
Use the cable when you are at a desk. USB-C transfer is faster and more stable than WiFi. It works with any laptop or computer. Use this for editing sessions where you need full resolution files.
The cable method is also the best choice when the camera battery is low and you want to transfer without draining it further.
Use the card when speed matters most. The microSD card method is the undisputed speed champion. Use this when you have shot a lot of footage. A full day of 2.7K video transfers in minutes instead of hours.
It is also the best method for backing up before a long trip.
Test each method at home before you rely on it in the field. Try the app connection. Confirm your cable works with your computer.
Make sure your card reader is compatible. Knowing which method works best for your setup saves frustration when you are on a deadline.
The GO 3S is a versatile little camera. Its transfer methods match that versatility. Pick the one that fits your moment and get back to creating.

Similar Posts






























