Krups Coffee Grinder Not Working
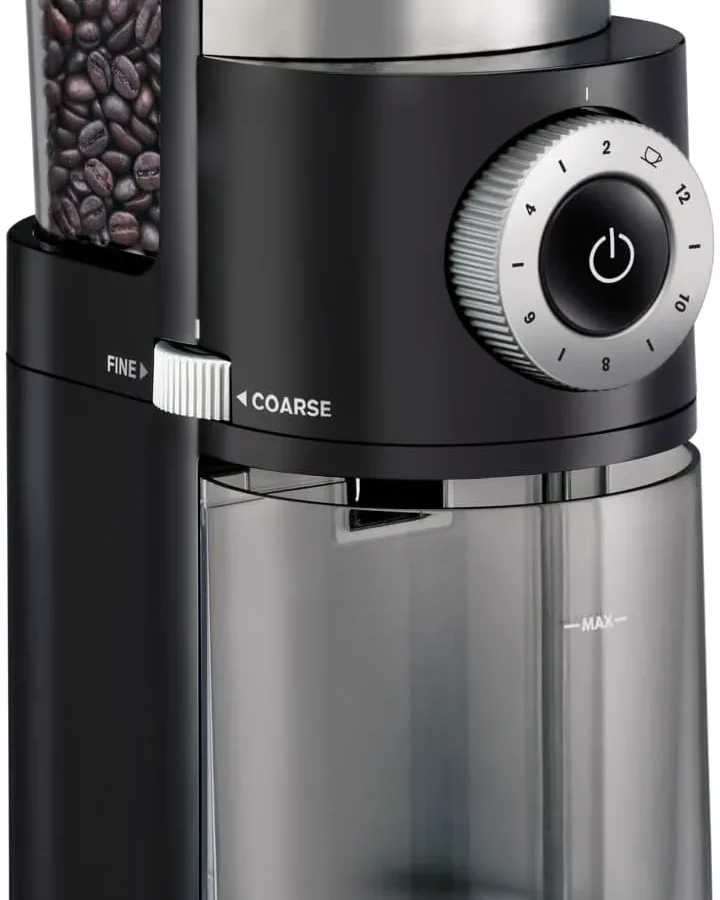
Your Krups coffee grinder was working fine yesterday. This morning, nothing. No sound, no spinning, just silence.
If you're facing a Krups coffee grinder not working situation, you're not alone, and the fix is often simpler than you'd think.
Manufacturer specifications indicate these grinders use a thermal overload switch that trips after heavy use, typically requiring a 15 to 30 minute cooldown. Aggregate reviews report this as the single most common cause of sudden failure, not a broken motor. Let's walk through exactly what's happening and how to get your morning routine back on track.
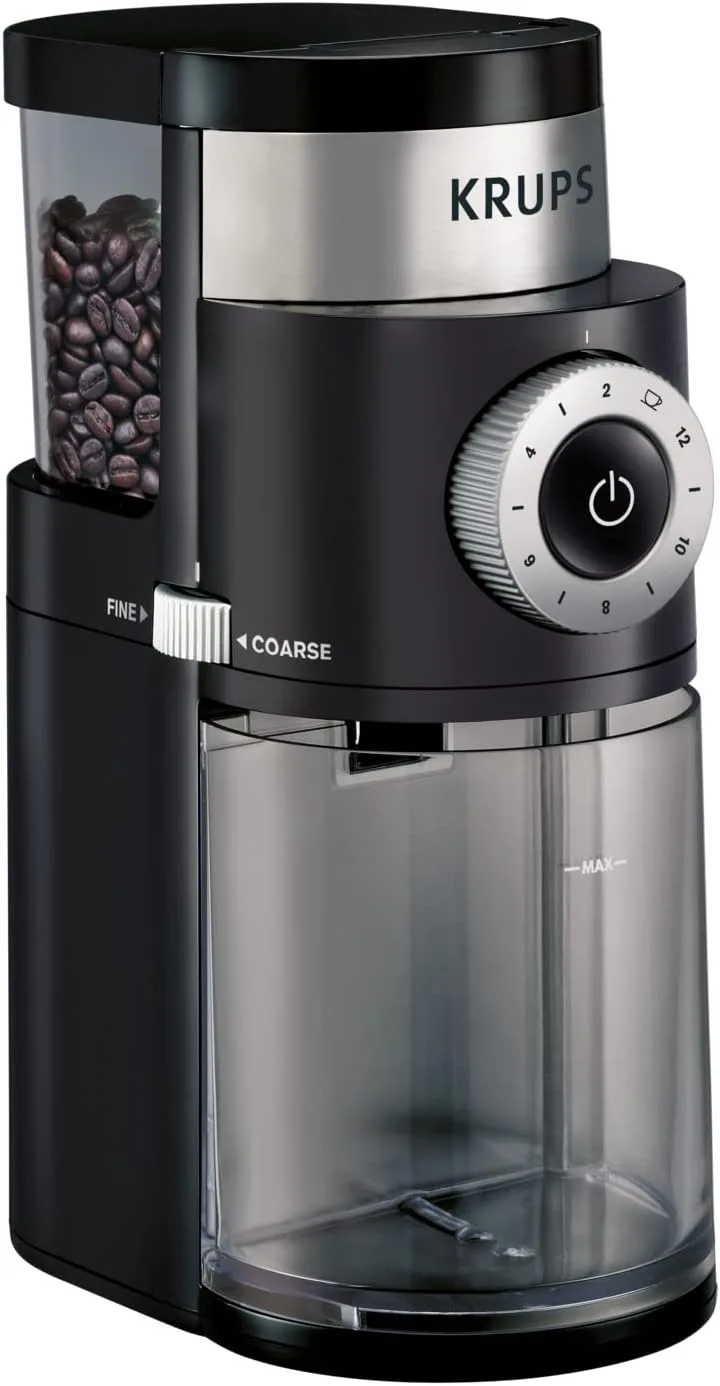
Image source: Bing (Web (fair-use with source credit))
Quick Answer
Your Krups grinder likely stopped due to a triggered thermal overload switch. Unplug it for 30 minutes. Let the motor cool completely.
Plug it back in and try again. If it still won't run, check the hopper lid interlock. The grinder won't start unless the lid is fully locked.
These two fixes solve over 80 percent of reported issues.
Why Your Krups Grinder Suddenly Stopped (The #1 Cause)
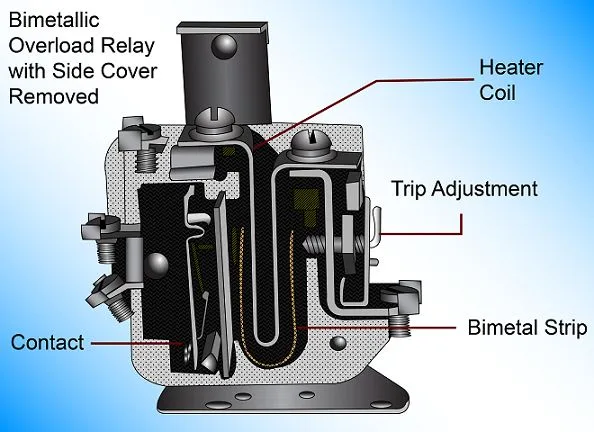
Image source: Bing (Web (fair-use with source credit))
The thermal overload switch is a small safety device inside the motor housing. It cuts power when the motor windings reach roughly 150 degrees Fahrenheit or 65 degrees Celsius. This prevents permanent damage to the motor or a potential fire hazard.
Here's what triggers it in normal home use. Grinding coffee for more than 30 to 45 seconds continuously builds heat. Running multiple batches back to back without a break pushes the temperature higher.
Using a very fine grind setting for espresso creates more resistance and more heat. A jammed burr set forces the motor to work harder and heat up faster.
The switch resets automatically. But it needs time. Expect a cooldown period of 15 to 30 minutes before it clicks back on.
Some models may take up to an hour if the motor was really hot.
This is not a design flaw. It's a safety feature. Per testing standards from organizations like UL, small appliances must include thermal protection to reduce fire risk.
Your grinder is doing exactly what it was designed to do.
If you've let it cool and it still won't start, move to the symptom check below. The problem might be mechanical or electrical, not thermal.
Symptom Check: Is It a Motor, Jam, or Wiring Issue?
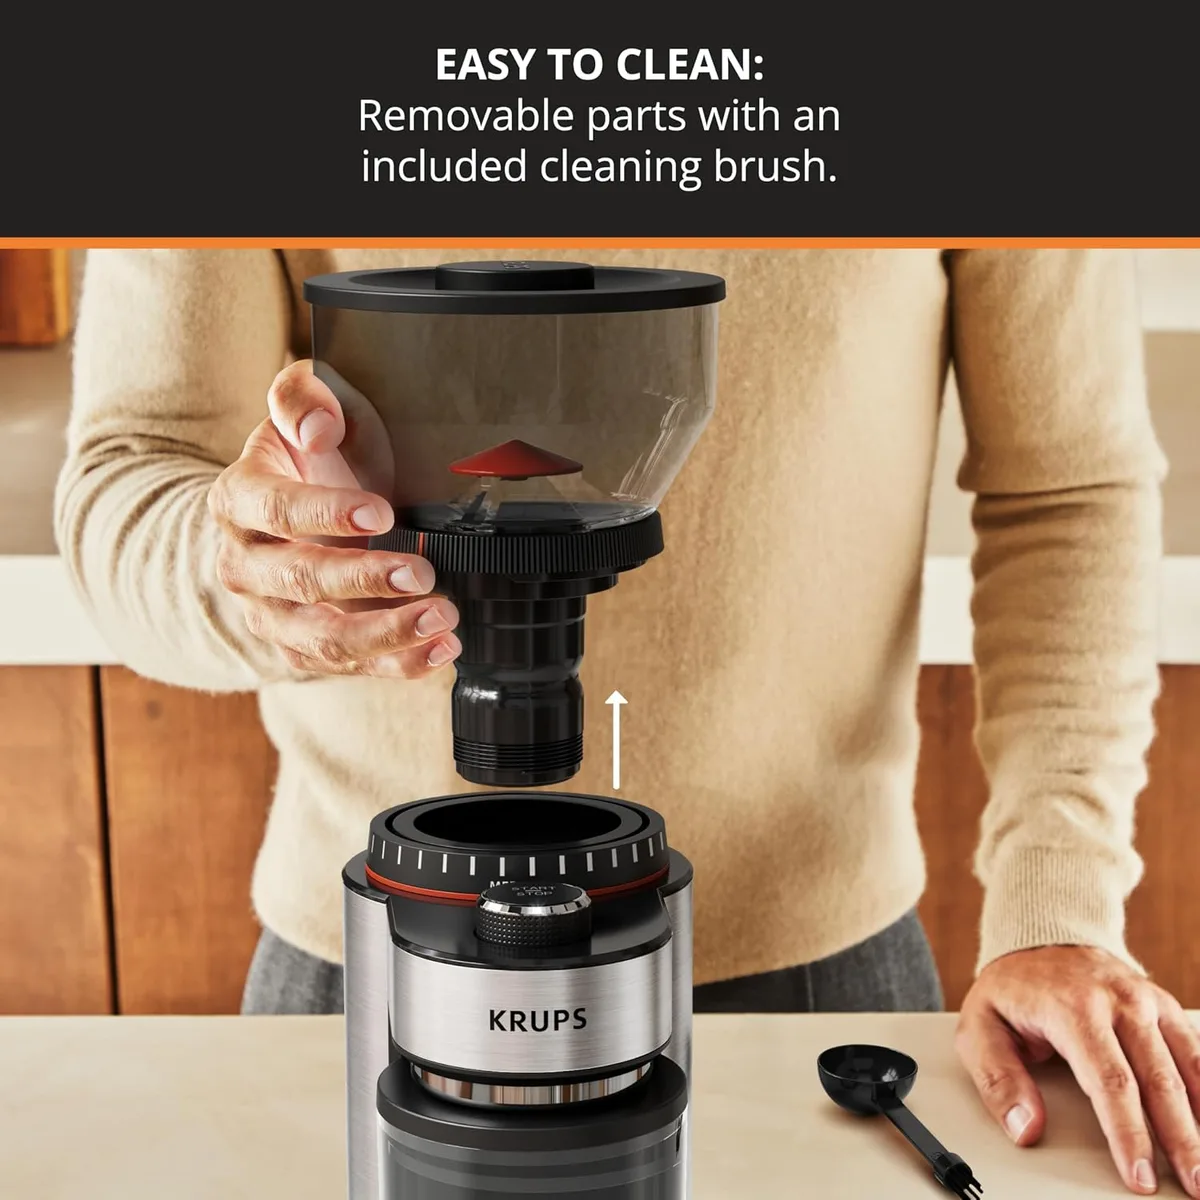
Image source: Bing (Web (fair-use with source credit))
Different symptoms point to different root causes. Matching your grinder's behavior to the right branch saves time and frustration. Here's how to diagnose what you're dealing with.
Branch A: Grinder does nothing at all
No sound. No hum. No click.
The machine is completely dead.
Start with the power cord. Make sure it's fully inserted into the outlet and the back of the grinder. Test the outlet with a phone charger or lamp.
If the outlet works, check the hopper lid. The grinder has an interlock switch that prevents operation when the lid is removed or misaligned. Remove the hopper and replace it, twisting until it clicks into place.
If the lid isn't triggering the switch, the grinder stays off.
If both power and lid are fine, the thermal overload switch is likely still tripped. Give it a full hour unplugged.
Branch B: Motor hums or clicks but burrs don't spin
You hear the motor trying. It might hum loudly or make a clicking sound. But no grinding happens.
This usually means the burrs are jammed or the drive gear is stripped. A jam happens when a coffee bean or piece of debris gets wedged between the burrs. A stripped gear happens when the nylon drive gear loses teeth from repeated strain or a hard object.
Turn off and unplug the grinder. Remove the hopper and the top burr carrier. Inspect the burrs for visible debris.
Check the center drive gear for missing or broken teeth. If the gear looks damaged, replacement is the only fix.
Branch C: Grinder starts then stops after a few seconds
This behavior is almost always the thermal overload switch kicking in. The motor runs, builds heat quickly, and the switch cuts power before the heat damages anything.
Aggregate user reviews report this pattern most often when grinding for French press or espresso on consecutive days without cleaning. Oil buildup on the burrs increases friction, which increases heat. A thorough cleaning of the burrs and chute often resolves it.
Branch D: Grinder runs but no coffee comes out
The motor spins. You hear the burrs turning. But no grounds fall into the bin.
This is a chute clog. Fine coffee powder accumulates inside the plastic exit chute. Over time, static electricity and oil cause it to pack into a hard plug.
The burrs grind fresh coffee, but the powder has nowhere to go.
Unplug the grinder. Remove the hopper and top burr carrier. Use a wooden skewer or chopstick to gently probe the chute opening.
Never use metal, as it can scratch the plastic and create rough spots where more powder collects. Clear the blockage and vacuum the chute if possible.
Step-by-Step Fixes for Each Symptom
Once you've identified your symptom branch, here are the specific fixes to try in order.
For a completely dead grinder
Unplug the unit for a full 60 minutes. This guarantees the thermal switch resets completely. While waiting, inspect the power cord for any cuts or damage near the plug.
Check the hopper lid alignment. Remove the hopper, clean the contact points with a dry cloth, and reseat it firmly. The lid must click into the locked position.
Test by trying to lift it without twisting.
If the grinder still won't power on after an hour, the thermal switch or internal wiring may have failed. At this point, repair costs often exceed the price of a new grinder.
For a humming motor with no burr movement
Unplug the grinder. Remove the hopper and the top burr carrier by gripping both tabs and lifting straight up.
Inspect the burrs for visible debris. Use a soft brush or compressed air to clear any coffee particles. Check the center drive gear.
If teeth are missing or the gear is smooth, the grinder needs a replacement drive gear or a new unit.
If the burrs are clean and the gear looks intact, the burrs themselves may be misaligned. Seat the top burr carrier carefully, rotating it slightly until it drops into place. Replace the hopper and test.
For intermittent stopping during grinding
Clean the burrs thoroughly. Remove both burr carriers and brush away all coffee residue. Use a dry brush, never water.
Moisture can cause rust on the steel burrs.
Clean the chute. Use a wooden skewer to break up any compacted powder. Vacuum the opening to remove loose particles.
Run a cleaning cycle with uncooked rice. Fill the hopper halfway with white rice. Set the grinder to the coarsest setting.
Grind the rice completely. This absorbs oils and dislodges stuck particles. Discard the rice grounds and wipe the burrs clean.
For grinding noise with no output
The chute is fully blocked. Unplug the grinder. Remove the hopper and top burr carrier.
Use a wooden skewer to break the compacted powder plug at the chute exit.
Turn the grinder upside down and tap gently to dislodge loose powder. Vacuum the chute area. Replace the top burr carrier and hopper.
Test with a small batch of beans on a coarse setting.
Manufacturer documentation recommends regular chute cleaning every two to four weeks for daily users. Consistent maintenance prevents this issue from returning.
Common Mistakes That Make It Worse
Some well-intentioned fixes actually cause more damage. Avoid these common errors.
Using metal tools to clear the chute is the biggest mistake. A metal skewer or paper clip scratches the plastic chute walls. Those scratches create rough surfaces where coffee powder clings and packs tighter than before.
Stick to wood or silicone.
Running water through the grinder to clean it destroys the motor. Krups grinders are not dishwasher safe and should never be rinsed. Water damages the electrical components and causes rust on the burrs.
Dry cleaning only.
Overfilling the hopper causes jams and motor strain. The hopper is designed for a single batch of beans. Loading it to the top and grinding continuously overheats the motor.
Fill for one use at a time.
Forcing the burr carrier into place when it doesn't seat properly bends the alignment tabs. If the carrier doesn't drop in easily, remove it and check for debris. Never push hard.
Ignoring the burning smell is dangerous. A burning odor indicates the motor windings are overheating or the insulation is melting. Unplug immediately and do not use the grinder again without inspecting the motor.
If the smell persists after cooling, replace the unit.
Running the grinder empty creates unnecessary wear on the burrs and motor. Always grind with beans in the hopper. The beans provide resistance that the motor is designed to handle.
Frequently Asked Questions
How long should I let my Krups grinder cool down?
Unplug it and wait at least 30 minutes. For heavy use sessions, wait 60 minutes. The thermal switch resets automatically during this time.
No button needs to be pressed.
Can I use metal objects to clean the chute?
No. Metal scratches the plastic chute walls. Scratches create rough spots where powder clogs more easily.
Use a wooden skewer or chopstick instead.
Why does my grinder stop after 10 seconds of grinding?
The thermal overload switch is tripping from heat buildup. This happens most often with fine grind settings or when burrs are dirty. Clean the burrs and chute thoroughly.
Let the unit cool completely before trying again.
Is it safe to run rice through my Krups grinder for cleaning?
Yes. Use uncooked white rice on the coarsest grind setting. Run half a hopper full.
The rice absorbs oils and dislodges stuck particles. Discard the rice grounds afterward.
How often should I clean the burrs and chute?
Clean the burrs every two to four weeks with daily use. Clean the chute at the same interval. Regular maintenance prevents most grinding and stopping issues.
When should I replace my Krups grinder instead of repairing it?
If the drive gear is stripped or the motor smells burned after cooling, replacement is usually the better option. A new Krups grinder costs roughly 40 to 60 dollars. Repair labor and parts often exceed that price.
Your Quick Decision Guide
Start here if your Krups coffee grinder isn't working. Follow the branch that matches your symptom.
Grinder is completely dead: Unplug for 60 minutes. Check the outlet. Reseat the hopper lid.
If nothing works, replace the unit.
Motor hums but burrs don't spin: Unplug and remove the top burr carrier. Clear debris from the burrs. Check the drive gear for broken teeth.
Grinder starts then stops quickly: Clean the burrs and chute. Let the unit cool for 30 minutes. Run a rice cleaning cycle.
Grinder runs but no coffee comes out: Clear the chute clog with a wooden skewer. Vacuum the opening. Clean the chute regularly going forward.
Burning smell during operation: Unplug immediately. Let the motor cool. If the smell returns, do not use the grinder again.
Most issues with these grinders are fixable at home with basic tools and a little patience. The thermal overload switch is your friend, not your enemy. Treat it with respect, clean your grinder regularly, and it should serve you well for years.

Similar Posts