Roomba Vacuum Troubleshooting
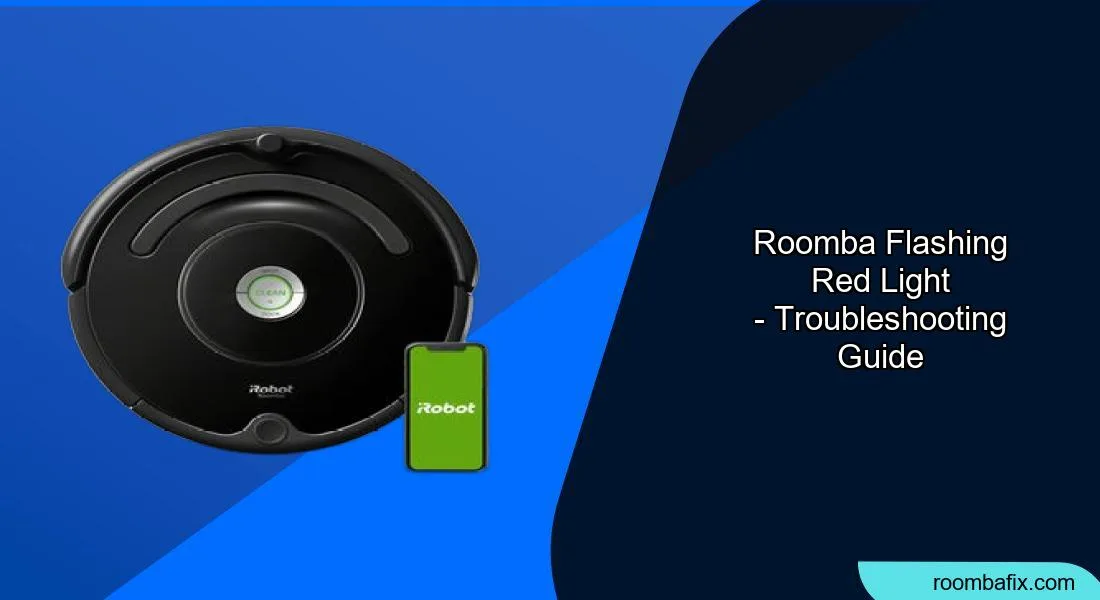
Image source: Bing (Web (fair-use with source credit))
Your Roomba is acting up, and you're not alone. Whether it's blinking red, spinning in circles, or refusing to charge, robot vacuum problems are frustrating. The good news is that most issues have simple fixes you can handle at home in under ten minutes, no repair shop required.
Most Roomba failures trace back to three root causes: dirty sensors, tangled brushes, or charging contact problems. This guide walks you through each one step by step.
Start Here: Watch and Identify the Problem
Before you start taking things apart, take a breath. Robot vacuums look complex, but they're actually pretty simple machines. A motor spins the brushes, a fan pulls debris into the bin, and a handful of sensors tell it where to go.
When any one of those pieces stops working right, you get weird behavior.
Here's the thing: the fix depends entirely on the symptom. A Roomba that won't charge has a completely different problem than one that's throwing an error 31 mid-clean. So your first job is figuring out which category your robot falls into.
Start by watching your Roomba run for a full minute. Notice what it does right before the problem appears. Does it stop at a specific spot?
Does the light change color? Does it make a clicking sound first? These details matter because they point you toward the right fix.
Before touching anything, open the iRobot Home app. The app logs error codes and gives you a direct readout of what the robot thinks is wrong. That's not always the full story, but it's a solid starting point.
If the app shows a specific error number, jump straight to the error code table below.
Roomba Won't Turn On or Charge
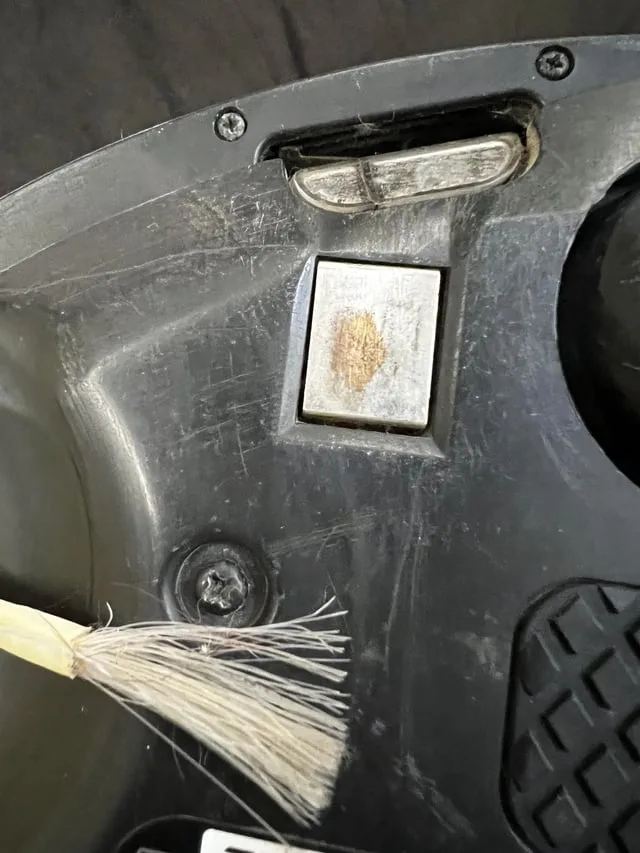
Image source: Bing (Web (fair-use with source credit))
If your Roomba is completely dead, the first suspect is always the charging contacts. Those little metal strips on the bottom of the robot and the matching strips on the Home Base dock collect dust, hair, and grime over time. When they're dirty, power can't flow, plain and simple.
Check the dock first:
- Is the dock's indicator light on? If not, test the outlet with another device to confirm it's delivering power.
- Inspect the power cord for bites, kinks, or damage, especially if you have pets.
Clean the contacts:
- Use a dry microfiber cloth to wipe both the robot's charging strips and the dock's contacts.
- Don't use water or cleaning spray, moisture can cause a short.
- If the contacts look corroded or discolored, rub them gently with a pencil eraser to remove oxidation. Brush away the crumbs afterward.
Check the battery:
If your Roomba still won't take a charge after cleaning, the battery might be the culprit. Lithium-ion batteries degrade over time. Most batteries last 18 to 24 months with regular use.
If yours is older than that, replacement is probably the move.
Roomba Keeps Getting Stuck or Spinning in Circles
A Roomba that spins in circles like it's chasing its tail usually has a dirty sensor problem. The cliff sensors on the bottom look for drops to prevent the robot from falling down stairs. When they get dusty, they send false signals, and the robot gets confused.
Clean the cliff sensors:
- Turn the robot upside down.
- Locate the small circular sensor windows near the wheels.
- Wipe them gently with a dry microfiber cloth.
- For stubborn buildup, use a cotton swab slightly dampened with rubbing alcohol, then dry thoroughly.
Check the bumper:
The bumper sensors can also get sticky over time, which makes the robot think it's constantly hitting something. Press the bumper, it should slide in and out freely. If it feels stuck, wipe around the edges to remove debris.
Fix the environment:
A Roomba that physically gets stuck under furniture or on cords is an environment problem, not a hardware failure. Move phone chargers off the floor, watch for low furniture, and use the app's boundary markers to keep the robot out of trouble zones.
Roomba Is Cleaning Weakly or Leaving Debris Behind
Weak suction almost always means something is blocking the airflow path. Work through these checks in order.
1. Empty the dust bin.
If the bin is full, the robot physically can't pull in more debris. Empty it completely over a trash can.
2. Clean or replace the filter.
A clogged filter is the number one cause of poor cleaning performance. If the filter looks gray or clogged with fine dust, clean it or replace it. Filters need replacing roughly every two months under normal use.
3. Inspect the brush roll.
Hair, strings, and carpet fibers wrap around the brush axle and stop it from spinning properly. Most newer Roomba models use dual multi-surface rubber brushes that resist tangling better than older bristle designs, but they still need maintenance.
- Remove the brush guard.
- Pull out the brush roll.
- Cut away any tangled hair or strings with scissors.
- Check that the end caps spin freely and the bearings aren't seized.
- Reinstall everything and make sure the guard clicks back into place.
4. Check the side brush.
The three-arm side brush can also collect hair and debris. Pull it off, clean the axle, and snap it back on.
Roomba Is Making Loud or Unusual Noises
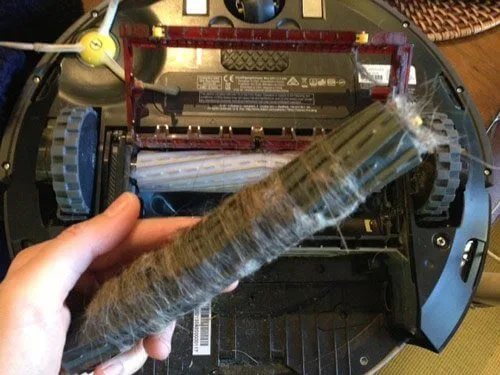
Image source: Bing (Web (fair-use with source credit))
A Roomba that suddenly sounds like a blender full of rocks has something stuck in the brush area. Turn it off immediately and check the brush roll, the side brush, and the vacuum inlet. Even small objects like coins or pet hair matted into a solid clump can cause rattling.
If everything is clear and the noise persists, check the filter. A completely clogged filter forces the motor to work harder, which creates a distinct whining sound. Also check the filter housing for trapped debris.
Grinding noises can also come from the wheel assemblies. Hair wraps around the wheel axles and eventually prevents free rotation. Tug gently on any visible hair or cut it free with scissors.
If a wheel still won't spin freely by hand, it may need replacement parts.
Error Codes Decoded: What That Blinking Light Actually Means
The blinking pattern on your Roomba's light ring is a language of its own. Different models use slightly different patterns, but the general logic holds across the lineup. Here's a cheat sheet for the most common codes.
| Error Code | Light Pattern | Likely Cause | Fix |
|---|---|---|---|
| Error 1 | Single red blink | Bumper stuck | Push bumper, clean sensors |
| Error 2 | Two red blinks | Cliff sensor dirty | Wipe sensor windows |
| Error 3 | Three red blinks | Wheel stuck | Remove hair from wheel axle |
| Error 4 | Four red blinks | Brush roll jammed | Clean brush roll and guard |
| Error 5 | Five red blinks | Side brush stuck | Remove and clean side brush |
| Error 6 | Red "!" icon | Bin or filter issue | Empty bin, clean filter |
| Error 31 | Red with white spin | Charging contact issue | Clean dock and robot contacts |
The exact code for your specific model is always listed in the user manual. If you've lost the manual, the iRobot Home app has a digital copy under the settings menu.
One thing worth noting: error codes don't always tell the whole story. You might clear an error 4, run the robot, and immediately get an error 2. That's not a new problem, it's a cascading failure.
Fix the brush jam, and the robot can properly navigate again, which clears the sensor error.
Roomba Won't Connect to Wi-Fi or the App
Connection problems are usually simpler than they look. Work through these steps in order.
1. Check your network band.
Most Roomba models only support 2.4GHz Wi-Fi, they don't work on 5GHz networks. If your router broadcasts both bands under one name, the robot might be trying to join the wrong one. Check your router settings and consider splitting the bands temporarily during setup.
2. Check the range.
Make sure the Roomba is within roughly 30 feet of your router, especially if it needs to pass through interior walls.
3. Restart everything.
- Close the iRobot Home app completely and reopen it.
- Reboot your phone.
- Reset the robot by holding the CLEAN button until the light ring fades out (about 10 seconds).
- Try reconnecting after everything powers back on.
The Full Maintenance Routine: Do This Monthly
Prevention beats troubleshooting. Between deep cleans, run this maintenance routine once a month to keep your Roomba running like new.
You'll need:
- Dry microfiber cloth
- Cotton swabs
- Scissors
- Philips-head screwdriver (for some models)
Step-by-step:
- Power down the robot completely.
- Remove the dust bin and empty it.
- Remove the filter and tap it gently against the trash can. Replace it if it looks worn or heavily discolored.
- Flip the robot over.
- Remove the brush guard by releasing the clips or unscrewing the retaining screws.
- Pull out the brush roll and the side brush.
- Inspect each one for wrapped hair, strings, or debris. Cut away anything tangled around the axles.
- Wipe down the entire underside with a microfiber cloth, paying special attention to sensor windows, charging contacts, and wheel wells.
- Use a cotton swab for tight spots around the sensors.
- Reinstall the brushes and the guard, make sure they click or screw back into place firmly.
- Hold the CLEAN button for 10 to 20 seconds until you hear a tone or see the light ring flash. Release and wait for the robot to power back on.
- Place the robot on its Home Base and let it charge for at least two hours before running it again.
A full charge cycle ensures the battery has enough juice to complete a cleaning pass, which reduces the chance of it dying mid-run and throwing a different error.
When to Replace Parts vs. When to Call It Quits
Not every problem is worth fixing. Here's a practical breakdown.
| Part | Typical Lifespan | When to Replace |
|---|---|---|
| Filter | 2 months | Discolored, clogged, or won't clean out |
| Brush roll | 6–12 months | Worn bristles, cracked rubber, won't spin freely |
| Side brush | 3–6 months | Bent arms, broken bristles |
| Battery | 18–24 months | Won't hold a charge, dies mid-run |
| Cliff sensors | Lifetime | Clean but still erroring — replace unit |
If your Roomba is more than three years old and needs multiple new parts, the cost of repairs might exceed the price of a newer model. Newer models have better navigation, stronger suction, and self-emptying docks. Sometimes upgrading is the smarter move.
Quick Reference: What to Check for Each Symptom
| Symptom | Check First | Then Check |
|---|---|---|
| Won't power on | Charging contacts | Battery, outlet |
| Won't charge | Dock contacts | Power cord, battery |
| Spinning in circles | Cliff sensors | Bumper, wheels |
| Getting stuck | Bumper | Environment, cords |
| Weak suction | Dust bin | Filter, brush roll |
| Loud noises | Brush roll | Side brush, filter |
| Won't connect to app | 2.4GHz network | Router range, reset |
The Bottom Line
Most Roomba problems come down to a few basic causes: dirty contacts, tangled brushes, or clogged airflow. You can fix all of these at home in under fifteen minutes with nothing more than a cloth, some scissors, and a cotton swab.
When you do hit a problem, don't panic. Check the error code, work through the matching fix, and run the maintenance routine. Nine times out of ten, that's all you need to get your robot back to work.
And if you've done all that and the Roomba is still throwing errors? It might be time to retire it and look at a newer model. But first, try the steps above, you might be surprised how much life you can get out of a little maintenance.

Similar Posts