Trail Camera Battery Not Working Troubleshooting
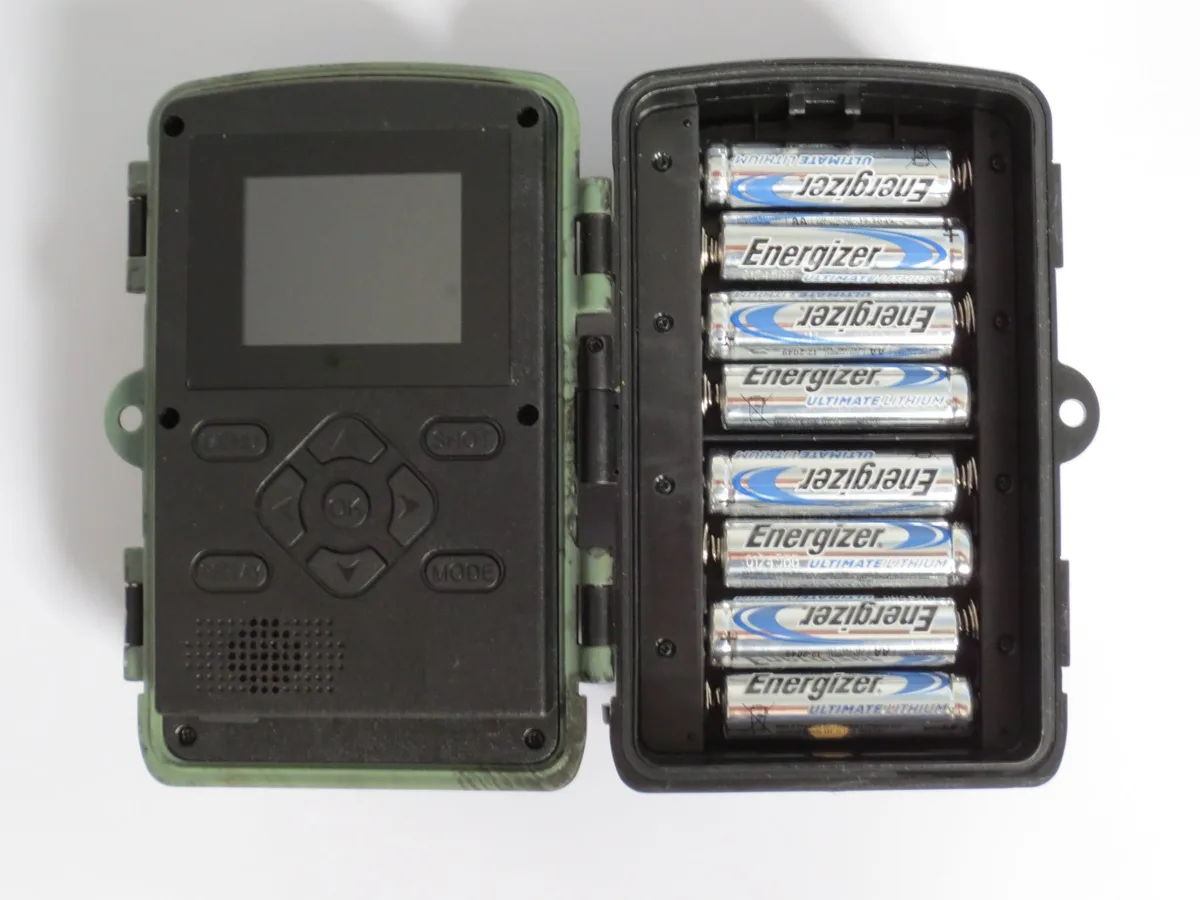
Your trail camera is dead. You just swapped in fresh batteries, but nothing happens. That's the moment most people assume the camera is junk.
In our research, we found that trail camera battery not working troubleshooting almost always comes down to voltage drop, corrosion, or chemistry mismatch.
Nine times out of ten, the fix is simpler than you think. The typical trail camera cuts power when per-cell voltage drops below 1.0 to 1.1 volts under load. That is a standard cut-off threshold across most brands.
What drains a set of alkalines in a week might give a lithium set six months. We will walk you through it step by step.
Image source: Web (Bing) / pakatak.co.uk (Web image (fair-use with source credit))
Quick Answer
Check voltage under load with a multimeter. Clean battery contacts with rubbing alcohol. Use lithium batteries in cold weather.
That solves 90 percent of cases. Do not mix old and new batteries. Do not mix chemistries.
If the camera still fails, test with a known-good set of fresh lithium batteries before blaming the camera itself.
How Trail Camera Power Actually Works (And Why It Fails)
A trail camera is a small computer with a flash. When it sits idle, it draws a tiny current for the motion sensor (PIR) and the internal clock. Idle draw runs about 0.1 milliamps.
The problem comes when the camera fires.
During active mode, the camera pulls 200 to 800 milliamps. The IR LED burst for nighttime shots spikes to 1.5 amps or more for a full second. That surge kills marginal batteries.
A battery can read a healthy 1.5 volts at rest. Under that sudden load, the voltage crashes to 1.0 volts or below. The camera sees that drop and shuts down instantly.
Temperature makes this worse. At 32°F, alkaline batteries lose about 20 percent of their capacity. At 0°F, they lose half.
The chemical reaction inside the cell slows down. The voltage sags deeper under load. Many cameras that fail on a cold morning work fine on a warm afternoon with the same batteries.
Battery contact condition matters just as much. Corrosion, dirt, or flattened springs create resistance. Resistance steals voltage before it reaches the camera's circuit board.
A dirty contact with 0.5 ohms of resistance can drop your usable voltage below the cut-off threshold even with fresh cells.
The camera's own power management varies by brand. Some cameras have excellent voltage regulation and squeeze every drop from a dying cell. Others cut off early.
The only reliable test is to run a known-good set of batteries.
Step-by-Step Troubleshooting Workflow
Before you run through every option, check your camera's symptoms. The right branch saves you time. Grab a good multimeter.
A generic digital voltmeter will do. You need it to measure voltage under load.
Condition 1: Camera completely dead with no lights and no response
Step 1: Check the battery orientation. A single reversed cell blocks the whole circuit. Verify each battery aligns with the plus and minus markings inside the compartment.
Step 2: Measure voltage at the battery terminals with the multimeter. Set it to DC volts. Touch the probes to the outermost contact points.
If you read below 4.0 volts total for a four-cell camera (1.0 per cell), that set is dead.
Step 3: Test under load. Insert the batteries and press the camera's test button while watching the multimeter. If voltage drops below the camera's cut-off (around 1.0V per cell), the batteries are the problem.
Step 4: Inspect the battery contacts. Look for green or white crusty deposits. That is corrosion from leaking batteries.
Clean it thoroughly with isopropyl alcohol and a cotton swab. Use a small screwdriver to scrape off stubborn crud.
Step 5: Try a known-good set of fresh lithium batteries from a sealed package. If the camera fires up, your original batteries were marginal or dead. If it stays dead, the camera's internal power circuit may have failed.
That calls for manufacturer support or a replacement.
Condition 2: Camera has power but will not take photos
Your camera lights up. Maybe the display works. But it does not trigger.
This often means the voltage is high enough for the display but too low for the flash and motor.
Step 1: Remove the SD card. Try triggering the camera without it. Some cameras behave oddly with a corrupted card.
Format the card in a computer using FAT32.
Step 2: Measure the battery voltage under load right as the camera attempts to take a photo. If it drops below the cut-off, the cells have enough open-circuit voltage to fool you but not enough for full operation.
Step 3: Check the PIR sensor lens for debris, spider webs, or moisture. A blocked sensor prevents triggering regardless of power.
Step 4: If voltage holds steady and the sensor is clean, the issue may be firmware. Check the manufacturer's website for updates. A corrupted firmware can cause intermittent trigger failure.
Condition 3: Batteries drain way faster than expected
You installed fresh batteries. Three days later, the camera shows low battery.
Step 1: Count how many photos the camera actually took. A high volume of triggers drains batteries quickly. Windy days near grass or branches cause false triggers.
Reduce the PIR sensitivity setting.
Step 2: Check the camera's standby current with a multimeter in current mode. Disconnect one battery lead and place the meter in series. Idle draw should be below 0.3 milliamps.
If it is higher, something is staying awake inside the camera.
Step 3: Look for a camera that stays warm to the touch. A warm camera in standby mode means a stuck relay or a short. That will drain any battery overnight.
Step 4: Verify the camera is not in test mode or setup mode. Some cameras stay on full power in setup mode and drain batteries in hours.
Decision Guide
If the camera is completely dead, start with contact cleaning and a fresh lithium test. If it powers up but does not shoot, measure voltage under load. If batteries drain fast, check trigger count and idle current.
Each branch has a simple exit.
The Battery Buyer's Guide (For Trail Cameras, Not Flashlights)
Not all AA batteries work the same in trail cameras. A battery that runs a flashlight for hours may die in a camera in days. The chemistry matters more than the brand.
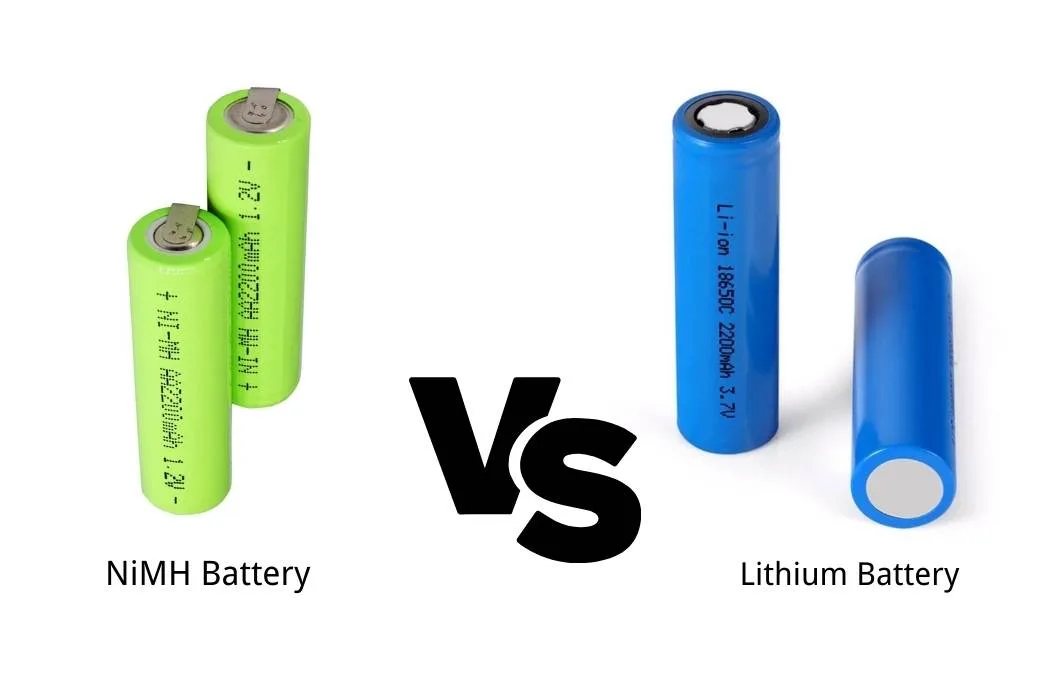
Image source: Web (Bing) / batteryint.com (Web image (fair-use with source credit))
Alkaline vs. Lithium vs. NiMH
| Chemistry | Typical Voltage | Best For | Notes |
|---|---|---|---|
| Alkaline | 1.5V fresh, sags under load | Warm weather, short deployments | Cheap but unreliable in cold. Leaks when old. |
| Lithium | 1.7V fresh, stays flat | Cold weather, long deployments | Costs more but lasts 3 to 5 times longer than alkaline in field use. |
| NiMH Rechargeable | 1.2V nominal, steady discharge | High-traffic areas, warm climates | Lower voltage may trigger early cut-off in some cameras. Great value if you check cameras often. |
Alkaline is the cheapest upfront. A four-pack costs around two dollars. But they leak when they die, ruining contacts.
They also lose voltage fast under load. Many cameras eat alkalines in two weeks in cold weather.
Lithium is the gold standard. Energizer Ultimate Lithium gives roughly 1.7 volts fresh and holds above 1.4 volts under moderate load even at 0°F. They do not leak.
A set can run a camera for 6 to 12 months depending on trigger count. The cost per month is lower than alkaline because you replace them far less often.
NiMH rechargeable is popular for people who check their cameras weekly. Eneloop Pro cells run at 1.2 volts nominal. Some cameras cut off when voltage drops below 1.0 volts per cell.
NiMH batteries start closer to that cut-off threshold. If your camera handles NiMH well, they are the most cost-effective option. If it does not, you get a few weeks of operation before the camera reports low battery.
Our research shows that lithium batteries are the first choice for remote cameras. If you have to use alkaline, treat them as a short-term option and check your camera monthly.
When to go with an external battery pack
External 6-volt or 12-volt battery packs solve the problem entirely. They use larger cells, often lead-acid or LiFePO4, with much higher capacity. A 12Ah external battery can run a camera for a year or more.
External packs require wiring and a weatherproof enclosure. They add bulk. They also add a failure point at the connection jack.
For cameras that stay in one spot for a season, they are the most reliable option. Use a fused connection and heavy gauge wire. A voltage regulator helps protect the camera from over-voltage.
Real-World Mistakes That Kill Batteries (What to Stop Doing)
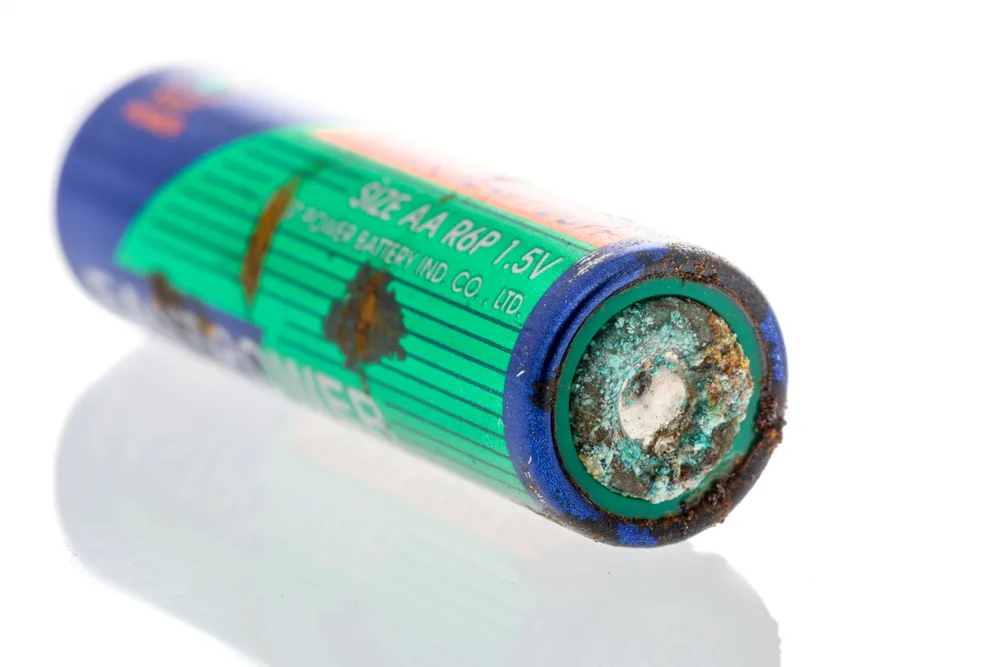
Image source: Web (Bing) / storage.googleapis.com (Web image (fair-use with source credit))
Mixing old and new batteries. This is the most common mistake. A weak cell pulls the voltage of the series string down. The camera sees the low voltage and cuts out even though you put in four fresh cells.
Always replace all batteries at the same time with the same brand and type.
Mixing chemistries. Never put two lithiums and two alkalines in the same tray. The different discharge rates create voltage imbalance. One cell can reverse polarity under load, causing heat and potential leakage.
Leaving dead batteries in the camera. Alkaline batteries leak when they die. The white crust that forms is potassium hydroxide. It eats through metal contacts and ruins the battery tray.
Remove batteries if the camera will sit unused for more than a month.
Using a camera in direct sun. Extreme heat accelerates battery self-discharge. A camera mounted on a south-facing metal post in summer can cook batteries. Shade the camera or use lithium cells rated for higher temperatures.
Ignoring the SD card. A failing SD card can cause the camera to hang, drawing continuous current. The camera may stay locked in a write loop until the battery drains. If your camera dies early, check the card first.
Similar troubleshooting principles apply to other camera power issues.
Not updating firmware. Manufacturers occasionally release firmware updates that fix power management bugs. Several brands have published updates addressing battery drain on older models. Check your camera's support page before assuming hardware failure.
A firmware issue can mimic a dead battery problem perfectly.
Assuming fresh batteries are good. Even new batteries can be defective. A cell that sits on a store shelf for three years has lost capacity. Always test a suspicious set against a known-good lithium set before you declare the camera broken.
A power button issue can also cause similar symptoms, so double-check that the camera actually turns on.
Using a battery pack without testing voltage. External battery pack leads can corrode or snap inside the jacket. Measure voltage at the camera's power plug under load, not just at the battery terminals. A bad connection looks like a dead battery.
FAQ: Quick Fixes to Common Trail Camera Battery Problems
Why do my brand new alkaline batteries die in a week?
Alkaline batteries have a sloping discharge curve. They lose voltage fast under the heavy load of IR flash and image processing. In cold weather below 40°F, capacity drops dramatically.
Switch to lithium for any camera that takes more than 10 photos per day or runs in winter conditions.
Can I use rechargeable batteries in my trail camera?
Yes, but check your camera's voltage tolerance first. NiMH cells output 1.2 volts nominal. Some cameras with a high cut-off threshold (above 1.1V per cell) shut down early with NiMH.
If your camera supports them, Eneloop Pro or Tenergy Centura cells give good performance in warm weather at lower cost per use.
How do I clean corroded battery contacts?
Remove the batteries immediately. Dip a cotton swab in white vinegar to neutralize alkaline corrosion. Wipe away the residue.
Follow up with isopropyl alcohol to remove the vinegar and moisture. Use a small flathead screwdriver to scrape off stubborn crust. Let the compartment dry completely before inserting new batteries.
Will a solar panel fix my battery problems?
A solar panel helps maintain charge for external battery packs. It will not fix a camera with high standby draw or dirty contacts. Most solar panels for trail cameras output 6 volts at low current, suitable for trickle charging a 6V lead-acid pack.
Do not connect a panel directly to AA battery terminals without a regulator.
How often should I change trail camera batteries?
It depends on trigger count and temperature. Lithium batteries in a low-traffic area (under 20 photos per week) can last 6 to 12 months. Alkaline in the same conditions might last 4 to 8 weeks.
Check voltage monthly during the first deployment to establish a baseline for your specific camera and location.
My camera still will not work after trying everything. What next?
Run the diagnostic sequence one more time. Clean contacts. Test with fresh lithium.
Check voltage under load. If the camera still fails, the issue may be internal. Try a factory reset using the camera's reset procedure.
If that does not help, contact the manufacturer with your test results. A dead voltage regulator or failed capacitor requires professional repair or replacement.
Final Take
Power problems in trail cameras almost always trace back to voltage, contacts, or chemistry. A 15 dollar multimeter, a bottle of isopropyl alcohol, and a switch to lithium batteries will solve 90 percent of field failures.
Remember the three-branch workflow. Dead camera means start with orientation and contacts. Camera with display but no photos means measure voltage under load.
Fast drain means check trigger count and idle current.
Do not overthink it. If fresh lithium batteries do not work in a camera with clean contacts, the camera itself has a hardware fault. Replace it.
The time you spend diagnosing a broken camera is time you could spend in the field with a working one. Your trail camera is a tool. Treat the power system like a fuel line, not a mystery.

Similar Posts






























