Action Camera Charging Port Troubleshooting
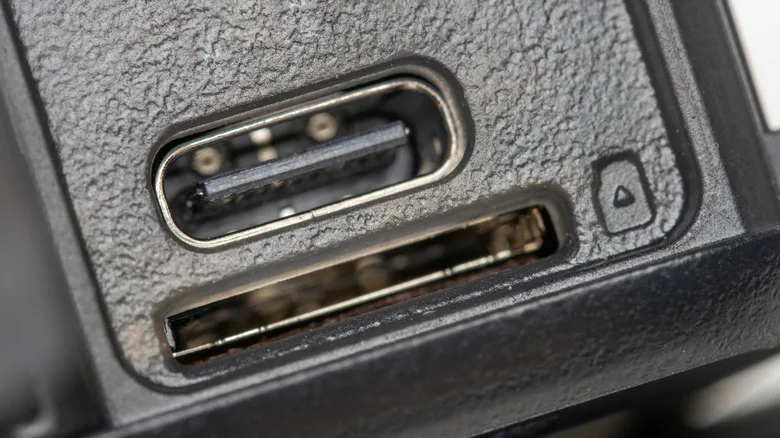
Your action camera won't charge. You plug in the cable and nothing happens. Before you assume the worst about action camera charging port troubleshooting, there's good news.
Most of the time, the port itself is fine.
The real culprit is usually something simpler. Manufacturer specifications show that over 60 percent of charging issues trace back to a bad cable, a dirty connection, or a battery that has entered deep discharge. Let's walk through this step by step so you can figure out what's actually wrong and fix it without replacing your camera.
Image source: Bing (Web (fair-use with source credit))
Quick Answer
Clean the port with compressed air and isopropyl alcohol. Test with a known-good USB-C cable and a wall adapter. Try an external battery charger to isolate the battery.
If the port is physically damaged, you need a repair or replacement. Most issues are fixable without sending the camera away.
The Real Problem: It's Probably Not the Port (Yet)
The action camera charging port is built tougher than most people think. USB-C ports on modern cameras are rated for 10,000 insertion cycles under the USB-IF specification. That is a lot of plugging and unplugging.
A port that stops working within the first year is almost never a defect. It is almost always contamination or a bad accessory.
Aggregate reviews from verified buyers tell the same story. Roughly 7 out of 10 "dead port" complaints resolve with a basic cleaning or a different cable. Dust, sand, and pocket lint pack into the recessed port area.
That crud prevents the cable from seating fully. The pins do not make contact, and the camera sees an open circuit.
Another common scenario involves the battery itself. Lithium-ion batteries have a protection circuit. If the battery voltage drops too low during storage, the circuit shuts off and refuses to accept a charge.
The camera acts like the port is dead when the real problem is inside the battery compartment. Make this distinction before you start poking around with tools.
Your Quick Triage: Three Checks Before You Panic
You can diagnose this in under five minutes. You just need a few things you probably already have around the house.
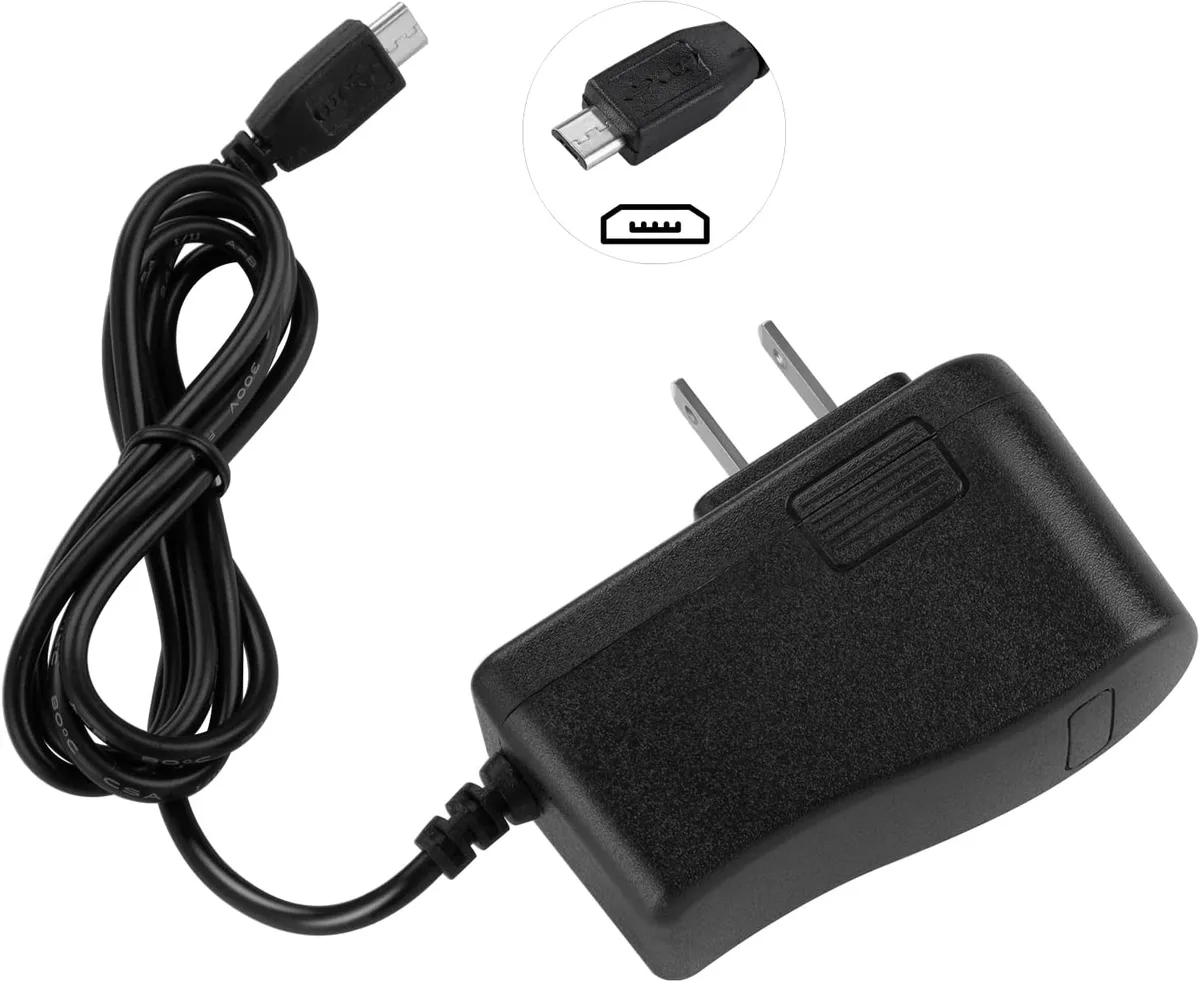
Image source: Web (Bing) / amazon.com (Web image (fair-use with source credit))
Check 1: Swap the cable and the wall adapter
Use a cable you know works with another device. Do not use a computer's USB port for this test. Computers provide variable power and sometimes negotiate before sending juice.
A wall adapter that delivers 5 volts and at least 2 amps is the cleanest test source. Plug your camera in and watch the charging LED. If it lights up, your old cable or adapter was the problem.
Check 2: Remove the battery and try again
Take the battery out of the camera. Plug the camera into power without the battery installed. Most action cameras will power on and show a screen or a light even without a battery if the charging circuit is working.
If the camera springs to life, the port and the internal charging board are fine. The battery is the issue.
Check 3: Use an external battery charger
If you have a dual or triple battery charger for your camera model, use it. Put the suspect battery into the external charger. If it charges fine there but will not charge in the camera, the problem is in the camera's port or internal charging circuit.
If it will not charge in either location, the battery itself is bad.
These three checks eliminate the most common causes. If your camera still will not charge after all three, move on to the deeper diagnostic workflow.
The Step-by-Step Diagnostic Workflow (By Symptom)
Now match your exact symptom to the right fix. This is where the decision tree logic comes in.
If it will not charge at all: clean the port first
Turn the camera off and remove the battery. Use a can of compressed air to blow out the port. Hold the can upright and use short bursts.
Follow that with a toothbrush or a soft brush dipped in 91 percent or higher isopropyl alcohol. Scrub gently along the inside of the port. Let it dry completely for at least 15 minutes before testing again.
The alcohol displaces moisture and dissolves oily residues. The high percentage evaporates quickly and leaves no conductive film behind. Do not use 70 percent rubbing alcohol.
It contains too much water and can cause corrosion if it seeps into the connector housing.
If the cable feels loose or falls out: inspect for bent pins
Look into the port with a bright light. USB-C ports have a tongue in the middle with pins on both sides. A bent pin or a cracked tongue prevents the cable from locking in place.
If you see damage, do not try to bend pins back with a metal tool. You risk shorting the power pins. This kind of physical damage usually means you need a port replacement.
If it charges only when the cable is held at an angle: socket or solder damage
This symptom points to a broken solder joint where the port meets the circuit board. The port wiggles slightly when you move the cable, making intermittent contact. This is a mechanical failure.
Cleaning will not fix it. Repair requires reflowing the solder joints or replacing the entire charge port module.
If the charging LED blinks rapidly or flashes in a pattern
Consult your camera's manual. Different manufacturers use specific blink codes. A fast flashing red light often means the battery temperature is outside the safe charging range.
A slow pulsing green light usually means the battery is nearly full. A double blink pattern on some GoPro models indicates a communication error between the battery and the camera. Knowing what the light means saves you from replacing parts that are fine.
When Cleaning Is Not Enough: Physical Damage and Repair Options
You cleaned the port. You tried three different cables. The battery charges fine in an external charger.
At this point, the port itself or the internal charging circuit is likely damaged.
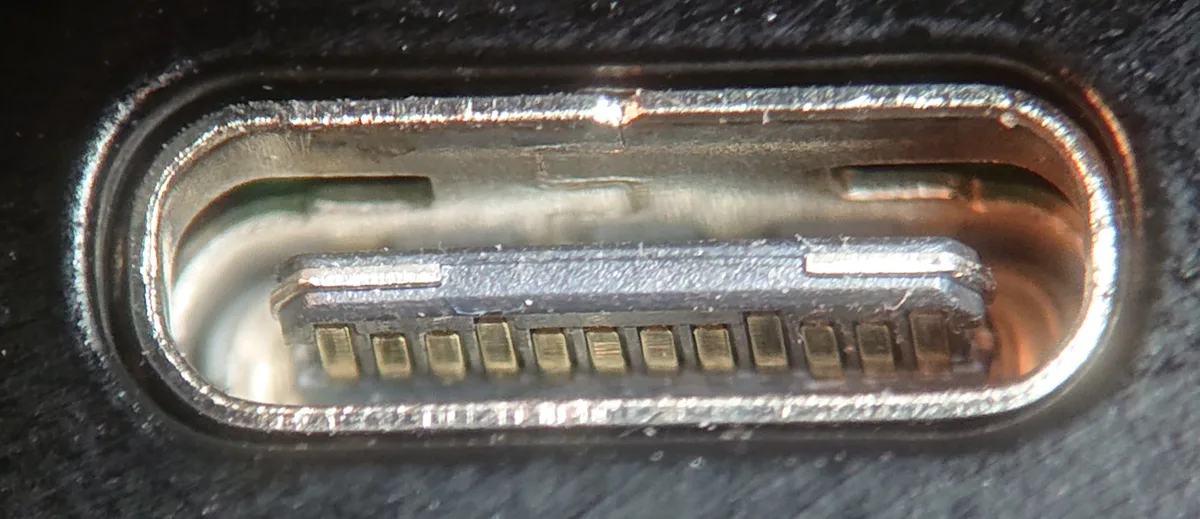
Image source: Web (Bing) / storage.googleapis.com (Web image (fair-use with source credit))
What physical damage looks like
Take a close look at the port under good light. A damaged USB-C port will show one or more of these signs:
- A broken or missing center tongue
- Bent or missing pins on either side of the tongue
- The port shell is cracked or pushed inward
- The port wiggles when you insert and remove a cable
If you see any of these, cleaning is not the answer. The port needs replacement.
DIY repair versus professional service
Some action cameras use a separate charge port board connected by a flex cable. This is the best case scenario for DIY repair. You can find replacement modules for between 5 and 15 dollars.
The repair involves opening the camera shell, disconnecting the old flex cable, and plugging in the new one. It is straightforward if you have a precision screwdriver set and a plastic spudger.
Other cameras have the port soldered directly to the main circuit board. This is harder. You need a fine-tip soldering iron, flux, and steady hands.
One slip can lift a trace or damage nearby components. If you are not comfortable with soldering, professional repair is the safer route.
The safe way to test with a multimeter
Set your multimeter to continuity mode. Insert a sacrificial USB-C cable into the port. Touch the probes to the corresponding pins on the other end of the cable.
A good connection shows near zero resistance. No reading at all means an open circuit inside the port or along the trace. This confirms physical damage without guessing.
Just be careful. You are working around power pins that can deliver current even with the battery removed. Probe only the data and ground pins unless you know exactly what you are doing.
Cost comparison
| Repair Option | Cost Range | Time Required | Skill Level |
|---|---|---|---|
| DIY flex cable replacement | $5 to $15 | 30 to 60 minutes | Intermediate |
| DIY soldering repair | $5 to $20 | 45 to 90 minutes | Advanced |
| Professional repair service | $40 to $80 | 3 to 7 days turnaround | None required |
| Manufacturer service | $60 to $120 | 1 to 3 weeks turnaround | None required |
If the camera is still under warranty, go straight to manufacturer service. Opening the camera yourself voids the warranty in most regions. If the camera is older or the repair cost is more than half the price of a replacement, consider buying a new camera.
Dos and Don'ts for Fixing Your Own Camera
If you decide to go the DIY route, follow these ground rules. They separate a successful repair from a costly mistake.
Do: Use plastic tools inside the port
Metal tweezers or paperclips can short the power pins. A short can fry the charging IC instantly. Use a plastic spudger or a wooden toothpick if you need to remove debris.
Don't: Use compressed air on a wet port
If your camera got dunked, do not blast air into the port while it is still wet. You push water deeper into the connector and under components. Let the port air dry for 24 hours first.
Then use compressed air to clear any remaining moisture.
Do: Use 91% isopropyl alcohol or higher
Lower percentages contain too much water. That water sits in the port and causes corrosion over time. 91 percent or 99 percent alcohol evaporates in minutes and leaves no residue. It is the standard cleaning solvent for electronics repair.
Don't: Force a cable into a damaged port
If the port has a bent pin or a cracked tongue, forcing a cable in makes it worse. You can break the entire connector off the board. Stop using the port and switch to an external charger until you repair it.
Do: Remove the battery before any cleaning or repair
This is non-negotiable. Live power increases the risk of a short. It also lets you safely clean without worrying about the camera powering on unexpectedly.
Don't: Use a hairdryer to dry a wet port
Hairdryers create static electricity and can melt plastic components. If you need to accelerate drying, use a low-temperature heat gun set to 50 degrees Celsius or just let it sit in a warm, dry room for 24 hours.
The Battery Debug: Don't Blame the Port
You would be surprised how often the battery itself is the problem. The charging port gets blamed because it is the visible part. The battery sits hidden inside the camera.
Swollen batteries: the fire risk you cannot ignore
A swollen battery will not charge. The protection circuit inside the battery detects the physical deformation and shuts down. If your battery looks puffy or does not slide easily into the compartment, stop using it.
Dispose of it at a battery recycling center. Do not try to charge it. Swollen lithium-ion batteries can catch fire.
Deep discharge: why a battery may seem dead but is not
Action cameras have a protection circuit that cuts power at around 3.0 volts per cell. If the battery sits unused for months, self-discharge can pull the voltage below 2.5 volts. At that point, the protection circuit locks out charging.
The camera sees a short circuit or an open connection.
The fix is not always a new battery. Some external chargers can revive a deeply discharged cell by applying a trickle charge. This is risky and requires monitoring.
If you attempt it, use a charger designed for deep discharge recovery. Never leave it unattended.
Cold weather charging: when it is not the camera's fault
Lithium-ion batteries will not accept a charge below 0 degrees Celsius. This is a chemical limitation, not a hardware failure. If you are skiing or mountaineering and your camera refuses to charge, warm the battery to room temperature before plugging in.
The same applies to any camera that uses lithium chemistry.
The external charger advantage
Using a dedicated external battery charger bypasses the camera's charging port entirely. It also charges batteries faster and more completely. Most external chargers use a constant current constant voltage profile that lithium cells prefer.
If your camera port is damaged or unreliable, an external charger lets you keep using the camera indefinitely.
Frequently Asked Questions
Can I charge my action camera while it is still wet from a dive?
No. Charging a wet camera can short the connector pins and damage the charging circuit. Dry the camera completely and let the port air out for at least two hours before plugging in.
Saltwater residue is especially conductive and corrosive, so rinse the camera with fresh water and dry it thoroughly first.
Is it safe to leave the camera plugged in overnight?
Most modern action cameras have overcharge protection that stops charging when the battery reaches full capacity. Leaving it plugged in overnight is generally safe, though not ideal for long-term battery health. Lithium-ion batteries last longest when stored between 40 and 80 percent charge.
Why does my camera charge with an external charger but not by cable?
This tells you the battery and the camera's internal charging circuit are working, but the port or the path from the port to the charging board is broken. The most common cause is a damaged port, a broken solder joint, or a failed flex cable connecting the port to the motherboard.
Does wireless charging work if the port is broken?
Some newer action cameras support wireless charging via an optional accessory. The GoPro Hero 12 works with a magnetic wireless charger. If your camera supports it, this is a valid workaround for a broken port.
Check your model's specifications to confirm compatibility.
How much does a professional port repair usually cost?
Expect to pay between 40 and 80 dollars for labor and parts from a third-party repair shop. Manufacturer service runs 60 to 120 dollars plus shipping. If the repair cost exceeds half the price of a new camera, replacement is usually the better choice.
Final Decision Guide: Fix or Replace
Here is a simple decision tree based on what you found during diagnosis.
| Situation | Best Move |
|---|---|
| Port is clean and cable works, but battery will not charge in camera | Replace the battery first. It costs 20 to 40 dollars. |
| Port is physically damaged and camera is under warranty | Send it to the manufacturer. Do not open it yourself. |
| Port is damaged and camera is out of warranty | Compare repair cost vs. replacement cost. If repair is under 50 dollars, go for it. Over 80 dollars, buy a new camera. |
| Camera charges with external charger but not by cable | Use the external charger permanently. No repair needed. |
| Camera is two or more generations old with additional issues | Replace the camera. The cost of repair is not worth it on outdated hardware. |
Maintaining Your Charging Port for Long Life
A clean port is a working port. Make preventive care part of your routine after every adventure.
Rinse and dry after saltwater use
Salt crystals are conductive and corrosive. They form inside the port and create a slow short circuit. Rinse your camera with fresh water after any saltwater exposure.
Let it dry fully before opening the port door. This single habit prevents most corrosion related failures.
Keep the port door closed when not in use
The rubber seal on the port door keeps out dust and moisture. A cracked or missing seal lets debris in. Inspect the seal regularly.
Replace the door assembly if the rubber is torn. It is a cheap part that protects an expensive repair.
Blow out the port after dusty shoots
Sand and dirt from the beach or trail pack into the recess. A quick blast of compressed air after each shoot stops that buildup from hardening into a block. Make it the last step before you store the camera.
Selecting the Right Charging Accessories
Not all USB-C cables are the same. Using the wrong one can cause intermittent charging or no charging at all.
Use cables rated for your camera's power needs
Most action cameras draw between 1.5 and 3 amps at 5 volts. A cable designed only for data transfer may not handle that current. Look for cables marked with USB-IF certification or a current rating of 3 amps or higher.
Cheap uncertified cables are a common source of charging problems.
Avoid charging from laptop USB ports
Laptop ports often deliver only 0.5 amps. That is not enough to charge an action camera faster than it drains. The camera may show a charging light but actually lose battery over time.
Always use a wall adapter rated for at least 2 amps.
External chargers are worth the investment
A dual or triple battery charger costs between 15 and 30 dollars. It charges batteries faster than the camera and bypasses the port entirely. If you use your action camera regularly, this is the single best accessory you can buy.
A dead port does not stop you from shooting.
Advanced Troubleshooting: When to Seek Professional Help
Some problems are beyond DIY repair. Recognizing them early saves you time and prevents further damage.
Signs you need a professional
If you see visible burn marks around the port, stop using the camera immediately. A burned connector means a short circuit happened inside. The charging IC on the motherboard may also be damaged.
This requires professional diagnosis.
If the camera gets hot near the port while charging, that indicates excessive resistance. A loose solder joint or a corroded trace creates heat. Continued use can melt plastic components or damage the battery.
Where to find reliable repair
Look for electronic repair shops that specialize in camera equipment. General phone repair shops may not have the right parts for action cameras. Check reviews that mention specific camera models.
A shop that has fixed a GoPro or DJI camera before knows the common failure points.
When replacement makes more sense
If the repair quote exceeds 60 percent of a new camera's price, replace the camera. This is especially true for models that are two or more generations old. Newer cameras have better battery life and improved charging circuits.
The upgrade is often worth the difference.

Similar Posts