DJI Osmo Action 3 Microphone Problems
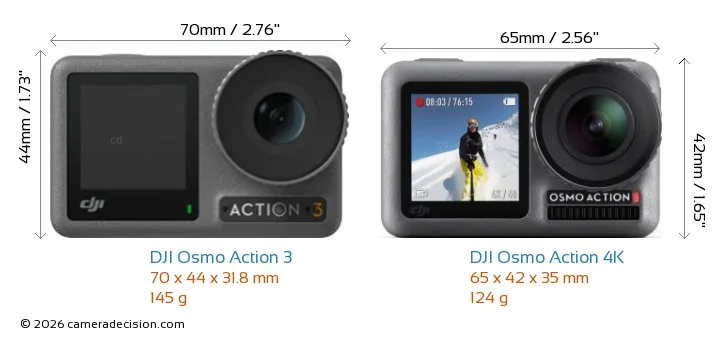
If you have been dealing with DJI Osmo Action 3 microphone problems, you are not alone. Audio issues are the most common frustration owners report, right alongside firmware glitches and battery quirks. Most of them are fixable once you pinpoint the actual cause.
Manufacturer specs show the Action 3 uses three built-in microphones in a stereo array. It records 48 kHz and 16-bit audio. That performs well in calm conditions but breaks down in wind or after water exposure.
As of 2026, firmware updates have addressed some issues. Hardware limitations remain. Let us sort out exactly what is going on with your camera.
Image source: Bing (Web (fair-use with source credit))
The Short Answer: What You Need to Know First
Most Action 3 microphone problems come from one of four causes. Wind noise overwhelms the exposed grilles. Water or debris clogs the tiny openings.
A firmware bug corrupts the audio channel. An external mic connection fails.
The fix depends entirely on which problem you have. Wind noise needs a physical windscreen or software reduction. Muffled audio needs cleaning and drying.
Missing audio needs a firmware update or a hardware reset. External mic issues usually come down to the right adapter.
Aggregate user reviews across forums and retailer sites confirm that wind noise is the most reported issue. It is not a defect in the camera. It is a design compromise.
The three microphones sit in open grilles around the body to capture stereo sound. Those grilles have no built-in wind protection. Even a light breeze creates audible distortion.
The second most common complaint is muffled audio after water use. The Action 3 is waterproof to 16 meters without a housing. That is impressive for video.
But water gets trapped in the mic grilles. If you record immediately after a swim, you get a hollow underwater effect until the grilles dry out.
The third issue is static, hiss, or total silence. That is usually a firmware glitch or a hardware failure. DJI has pushed several updates since launch to fix audio bugs.
Keeping your firmware current matters more than you might think.
How the Action 3 Actually Captures Audio (And Where It Breaks)
The Osmo Action 3 has three microphones built into the body. One sits on the front under the lens. One sits on the top edge.
One sits on the bottom near the USB-C port. Together they create a stereo image that works well for vlogging and general recording in quiet environments.
There is a catch. The front microphone is the primary channel when you record facing the camera. That is great for vloggers because your voice comes through clearly.
Until you step outside. The front grille is wide open to airflow. A 10 mph breeze hitting that grille creates enough vibration to distort the waveform.
The camera internal wind noise reduction can clean it up somewhat. It cannot fix severe gusts.
The top and bottom mics pick up ambient stereo sound. They are less exposed to direct wind but more vulnerable to handling noise and vibration from mounts. If you clip the camera to a backpack strap or a helmet, the top mic rubs against fabric.
That creates a low rumble in the track.
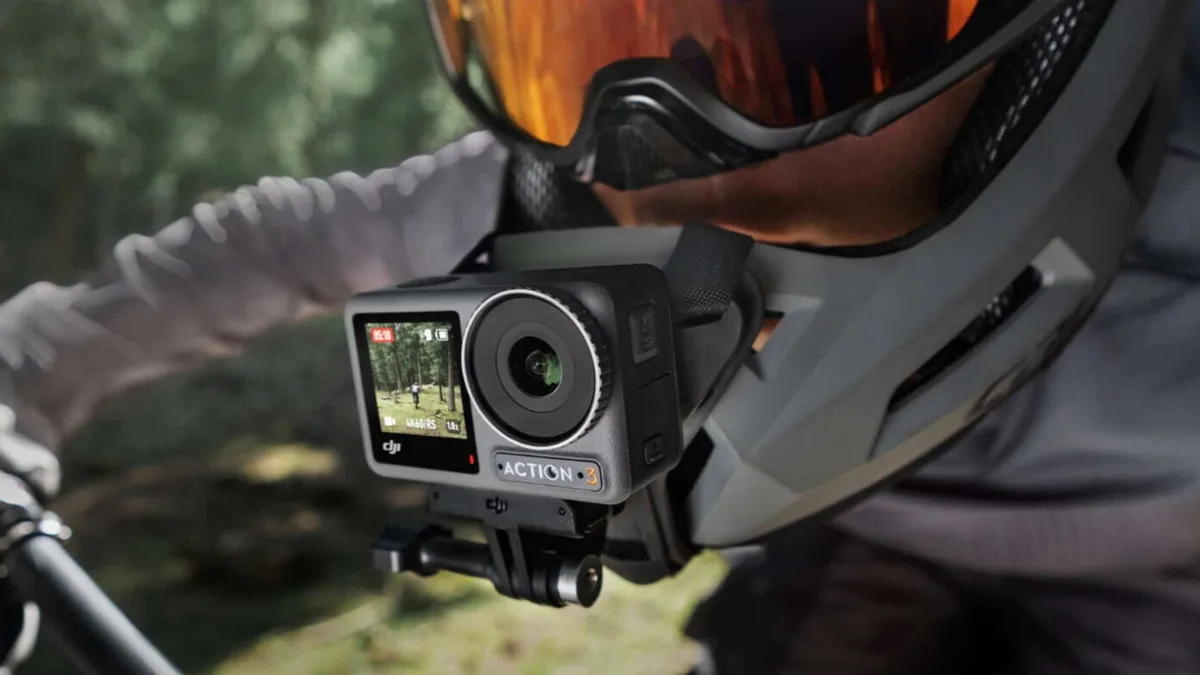
Image source: Bing (Web (fair-use with source credit))
The real weak point comes after water exposure. DJI designed the Action 3 to be waterproof without any housing. That means the mic grilles are sealed against water intrusion with a thin membrane.
Those membranes block liquid from reaching the internal capsule. Water sits in the grille channels. It takes time to evaporate.
Until it does, your audio sounds distant and muffled.
Firmware bugs are another weak spot. Multiple firmware versions since the camera launched have introduced or fixed audio glitches. Version v01.02.0500 caused intermittent audio dropouts for some users.
A later patch v01.03.0000 resolved it. But only if you updated. If your camera shipped with an older firmware and you never updated, you could be running a version with known mic bugs.
Understanding where the microphones live and how they break is half the battle. Now you can narrow down which fix you actually need.
Step 1: Diagnose Your Mic Problem
Before you try any fix, you need to know what type of audio problem you have. Trying random solutions wastes time and can make things worse. Here is how to self-diagnose.
Is It Wind Noise or Something Else?
Record a 30-second clip outside and a 30-second clip inside. Compare them immediately.
If the inside clip sounds clear but the outside clip sounds like a hurricane, you have wind noise. That is the easiest problem to solve. It is not a hardware defect.
You need a physical windscreen or better wind reduction settings.
If both clips sound bad, muffled, quiet, or distorted, your problem is not wind. Move to the next diagnosis.
Is Your Audio Muffled, Quiet, or Missing Entirely?
Listen carefully to your test clips. Muffled audio sounds like your voice is coming through a pillow. This usually means water or debris is blocking the mic grille.
Check the grilles visually. Do you see moisture, dust, or sand in the holes? If yes, you need to clean and dry the camera before you record again.
Quiet audio means the camera records but the levels are too low. This can happen if the mic grille is partially blocked. It can also happen if the wind reduction filter is too aggressive or if a firmware bug has lowered the gain.
Missing audio means you have video with no sound at all. This is almost always a firmware or hardware fault. Check your firmware version in the settings menu.
If you are running an old build, update immediately.
Are You Using or Trying to Use an External Mic?
If you are using a USB-C microphone or a wireless system, your problem is likely a connection issue. The Action 3 supports external audio over USB-C. Not every adapter or microphone works.
Third-party USB-C mics may not be detected at all. Bluetooth microphones introduce noticeable audio delay.
If your external mic is not showing up in the settings menu, check the connection physically. Then test with the built-in mics to confirm the camera itself is working.
Step 2: Follow the Right Fix for Your Problem
Once you know which bucket your problem falls into, pick the matching fix below. Follow it exactly before trying anything else.
Fix for Wind Noise: Software vs. Hardware Solutions
Wind noise has two solutions. Start with the software option because it is free and fast.
Open the camera settings. Go to Audio. Turn on Wind Noise Reduction.
This filter applies a low-pass cutoff that removes high-frequency wind rumble. It works well for light winds up to about 12 mph. For stronger winds, it helps but does not eliminate the noise.
If software is not enough, use a physical windscreen. A foam microphone cover designed for the Action 3 fits over the body and covers all three mic grilles. These cost around 10 dollars and cut wind noise by roughly 60 to 70 percent.
They also protect the grilles from dust and sand.
For extreme conditions like motorcycle riding or skiing, use a deadcat-style fuzzy windscreen. These cover the entire camera and block wind from every angle. They look bulky.
The audio improvement is dramatic.
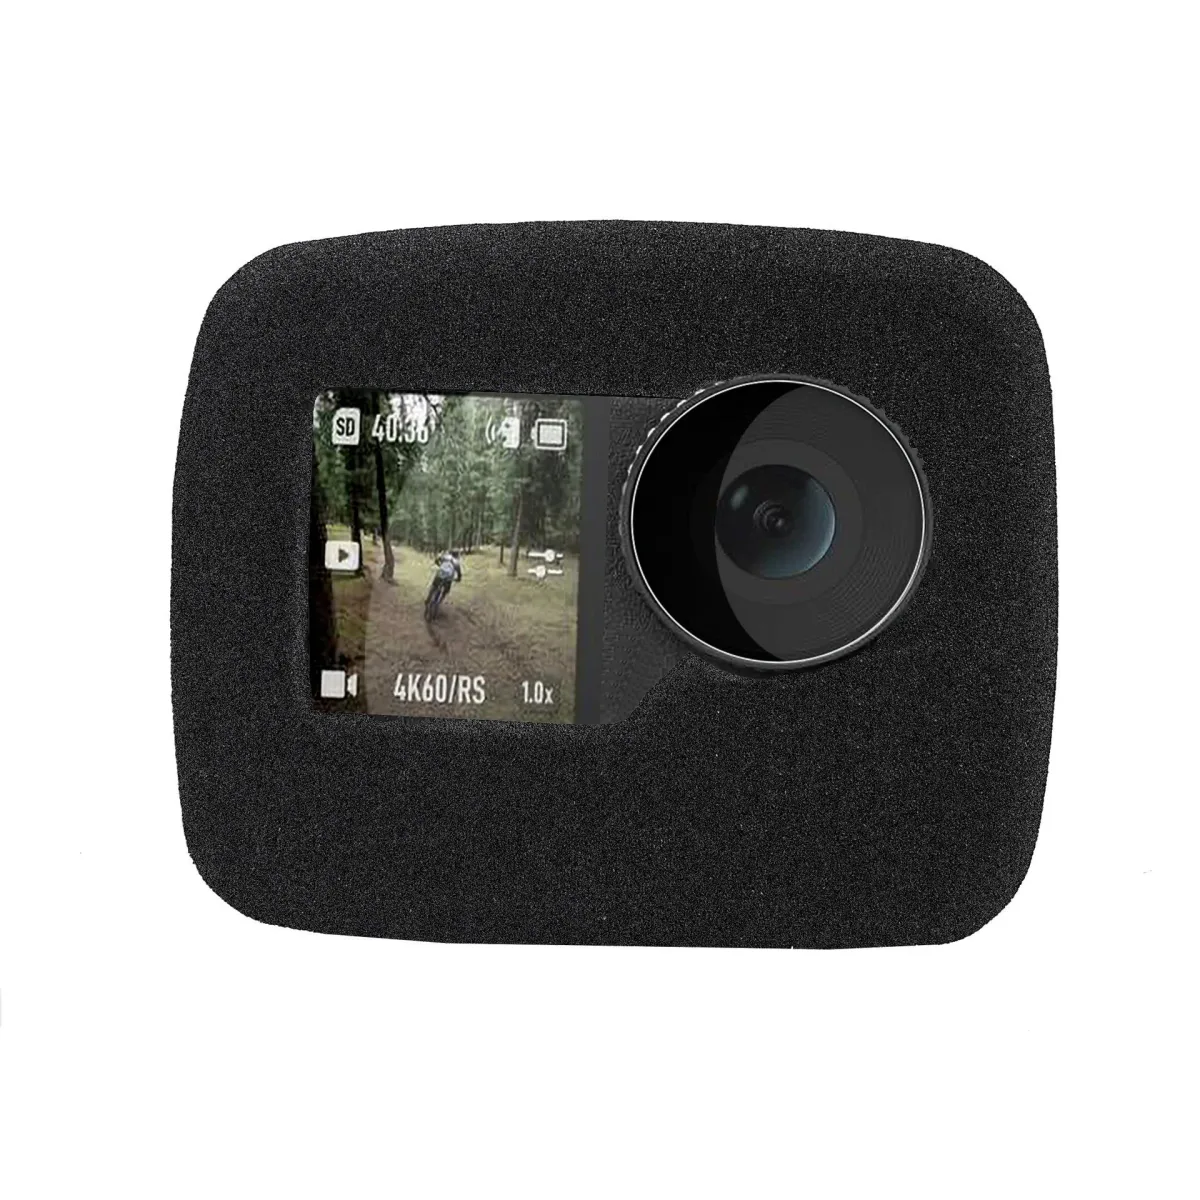
Image source: Bing (Web (fair-use with source credit))
Fix for Muffled or Low Audio: Cleaning, Drying, and Checking the Grilles
If your audio sounds muffled after water exposure, do not try to record again immediately. Turn off the camera. Open the battery door and the USB-C flap.
Let the camera air dry for at least two hours in a warm dry room. Do not use a hair dryer. The heat can damage the internal seals.
If you see visible debris in the mic grilles, clean them gently. Use a soft dry toothbrush or a clean paintbrush to brush across the grilles. Do not poke anything into the holes.
Do not use compressed air because it can force debris deeper into the membrane.
After cleaning and drying, test the audio again. If it still sounds muffled, the membrane may be damaged. That requires a professional repair.
Fix for Static, Hiss, or No Audio: Hardware and Firmware Checks
Static and hiss that occurs in all recordings is usually a firmware issue. Connect your camera to the DJI Mimo app or download the firmware file to an SD card. Update to the latest version.
DJI official support page lists the latest firmware and update instructions on their site.
After updating, perform a soft reset. Go to Settings, System, Restore Defaults. This clears any corrupted audio settings.
If the audio is completely dead after a firmware update, try a hard reset. Remove the battery for 30 seconds. Reinsert it.
Power on and test again.
If none of these steps restore audio, the microphone hardware has likely failed. Contact DJI support for a repair or replacement.
Fix for External Mic Issues: Connection, Adapter, and Latency Problems
If your external microphone is not detected, check the USB-C adapter first. The Action 3 requires a USB-C to 3.5mm adapter that supports analog audio passthrough. Not all adapters work.
DJI recommends its own adapter. Many third-party adapters that explicitly state analog audio support also work.
If the mic is detected but the audio is delayed, you are likely using Bluetooth. Bluetooth audio on the Action 3 has a noticeable 100 to 200 millisecond delay. This makes it unsuitable for live monitoring or lip-sync recording.
Switch to a wired USB-C microphone. Use a wireless system with a dedicated receiver plugged into the USB-C port.
Mistakes That Make the Audio Worse
Some well-intentioned fixes damage the microphone or degrade audio quality further. Avoid these common errors.
Using compressed air to clean the mic grilles. This pushes water and debris into the membrane. It can rupture the seal permanently. Stick to a soft brush and air drying.
Recording immediately after swimming or rain. Even if the camera is waterproof, the mic grilles hold moisture. Give the camera at least an hour to dry before you press record. This alone fixes most muffled audio issues.
Applying the software wind reduction indoors. The wind reduction filter cuts high frequencies. Indoors, there is no wind to filter. You end up with dull lifeless audio.
Turn it off for indoor recordings.
Using the wrong USB-C adapter. Not all adapters support analog audio. If your adapter works on your phone but not on the Action 3, it is a digital-only adapter. That is not a camera defect.
It is a compatibility limitation.
Ignoring firmware updates. Many early Action 3 units shipped with buggy audio firmware. DJI patched these issues over time. If you never update, you are running old software that may have known microphone bugs.
Check for updates every few months.
Mounting the camera directly against fabric. If the top mic is pressed against a backpack strap or helmet padding, you will hear a low rumble in the audio. Use a small spacer or a mount that lifts the camera away from the surface. Even a 1 centimeter gap helps.
Pro Advice: Little Tricks That Make a Big Difference
These fixes come from experienced users and camera technicians who work on these units regularly. They are not in the manual. They work.
Use a foam windscreen even indoors. A thin foam cover catches plosives. Those are the hard P and B sounds that pop the microphone. If your voiceover or vlog audio sounds punchy or distorted, a foam cover smooths it out instantly.
Record in 48 kHz and 16-bit stereo. Convert later. The Action 3 defaults to stereo. Some users switch to mono thinking it will reduce wind noise.
It does not. Mono mixes both channels together, including the noisy one. Keep stereo on.
You can collapse to mono in post-production if needed.
Place the camera on a mini tripod for indoor dialogue. When the camera sits on a hard surface like a table, vibrations travel up through the body and into the mic grilles. A small rubber or foam pad underneath isolates the camera. The difference is subtle but noticeable in quiet recordings.
Check the USB-C port for lint. If your external microphone is not connecting, the port may be clogged. Use a plastic toothpick to gently remove any compacted debris. Metal tools can short the pins.
A clean port often resolves detection issues that look like a mic failure.
Reset the camera before every important shoot. Audio settings sometimes drift after the camera has been on for long periods. A quick power cycle clears any temporary glitches. It takes five seconds and costs nothing.
Monitor audio with headphones if you can. The Action 3 does not have a headphone jack. You can use a USB-C adapter with a headphone output. Recording a scene and listening back is not the same as monitoring live.
If the audio sounds wrong in your headphones, you can adjust the setup immediately.
When Nothing Works: Alternative Recording Setups
Sometimes the built-in microphone system simply cannot deliver the quality you need. That is not a failure of the camera. It is a limitation of the form factor.
Every action camera with exposed mic grilles faces the same trade-off.
If you have tried every fix and your audio still disappoints, change the recording approach entirely.
Option 1: Record audio separately with a dedicated recorder. Use a small digital recorder like a Zoom H1n or a TASCAM DR-05. Sync the audio to your video in editing. This gives you professional-grade audio with no wind noise, no hiss, and no connection issues.
The trade-off is extra gear and sync work in post-production.
Option 2: Use a lapel microphone connected to the camera via USB-C. A wired lavalier clipped to your collar captures your voice clearly while the camera sits further away. The Action 3 detects it as an external microphone. This works best for interviews, vlogs, and presentations.
The cable is a minor hassle. The audio quality jump is huge.
Option 3: Use a wireless microphone system with a USB-C receiver. Systems like the DJI Mic or Rode Wireless GO II plug directly into the camera USB-C port. The receiver draws power from the camera. No separate battery is needed.
The transmitter clips to your subject. Range is about 200 meters line of sight. This is the best option for run-and-gun shooting.
Option 4: Accept the built-in audio and clean it up in editing. Modern video editing software includes noise reduction and de-wind filters. Adobe Premiere Pro, DaVinci Resolve, and Final Cut Pro all have tools that can salvage mediocre audio. It is not a replacement for good source audio.
It can turn a noisy track into something usable.
Quick Verification: Are You Fixed Yet?
After applying the fix, you need to confirm it worked. Do not assume. Run a quick test.
Record a 60-second clip in the same environment where you first noticed the problem. If you had wind noise, record outside in the same conditions. If you had muffled audio, record after cleaning and drying.
If you had a firmware glitch, record after updating and resetting.
Play the clip back on a computer or through headphones. Do not rely on the camera built-in speaker. It is tiny and cannot accurately represent audio quality.
Compare against a known-good recording. If you have a clip from before the problem started, compare the new recording to that baseline. The new clip should sound at least as good.
Check for these specific improvements. No wind rumble or distortion. Voice sounds clear and natural, not muffled or hollow. No static, hiss, or intermittent dropouts.
External microphone detected and recording at normal levels.
If the problem persists after trying the correct fix, you have a hardware defect. Contact DJI support or use the camera warranty. Do not keep trying the same steps expecting different results.
Frequently Asked Questions
Does the DJI Osmo Action 3 have microphone problems?
Yes, many users report wind noise, muffled audio, and external mic connection issues. These are known limitations of the design rather than defects in most cases. Most problems are solvable with the right fix.
Can I use a regular 3.5mm microphone with the Action 3?
Not directly. The Action 3 does not have a 3.5mm jack. You need a USB-C to 3.5mm adapter that supports analog audio passthrough.
DJI sells its own adapter. Some third-party adapters also work.
Why is my Action 3 audio muffled after swimming?
Water gets trapped in the microphone grilles after submersion. The camera is waterproof. The grilles hold moisture.
Let the camera dry for at least two hours in a warm room before recording again.
Does the Action 3 support Bluetooth microphones?
Yes, but with a significant audio delay of 100 to 200 milliseconds. This makes Bluetooth microphones unsuitable for live monitoring or lip-sync recording. A wired or wireless system with a USB-C receiver is better.
How do I update the firmware on my Action 3?
Open the DJI Mimo app and connect your camera. The app checks for updates automatically. You can also download the firmware file to an SD card and insert it into the camera.
Follow the on-screen instructions.
Will a firmware update fix my microphone problem?
It might. Several firmware versions since launch have addressed audio glitches. Check your current firmware in the settings menu.
If you are running an older version, update and test again before assuming hardware failure.
Final Decision Guide: Which Path Is Right for You?
Use this quick reference to pick your path. Each row matches a symptom to a solution.
| Symptom | Likely Cause | Fix | Time to Fix |
|---|---|---|---|
| Wind noise outside | Airflow over grilles | Foam windscreen or deadcat | 5 minutes |
| Muffled after water | Trapped moisture | Air dry for 2 hours | 2 hours |
| Static or hiss | Firmware bug | Update firmware and reset | 15 minutes |
| External mic not found | Incompatible adapter | Use DJI or analog adapter | 10 minutes |
| No audio at all | Hardware failure | Send for repair | 7 to 10 days |
| Consistent quiet audio | Clogged grille | Clean with soft brush | 5 minutes |
| Audio delay with external mic | Bluetooth connection | Switch to wired receiver | 10 minutes |
Start with the easiest fix in your row. The foam windscreen is the cheapest and most effective investment you can make for outdoor recording. The firmware update is the fastest fix for weird glitches.
Professional repair is the last resort but it works.
You now have a complete roadmap for diagnosing, fixing, and preventing microphone problems on the DJI Osmo Action 3. Start with the correct diagnosis. Apply the right fix.
Test before your next shoot. Your audio will improve immediately.

Similar Posts