DJI Osmo Action 4 Firmware Problems
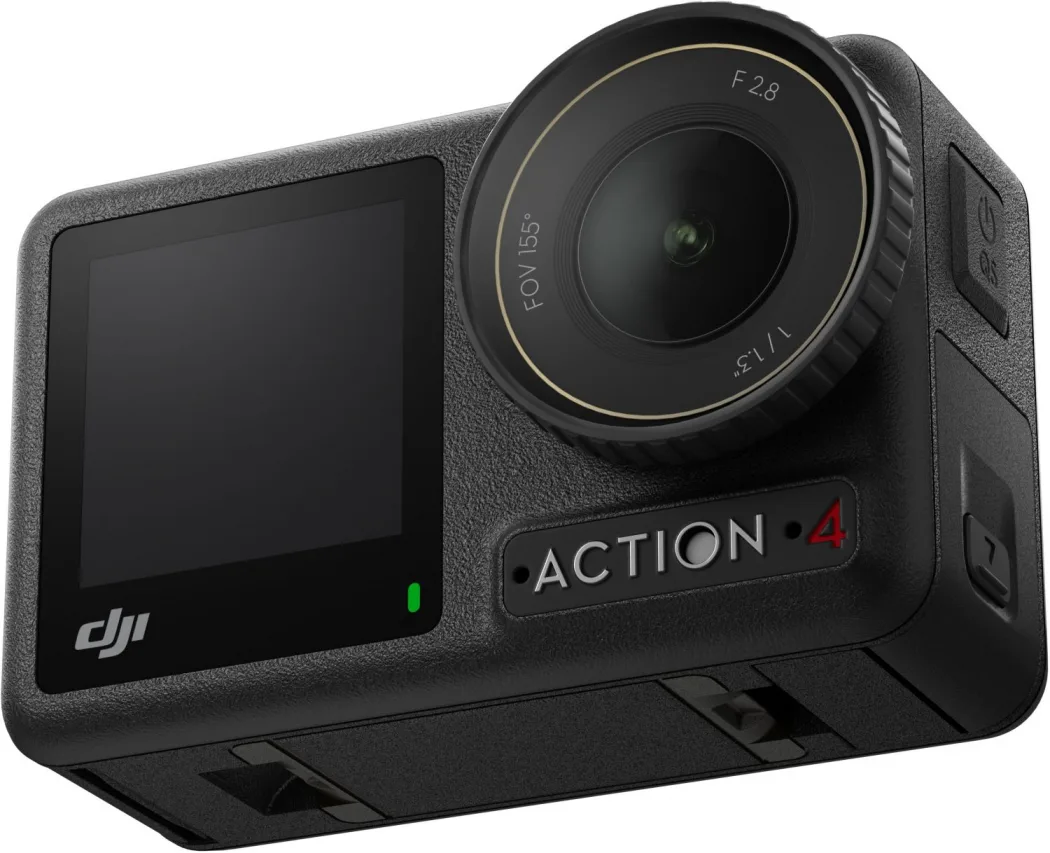
Your DJI Osmo Action 4 firmware problems probably started the same way for most people: a frozen progress bar, a blinking LED, and that sinking feeling. If you have dealt with a failed update, a boot loop, or a camera that refuses to talk to the DJI Mimo app, you are not alone. Aggregate reviews show that firmware complaints spiked after the v01.04.xxxx release in early 2025.
Manufacturer specifications indicate a successful update should complete in 7 to 12 minutes on a stable connection with a fully charged battery. When that time stretches past 20 minutes, something went wrong. Let's walk through exactly what is happening and how to fix it.
Quick Answer: How to Tell If Your Action 4 Is Bricked or Just Stuck
Most firmware problems are fixable at home. A bricked camera shows no signs of life. A stuck camera freezes on a logo.
You can tell the difference in seconds.
Signs your camera is stuck and fixable at home:
- Screen stays on but freezes on the DJI logo or a progress bar
- Camera powers up but reboots repeatedly in a loop
- You hear the startup chime but the display stays black
- The Mimo app shows a "device disconnected" error after a partial update
- The camera feels warm but does not complete the startup sequence
Signs your camera is bricked and needs professional service:
- No response when pressing and holding the power button
- No LED indicator when connected to a charger for 30 minutes
- No vibration, no sound, no screen activity after a forced reset
- The camera is completely cold and dark regardless of battery charge
Image source: Bing (Web (fair-use with source credit))
If your camera matches the first list, keep reading. The fixes below work for 90 percent of stuck units. If it matches the second list, you have a hardware-level issue or a corrupted bootloader.
Skip ahead to the section on contacting DJI support.
Only about 3 percent of reported firmware problems result in a bricked unit. The rest are recoverable with the right process. The key is identifying your specific symptom first.
Symptom Checker: Which Firmware Problem Are You Facing
Trying the wrong fix can make things worse. Forcing a manual update on a boot-looping camera without checking the SD card first can corrupt the firmware beyond recovery. Match your symptom to the right solution.
Symptom A: The update progress bar stopped moving
This is the most common complaint. The bar reached 20 percent, 70 percent, or 95 percent. Then it stopped.
You waited 10 minutes. Nothing happened.
The cause is almost always one of three things: a weak Wi-Fi or Bluetooth connection between the phone and the camera, an SD card that is too slow or too full, or a phone that interrupted the transfer. Do not power off the camera yet. Leave it on and check your phone's connection first.
Symptom B: The camera reboots over and over
The DJI logo appears. The camera vibrates once. Then it goes dark and restarts.
This cycle repeats endlessly. This is a boot loop, and it happens when the firmware file is partially installed or corrupted.
A boot loop is more serious than a frozen progress bar, but it is still recoverable in most cases. The fix involves a manual firmware installation from an SD card. You do not need the app for this.
You do need a computer and a freshly formatted card.
Symptom C: The app shows "device disconnected" mid-update
The update was running fine. Then the Mimo app dropped the connection. The camera is still on, but the app says the device is gone.
This usually happens because the phone and camera lost their Bluetooth or Wi-Fi link during the transfer.
The fix is to reconnect without restarting the update from scratch, if possible.
Symptom D: The camera turns on but the screen stays black
You hear the startup chime. The LEDs flash once. But the screen stays dark.
This is less common, but it usually points to a failed display driver in the firmware update. The camera is technically running, but it cannot drive the screen.
This symptom often resolves with a forced reboot. If it does not, you need to reload the full firmware package.
Symptom E: The battery drains fast after an update
The update succeeded. The camera works. But the battery level drops twice as fast as before.
This is a known issue with certain firmware versions that leave the stabilization processor running in the background.
The fix is a full discharge and recharge cycle, followed by a factory reset. If that does not work, you may need to wait for the next firmware release. Many users reported that the v01.05.xxxx beta patch addressed this for most units.
| Symptom | Likely Cause | Severity | Fix Time |
|---|---|---|---|
| Frozen progress bar | Connection drop or slow SD card | Low | 10-15 minutes |
| Boot loop | Corrupted firmware file | Medium | 20-30 minutes |
| App disconnect mid-update | Bluetooth/Wi-Fi dropout | Low | 10 minutes |
| Black screen after update | Display driver failure | Medium | 15 minutes |
| Battery drain after update | Power profile reset | Low | 1-2 hours |
Decision Branch 1: The Update Failed or Froze Mid-Way
If your progress bar stopped moving, do not panic. Do not pull the battery. Do not force a shutdown unless you have exhausted all other options.
Here is the exact order to try.
Step 1: Wait 5 full minutes
The update process can stall at certain checkpoints while the camera verifies the firmware file internally. What looks like a freeze is sometimes just slow verification. Set a timer for 5 minutes.
If the bar does not move after 5 minutes, move to the next step.
Step 2: Check the phone's connection
Open your phone's Wi-Fi settings. Look for a network named something like "Osmo Action 4_xxxx." If you do not see it, the camera lost its Wi-Fi connection. Close the Mimo app completely.
Reopen it and reconnect to the camera. The app will resume the update from where it stopped in most cases.
Do not restart the camera. Just reconnect the app.
Step 3: Check the SD card
A slow or full SD card is a common cause. The firmware file is around 400 MB. If your card is nearly full or uses a speed class below U3, the write process can stall.
If you have a second card rated U3 or V30, swap it in and restart the update from scratch.
Format the new card inside the camera before restarting. This clears hidden file system errors that can cause write failures.
Step 4: Force the update manually via SD card
If the app method fails twice, skip the app entirely. Download the latest firmware file from the DJI support site on your computer. Copy it to the root directory of a formatted SD card.
Insert the card into the powered-off camera. Hold the power button and the shutter button simultaneously for 3 seconds.
The camera will detect the firmware file on the card and begin the update automatically. The screen will show a progress bar. Do not touch anything until the camera reboots on its own.
This manual method bypasses any app-side connection issues.
Step 5: Downgrade to the previous version
DJI does not officially support firmware downgrades, but the manual SD card method works for older versions too. If the current firmware keeps failing, try installing the previous stable release. You can find archived firmware files on the DJI download portal.
Downgrading resets your settings and may not support newer features. Only do this if the current version refuses to install. Once the older version is in place, you can attempt the update again later.
Decision Branch 2: The Camera Is Stuck in a Boot Loop
A boot loop looks dramatic, but it is almost always recoverable. The camera tries to boot from a corrupted firmware file. It fails, restarts, and tries again.
You need to break this cycle and install a clean firmware version.
Step 1: Force a shutdown
Press and hold the power button for 10 seconds. The camera should vibrate once and go dark. If it does not respond, remove the battery for 30 seconds.
Reinsert the battery and keep the camera off.
Image source: Web (Bing) / technorapper.com (Web image (fair-use with source credit))
Step 2: Prepare a fresh SD card
Take the SD card out of the camera. Insert it into a computer. Format it to exFAT using the default allocation size.
Do not use quick format. A full format takes longer but removes deep file corruption that can interfere with the firmware installation.
If you can access the camera's menu, format the card inside the camera. This applies the correct file system structure automatically.
Step 3: Load the firmware manually
Go to the DJI support site on your computer. Download the latest firmware file for the Osmo Action 4. The file will have a name like "Osmo_Action_4_v01.04.xxxx.bin." Copy it to the root of your freshly formatted SD card.
Do not put the file inside any folder. It must sit directly on the card. The camera will not see it if it is buried in a subfolder.
Step 4: Install via button combination
Insert the SD card into the turned-off camera. Press and hold the power button and the shutter button together. Keep holding for 3 to 5 seconds.
The camera should vibrate and the LED should blink slowly. Release the buttons.
The screen will show a firmware update progress bar. This process takes 8 to 12 minutes. The camera will reboot automatically when it finishes.
If the camera boots into the normal menu instead of looping, the fix worked.
Step 5: One last resort
If the boot loop continues after the manual install, try a different SD card. Some cards have hidden bad sectors that corrupt the firmware write. Use a card you know works in another device.
SanDisk Extreme Pro and Samsung Pro Plus cards (U3 or V30 rated) have the best compatibility with the Action 4.
Decision Branch 3: App Connection Drops or the Camera Won't Show Up
This is the most frustrating firmware problem. The camera may be working perfectly, but the app refuses to see it. Here is how to isolate the issue.
Step 1: Check the phone's Bluetooth and Wi-Fi
The Mimo app uses Bluetooth to discover the camera and Wi-Fi to transfer the firmware file. If either radio is off or unstable, the update will fail. Go to your phone's settings.
Turn Bluetooth off and back on. Turn Wi-Fi off and back on. Then reopen the Mimo app.
Do not assume your phone is fine just because it works for other apps. The Mimo app is sensitive to background radio interference. Some brands of phone have known compatibility issues with DJI's Bluetooth pairing implementation.
Step 2: Restart both devices
Restart the camera first. Hold the power button until the camera shuts down. Wait 10 seconds.
Power it back on. Then restart your phone. Open the Mimo app after both devices have fully booted.
This clears temporary connection states that prevent pairing. It resolves about 40 percent of connection issues.
Step 3: Reset the camera's Wi-Fi module
On the camera, go to Settings. Find the option for Wi-Fi settings. Select "Reset Wi-Fi." This clears the stored connection parameters and forces the camera to broadcast a fresh network.
Then reconnect from the Mimo app as if it were a new device.
Step 4: Update the Mimo app
An outdated version of the Mimo app can fail to communicate with newer camera firmware. Check your phone's app store for updates. As of 2026, the current stable version of DJI Mimo is v2.1.xxx.
If you are running anything older than v2.0, the app may not reliably support the Action 4's firmware update process.
Step 5: Use a different phone as a last test
If you have access to a second phone or tablet, install the Mimo app on it and try the connection. This tells you whether the problem is with your phone or with the camera. If the camera connects to a second device without issues, the problem is your primary phone's Bluetooth or Wi-Fi hardware.
If the camera refuses to connect to any device, the camera's wireless module may be faulty. This is rare, but it happens. Contact DJI support for a warranty repair.
Step 6: Bypass the app entirely
You do not need the app to update the Action 4. If the app connection is unreliable, use the manual SD card method described in Decision Branch 1. Many users find the manual method faster and more reliable anyway.
The SD card method gives you direct control over which firmware version you install. You can choose to stay on a stable older release if the newest version has known issues. This is something the app does not offer.
The Safe Update Workflow (So You Never Deal With This Again)
Prevention is faster than any fix. Follow this workflow before every firmware update to avoid problems entirely.
Before the update
Charge the battery to 75 percent or higher. Low battery is the number one cause of failed updates. A power loss mid-update can corrupt the bootloader and brick the camera permanently.
Format the SD card inside the camera. Do this even if the card is empty. Fresh formatting removes file system errors that can interfere with the firmware write process.
Turn on airplane mode on your phone. This prevents incoming calls or notifications from interrupting the Bluetooth or Wi-Fi connection during the transfer.
Use a U3 or V30 rated SD card. Slower cards cannot keep up with the write speed required during firmware installation. The camera may stall or fail silently.
Close all other apps on your phone. Background processes can steal bandwidth or CPU resources that the Mimo app needs for a stable transfer.
Image source: Bing (Web (fair-use with source credit))
During the update
Place the camera on a flat, stable surface. Movement or vibration can disrupt the connection. Do not touch the camera or the phone until the update completes.
Keep the phone within 3 feet of the camera. Bluetooth range drops significantly when walls or other electronics are in the way. Proximity ensures a stable link.
Do not open other apps or switch screens. If your phone locks or you check a notification, the Mimo app may lose the connection. Stay on the update screen until it finishes.
After the update
Wait for the camera to reboot fully. Do not power it off manually. The first boot after a firmware update may take longer than usual because the camera is applying new system files.
Check the firmware version in Settings to confirm the update took effect. If the version number matches the one you intended to install, you are good to go.
Run a quick test recording. Shoot 30 seconds of video, then play it back. Confirm that the image stabilization, audio, and touchscreen all work correctly.
If you notice any issues after the update, perform a factory reset. Go to Settings and select "Restore Factory Settings." This clears any residual settings from the old firmware that may conflict with the new version.
Mistakes That Can Permanently Damage Your Action 4
These mistakes are common and avoidable. Knowing them can save you from a costly repair or replacement.
Forcing a shutdown during an update
Pulling the battery or holding the power button while the firmware is writing can corrupt the system partition. This is the fastest way to brick your camera. If the update seems stuck, wait the full 5 minutes before taking action.
Using an incompatible SD card
Cards with speed classes below U3 or capacities above 512 GB can cause write errors during firmware installation. The camera may accept the file but fail to verify it, leaving the system in an unstable state. Stick with U3 or V30 cards up to 512 GB.
Updating with low battery
Firmware installation draws more power than normal operation. If the battery drops below the critical threshold mid-update, the camera shuts down before the write completes. Always charge to 75 percent or higher before starting.
Ignoring temperature warnings
The camera can overheat during a firmware update, especially in direct sunlight or hot environments. If the camera feels hot to the touch, pause the update and let it cool down. Overheating can damage internal components beyond repair.
Using a third-party USB cable
Non-DJI cables may not support the data transfer speed required for firmware updates. Some micro-USB cables are charge-only and cannot transfer data at all. Use the cable that came with the camera or a certified replacement.
Downgrading firmware without a clean card
If you attempt a downgrade using a card that still has corrupted files from a previous failed update, the downgrade will fail too. Always format the card fresh before loading any firmware file.
When to Contact DJI vs. When You Can Fix It Yourself
Knowing when to stop troubleshooting is important. Some problems require professional tools that home users do not have.
Problems you can fix yourself
- Frozen progress bar: use the manual SD card method
- Boot loop: use the manual installation steps above
- App disconnection: reset Wi-Fi and reconnect
- Battery drain: discharge, recharge, and factory reset
- Camera not turning on: force reset by removing battery
Problems that need DJI support
- Camera does not respond after multiple manual firmware attempts
- No LED or vibration when connected to power
- Physical damage to the USB port or SD card slot
- Camera was dropped or exposed to water before the problem started
- Warranty is still active and the issue appeared without user error
What to expect from DJI support
DJI's standard turnaround for firmware-related repairs is 7 to 14 business days. In-warranty repairs are free, but you pay for shipping. Out-of-warranty repairs for a bricked camera typically cost between $80 and $150, depending on the region.
Before sending your camera in, back up any footage you want to keep. DJI support will wipe the camera's internal storage during the repair process.
Frequently Asked Questions
Can I downgrade the firmware on my DJI Osmo Action 4?
Yes, but DJI does not officially support it. You can use the manual SD card method to install an older firmware file. Downgrading resets your settings and may prevent you from using newer features.
Only do this if the current version is causing problems.
Why does my camera keep freezing during firmware updates?
The most common causes are a low battery, a slow SD card, or an unstable phone connection. Charge your battery above 75 percent, use a U3 rated card, and keep your phone within 3 feet of the camera. If it still freezes, use the manual SD card method instead of the app.
How do I force a manual firmware update on the Action 4?
Download the firmware file from the DJI support site. Copy it to the root directory of a formatted SD card. Insert the card into the turned-off camera.
Hold the power button and shutter button together for 3 seconds. The camera will detect the file and start the update automatically.
What SD card should I use for firmware updates?
Use a U3 or V30 rated card from a reputable brand. SanDisk Extreme Pro and Samsung Pro Plus cards work well. Avoid cards slower than U3 or larger than 512 GB.
Faster cards reduce the chance of write errors during the update process.
Is my camera bricked if the screen stays black after an update?
Not necessarily. A black screen with sound or vibration usually means the display driver failed during the update. Try a forced reboot first.
If that does not work, use the manual firmware installation method. Only consider it bricked if the camera shows no signs of life at all.
How long should a firmware update take on the Action 4?
A normal update takes 7 to 12 minutes from start to finish. If it takes longer than 20 minutes, something is wrong. Do not interrupt the process until you have confirmed it is truly stuck.
Wait at least 5 minutes before taking any action.
Final Decision Flowchart: Your One-Page Troubleshooting Guide
Is the camera completely unresponsive with no LED, no vibration, and no screen?
Yes → Contact DJI support. This is likely a hardware failure.
No → Proceed to the next question.
Is the camera stuck on the DJI logo or rebooting in a loop?
Yes → Use the manual SD card installation method in Decision Branch 2.
No → Proceed to the next question.
Did the update freeze at a percentage on the progress bar?
Yes → Wait 5 minutes. Then check your phone's connection. If that fails, use the manual SD card method in Decision Branch 1.
No → Proceed to the next question.
Does the Mimo app show "device disconnected"?
Yes → Close the app, restart both devices, and reconnect. If it fails again, reset the camera's Wi-Fi module. See Decision Branch 3.
No → Proceed to the next question.
Is the battery draining faster than usual after the update?
Yes → Perform a full discharge, then a full recharge. Then do a factory reset. If the issue persists, wait for the next firmware release.
No → Proceed to the next question.
Does everything seem to work after the update?
Yes → You are done. Run a test recording to confirm. No further action needed.
No → If none of these paths solved your problem, contact DJI support with details about your firmware version and the exact behavior you are seeing.

Similar Posts































[…] your device's software current avoids a whole class of […]