DJI Pocket 3 How to Use as Webcam
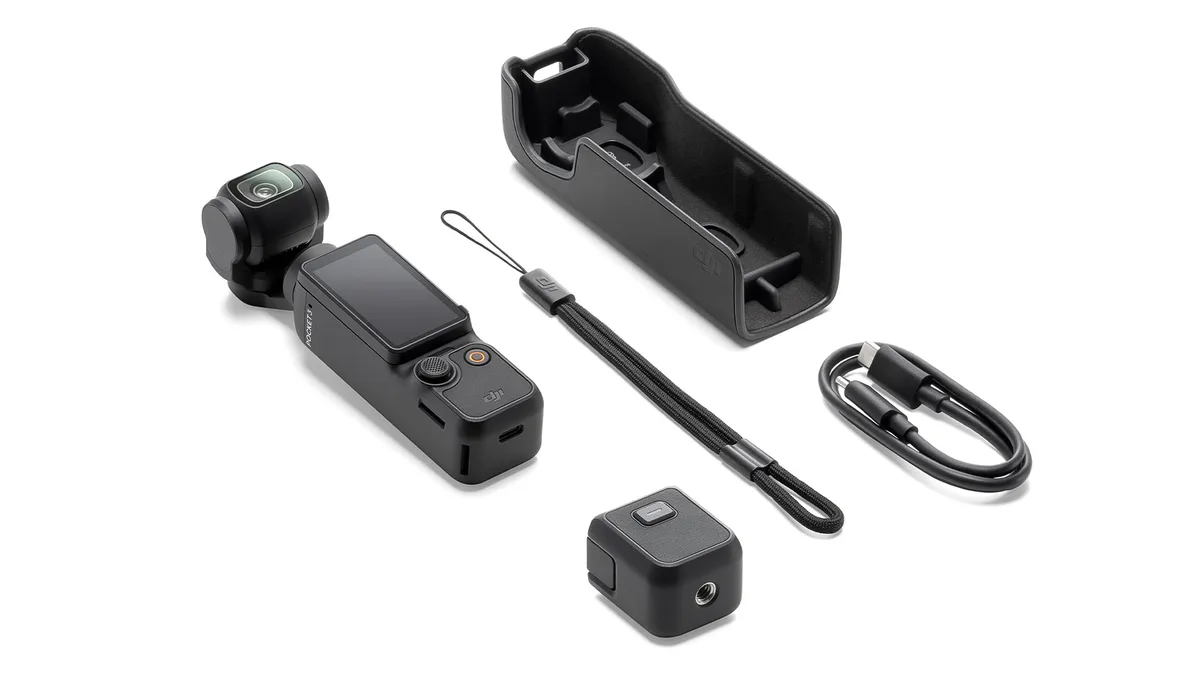
Your laptop's built-in webcam is probably holding you back. If you own a DJI Pocket 3, using it as a webcam is a much better alternative. That compact 4K camera in your pocket can make you look like a professional streamer or remote worker.
With a 1-inch CMOS sensor that captures more light than typical webcams, the Pocket 3 outputs clean 4K video at 30 frames per second. That is a major upgrade from the 720p or 1080p cameras built into most laptops. But getting it running smoothly requires understanding how webcam mode actually works.
Image source: Bing (Web (fair-use with source credit))
The Frustration That Led Me Here
You have probably sat through meetings where your own video feed looked grainy. Shadows are blown out. Highlights are clipped.
The fixed lens makes everything look slightly off.
Laptop cameras have three core problems. They use tiny sensors that cannot handle anything but perfect overhead lighting. They use fixed focus, so you are blurry if you lean in or sit back.
They have no stabilization, so every small movement looks jittery.
The Pocket 3 flips all three. Its 1-inch sensor handles dim rooms without looking noisy. The gimbal keeps your face steady even if you shift in your chair.
The autofocus tracks you moving around the frame.
But here is the catch. The camera was not designed for webcam duty out of the box. It needs a specific connection method and the right software.
You also need to know about the audio limitation. Skip those steps, and you will waste an hour plugging cables in and out while your colleagues wait.
Quick Answer
Connect the Pocket 3 to your computer with a USB-C data cable. Open the DJI Mimo app on your desktop. Switch the camera to webcam mode on the touchscreen.
Your computer will see it as a standard UVC webcam. Audio requires a separate microphone.
How Webcam Mode Actually Works
The Pocket 3 uses the USB Video Class (UVC) standard. That is the same protocol used by almost every USB webcam on the market. It means you do not need special drivers.
Plug it in, and your computer recognizes it as a video input device.
Here is the fine print. UVC support on macOS is built into the operating system. Plug the camera in, select it in Zoom or OBS, and it works.
On Windows, UVC is also supported. But the camera's webcam mode is only activated through the DJI Mimo desktop app. Without the app running, the computer will not see the camera as a webcam at all.
Firmware: The step most people skip
Before anything else, your Pocket 3 needs firmware version 1.01.0500 or newer. Webcam support was added in that update. If you bought the camera early in 2024 and never updated it, you are probably on an older version.
To check your firmware:
- Turn on the Pocket 3 and go to Settings (the gear icon on the touchscreen).
- Scroll to About and look at the firmware number.
- If it is below 1.01.0500, update via the DJI Mimo mobile app or the desktop app.
Updating takes about 10 to 15 minutes. Make sure the camera has a full battery or is plugged into a power source during the update. Interrupting a firmware flash can brick the camera.
Do not let the battery run out mid-update.
Some users encounter similar firmware complications that can stall the process. If you hit a snag, the general troubleshooting approach applies. Restart the system.
Retry the download. Avoid using a USB hub.
The Mimo app: required or optional?
On Windows, you need the Mimo desktop app installed and open. Launch it. Connect the camera.
Tap the Webcam icon on the touchscreen. The app pushes the camera into UVC mode. After that, you can minimize the Mimo app.
It sits in the system tray, and the camera keeps working.
On macOS, you can use the Mimo app for the same process. But you can also skip it if you already have the camera set to webcam mode from a previous session. The camera remembers the last mode it was in.
Set it to webcam mode once, power it down, and it reconnects in webcam mode when you plug it back in. The app is still the easiest way to switch modes initially.
Method 1: The Direct USB-C Connection
This is the path most people should take. It is free. It uses only the cable that came with the camera.
It provides excellent video quality. Here is what you need to check before you start.
What you need
- A USB-C cable that supports data transfer. The cable that ships with the Pocket 3 is a data cable and works fine. Many third-party cables, especially cheap ones from convenience stores, are charge-only cables. They power the camera but will not transmit video.
- A computer with a USB 3.0 port or better. USB 2.0 ports can work for 1080p, but you will struggle with 4K. Look for a port marked with the blue SS (SuperSpeed) logo.
- The DJI Mimo desktop app installed. Download it from the official DJI support page.
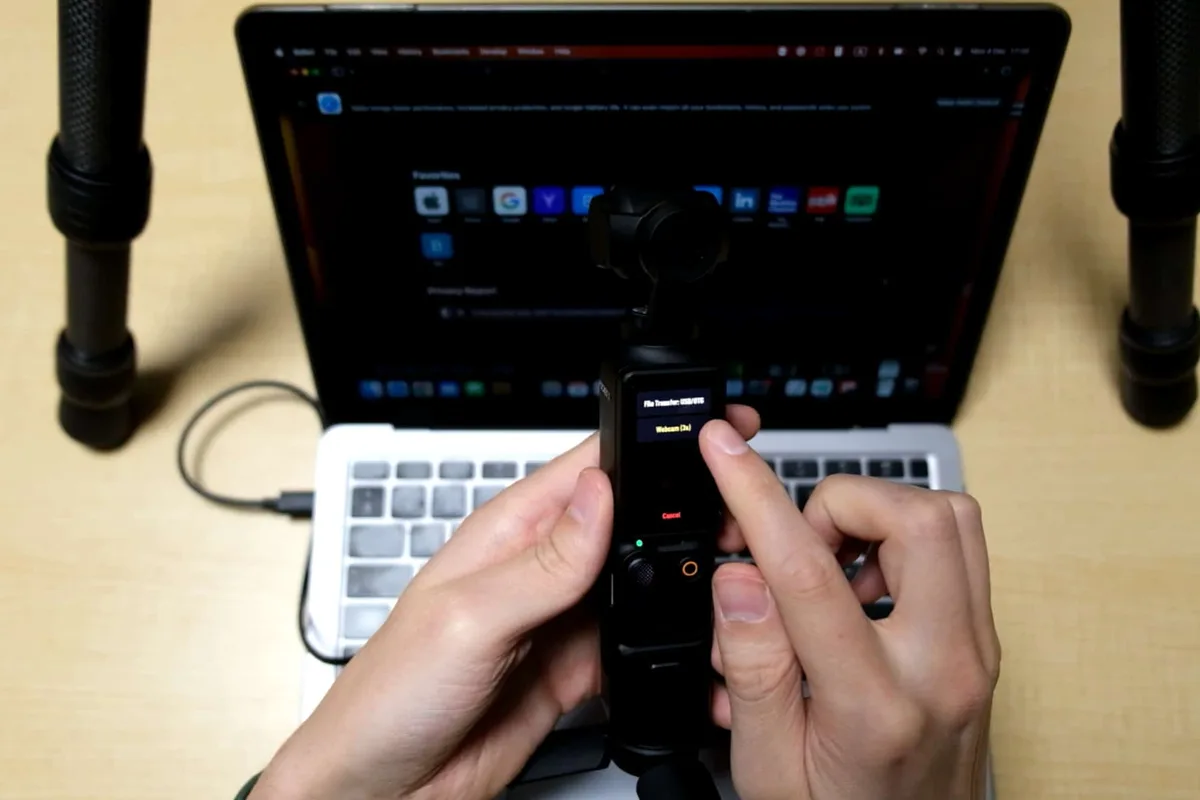
Image source: Web (Bing) / captureguide.com (Web image (fair-use with source credit))
Step-by-step for Windows 10 and 11
- Install the Mimo desktop app from the official DJI website. Reboot your computer after installation.
- Connect the Pocket 3 to your computer using a known good USB-C data cable.
- Turn on the camera. The touchscreen should light up.
- Open the Mimo app. It may prompt you to update firmware. Do that now if needed.
- On the camera touchscreen, swipe down to open the quick menu. Tap Webcam. The camera screen will show a Webcam label.
- Open your video app (Zoom, Teams, OBS, Google Meet). Select DJI Pocket 3 as the video source.
You should see live video appear within seconds. If you do not, the camera might be in a different mode. Power it off and on, then try again.
Step-by-step for macOS
The process is nearly identical on Mac.
- Install the Mimo desktop app (available for both Intel and Apple Silicon Macs).
- Connect the camera via USB-C.
- Open the Mimo app.
- Tap Webcam on the camera screen.
- In your video app, select DJI Pocket 3 from the camera list.
Mac users often report that the camera stays in webcam mode even after closing the Mimo app. That is a nice bonus. Once you set it up the first time, you can skip the app on reconnection.
Resolution and frame rate limits
The Pocket 3 supports these modes in webcam mode.
| Resolution | Frame Rate | Notes |
|---|---|---|
| 4K | 30fps | Clean and sharp. Excellent for recording. |
| 1080p | 60fps | Smoother motion. Ideal for streaming. |
| 1080p | 30fps | Default. Works with any USB port. |
| 720p | 30fps | Useful for very old computers. |
You cannot get 4K at 60fps in webcam mode. That is a hardware limitation of the UVC implementation. If you need 60fps, drop to 1080p.
Method 2: The HDMI Capture Card Route
There are only two reasons to use a capture card instead of the direct USB-C method.
- Your computer does not have USB 3.0 ports and struggles with 4K video.
- You want to use the camera in a multi-camera setup with a streaming switcher.
If neither applies, stick with the direct connection. It is simpler, cheaper, and produces identical video quality.
When you need a capture card
The Pocket 3 has a micro-HDMI port. You can plug that port into an HDMI capture card (sometimes called a USB HDMI dongle). The capture card then plugs into your computer's USB port.
It converts the HDMI signal into a UVC stream that your computer treats as a webcam.
This method bypasses the camera's internal UVC chipset entirely. That is useful if the camera's USB port is acting up. It also helps if you want to use the camera at a setting the webcam mode does not offer.
What to buy
You do not need an expensive capture card. A generic USB 3.0 HDMI capture dongle from a reputable brand works fine. Avoid the ultra-cheap $10 units with no brand name.
They often only support 1080p at 30fps and introduce latency.
Look for a card that supports 4K passthrough and 1080p capture at 60fps. That covers everything the Pocket 3 can output.
Step-by-step setup
- Connect the Pocket 3 to the capture card via a micro-HDMI to HDMI cable. The micro-HDMI port is on the side of the camera.
- Plug the capture card into your computer's USB 3.0 port.
- Turn on the Pocket 3. It should output video through the HDMI port immediately.
- Open your video app and select the capture card as the video source. It will not appear as DJI Pocket 3. It will show as the card's generic name, like USB Video Device.
Why most people do not need this
The capture card method adds complexity and cost. The direct USB-C method already gives you 4K at 30fps or 1080p at 60fps with zero extra hardware. Unless you have a specific reason, skip the capture card.
If you are recording high-bitrate content and notice glitches in the direct USB stream, a capture card can sometimes help. But that rare edge case does not apply to 99% of users.
Audio: The Elephant in the Room
Here is the biggest surprise for most new users. The Pocket 3 does not send audio over the USB-C connection in webcam mode. Your video will look amazing.
Your colleagues or viewers will hear silence.
This is not a bug. It is a design choice. The camera's internal microphone is disabled during UVC streaming.
The USB connection itself does not carry an audio channel. If you want sound, you need a separate solution.
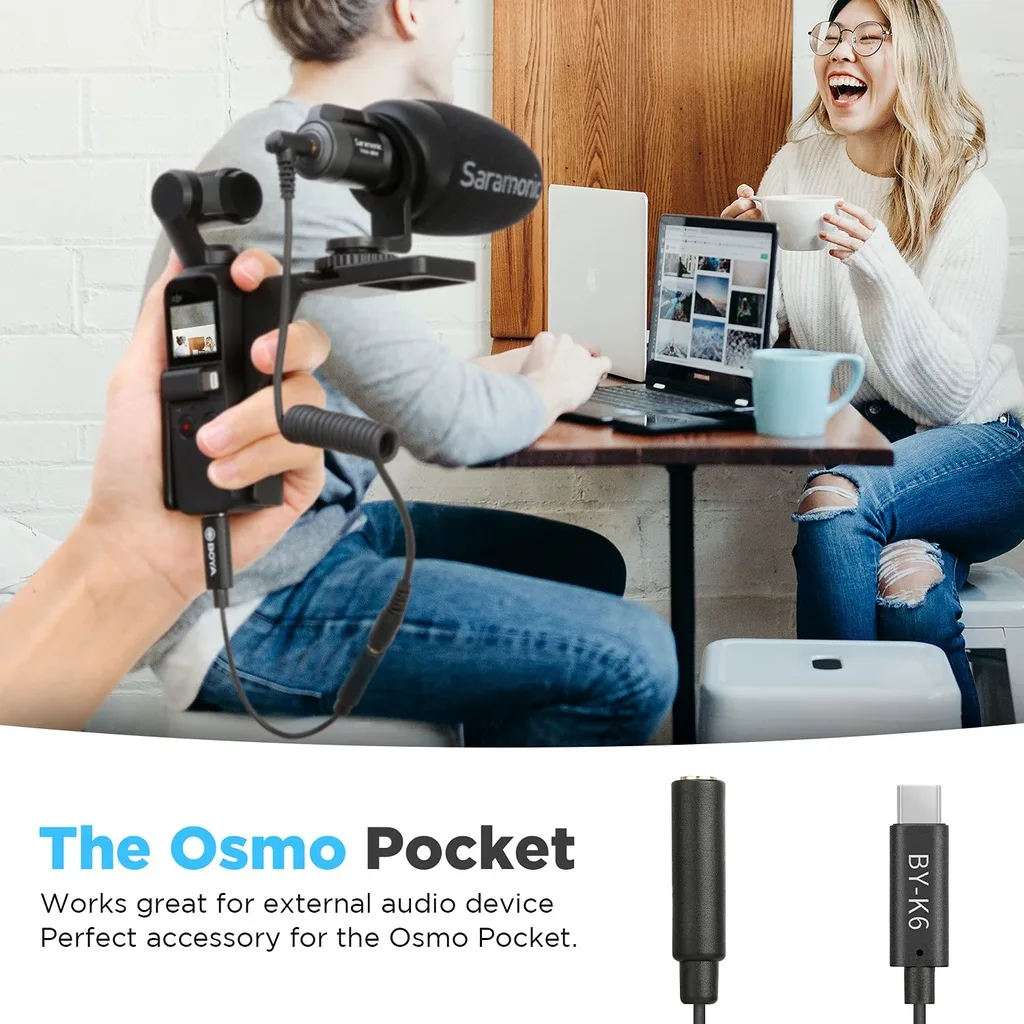
Image source: Bing (Web (fair-use with source credit))
Three ways to fix it
Option 1: Use your computer's built-in microphone.
This is the simplest solution. Your laptop already has a mic. It is not great, but it works for casual meetings.
In Zoom or Teams, select your laptop's internal microphone as the audio source. Keep the Pocket 3 as the video source.
The downside is obvious. Laptop mics pick up keyboard clicks, room echo, and background noise. If you are in a quiet room and only need basic audio, go with this.
It costs nothing and takes ten seconds to set up.
Option 2: Use a USB or Bluetooth external microphone.
A separate microphone gives you much better audio quality. A simple USB condenser mic or a wireless lavalier microphone clipped to your collar will sound far cleaner than any laptop mic. Plug it into a free USB port or pair it via Bluetooth.
Select that mic as the audio source in your video app. The Pocket 3 handles video only. Your computer handles audio only.
They do not need to be linked. This is the approach most streamers and remote workers use long term.
Option 3: Use a separate audio recorder and sync in post.
This only matters if you are recording for a podcast or a polished video project. Record audio on a separate device like a field recorder or a smartphone. Sync the audio and video tracks in editing software.
For live calls this does not apply. But it is worth knowing if you repurpose your recordings later.
Which option works best for your setup
| Your Situation | Best Audio Solution |
|---|---|
| Quick work meeting, quiet room | Laptop internal mic |
| Regular video calls, home office | USB desktop mic or wireless lavalier |
| Live streaming on Twitch or YouTube | USB mic with cardioid pickup pattern |
| Recording content for editing | Separate audio recorder, sync in post |
If you are dealing with persistent mic problems from a different camera, many troubleshooting steps carry over. The same principles of checking input levels and selecting the correct source apply across devices.
The Complete Decision Flowchart
By now you have enough information to choose your path. Here is a clear decision tree so you can find your exact setup in seconds.
Quick reference table: which path fits your situation
| Your Hardware | Recommended Method | Audio Solution |
|---|---|---|
| Windows laptop, USB 3.0 ports | Direct USB-C | External mic or laptop mic |
| MacBook with USB-C | Direct USB-C | External mic or laptop mic |
| Older computer, USB 2.0 only | Direct USB-C (1080p max) | External mic |
| Multi-camera streaming setup | HDMI capture card | External mic |
| Camera USB port is broken | HDMI capture card | External mic |
| You want the simplest setup | Direct USB-C | Laptop mic |
Decision tree: your computer, your gear, your needs
Step 1: Do you need audio?
Yes. Go to Step 2.
No. Connect via USB-C. Set webcam mode.
You are done. Your video app will only show video.
Step 2: Do you have a USB 3.0 port or better?
Yes. Use direct USB-C connection. Hardware capture cards are unnecessary.
No. Use direct USB-C anyway. Drop to 1080p 30fps.
USB 2.0 lacks bandwidth for 4K.
Step 3: Do you already own a good external microphone?
Yes. Connect it to your computer. Select it as the audio source in your video app.
No. Use your laptop's built-in mic. It is good enough for casual calls.
Step 4: Are you on Windows or macOS?
Windows. You need the DJI Mimo app open every time. The camera will not enter webcam mode without it.
macOS. You can use the Mimo app once. After that, the camera remembers the setting.
Recommended settings for Zoom, Teams, OBS, and Google Meet
Zoom: Settings. Video. Camera.
DJI Pocket 3. Audio. Microphone.
Your chosen mic. Check Enable HD for 1080p.
Microsoft Teams: Settings. Devices. Camera.
DJI Pocket 3. Audio. Your chosen mic.
Teams caps incoming video at 1080p even if your camera sends 4K.
OBS Studio: Add a Video Capture Device source. Select DJI Pocket 3. Set resolution to 1920×1080 or 3840×2160.
Add an Audio Input Capture for your mic.
Google Meet: Click the three dots. Settings. Video.
DJI Pocket 3. Audio. Your chosen mic.
Meet also limits incoming video to 1080p.
Mistakes and Fixes
Even with a clear decision tree, things can go wrong. Here are the most common issues and how to solve them quickly.
The charge-only cable trap
This is the number one cause of no signal frustration. Many USB-C cables are designed for charging only. They contain only power wires.
No data wires. Your Pocket 3 will power on, but the computer will not see it.
Fix: Use the cable that came with the camera. It is a known good data cable. If you lost it, buy a cable explicitly labeled as USB 3.0 data cable or USB-C to USB-C data cable.
Avoid bargain bin cables from discount stores.
No signal and how to fix it in 10 seconds
You plugged everything in. The camera is on. Your video app shows a black screen or a No Signal message.
Do not panic.
Quick fix order:
- Disconnect the USB-C cable from both ends. Reconnect firmly.
- Close the Mimo app entirely. Right-click the system tray icon and select Quit.
- Reopen the Mimo app.
- On the camera touchscreen, swipe down and tap Webcam again.
- If that fails, power the camera off and on. Repeat steps 2 through 4.
This resolves about 90 percent of no signal cases. The issue is usually the camera not being in webcam mode when the app launches.
If you have used a different camera in the same app before, the app might hold onto the old device. This can happen with any UVC device that switches modes.
Overheating and battery drain
The Pocket 3 generates heat during webcam use. The gimbal motors run constantly to keep the camera level. That draws power and creates warmth.
In a cool room (under 25°C), the camera can run for about two hours before you need a pause. In a warm room or under direct sunlight, that drops to about 45 minutes. The camera will shut down automatically to protect the sensor and gimbal.
Best practice: Keep the camera plugged into a USB power source. Use a USB wall adapter or a powered USB hub. Do not rely on the internal battery.
It lasts about one hour in webcam mode, and running it flat mid-call is frustrating.
Why your frame rate might look wrong
You selected 4K 30fps, but the video looks choppy. Or you selected 1080p 60fps, and it is stuttering. Two possible causes.
Your USB port is too slow. USB 2.0 caps out at around 480 Mbps. That is enough for 1080p 30fps but not for 4K or high frame rates. Switch to a USB 3.0 port.
Look for the blue interior tab or the SS logo.
Your computer cannot decode the stream fast enough. 4K video processing is CPU intensive. A laptop from 2018 or earlier might struggle. Drop to 1080p.
The visual difference on a small video call window is negligible.
Frequently Asked Questions
Does webcam mode damage the gimbal over time?
No. The gimbal is designed for constant movement during normal video recording. Webcam mode is no different.
It maintains a level horizon and makes small adjustments as you move. Aggregate user feedback shows no increased failure rate among cameras used daily as webcams.
Can I use it wirelessly as a webcam?
No. The Pocket 3 does not support wireless streaming to a computer. The latency over Wi-Fi would be too high for real-time calls.
You must use a physical USB-C or HDMI connection.
Does it work with Linux or Chromebooks?
Linux users can get it working, but it requires manual setup. The camera appears as a standard UVC device, so the kernel recognizes it. However, there is no Linux version of the Mimo app.
You must switch the camera to webcam mode on a Windows or Mac machine first. Then plug it into the Linux computer. The camera remembers the mode until powered off.
Chromebooks also recognize UVC devices. The same caveat applies. Switch the camera to webcam mode on another device first.
How do I switch back to normal mode?
Swipe down on the touchscreen while the camera is in webcam mode. Tap the Exit Webcam button. The camera will return to video recording mode.
You can also power the camera off and on. It defaults to video mode after a full power cycle on most firmware versions.
Will the Pocket 3 work with video conferencing software on my phone?
No. Webcam mode is designed for desktop operating systems. The camera can connect to a phone via the DJI Mimo mobile app for remote control and media transfer.
But it will not work as a webcam for phone-based video calls.
Can I use a third-party USB-C to HDMI cable?
Yes, but only if you are using the HDMI capture card method. The cable must support video output. Not all USB-C to HDMI cables work.
Look for cables labeled USB-C to HDMI with video support.
Final Verdict
After stepping through all the options and troubleshooting, one path clearly fits most people.
Who should use the direct USB-C method
Almost everyone. If you have a USB 3.0 port and a data cable, use the direct connection. It gives you 4K 30fps or 1080p 60fps with zero extra hardware.
Setup takes under three minutes. Audio requires a separate mic. But that is a small trade-off for dramatically better video quality.
This method works on both Windows and macOS. Windows users need the Mimo app running. Mac users can set it once and forget it.
Who absolutely needs a capture card
Only two groups benefit from a capture card.
- Users with a broken USB port on the camera who need to use the micro-HDMI port.
- Streamers running a multi-camera setup through a hardware switcher.
For everyone else, a capture card is an unnecessary expense and an extra cable to manage.
One quick recommendation for most people
Follow the direct USB-C path. Use the included cable. Keep the Mimo app open on Windows.
Pair it with a simple USB microphone. That combination gives you professional-quality video and clean audio for very little extra cost if you already own the camera.
The Pocket 3 is one of the best webcams you can buy. It just takes a tiny bit of setup to unlock that potential. Now you know exactly how to do it.

Similar Posts