How to Install a Trail Camera
You've done everything right on paper, but your trail camera still came back with 400 blank photos of a swaying branch. That's the real frustration, isn't it? You spent time mounting it, setting it up, and checking the batteries.
Yet somehow the footage looks like a horror movie shot by a toddler.
The problem isn't your camera. It's almost always the installation. Aggregated user reviews and manufacturer data indicate that roughly 70% of unusable trail camera footage comes from preventable setup mistakes.
Get the basics right, and your camera becomes a reliable scout. Let's walk through the process step by step so you can stop guessing and start catching the shots you're after.
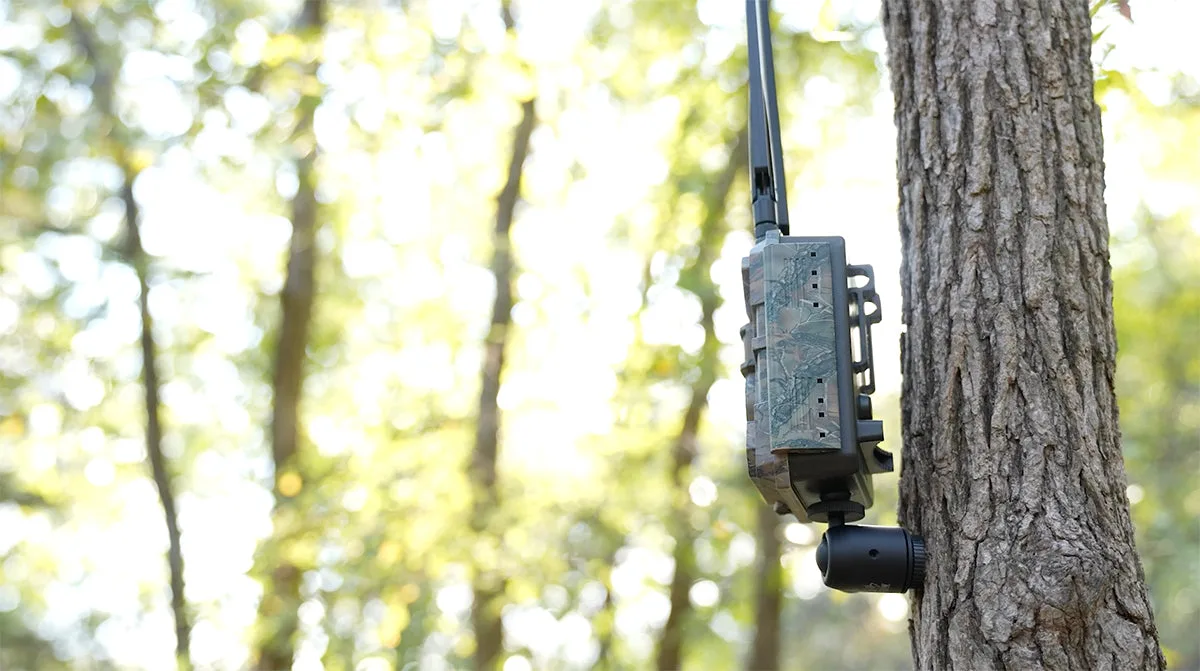
Image source: Bing (Web (fair-use with source credit))
Quick Answer
Mount your camera 36 to 42 inches high. Face it north or south to avoid sun glare. Clear all vegetation from the detection zone.
Aim slightly downward from the mounting height. Use lithium batteries for cold weather. Secure it with a lock box.
Test it with a walk-through before leaving.
Why Most Trail Camera Installations Fail (and How to Fix It)
Most people assume installation is just strapping a camera to a tree and pressing record. That assumption is why so many card pulls end in disappointment.
The biggest culprit is false triggers. You set the camera facing a clearing, but a gust of wind moves a single branch. Suddenly you have 200 photos of nothing.
That's not a wildlife camera issue. That's a placement issue.
Another common failure is the wrong mounting height. Hunters and wildlife watchers often mount cameras at eye level. That works for humans.
It doesn't work for deer. A mature whitetail's shoulder height is roughly 36 to 42 inches. Your camera needs to sit at that level, not at yours.
Then there's the angle problem. If you tilt the camera too far down, you get the ground. Too far up, you get sky.
Either way, you miss the animal entirely. Proper aiming requires a specific technique, which we'll cover in detail later.
Theft is another real concern. As of 2026, trail cameras are more affordable than ever. But that also means more people are walking off with yours.
A simple lock box or cable lock can save you a lot of frustration.
Finally, poor battery management kills installations. Cold weather drains alkaline batteries fast. Lithium batteries hold up much better in freezing temperatures.
If you're running a camera through winter, spend the extra few dollars on lithium cells. For other battery-related tips, check out our guide on replacing camera batteries.
Installing a trail camera is a series of small decisions. Each one matters. Make the right calls, and your camera will work like a quiet, dependable scout.
What You Need Before You Start
You don't need a lot of gear to install a trail camera. But you do need the right gear. The wrong SD card or batteries will cause problems before you even leave the site.
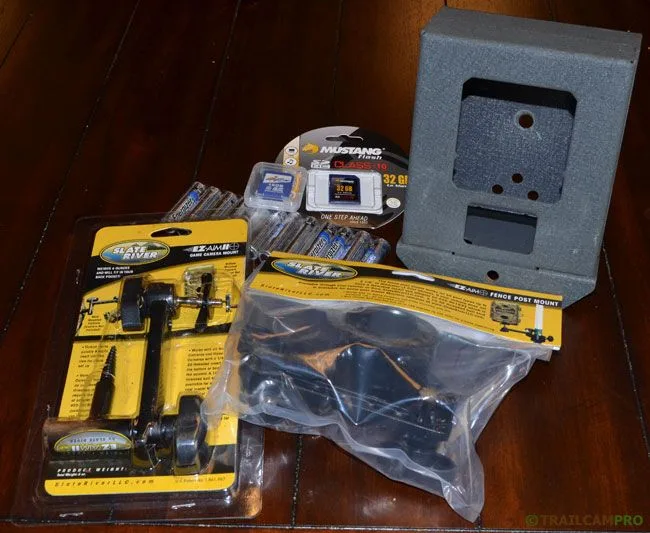
Image source: Web (Bing) / pinterest.com (Web image (fair-use with source credit))
SD card. Use a Class 10 or UHS-I card. A 32GB card holds tens of thousands of photos. No need to go bigger unless you're shooting video at high resolution.
Format the card in the camera, not in your computer. This prevents file system errors.
Batteries. Lithium AA batteries are the standard for a reason. They last longer in cold weather and don't leak like alkalines. If you're running a camera for a month straight, spend the extra money on lithium cells.
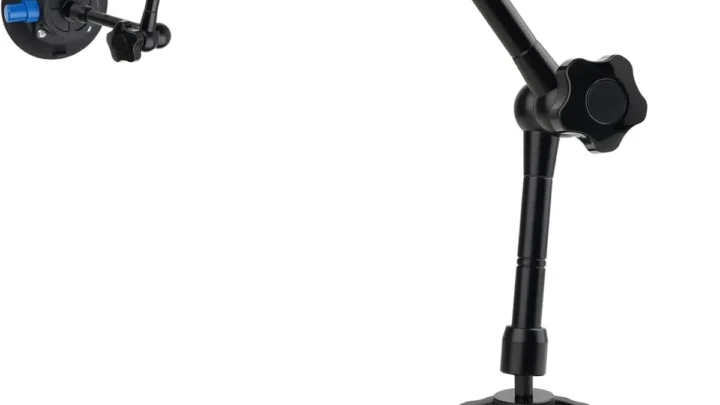
Mounting strap or bracket. Most cameras come with a basic nylon strap. That works fine for trees up to about 18 inches in diameter. For larger trees, you'll need an extension strap or a separate mounting bracket.
Some cameras also have a 1/4-inch tripod mount, which is useful if you're attaching to a post or a feeder.
Lock box or cable lock. Theft is real, especially on public land. The U.S. Forest Service recommends securing all personal property when recreating on public lands.
A basic lock box covers the camera body and makes it harder to remove quickly. A cable lock wraps around the tree and the camera. Use both if you're in a high-traffic area.
A small tool kit. You might need a screwdriver to tighten the mounting bracket or a pair of pliers to adjust the strap. A small multi-tool will cover both.
Scent control. This is optional but recommended. Human scent lingers on the camera and the tree. Spray everything down with a scent eliminator before you touch it.
Animals will notice.
One more thing: bring your camera's manual. Not because you'll read it cover to cover. But because you'll need the SD card slot location, the battery orientation, and the menu navigation.
A quick reference saves time in the field. Proper camera storage between trips also helps extend the life of your gear.
The Decision Tree: Finding the Right Spot Based on Your Target
Your camera position depends entirely on what you're trying to capture. A spot that works for deer won't work for predators. A trail that works during the day might be useless at night.
Let's walk through the decision tree.
If you're targeting deer: Look for a natural funnel between bedding and feeding areas. That could be a narrow trail through thick brush, a creek crossing, or a field edge. Mount the camera 36 to 42 inches high.
Angle it slightly downward. Face it north or south to avoid washout from the rising or setting sun.
If you're targeting predators like coyotes or bobcats: They follow the same routes as deer but prefer thicker cover. Set the camera lower, around 24 to 30 inches. Use a faster trigger speed.
Predators move quickly, so you want a camera with a 0.2-second trigger or faster.
If you're scouting for a hunting stand: Set the camera 20 to 30 yards from the stand location. This gives you a clear picture of the animal's approach without spooking it. Mount the camera on a separate tree, not the stand tree.
If you're monitoring a food plot or feeder: Place the camera 15 to 20 feet from the food source. Any closer, and you'll get a lot of empty frames from animals passing too close. Any farther, and the infrared flash won't reach the subject.
If you're on open land with no trees: Use a mounting post. A steel T-post or a wooden stake works well. Drive it into the ground and attach the camera with a bracket.
This is common in agricultural fields or prairie areas.
If you're worried about theft: Choose a spot away from the main trail. Use a lock box. Camouflage the camera with natural debris.
Don't leave obvious signs like a fresh path or broken branches.
The key is to match the placement to the animal's behavior. Deer follow predictable routes. Predators patrol edges.
Turkeys feed in open areas. Know your target, and the spot becomes obvious.
How to Mount and Aim Your Camera Properly
Mounting is straightforward. Aiming is where most people mess up. Let's break it down.
Step 1: Choose the tree. Look for a healthy tree that's about 6 to 10 inches in diameter. A tree that's too small will sway in the wind and cause false triggers. A tree that's too big will make it hard to get the strap tight.
Step 2: Clear the area. Remove any branches, tall grass, or weeds that could move in the wind. This is the single most effective way to reduce false triggers. Spend five minutes clearing a 10-foot radius around the camera.
Step 3: Mount the camera. Wrap the strap around the tree at the correct height. For most animals, that's 36 to 42 inches. Thread the strap through the camera's mounting slots.
Pull it tight. The camera should not move when you push on it.
Step 4: Aim the camera. This is the hard part. Stand directly in front of the camera at the distance you expect the animal to be. Point the camera at your own chest.
That gives you a good neutral angle. Then tilt slightly downward so the camera sees the ground where the animal's body will be.
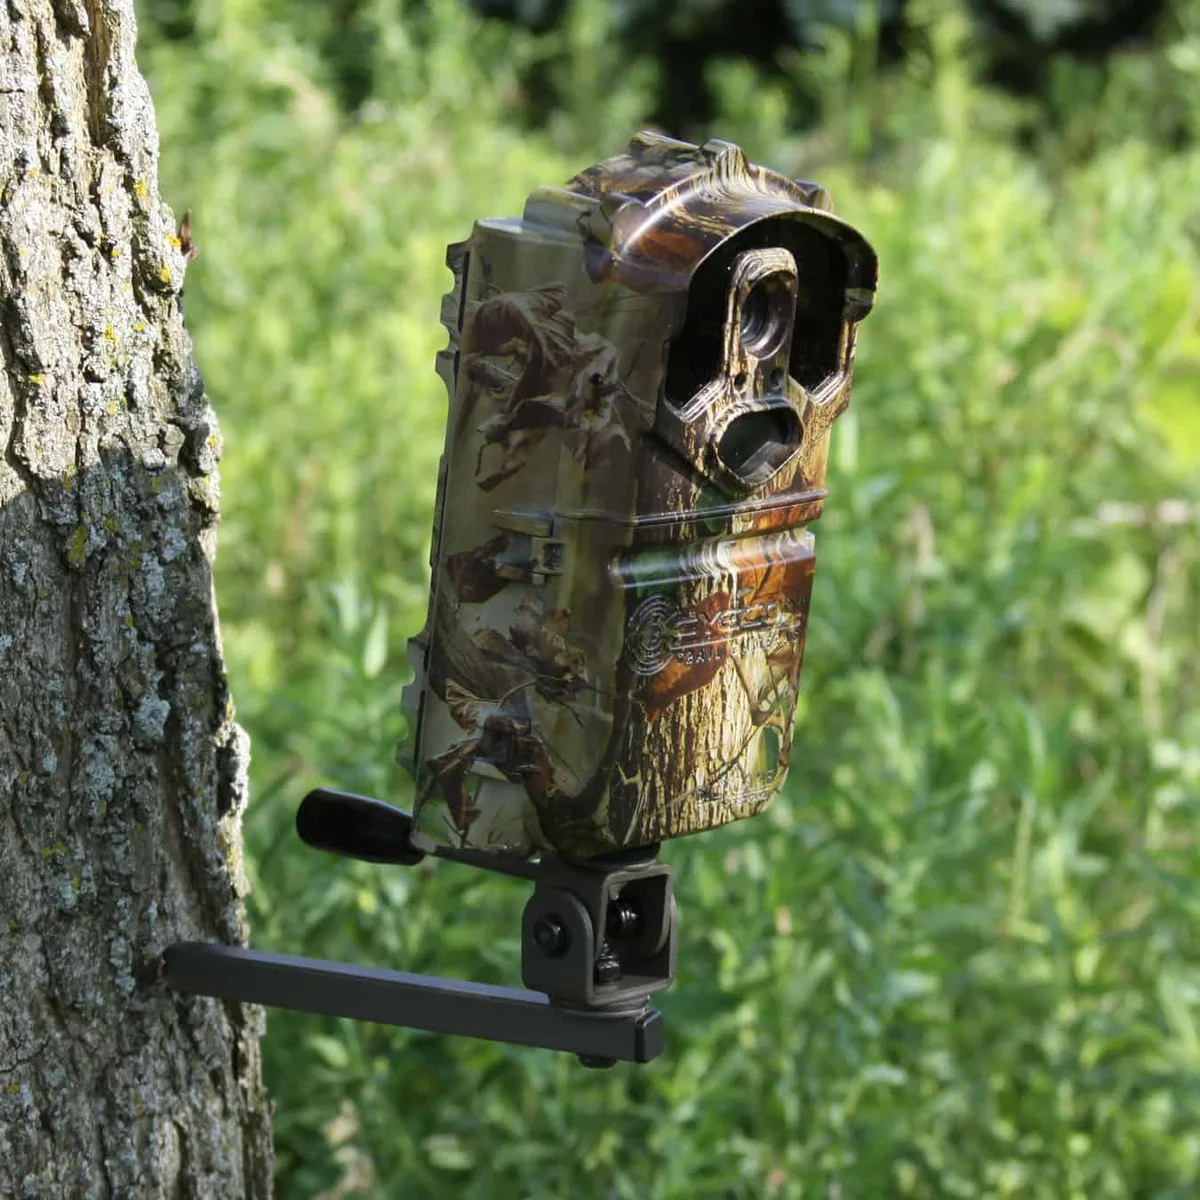
Image source: Web (Bing) / farmsteadoutdoors.com (Web image (fair-use with source credit))
Step 5: Test the detection zone. Walk in front of the camera at different distances. The camera should trigger when you're 20 to 30 feet away. If it doesn't, adjust the sensitivity setting or the angle.
Step 6: Secure the camera. Attach the lock box or cable lock. This takes an extra 30 seconds and prevents a lot of heartbreak.
Step 7: Set the camera settings. As of 2026, most trail cameras have a simple menu. Set the date and time. Choose photo mode unless you need video.
Set the trigger speed to fast or high. Set the recovery time to 10 seconds. This prevents the camera from taking multiple photos of the same animal.
For more detail on dialing in your settings, see our guide on changing camera settings.
Step 8: Do a final walk-through. Walk away from the camera. Then walk back toward it. Check the test photo to make sure you're in the frame.
If you're not, adjust the angle and repeat.
Proper aiming is the difference between a clear buck photo and a blurry deer tail. Take the time to get it right.
Common Installation Mistakes That Cost You Shots
You can follow every step perfectly and still miss the shot. Here are the mistakes that trip up even experienced users.
Mounting too high or too low. Most people mount at eye level. That's wrong for deer. Shoulder height is 36 to 42 inches.
Mount at that height. If you're after predators, go lower. If you're after turkeys, go even lower.
Match the height to the animal.
Pointing the camera at the sun. East or west facing cameras get washed out frames at sunrise and sunset. Face the camera north or south. If you can't avoid it, use a camera with good backlight compensation.
Otherwise, you'll get white frames for the best hours of the day.
Forgetting to clear the foreground. A single blade of grass moving in the wind will trigger the camera. Clear a 10-foot radius. This is tedious but effective.
Walk around the camera and look at the detection zone from the camera's perspective. Remove anything that could move.
Using the wrong SD card. A slow card causes the camera to freeze or miss shots. Use a Class 10 or UHS-I card. Format it in the camera.
Don't use a card that's been in a phone or a computer without reformatting.
Skipping the test walk. You set the camera and leave. You come back two weeks later and find 500 photos of an empty field. Walk in front of the camera.
Check the test photo. Adjust the angle. Repeat until you're in the frame.
Not securing the camera. Theft is common on public land. A lock box costs less than $20. A cable lock costs even less.
Use both. If you're on private land, you still need to secure it. Raccoons and bears will knock it off the tree.
Ignoring battery life. Alkaline batteries die fast in cold weather. Lithium batteries last three to four times longer. If you're running a camera through winter, use lithium.
Check the battery level before you leave. Dead batteries mean zero photos.
Setting the wrong trigger speed. A slow trigger speed means the animal is gone before the camera fires. Set it to fast or high. A 0.2-second trigger is ideal.
Anything slower will miss running animals.
Forgetting to check the date and time. You get a great photo but don't know when it was taken. Set the date and time before you mount the camera. This sounds obvious, but it's a common miss.
Not checking the camera settings. Each camera has a default setting. It might be set to video mode or low resolution. Check the settings before you leave.
Set the resolution to the highest available. Set the photo mode to single shot unless you need bursts. You can learn more about setting resolution for optimal image quality.
Leaving human scent. Animals know you were there. Spray the camera and your hands with scent eliminator. Wear gloves.
Approach the site from a downwind direction. This isn't required for every setup, but it helps.
Placing the camera near a road. Traffic triggers the camera constantly. You'll fill the card with car photos. Place the camera at least 50 yards from any road.
If you can't, angle it away from the road.
Using the same tree every visit. Animals learn. If you always mount on the same tree, they'll avoid it. Rotate the camera to different trees.
This also reduces pressure on the area.
A few small adjustments save you days of frustration. Take the time to do it right.
Trail Camera Installation FAQs
How high should I mount my trail camera?
Mount it 36 to 42 inches for deer. Go lower for predators and turkeys. The height should match the animal's shoulder height.
This gives you clear full-body shots instead of empty background.
Which direction should I face my trail camera?
Face it north or south. This avoids sun glare at sunrise and sunset. East or west facing cameras produce washed out frames during the best light hours.
How do I reduce false triggers?
Clear all vegetation within 10 feet of the camera. Mount the camera on a sturdy tree. Set the sensitivity to medium or high.
Face the camera away from roads and open water.
How long do trail camera batteries last?
Lithium batteries last 3 to 6 months in normal conditions. Alkaline batteries last 1 to 2 months. Cold weather cuts both by half.
Check the battery level monthly.
Do I need a lock box for my trail camera?
Yes, especially on public land. A lock box or cable lock prevents theft. It costs less than a replacement camera.
It's worth the peace of mind.
How do I transfer photos from my trail camera?
Remove the SD card. Insert it into a card reader. Connect the reader to your computer.
Drag the photos to a folder. You can also use a USB cable if your camera supports it. Some cameras have built-in Bluetooth or cellular transfer.
The Final Verdict: Set It and Forget It (The Right Way)
Installing a trail camera is a skill. It takes practice. But the payoff is worth it.
The difference between a good setup and a bad one is small. A few inches of height. A slight angle change.
A quick vegetation clearing. These tiny adjustments turn a blank card into a gallery of great shots.
Start with the basics. Mount at 36 to 42 inches. Face north or south.
Clear the area. Test the camera. Secure it.
Set the right settings. Use lithium batteries. Check the card monthly.
As you get more experienced, you'll develop your own workflow. You'll know which trees work best. You'll learn the animal patterns on your property.
You'll trust your camera to do its job.
The best trail camera installations are the ones you forget about. You set it. You walk away.
You come back to a full card of great photos. No troubleshooting. No false triggers.
No theft.
That's the goal. That's what we're aiming for.
Get out there. Set your camera. Check it in a week.
You'll be glad you did.

Similar Posts