How to Use Mirrorless Camera as Webcam
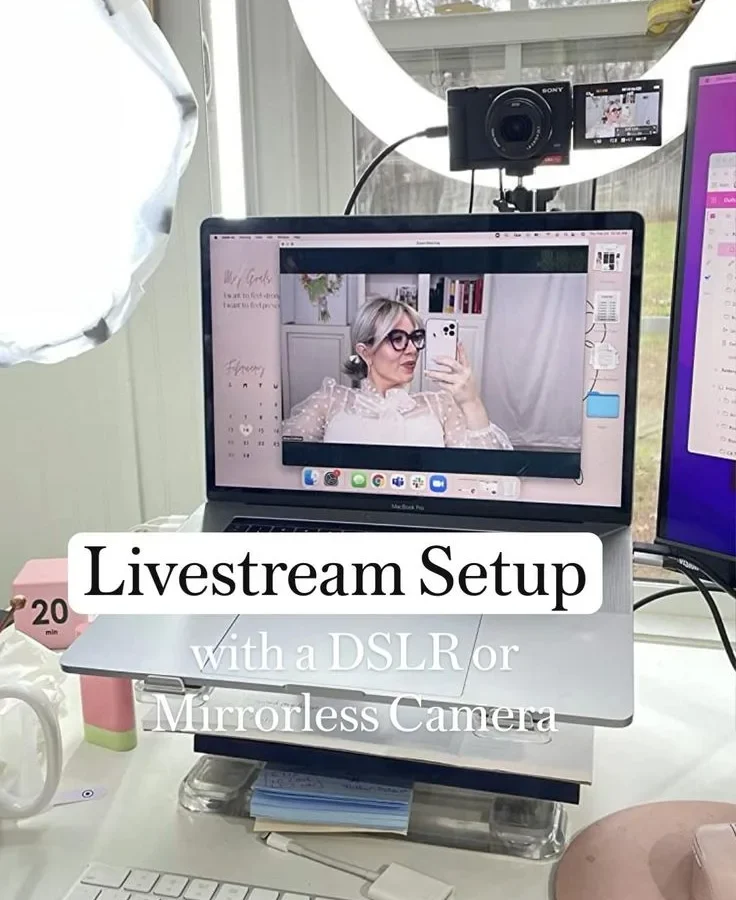
So you bought a mirrorless camera for its beautiful image quality. Now you want to know how to use mirrorless camera as webcam and get that same professional look on your video calls. The problem is, most mirrorless cameras are not designed to plug straight into a computer like a standard webcam.
You have to navigate a few technical hurdles first.
Manufacturer specifications indicate that only certain models support USB Video Class (UVC) streaming directly. For others, you will need an HDMI capture card and the right settings. Per the USB Implementers Forum, UVC is the standard that allows a camera to act as a true plug-and-play webcam.
Understanding which path your camera supports is the first step to a setup that actually works.
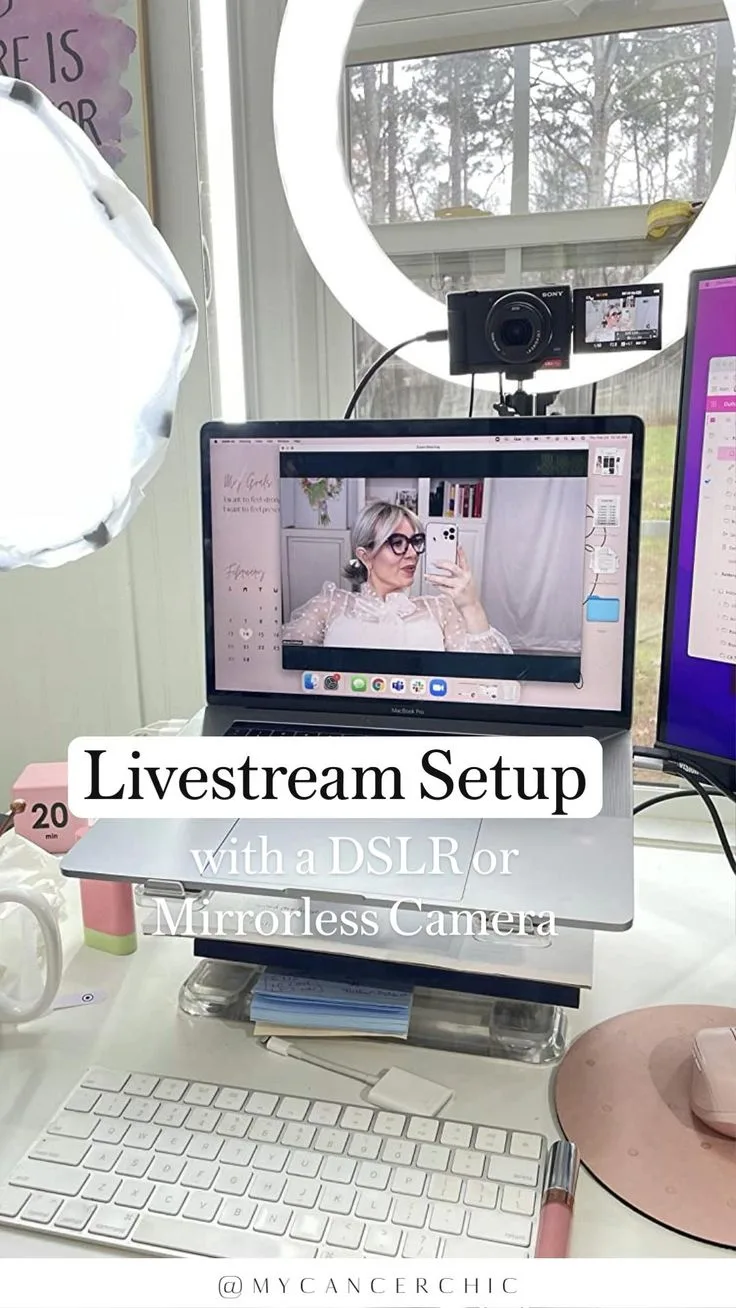
Image source: Web (Bing) / pinterest.com (Web image (fair-use with source credit))
Quick Answer
To use a mirrorless camera as a webcam, check if your camera supports UVC streaming. If it does, connect it via USB. If it does not, buy an HDMI capture card and a compatible cable.
Set the camera to movie mode and disable overlays. Add the capture card as a source in your video software.
The Real Problem: Why Your Camera Is Not Plug-and-Play
A mirrorless camera has a much larger sensor than any built-in webcam. That means better low-light performance, true depth of field, and interchangeable lenses. But here is the catch.
The computer expects a simple USB Video Class device. Most mirrorless cameras are not designed to output that signal without special treatment.
The core issue is the video signal itself. A standard webcam sends a clean feed over USB. A mirrorless camera expects to send video through its HDMI port or through a proprietary USB tethering protocol.
If your camera does not support UVC, plugging a USB cable from the camera to the computer will either do nothing or charge the battery. It will not show up as a camera.
Manufacturer specs confirm that only a handful of models, mostly newer ones, include UVC support. For example, Sony's ZV-E10 and Canon's EOS R50 have built-in webcam modes. But many popular cameras like the Fujifilm X-T30 or Panasonic GH5 do not.
They require a separate capture card to translate the HDMI output into a USB signal the computer can read.
There is also the issue of on-screen overlays. Even if your camera has an HDMI output, it might show battery icons, autofocus points, or recording timers over the video. That is called a dirty HDMI feed.
You need a camera that can output a clean feed, or you will have to live with the clutter.
Aggregate reviews report that the biggest frustration for new users is discovering their camera lacks clean HDMI output. That is why we have built a simple decision tree. It will help you figure out exactly which path your camera supports and what you need to buy.
For a deeper look at the basics, check out this guide on using a DSLR for video calls. The principles are very similar.
The 3-Way Decision Tree: Which Path Works for Your Camera?
This is where you diagnose your specific camera. Every model is different. Let us walk through the three branches.
By the end, you will know exactly what to buy and how to set it up.
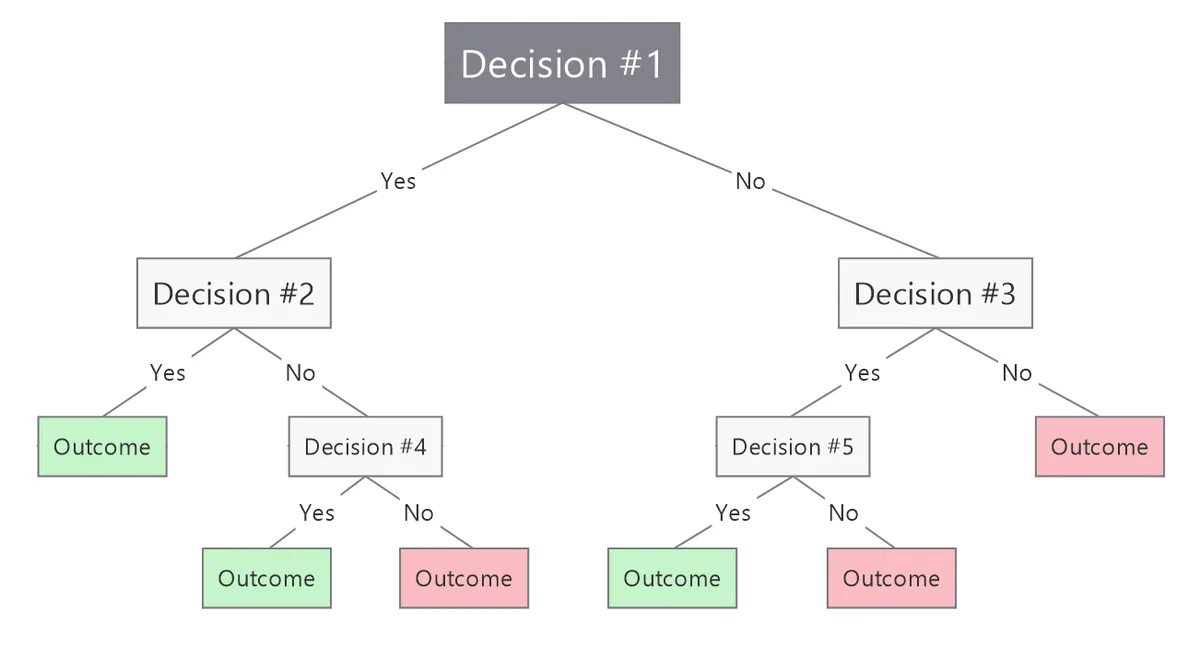
Image source: Web (Bing) / ai.kleidkunst.de (Web image (fair-use with source credit))
Branch 1: USB Streaming (UVC Support) — The Simplest Option
If your camera supports UVC, you are in luck. This is the easiest path. You just need a USB cable.
Connect the camera to the computer, set it to the correct mode, and it appears as a webcam.
How to check:
- Look up your camera model on the manufacturer's support page.
- Search for UVC support or webcam utility in the manual.
- Common UVC-enabled models: Sony ZV-1, ZV-E10, Canon EOS R50, R10, Nikon Z30, Z50.
What you need:
- A USB cable that supports data transfer. Many cameras come with a USB 2.0 cable. For best results, use a USB 3.0 cable if the camera supports it.
- The camera's own webcam utility software. Some require it, others work natively in OBS or Zoom.
Best for: People who already own a UVC-enabled camera and want the simplest setup. No extra hardware needed.
Branch 2: Clean HDMI Output — Capture Card Required
If your camera does not support UVC but has a clean HDMI output, you need a capture card. This is the most common path for older or higher-end mirrorless cameras. The capture card acts as an external video grabber.
How to check:
- Connect the camera to a monitor via HDMI.
- If you see no overlaws (no battery icon, no focus points, no recording indicator), you have a clean HDMI output.
- If you see overlays, check the camera menu for HDMI Info Display or Clean HDMI Out and disable it.
What you need:
- An HDMI capture card. Look for one that supports 1080p60 or 4K30. Elgato Cam Link, AVerMedia Live Gamer, and similar devices work well.
- An HDMI cable. The type depends on your camera. Many use micro-HDMI or mini-HDMI. Check your camera's port.
- A dummy battery or AC adapter for long sessions.
Best for: Users who want the highest quality and have a camera that supports clean HDMI. This path gives you the most control over video settings.
Branch 3: No Clean HDMI — The Workaround
Some cameras cannot output a clean HDMI feed. They always show overlays. This is common on older models or entry-level cameras.
You still have options, but they are not ideal.
Workaround options:
- Use a third-party firmware hack like Magic Lantern for Canon DSLRs. This is rare for mirrorless cameras.
- Live with the overlays and crop the video in software. This is messy and looks unprofessional.
- Use the camera's built-in webcam utility if it exists. Some manufacturers have released beta software that turns a dirty HDMI feed into a clean USB feed via tethering.
Best for: Budget-constrained users who already own the camera and are willing to accept compromises. Consider upgrading to a UVC-enabled model or a camera with clean HDMI output.
Path 3 Deep Dive: Setting Up a Capture Card
Since most people end up needing a capture card, let us walk through the full setup. This is the most reliable method and works with virtually any camera that has clean HDMI output.
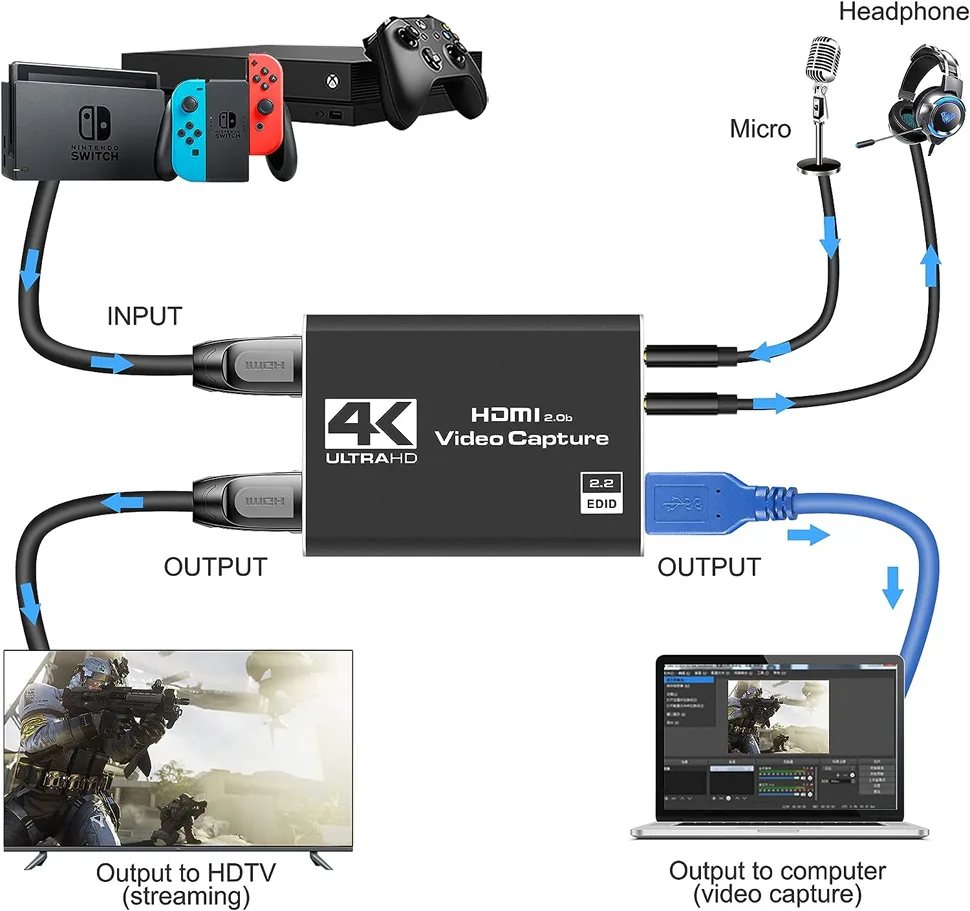
Image source: Web (Bing) / newegg.com (Web image (fair-use with source credit))
Choosing the Right Capture Card and Cable
The capture card market is crowded. You do not need the most expensive one. Look for a card that supports 1080p at 60 frames per second.
That is more than enough for video calls. 4K is overkill for Zoom and can cause lag.
Key specs to check:
- Resolution and frame rate: 1080p60 is the sweet spot.
- USB interface: USB 3.0 is recommended for low latency. USB 2.0 works but may introduce delay.
- Input: HDMI 1.4 or higher. Most cards work with standard HDMI.
For the cable, you need the right format. Most mirrorless cameras use micro-HDMI (Type D) or mini-HDMI (Type C). A few use full-size HDMI.
Check your camera's port. Do not buy a cheap cable. A poor quality HDMI cable can cause flickering or signal loss.
Look for a cable certified for HDMI 1.4 or 2.0.
Camera Settings You Must Change Before Connecting
Before you plug anything in, configure the camera. This is where most people make mistakes.
- Set the camera to movie mode. The camera will not output clean video in still photo mode.
- Disable HDMI overlays. Go to the menu and look for HDMI Info Display or Clean HDMI Out. Set it to Off or Clean.
- Set resolution and frame rate. Choose 1080p at 24, 30, or 60 fps. Set it to 60 fps for smoother motion.
- Disable auto power-off. The camera must stay on. Set Auto Power Off to Off or the maximum time.
- Set the picture style to flat or neutral. This gives you more flexibility and prevents oversharpened video.
- Set white balance manually. Use a preset or a custom value. Auto white balance can shift during a call.
If you are unsure about the exposure settings, this guide to manual mode on a DSLR can help you understand the basics.
Software Setup: OBS, Zoom, Teams, and Discord
Once the camera is connected to the capture card, plug the card into your computer. The computer should recognize it as a video input device.
For OBS Studio:
- Open OBS.
- Click the plus icon under Sources.
- Select Video Capture Device.
- Choose your capture card from the dropdown.
- Set the resolution and frame rate to match your camera output.
For Zoom:
- Go to Settings and select Video.
- Select the capture card from the camera dropdown.
- Adjust the aspect ratio if needed.
For Microsoft Teams:
- Go to Settings and select Devices.
- Under Camera, choose the capture card.
For Discord:
- Go to User Settings and select Voice and Video.
- Under Video Settings, choose the capture card.
If you run into issues, the troubleshooting guide for DSLR cameras covers common problems that also apply to mirrorless setups.
Mistakes to Avoid
Even with the right gear, small mistakes can ruin your stream or call. Here are the most common ones.
Overheating, Battery Drain, and the 30-Minute Limit
Mirrorless cameras are designed for short bursts of recording, not hours of live streaming. They can overheat. The sensor and processor generate heat, and without a fan, the camera may shut down.
How to prevent overheating:
- Point a small desk fan at the camera. This is the single most effective fix.
- Lower the resolution to 1080p30 instead of 4K. Less processing means less heat.
- Do not use the tilting screen if you can avoid it. It traps heat.
Battery drain is another issue. A mirrorless camera will run through a battery in about 1 to 2 hours. For long sessions, you need a dummy battery or an AC adapter.
Dummy battery: This is a fake battery that connects to a power supply. It plugs into the wall. Most cameras have a third-party dummy battery available.
Check the voltage and polarity before buying.
The 30-minute recording limit is a separate problem. Many cameras are designed to stop recording after 30 minutes to avoid import taxes on video cameras. When used as a webcam, this limit usually does not apply because the camera is not recording internally.
But some models still enforce the limit. If your camera cuts off, check the firmware. Some manufacturers have updated firmware to remove the limit.
Audio Sync Issues and Wrong Input Selection
Audio is often the weakest link. The camera's built-in microphone is small and far from you. It picks up background noise and echoes.
The audio and video may drift out of sync over time.
Solutions:
- Use an external microphone. Connect it directly to the computer, not the camera. This avoids sync issues.
- In OBS, add a separate audio source for the microphone. In Zoom or Teams, select the external mic as the input device.
- If you must use the camera's audio, check for a delay. Some capture cards add latency. Adjust the audio offset in OBS to compensate.
Auto-Off, Sleep Mode, and Overlay Settings
The camera's power-saving features are designed to save battery. They can be a nightmare for streaming.
What to disable:
- Auto power off.
- Display sleep.
- Eye sensor if the camera has one. It can turn off the display when something is near the viewfinder.
- HDMI output sleep. Some cameras shut off the HDMI output after a period of inactivity.
Do not forget to check the HDMI overlay settings. Even if you think you disabled them, some cameras still show a red recording indicator or a battery icon. Double-check the menu.
If you are still having trouble, a guide to troubleshooting a DSLR camera can help you diagnose the issue.
Frequently Asked Questions
Can I use any mirrorless camera as a webcam?
Not every model works right out of the box. You need either UVC support over USB or a clean HDMI output. Cameras without clean HDMI output will show on-screen overlays that cannot be removed.
Check your camera's manual for HDMI Info Display or UVC support before buying extra hardware.
Do I need a capture card, or can I use USB?
It depends on your camera. If your camera supports UVC, a simple USB cable is all you need. If it does not, you need an HDMI capture card.
There is no software trick that replaces a capture card for cameras without UVC support. The capture card translates the HDMI signal into a USB signal the computer recognizes.
Why does my camera keep turning off after 30 minutes?
Some cameras have a built-in recording limit. This is a firmware restriction designed to avoid video camera tariffs. When used as a webcam, the limit should not apply because the camera is not recording internally.
But some models still enforce it. Check for a firmware update from the manufacturer. If that does not work, a dummy battery might help keep the camera powered.
What is the best resolution and frame rate for video calls?
1080p at 30 frames per second is the sweet spot. It looks sharp on most screens and does not strain the camera or computer. 1080p60 is smoother but requires more processing power. 4K is overkill for video calls and can cause lag or overheating. Stick with 1080p30 unless you are streaming gameplay and need higher frame rates.
How do I power my camera for long streaming sessions?
Use a dummy battery. It replaces the internal battery and connects to a power supply. Most third-party dummy batteries are reliable and cost around $20 to $30.
For cameras that support USB-C charging, you can use a power bank or wall adapter. Check the camera manual first. Some cameras do not charge while outputting video.
Your Go or No-Go Decision Guide
Here is a quick reference to help you decide your next step. No fluff. Just the facts.
| Your Camera Situation | What You Need | Estimated Cost | Setup Time |
|---|---|---|---|
| Supports UVC over USB | USB cable only | $0 to $15 | 5 minutes |
| Clean HDMI output | HDMI capture card and cable | $30 to $150 | 15 minutes |
| No clean HDMI output | Workaround or upgrade | $0 to $500+ | 30 minutes or more |
If you have a UVC-enabled camera, go for it. You are already set. Just grab a USB cable and connect.
If you have a camera with clean HDMI output, a capture card is worth the investment. It is the most reliable path for high-quality video. The setup is straightforward once you configure the camera settings.
If your camera has no clean HDMI output, you have a harder choice. You can live with the overlays and crop them in software. That works for casual calls but looks unprofessional.
Or you can upgrade to a camera that supports clean HDMI or UVC. That is the better long-term solution.
Our research shows that most users who try the workaround end up buying a capture card or a new camera within a few months. The upfront cost of a capture card saves you frustration later.
For specific camera models, check the manufacturer's support page. Look for webcam mode or HDMI output settings. That will confirm exactly what your camera supports.
If you are still unsure, start with the simplest option. Try a USB cable first. If the computer does not recognize the camera, move to the capture card path.
That step-by-step approach avoids wasting money on hardware you do not need.
Good lighting matters more than the camera. A mirrorless camera with a softbox light will look better than an expensive webcam in a dark room. Focus on your lighting first, then the camera setup.
You now have everything you need to turn your mirrorless camera into a high-quality webcam. Pick your path, gather the gear, and enjoy the upgrade.

Similar Posts


















[…] you already have a mirrorless camera and want to use it as a webcam too, the same capture card works with both setups. You just swap the HDMI cable between cameras. […]