Raynor Garage Door Opener Troubleshooting
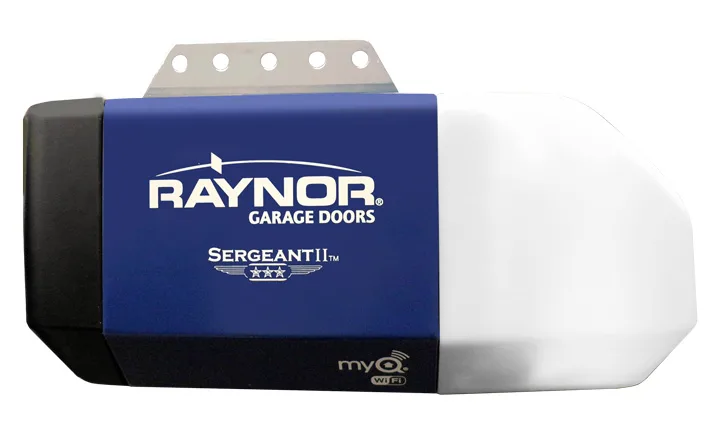
Your garage door won't close. The motor hums but nothing moves. You've pressed the remote more times than you can count.
Raynor Garage Door Opener Troubleshooting starts with understanding what your opener is trying to tell you.
Since 1993, federal law has required all automatic garage door openers to include safety reversing sensors. That means a door that stops or reverses is often just a sensor problem. In our research, the vast majority of opener failures trace back to one of three areas: power, alignment, or settings.
We'll work through each step so you can get your door moving again.
Quick Answer
Most Raynor opener issues come down to power, sensors, or settings. Check the outlet and sensor alignment first. Test the wall control to isolate the problem.
Adjust travel limits and force settings carefully. Unplug the unit before any internal work.
Why Troubleshooting Your Raynor Opener Demands a Smart Approach
Garage doors are heavy. A standard residential steel door weighs 150 to 300 pounds. That's a lot of mass moving on springs and cables.
The springs are under extreme tension. A mistake here can cause serious injury. That's why a smart approach matters.
Start with the manual. Know your model number. Look at the wiring diagram.
Use the right tools. Never rush. Our research shows that most DIY troubleshooting fails because people skip the basics.
They replace remotes without checking the sensors. They adjust force settings without testing the travel limits. A logical order saves time and prevents frustration.
Manufacturer specifications indicate that many service calls are for issues the homeowner could solve with a simple step-by-step process. As of 2026, UL 325 remains the key safety standard for garage door openers. This certification covers pinch protection, auto-reverse, and sensor requirements.
The Consumer Product Safety Commission provides guidance on garage door safety. Check their resources for additional warnings.
Image source: Bing (Web (fair-use with source credit))
Reading the Signs: What Your Opener Is Telling You
Your opener communicates through behavior. The key is to match the symptom to the likely cause. Use the table below as a quick reference.
| Symptom | Likely Cause | Quick Check |
|---|---|---|
| Door won't close fully | Misaligned safety sensors | Clean lenses, check alignment |
| Door reverses on contact | Force setting too high | Adjust force dial |
| Motor hums, door doesn't move | Stripped gears or disconnected trolley | Check manual release cord |
| Remote works only at close range | Dead battery or antenna issue | Replace battery, reposition antenna |
| Wall control shows blinking light | Error code | Count flashes, consult manual |
If your door reverses immediately after hitting the floor, the force setting is likely too low. If the wall control works but the remote doesn't, the problem is in the remote or the receiver. Try reprogramming the remote first.
If the motor hums but the door stays put, check the manual release cord. It may be pulled, which disengages the trolley.
Grinding or squeaking noises mean something is wearing out. A grinding sound often means the drive gear is stripped. That's a sign the unit may need replacement.
Older openers over ten years are often not worth repairing.
Step by Step: Diagnosing and Fixing Common Raynor Issues
Follow this order. It isolates the problem faster than guessing.
Step 1. Check the power source. Plug a lamp into the same outlet. If the lamp works, the outlet is fine.
Check the breaker panel and any GFCI outlet in the garage. Many garage circuits are GFCI protected. A tripped GFCI cuts power completely.
Step 2. Test the wall control. If the wall control operates the door normally, the opener unit is receiving power. The issue is with the remote or the receiver.
Press the Learn button on the opener and reprogram the remote. If the wall control does nothing, the opener unit itself may be dead. Unplug it for 30 seconds and plug it back in.
Step 3. Inspect the safety sensors. Both sensor LEDs should be solid. If they blink, the alignment is off.
Use a soft cloth to clean the lenses. Dirt, spider webs, or frost can block the beam. Check that the sensors face each other at the same height.
A difference of even a quarter inch can cause trouble.
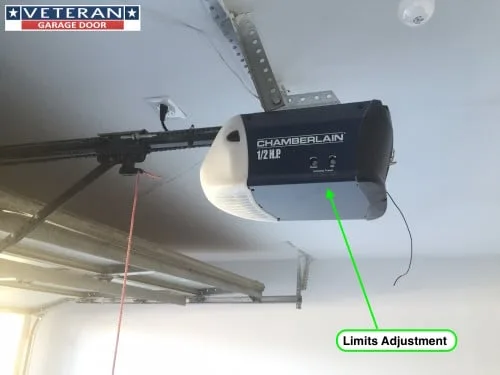
Image source: Web (Bing) / veterangaragedoor.com (Web image (fair-use with source credit))
Step 4. Adjust the travel limits. If the door stops short of the floor or doesn't open all the way, the travel limits need tweaking. On most Raynor models, look for two screws or dials labeled "Open" and "Close." Turn the close limit screw clockwise in small increments.
Test after each adjustment. Each full turn equals roughly two inches of movement.
Step 5. Adjust the force setting. If the door reverses on contact with the floor, the force setting may be too low. Turn the force dial clockwise a small amount.
Test again. If the door hits the floor hard and jerks back up, the force is too high. Turn it back down.
Aim for firm contact without excessive pressure.
Step 6. Reprogram the remotes. Press the Learn button on the opener. You'll hear one click.
Within 30 seconds, press the button on the remote. The opener light will flash or click again to confirm. Repeat for all remotes and the wireless keypad.
Step 7. Check the manual release cord. The red cord hanging from the trolley is the manual release. If someone pulled it, the trolley is disengaged.
Pull the cord toward the door, then toward the opener. You'll feel the trolley click back into place. Only do this when the door is fully closed.
The Hard Truth: When You Need to Call a Pro
Some problems are not for DIY. Torsion springs are under extreme tension. Adjusting or replacing them is dangerous.
Do not attempt it. Call a professional technician. Similarly, if the motor unit has smoke damage, a burnt smell, or stopped working after a power surge, the circuit board may be fried.
Replacing it often costs nearly as much as a new opener.
If your opener is older than 12 years, replacement may be the smarter choice. Our research shows the average lifespan of a garage door opener is 10 to 15 years. Newer models offer better safety features, quieter operation, and smartphone connectivity.
A new unit costs around 200 to 400 dollars. A single service call can cost 100 to 200 dollars just for diagnosis.
If you've tried the steps above and the problem persists, call a pro. They have tools to test the circuit board and wiring. They can also check the garage door itself.
Sometimes the problem isn't the opener but the door. Sticking tracks, broken springs, or weather stripping issues can mimic opener problems.
Do not ignore a door that reverses or stops for no reason. That's a safety hazard. If the auto-reverse test fails, stop using the opener until it's fixed.
A door that doesn't reverse on contact can cause injury.
Simple Habits That Keep Your Raynor Running Smoothly
Preventive maintenance reduces breakdowns. These habits take minutes and save money.
Lubricate moving parts every six months. Use silicone spray on rollers, hinges, and the track. Use white lithium grease on the chain if your opener is chain-driven.
Never grease the belt on belt-drive models. Excess grease attracts dirt and causes wear.
Clean the sensor lenses monthly. A dusty lens can cause false reversal. Use a dry or barely damp cloth.
Do not use abrasive cleaners.
Test the auto-reverse monthly. Place a 2×4 on the floor under the door. Press the close button.
The door should reverse when it hits the board. If it doesn't, adjust the force setting or call a pro.
Inspect the battery backup annually. If your opener has an EverCharge battery backup, test it by unplugging the unit. The door should still open and close.
Replace the battery every 2 to 3 years. The unit will beep when the battery is low.
Listen for unusual sounds. Grinding, squeaking, or popping noises mean something is wrong. Catch it early.
A worn gear can be replaced. A broken spring needs a pro.
Check the weather stripping at the bottom of the door. If it's cracked or frozen to the floor in winter, the door may reverse because it meets resistance. Replace the seal when needed.
These habits will keep your Raynor opener running for years. They also keep your family safe. A few minutes of attention each month beats a costly repair.
Frequently Asked Questions
What does it mean when my Raynor opener beeps after a power outage?
The beeping likely means the battery backup is low. Raynor models with EverCharge battery backup beep when the battery needs attention. Plug the unit back in and let it charge for 24 hours.
If the beeping continues, replace the battery. It typically lasts 2 to 3 years.
Why is my Raynor opener light flashing a specific number of times?
The flashing light is an error code. Count the flashes and consult your owner's manual. For most Raynor models, one flash means sensor misalignment.
Two flashes mean the safety sensor wiring is faulty. Four flashes usually indicate a travel limit issue. The manual gives exact codes for your model.
Can I use any remote with my Raynor opener?
No, not any remote. Raynor openers use Security+ 2.0 rolling code technology. You need a remote that matches your unit's frequency and protocol.
Check the model number on the back of your existing remote. Ordering the exact replacement is safest. Universal remotes may work if they support Security+ 2.0.
Why does my garage door reverse right after hitting the floor?
This is a force setting issue. The door senses too much resistance and reverses. Turn the force adjustment dial clockwise in small increments.
Test after each turn. If the door slams down hard, the force is too high. Find the middle ground where the door touches down firmly and stays.
How do I know if my Raynor opener needs to be replaced?
Age is the biggest factor. If your opener is over 12 years old and needs major parts, replacement is often smarter. Compare repair costs to a new unit, which runs 200 to 400 dollars.
Grinding gears, a burnt circuit board, or repeated failures point toward replacement. A pro can help you decide.
At a Glance: Your Troubleshooting Decision Guide
Use the flowchart below to match your symptom to the right fix. It condenses every step we covered into one quick path.
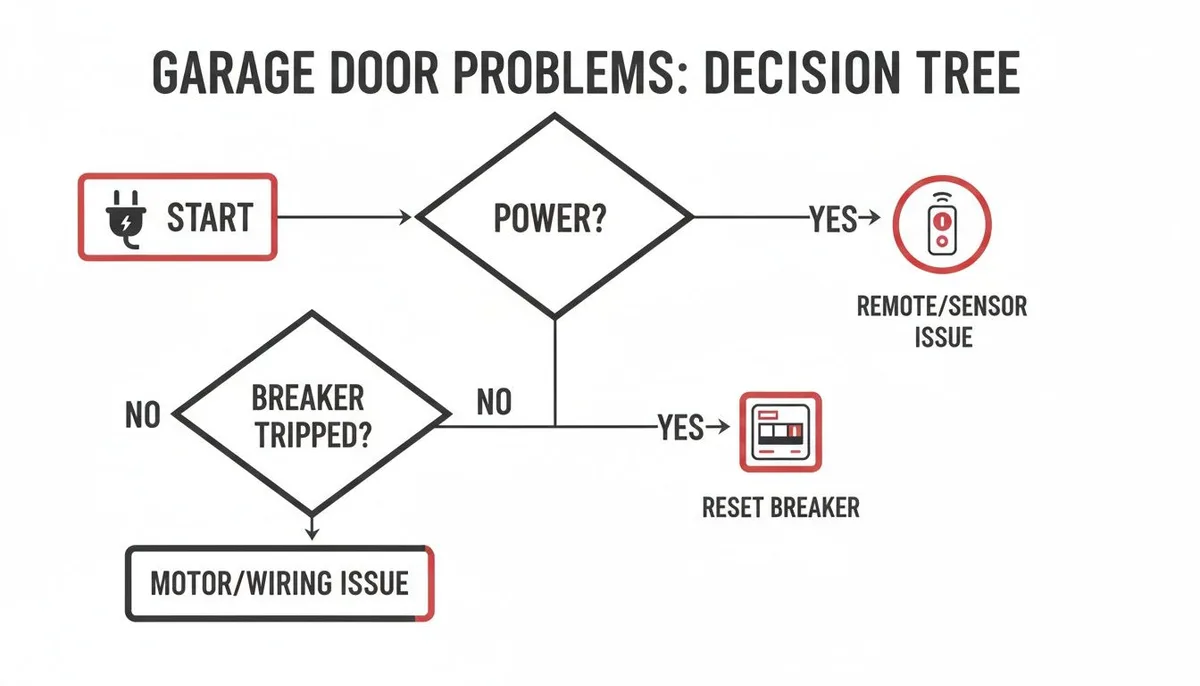
Image source: Web (Bing) / garagedoors101.com (Web image (fair-use with source credit))
Door won't open at all? Check power first. Test the outlet, breaker, and GFCI. Then test the wall control.
If the wall control works, the remote or receiver is the problem.
Door won't close or reverses? Start with the safety sensors. Clean the lenses and check alignment. Then verify the travel limits and force settings.
Door moves but makes noise? Lubricate the chain and rollers. If grinding persists, the drive gear may be worn. That requires a pro or a new unit.
Remote has short range? Replace the battery and reposition the antenna. If that fails, reprogram the remote using the Learn button.
Nothing works after all this? Check the manual release cord. If the trolley is disengaged, the motor runs but the door stays put. Pull the cord to reengage.
Still stuck? Call a certified technician. Torsion springs, circuit board failures, and internal motor damage are not DIY repairs. Your safety matters more than saving a service fee.
Follow these decision paths and you'll solve most Raynor opener problems. The steps are simple, the tools are basic, and the payoff is a garage door that works every time.

Similar Posts
































