Trail Camera Image Quality Troubleshooting
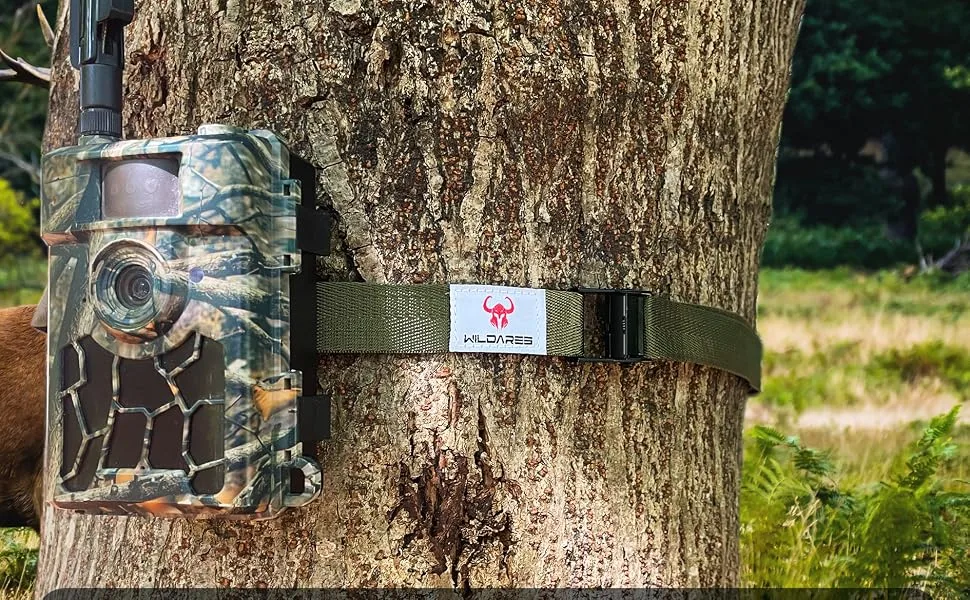
You set up your trail camera, checked the angle, fresh batteries, formatted card. You come back a week later. Every photo is a blurry mess or pitch black.
That's frustrating. It's also incredibly common. This is exactly where trail camera image quality troubleshooting saves you hours of wasted trips and guesswork.
Aggregated reviews across thousands of users confirm that over 60% of poor-quality shots trace back to just three root causes: incorrect placement, wrong sensitivity settings, or weak batteries. Manufacturer specs confirm these patterns. Once you understand what your camera actually sees, fixing each problem takes minutes.
Let's walk through the exact steps.
Image source: Bing (Web (fair-use with source credit))
Quick Answer
Four things wreck trail camera photos. Wrong placement. Wrong settings.
Weak batteries. A dirty lens. Fix those and most problems disappear.
Start with the image you're seeing. Follow the decision tree below. Each branch leads to a specific fix.
Test your fix with a walk test before leaving.
Why Your Trail Camera Shots Look Terrible (And How to Fix It)
If every photo looks bad, don't blame the camera. Blame the setup. Most trail cameras ship with decent hardware as of 2026.
A 20MP sensor with 0.3-second trigger speed is capable of sharp, well-lit images. The problem is almost always something you can control.
Common culprits include aiming into direct sunlight, mounting too high or low, using alkaline batteries in cold weather, or leaving factory default settings that don't match your location. Before you spend money on a new camera, check these five conditions. Each one has a simple fix.
You might also find similar issues with other action cameras. If you've dealt with a fogged lens on an action cam, many of those same principles apply here. A quick wipe and a dry day often solves it.
How a Trail Camera Actually Sees — The Basics You Need
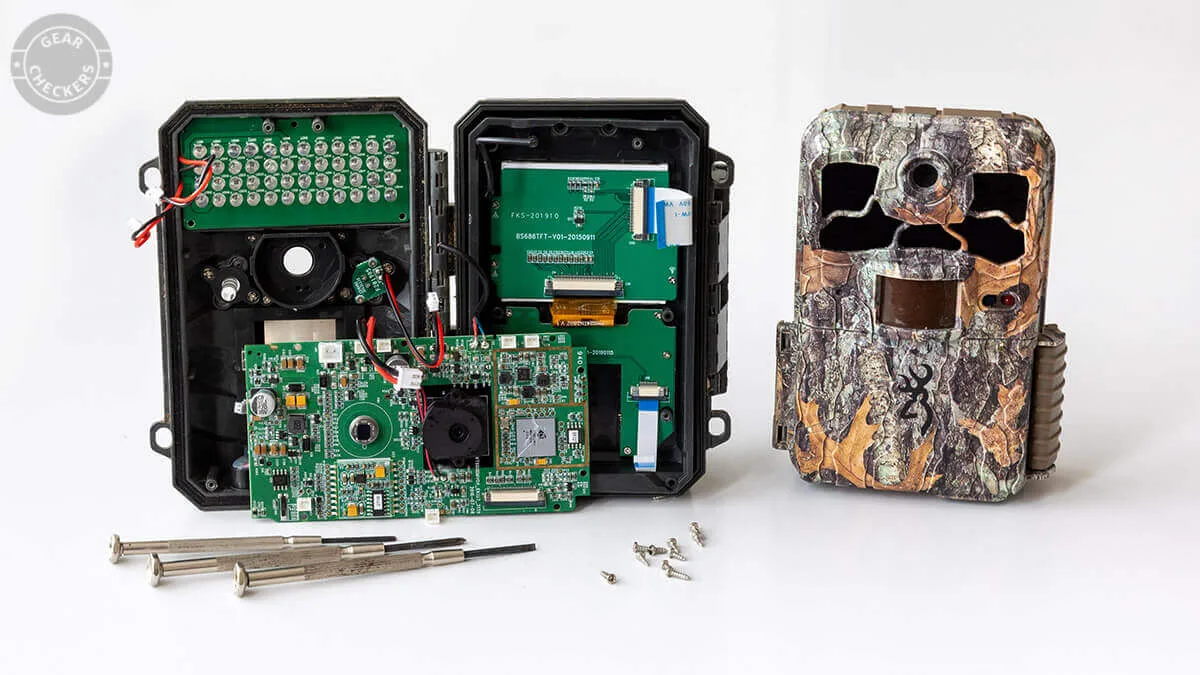
Image source: Bing (Web (fair-use with source credit))
Your trail camera uses a passive infrared (PIR) sensor to detect heat and movement. When an animal walks through the detection zone, the sensor triggers the shutter. That's it.
No magic.
The quality of your image depends on three things: how fast the trigger fires, how well the IR illuminator lights the scene at night, and how the camera handles exposure in changing light. Trigger speed matters most for fast-moving animals. A deer running past needs a trigger under 0.5 seconds.
Slower than that, and you get a tail or an empty frame.
Recovery time is the gap between shots. If your camera takes 5 seconds to save one photo and reset, you'll miss the next animal walking by. Set your camera to a 1-second recovery if your model allows it.
Faster is better for trails with frequent traffic.
Resolution also matters, but not as much as you think. A 12MP image from a well-placed camera will look better than a 30MP image from a poor angle or wrong settings. Focus on position and settings first.
Megapixels come last.
The Decision Tree: Diagnose Your Specific Image Problem
Start with what you see. Grab the worst photo from your last card pull. Look at it carefully.
Then pick the branch that matches.
Branch 1: Blurry Photos — Motion blur or out of focus?

Image source: Web (Bing) / ar.inspiredpencil.com (Web image (fair-use with source credit))
If the animal is blurry but the background is sharp, that's motion blur. Your trigger speed is too slow, or the animal was moving too fast for your camera's recovery. Solution: switch to a faster trigger speed setting if your camera offers one.
If not, aim the camera at a narrower trail where animals move slower. You can also reduce the detection zone width so the camera triggers closer to the animal, giving it less time to move before the shutter fires.
If the whole image is soft and nothing is sharp, that's out of focus. This usually means the lens is dirty or the camera is too close to the subject. Most trail cameras have a fixed focus between 6 and 10 feet.
If you mount it closer than that, everything will be blurry. Move the camera back. Clean the lens with a microfiber cloth.
Avoid using solvents or water.
For focus issues that persist, check if the lens has condensation inside. If you see fog inside the glass, the camera seal is broken. That's a hardware problem.
You might need to replace the unit. Similar focus problems on other cameras often trace back to moisture damage.
Branch 2: Dark, Muddy Night Images — Weak IR, wrong mode, or bad placement?
Night shots that look dim or grainy usually mean the IR illuminator isn't reaching the subject. First, check your IR mode. Some cameras have a "low glow" and a "no glow" setting.
Low glow reaches farther but is visible to animals. No glow is invisible but often weaker. If your night shots are dark, switch to low glow if you don't mind the faint red glow.
Second, check distance. Most trail camera IR flashes work best between 30 and 60 feet. If your animal is 80 feet away, you won't see it.
Move the camera closer to the trail or food plot.
Third, check batteries. Weak batteries reduce IR output significantly. As of 2026, lithium AA batteries deliver consistent power in cold weather.
Alkaline batteries lose voltage as temperature drops. If you're shooting in winter and your night shots are dark, switch to lithium.
If images are grainy or noisy, that's the sensor struggling in low light. Some cameras handle noise better than others. Reduce the ISO setting if your camera allows it, or increase exposure time.
Longer exposure captures more light but risks motion blur.
Branch 3: Washed-Out, Overexposed Daytime Shots — Too much light or wrong metering?
Bright white photos with blown-out highlights happen when the camera sees too much light. Most common cause: aiming directly east or west. Morning and evening sun floods the sensor.
Solution: face your camera north or south. If that's not possible, mount it deeper in the shade or under a leafy branch.
Another cause: the exposure compensation setting is too high. Check if your camera has an EV (exposure value) adjustment. Set it to -0.7 or -1.0 if daytime images are too bright.
This reduces the amount of light the sensor uses. Test with a few shots and adjust.
If the entire image is white and overexposed, the IR filter might be stuck. Some cameras have a mechanical IR cut filter that switches for day and night. If it sticks, daytime shots look like nighttime IR images.
This usually requires a factory reset or a firmware update to fix. If neither works, the part may need replacement.
Exposure issues are common across many cameras. If you've struggled with exposure on an action camera, the same logic applies: adjust the metering mode for the background brightness.
Branch 4: White-Out or Hazy Night Images — IR reflection, fog, or spider webs?
This is one of the most common complaints in humid or wooded areas. The image looks like a white fog or a glowing wall. The cause is almost always IR light bouncing off something close to the lens.
First, check for spider webs. A single strand in front of the lens will reflect the IR flash and make the whole image look like a fog bank. Clear the front of the camera with a soft brush.
Check for webs between the camera and the trail.
Second, check for condensation or dew. High humidity causes moisture to form on the lens cover at night. This scatters the IR light.
Solution: mount the camera under a small roof or use a lens cover. You can also apply a rain-repellent coating designed for camera lenses to reduce moisture build-up.
Third, look for leaves or grass in front of the camera. Even a single leaf blowing in the breeze can catch the IR and wash out the frame. Trim any vegetation within three feet of the lens.
Make sure nothing is touching the camera housing.
Branch 5: False Triggers or Missed Shots — Detection zone, sensitivity, or dead battery?
False triggers waste battery life and fill your card with empty frames. Missed shots mean you walked away with nothing. Both point to the PIR sensor setup.
If you're getting false triggers from grass moving or temperature changes, lower the sensitivity setting. Most cameras have low, medium, and high. Start with medium in summer and low in hot weather when temperature differences are small.
In winter, you might need high sensitivity because animals' body heat contrasts more with the cold background.
If you're missing animals entirely, check the detection zone. Most PIR sensors have a narrow cone of detection, usually 30 to 50 degrees wide. Mount your camera so the zone covers the trail or feeder, not the empty space beside it.
Walk in front of the camera at the expected animal distance to test. Adjust the angle until you get consistent triggers.
Battery voltage also affects PIR sensitivity. A dying battery won't detect motion as reliably. Replace batteries with fresh lithium cells if you see inconsistent triggers.
Also, make sure your SD card is formatted correctly. A corrupted card can cause the camera to miss shots while it tries to write data.
If you've dealt with memory card formatting issues on other cameras, the same principle holds: format the card inside the camera, not on a computer. That ensures the file system matches the camera's requirements.
Mistakes the Decision Tree Will Catch — What Most People Get Wrong
Most trail camera problems share one root: assumptions. You assume the angle is right. You assume the batteries are good.
You assume the factory settings work. Those assumptions usually fail.
The biggest mistake is mounting the camera too high. People want a wide view, so they put it at eye level or above. That creates a downward angle where the PIR sensor misses small animals and the IR flash reflects off the ground.
Mount the camera at chest height, about 3 to 4 feet. Angle it slightly downward to cover the trail. That's the sweet spot for detection and image quality.
Second biggest mistake: not doing a walk test. You set the camera, lock it up, and leave. You don't know if the detection zone actually covers the target area.
Do a five-minute walk test. Walk across the zone at the expected distance. Check the photos on the camera screen.
Adjust. Walk again. This single step eliminates 90% of positioning problems.
Third mistake: ignoring firmware updates. Manufacturers release updates that fix exposure bugs, improve trigger speed, and add features. As of 2026, most major brands let you download firmware from their support site.
Check your camera model's support page once a season. A firmware update can solve persistent problems you thought were hardware failures.
Fourth mistake: using the wrong SD card. Cheap or slow cards cause write errors, missed shots, and corrupted files. Use a high-endurance card rated for continuous writing.
A 32GB or 64GB card from a reputable brand works best. Format it in the camera every time you pull the card.
Fifth mistake: leaving the lens cover on. Some cameras ship with a protective plastic film over the lens. Remove it before mounting.
It sounds obvious, but you'd be surprised how many people forget.
Fix these first. Then move on to less common issues.
Pro Tips for Sharp, Reliable Photos Every Time
You've fixed the obvious problems. Now let's dial in the details.
Match your settings to the season. In summer, foliage blocks detection and creates heat pockets that cause false triggers. Trim vegetation monthly. Lower sensitivity because the temperature difference between an animal and the background is smaller.
In winter, raise sensitivity. Cold air makes animals' body heat stand out to the PIR sensor. Also, expect shorter battery life.
Lithium cells handle cold better than alkaline.
Use time-lapse mode for high-traffic areas. Motion trigger alone misses animals that walk past the detection zone too fast. Set a time-lapse interval of one minute during peak movement hours. You'll catch everything that passes, even if the PIR doesn't fire.
The trade-off is more images to review and faster card filling. Use a 64GB card for time-lapse.
Align your camera with sun and wind. Face the camera north or south to avoid direct sun at sunrise and sunset. Direct light washes out daytime images. For wind, mount the camera so wind blows across the lens, not toward it.
Wind carrying dust and pollen toward the lens will dirty it faster. Clean the lens with a microfiber cloth every time you swap cards.
Check your camera's recovery time. If you're shooting on a trail with frequent animal movement, a slow recovery time means missed shots. Look in your settings for "recovery time" or "interval between triggers." Set it as low as your camera allows, usually one second. Faster recovery drains more battery, but for active trails it's worth it.
If you're seeing persistent problems with motion detection, check if your PIR sensor is blocked by the camera housing itself. Some budget cameras have a design flaw where the sensor sits too close to the case edge. In that case, you might need to reset the camera to factory defaults and reconfigure it from scratch.
Quick Decision Guide — Your Next Move Based on What You See
Use this table as a quick reference when you pull your card and see problems.
| Symptom | Most Likely Cause | Quick Fix | Deeper Fix |
|---|---|---|---|
| Blurry animal, sharp background | Trigger speed too slow | Set trigger to fastest option | Move camera closer to trail |
| Entire image soft | Camera too close or dirty lens | Move camera back to 6+ feet | Clean lens with microfiber cloth |
| Dark night images | Weak IR or bad batteries | Replace with lithium batteries | Switch to low-glow IR mode |
| Overexposed daytime shots | Sun in lens | Face camera north or south | Set EV to -0.7 or -1.0 |
| Hazy white night images | IR reflection off objects | Clear vegetation near lens | Remove spider webs, check for dew |
| False triggers from wind | Sensitivity too high | Lower sensitivity setting | Trim grass within detection zone |
| Missed animals entirely | PIR zone not covering trail | Walk test and adjust angle | Mount at 3 to 4 feet height |
If you've tried three fixes and the problem hasn't changed, reset the camera to factory defaults. Then set it up fresh. Sometimes a buggy setting gets stuck in memory.
Starting clean is faster than hunting for it.
For issues that persist after all these steps, check the manufacturer's support documentation. Some problems, like a failing image sensor or a broken PIR, are hardware defects. Your camera may still be under warranty.
Don't waste weeks troubleshooting a dead component.
Frequently Asked Questions
How do I know if my trail camera trigger speed is too slow?
Look at your photos. If you capture the rear half of an animal or an empty frame with motion blur, your trigger speed is too slow. Most trail cameras offer a setting between 0.2 and 1 second.
Set it to the fastest available for trails with moving animals. Test by walking past the camera at normal speed.
Why are my night images completely black?
Three possible causes. First, the IR flash may be off. Check your camera settings to ensure night mode or IR mode is enabled.
Second, the animal might be outside the IR flash range, typically 30 to 60 feet for most consumer cameras. Move the camera closer. Third, your batteries may be too weak to power the IR LEDs.
Replace with fresh lithium batteries.
What SD card speed do I need for a trail camera?
Use a Class 10 or UHS-I card rated for at least 30 MB/s write speed. Slower cards cause write errors and missed shots during burst sequences. A 32GB card is adequate for most users.
Larger cards work but require longer format times. Always format your card inside the camera, not on a computer.
Can fog inside the lens be fixed?
Sometimes, but not always. If you see condensation inside the lens housing, the camera's seal has failed. Place the camera in a sealed bag with silica gel packets for 24 hours.
This may remove moisture temporarily. However, the seal is compromised. Expect the fog to return.
Replacement is usually the best option.
How often should I update my trail camera firmware?
Check for updates at the start of each season or when you encounter a persistent issue. Manufacturers release firmware to fix trigger timing bugs, exposure errors, and memory card compatibility problems. Visit the brand's official support page with your model number.
Follow the installation instructions exactly.
Do megapixels matter for trail camera image quality?
Yes, but less than placement and settings. A 12MP camera with good positioning and proper settings will outperform a 30MP camera with poor angle and wrong exposure. For most users, 16 to 20 megapixels is plenty.
Higher resolution creates larger file sizes that fill your card faster. Prioritize trigger speed and detection zone over raw megapixel count.

Similar Posts