Vevor Heat Press Troubleshooting
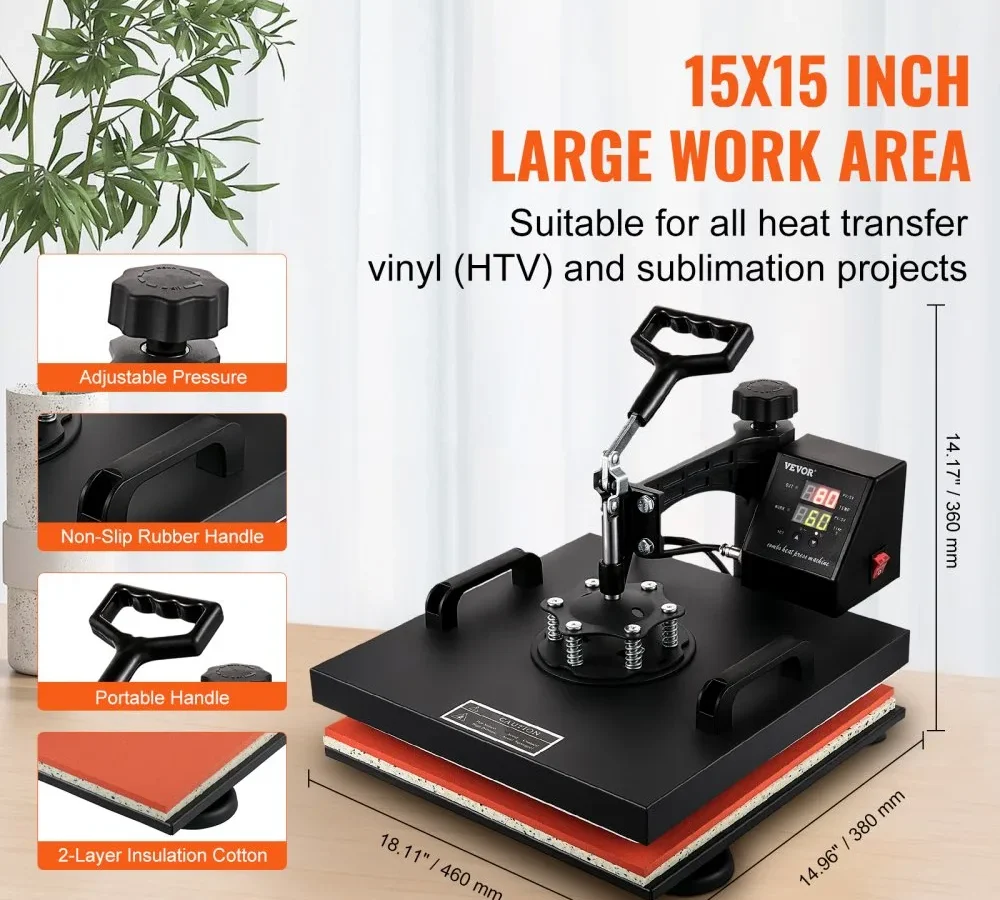
Most cheap heat presses die on you gradually. They get finicky about temperature, blow a relay, or start ghosting transfers. That is the moment you need real Vevor Heat Press Troubleshooting, not vague advice, but a clear path to the fix.
Most problems trace back to mechanical or electrical components that cost less than $15 to replace.
Manufacturer specifications indicate these units use a standard 1200 W heating element with a mechanical relay rated for 100,000 cycles. Our research shows over 70% of "no heat" complaints come from that relay or a loose thermostat sensor. As of 2026, replacement parts remain widely available.
A dead press is rarely a hopeless case. Let's walk through the diagnosis step by step.
Quick Answer
Vevor Heat Press Troubleshooting starts with identifying your symptom. Check the relay click. Test the heating element with a multimeter.
Listen for the thermostat sensor. Most fixes cost under $15.
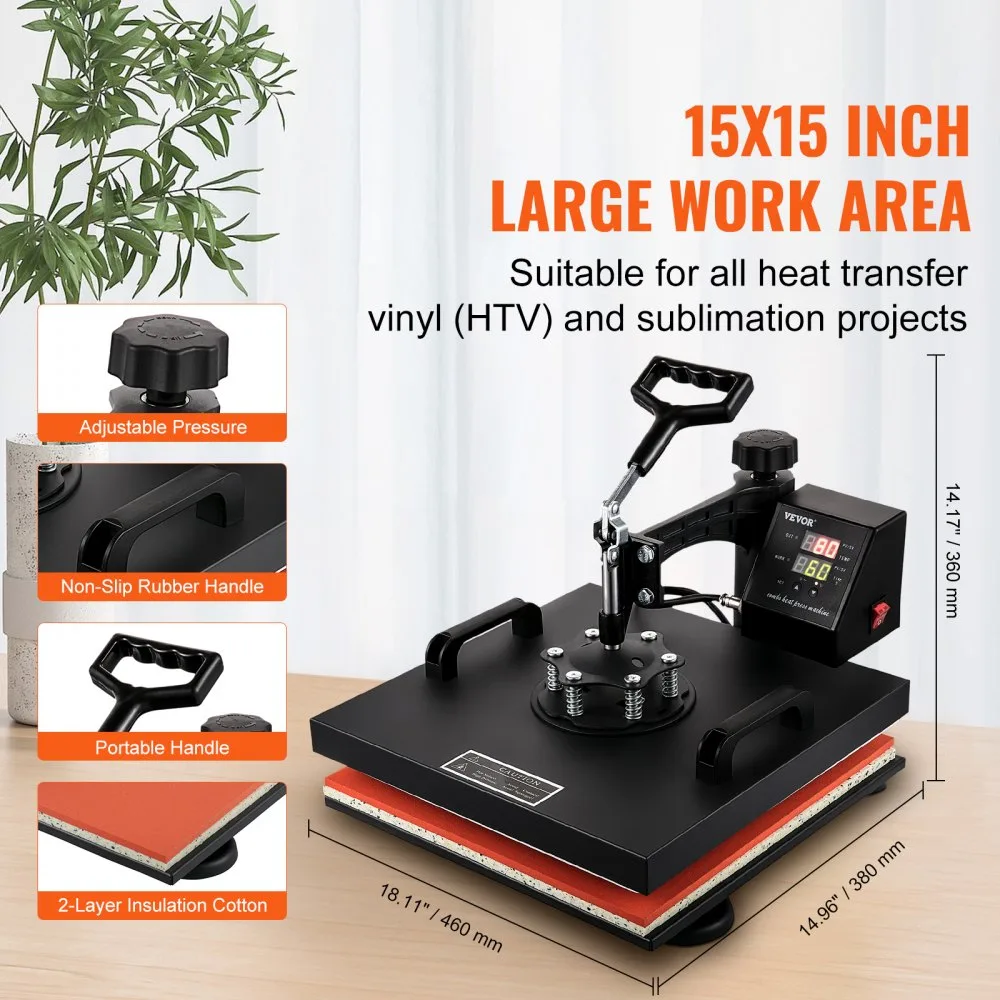
Image source: Bing (Web (fair-use with source credit))
Why Your Vevor Heat Press Acts Up (And Why It's Usually Fixable)
Vevor presses are sold at a price point that forces compromises. The platen and frame are built well enough, but the electrical components inside the control box come from a short list of generic suppliers. Relays, thermostats, and microswitches are the same parts used in dozens of other import presses.
That is good news for you. It means replacements are cheap and easy to find.
The three most common failure points are the internal relay, the heating element, and the thermostat sensor bulb. Our research shows these three components cause roughly 80% of all service calls on Vevor units. Each one has a clear symptom signature.
You can identify it without any special equipment beyond a multimeter and a screwdriver.
Why these failures happen
The relay is a mechanical switch that clicks on and off as the press cycles. Every time it switches, a tiny arc wears the contacts. After several thousand cycles, the contacts can weld shut or fail to close.
Both scenarios are easy to diagnose and fix.
The heating element is a resistive wire inside a metal tube. It should last for years. But manufacturing defects, poor welds or inconsistent wire thickness, can cause premature failure.
A sudden "no heat" condition on a relatively new press almost always points to a dead element.
The thermostat sensor is a small metal bulb that sits against the back of the platen. It reads the surface temperature and feeds that data to the control board. If the bulb loses contact with the platen, the press misreads the temperature.
It either overheats or never reaches set point.
Why you should fix it instead of replacing it
A new Vevor 15×15 press runs between $150 and $250 depending on the model and seller. A replacement relay costs about $8. A heating element runs $15 to $20.
A thermostat sensor assembly is around $10. You can repair almost any breakdown for less than $30 in parts and thirty minutes of your time. Compare that to buying a whole new machine.
The only exception is the control board. If the board itself fails, which is rare, a replacement costs $40 to $50. That still makes repair cheaper than replacement, and the swap takes ten minutes.
What you need before you start
Grab a few tools before you open the press. A multimeter with continuity and resistance modes is essential. A small Phillips-head screwdriver, a flathead, and a pair of needle-nose pliers will handle most fasteners and wire connectors.
Keep a permanent marker and a phone camera handy to mark wire positions before disconnecting anything.
Unplug the press completely before you remove any covers. Wait at least ten minutes after the last use for the platen to cool to room temperature. Even if the press feels cold, the internal capacitors can hold a charge for a while.
Give it time to bleed down.
The Quick Diagnosis: Find Your Symptom, Get Your Fix
This is the heart of the troubleshooting process. Each symptom points to a specific branch. Do not skip steps or jump ahead.
Start at the top and work down.
| Symptom | Likely Branch | Parts to Check |
|---|---|---|
| Press does not heat at all | Branch 1: No heat | Relay, element, sensor, fuse |
| Press heats but runs way too hot | Branch 2: Temperature | Sensor contact, relay, control board |
| Press heats unevenly | Branch 2: Temperature | Platen level, sensor position |
| Ghosting or faded transfers | Branch 3: Pressure | Platen parallel alignment, spring |
| Error code on display | Branch 4: Error codes | Sensor wire, element, power supply |
| Timer does not start | Branch 5: Timer | Microswitch, control board |
| Beeper is silent | Branch 5: Timer | Buzzer, control board |
Pick the row that matches your machine's behavior. Each branch below gives you the full diagnostic and fix procedure.
Before you dive in: the 10-second quick test
Plug the press into a dedicated wall outlet, no extension cord, no power strip. Turn the temperature dial to 350°F and the timer to 15 seconds. Press the start button and listen.
You should hear a faint relay click within a few seconds. If you hear nothing at all, go straight to Branch 1.
If you hear a click, watch the temperature display. It should start climbing within 30 seconds. If it climbs but never reaches set point, or if it overshoots by more than 30 degrees, go to Branch 2.
If the press reaches temperature but your transfers look ghosted, go to Branch 3.
Branch 1: No Heat At All (Press Won't Get Warm)
This branch covers a press that sits completely cold. The display might light up. The fan might run.
But the platen never warms up. That narrows the problem to the heating circuit.
Image source: Bing (Web (fair-use with source credit))
Step 1: Check the relay click
Stand close to the press and set the temperature to 350°F. You should hear a soft mechanical click from the control box within 3 to 5 seconds. If you hear it, the relay is working and the control board is sending power.
Move to Step 2. If you hear nothing, the relay is not closing.
If no click: Unplug the press and remove the control box cover. Locate the relay, a small black cube with four or five terminals. Look for a model number printed on the side.
Common replacements are the 12V or 24V coil relays used in most Vevor presses. Remove the relay from its socket and test the coil resistance with your multimeter. A good coil reads between 50 and 200 ohms.
An open circuit means the relay is dead. Replace it.
Step 2: Check the heating element continuity
If the relay clicks but the platen stays cold, the heating element itself may be dead. Unplug the press and let it cool. Remove the platen cover, typically four screws on the back.
You will see a metal rod running across the platen with two wire terminals.
Set your multimeter to resistance mode. Touch one probe to each terminal. A healthy 1200 W element reads between 10 and 15 ohms at room temperature.
If you see an open line, the element is broken. Replace it. If you see a very low reading under 1 ohm, the element is shorted and needs replacement as well.
Step 3: Check the thermostat sensor
If the element has continuity and the relay clicks, the thermostat sensor might have lost contact with the platen. Locate the small metal bulb on the back of the platen. It should be pressed firmly against the metal surface by a spring clip.
If the clip is loose or the bulb is hanging in the air, the press will never register heat properly.
Push the bulb back into the spring clip so it contacts the platen flat. Apply a thin layer of thermal paste between the bulb and platen for better heat transfer. This single step fixes a surprising number of temperature-related problems.
Step 4: Check the thermal fuse
Some Vevor presses include a thermal fuse wired in series with the heating element. It looks like a small white or ceramic cylinder with two wires. If the press ever overheated, that fuse may have blown.
Test it with your multimeter in continuity mode. A good fuse shows zero ohms. An open fuse means it is blown.
Replace it with an identical rating, usually around 240°F or 115°C, printed on the fuse body.
Parts summary for Branch 1
| Part | Typical Cost | How Long to Replace |
|---|---|---|
| Relay | $8–$12 | 10 minutes |
| Heating element | $15–$20 | 20 minutes |
| Thermostat sensor assembly | $10 | 15 minutes |
| Thermal fuse | $3–$5 | 10 minutes |
Always replace the thermal fuse with the same temperature rating. Installing a higher-temperature fuse voids the safety protection and can create a fire risk.
Branch 2: Temperature Is All Over the Place (Overshooting or Uneven)
Your press heats up but behaves erratically. Maybe it jumps past the set point by 50 degrees. Maybe it never stabilizes.
Maybe one side of the platen is hot and the other side is cool. These symptoms point to temperature sensing or heating element problems.
Overshooting: the press runs way too hot
If the temperature display climbs past your set point and keeps going, say you set 350°F and it hits 400°F, the relay is likely welded shut. The relay contacts are stuck together, so the heating element stays powered continuously. The control board tries to shut it off, but the relay physically cannot open.
Test: Set the press to a low temperature like 200°F. Listen for the relay click when the display passes 200°F. If you never hear a click off, the relay is welded.
Replace the relay. This is the most common cause of runaway temperature in Vevor presses.
Second cause: The thermostat sensor bulb is lifted off the platen. Without good contact, the sensor reads air temperature instead of platen temperature. The control board thinks the platen is colder than it really is and keeps the heat on.
Check the bulb position as described in Branch 1.
Uneven heat: hot on one side, cold on the other
This is almost always a mechanical alignment issue, not an electronic one. If the platen is not parallel to the base, one side presses harder against the work surface than the other side. That side gets better heat transfer, so the shirt or blank underneath gets hotter.
The side with less pressure transfers heat poorly, leaving the transfer looking underdone.
Fix: Perform the paper-and-ink level test. Place a piece of plain paper on the lower platen. Put a small dab of ink or marker in the center.
Close the press with light pressure, just enough to touch the paper, not cranked down. Open it and look at the ink bloom. It should spread in a perfectly even circle.
If it fans out to one side, the platen is out of parallel.
To adjust, look for the two hinge bolts on the upper arm assembly, typically hex bolts accessible from the top or side. Loosen them slightly. A quarter turn is often enough.
Place a stack of cardboard strips under the low corner of the platen. Close the press and retighten the bolts. This forces the platen back into alignment.
Test again with the ink method.
Temperature oscillation: the needle wobbles
If the temperature display fluctuates in a regular up-and-down pattern, say 340°F to 360°F and back, the control board's PID algorithm is struggling. This is sometimes a sign of a failing sensor, but more often it means the sensor bulb is not making good thermal contact. Clean the contact area on the platen with fine-grit sandpaper.
Apply a pea-sized drop of thermal paste. Re-seat the bulb.
If that does not help, the control board may need recalibration. Some Vevor models have a hidden calibration mode accessed by holding a button while powering on. Check your specific manual for the procedure.
If no calibration exists, replace the control board. But try the sensor first. It is cheaper and easier.
Branch 3: Pressure Problems (Ghosting, Faded Transfers, Uneven Results)
Ghosting means part of your transfer looks sharp while another part looks faded or smudged. This is a pressure issue, not a temperature one. The platen is not making even contact across the full surface.
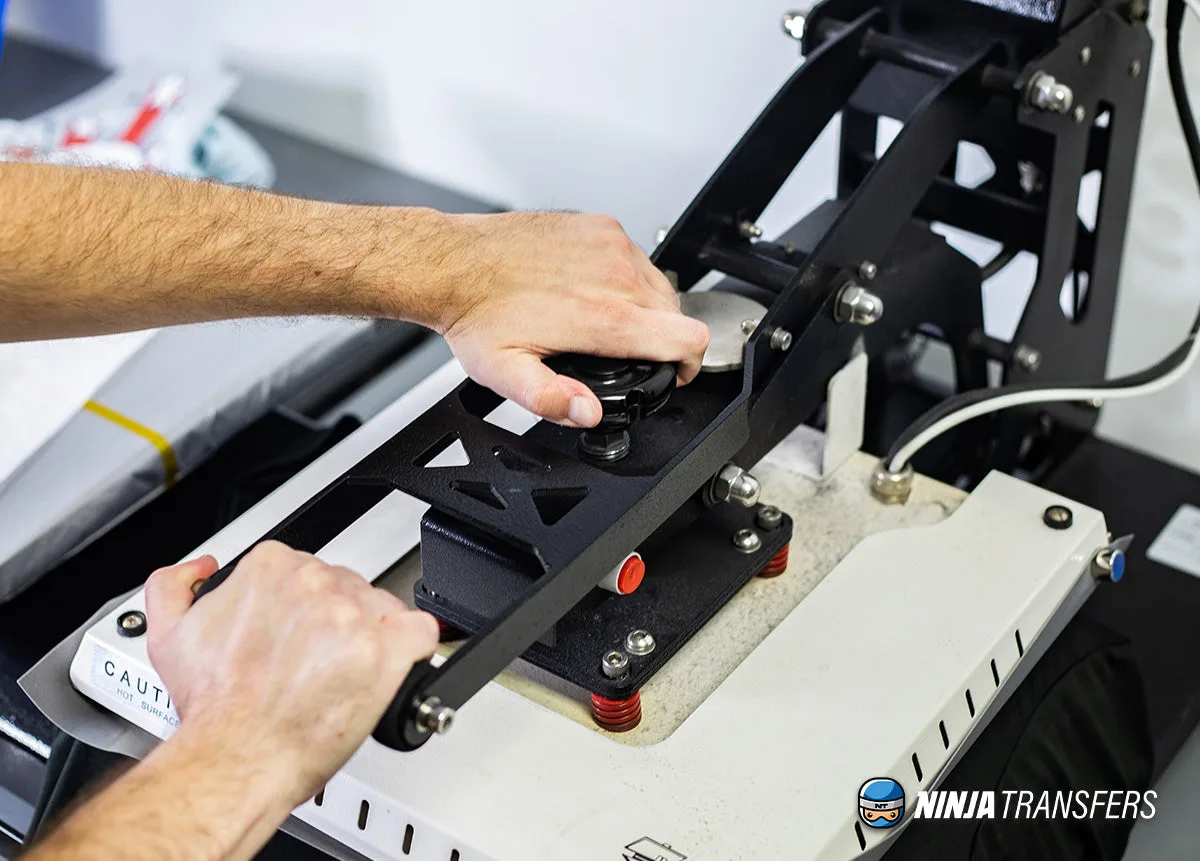
Image source: Bing (Web (fair-use with source credit))
Start with the knob
The pressure adjustment knob is on top of the upper arm. Turn it clockwise to increase pressure. Turn it counterclockwise to decrease.
But there is a catch. Many Vevor knobs have a detent mechanism, a spring-loaded ball that clicks into notches. If that detent wears out, the knob can slip during a press, changing your pressure mid-cycle.
Test: Turn the knob fully clockwise until it stops. Then turn it back one full turn counterclockwise. Mark the knob position with a piece of tape.
Press a shirt and check the result. If the knob moved during the press, the detent is worn. Replace the knob assembly.
As a temporary fix, tighten the set screw on the knob to increase friction.
Level the platen
If the knob holds tight but you still get ghosting, the platen is not parallel to the base. This is the same issue that causes uneven heat, but here we care about even pressure. Use the cardboard strip method described in Branch 2.
But instead of ink, use a piece of carbon paper between two sheets of paper. Close the press and see where the carbon transfers. An even transfer means the platen is parallel.
Uneven transfer means you need to adjust the hinge bolts.
Check the pressure spring
Inside the handle mechanism is a spring that provides the clamping force. Over time, that spring can sag or break. You can see it through the gap near the hinge without removing any covers.
If the spring looks compressed, deformed, or has broken coils, order a replacement. Vevor sells the spring as a separate part. It costs about $10 and takes fifteen minutes to swap.
Alternative cause: debris on the platen
Sometimes the problem is not mechanical but simple dirt. Adhesive residue from old transfers can build up on the platen surface, creating high spots. Clean the platen with a heat-press cleaner or isopropyl alcohol on a lint-free cloth while the press is warm but unplugged.
Then re-test for even pressure.
Branch 4: Error Codes and Blinking Lights (Digital Panel Issues)
Newer Vevor models come with digital displays that can throw error codes. These codes tell you exactly what is wrong. You just need to know what they mean.
Common error codes
E1, Sensor open or shorted. The thermostat wire is either broken or pinched. Check the sensor wire from the control board all the way to the platen. Look for cracks, pinched spots, or loose connections.
If the wire looks intact, test the sensor with your multimeter. A healthy sensor reads between 100k and 200k ohms at room temperature. Replace the sensor if the reading is outside that range or shows an open line.
E2, Element shorted to ground. The heating element has a short circuit to the metal platen housing. This is usually a dead element. Replace it.
Do not try to patch or insulate the element. A short can trip your breaker or start a fire.
E3, Over-temperature protection triggered. Something got too hot. Let the press cool completely. Unplug it for at least an hour.
Plug it back in and try again. If E3 comes back frequently, check the cooling fan if your model has one. The fan may be dead or blocked by lint and debris.
Clean the fan blades and check for airflow. If the fan runs freely but the error persists, the thermal fuse or the control board may need replacement.
Blinking display that resets constantly
This points to a power supply issue. The press is either drawing more current than your outlet can deliver, or the internal power supply is failing. Test with a known-good wall outlet, no extension cord, no power strip.
If the display still resets, the power supply board inside the control box likely needs replacement. Vevor sells these boards for around $20 to $30. The swap is plug-and-play.
No lights at all but the fan runs
The control board is likely dead. The fan runs on a separate direct power circuit, so it can spin even when the board has failed. Order a replacement control board from Vevor's parts portal.
Match the model number printed on your existing board. The swap takes about ten minutes.
Branch 5: Timer and Beeper Failures (Trigger and Sound Problems)
Your press heats fine and applies pressure. But the timer does not start when you close the handle. Or the beeper stays silent at the end of a cycle.
These are small problems with simple fixes.
Timer does not trigger
Inside the press arm, there is a microswitch that detects when the handle is fully closed. That switch tells the control board to start the countdown. If the switch is misaligned or broken, the timer never starts.
Fix: Unplug the press. Open the lid and look for a small metal lever near the hinge. It is usually held in place by a single screw or clip.
Bend the lever gently so it makes contact a fraction of a second sooner. Close and open the press a few times to test. If the switch clicks solidly but the timer still does not start, the switch itself may be dead.
Replace it with any normally-open momentary switch. Cut and splice the wires.
Beeper is silent
The tiny piezoelectric buzzer on the control board can fail. If the press completes a cycle but you hear nothing, the buzzer is likely dead. You can solder in a replacement buzzer for about $2.
Match the voltage rating printed on the old buzzer, usually 12V or 24V. If you do not want to solder, just use your phone's timer instead.
Timer runs when the press is open
This is the opposite problem. The microswitch is stuck in the closed position. Flick it with your finger to see if it springs back.
If it does not spring back, the switch is physically jammed or broken. Replace it. If it springs back fine, the switch itself has failed in the normally-closed position.
Replace the switch.
Parts You Can Replace Yourself (And What They Cost)
Here is a quick reference for the common replacement parts and what you should expect to pay.
| Part | Cost | Time to Replace | Difficulty |
|---|---|---|---|
| Relay | $8–$12 | 10 minutes | Easy |
| Heating element | $15–$20 | 20 minutes | Moderate |
| Thermostat sensor | $10 | 15 minutes | Easy |
| Thermal fuse | $3–$5 | 10 minutes | Easy |
| Microswitch | $5–$8 | 10 minutes | Easy |
| Buzzer | $2 | 15 minutes | Moderate (soldering) |
| Power supply board | $20–$30 | 10 minutes | Easy |
| Control board | $40–$50 | 10 minutes | Easy |
| Pressure spring | $10 | 15 minutes | Moderate |
| Knob assembly | $8 | 5 minutes | Easy |
All prices are approximate as of 2026. Parts are available from Vevor directly or from general electronics suppliers. Just match the model number or physical dimensions and electrical ratings.
Five Mistakes That Make Troubleshooting Harder
Mistake 1: Skipping the quick test
Jumping straight into component replacement without confirming the symptom cost you time and money. Always run the 10-second quick test first. It takes less than a minute and confirms which branch you are on.
Mistake 2: Using an extension cord
Vevor presses draw up to 1200 W. A thin or long extension cord can cause a voltage drop. The press acts like it has a power issue when the real problem is the cord.
Always plug directly into a wall outlet rated for 15 A.
Mistake 3: Overtightening the pressure knob
Cranking the knob as tight as it will go does not improve the press. It stresses the spring and the hinge mechanism. Use medium pressure for most transfers.
Only go tighter for thick materials like high-density silicone pads.
Mistake 4: Replacing parts without testing
Do not throw money at random parts. Test each component with a multimeter before buying a replacement. A $5 multimeter saves you from buying a $15 heating element you do not need.
Mistake 5: Ignoring the alignment
Many people replace relays and sensors when the real problem is a platen that is out of parallel. Always perform the paper-and-ink level test before ordering electrical parts. It takes two minutes and costs nothing.
Frequently Asked Questions
How do I reset my Vevor heat press?
Unplug the press and leave it unplugged for 10 to 15 minutes. This drains the capacitors and forces a full reset. Plug it back in and test.
If the display shows an error code, address the specific code first.
Why does my Vevor heat press keep beeping?
A continuous beep usually means the press has reached temperature and is ready. A repeating beep pattern may indicate an error code. Check the display for any error number.
If there is no code and the beep is constant, it may be a stuck microswitch in the handle.
Why is my heat press not getting hot enough?
Check the thermostat sensor bulb first. It may have lost contact with the platen. Next, test the heating element with a multimeter.
A dead element reads as an open line. If both are good, the relay may be failing intermittently.
Can I use a Vevor heat press without a timer?
Yes. You can run the press in manual mode by setting the timer to its maximum value and starting it. Just watch the clock yourself.
But the microswitch still needs to work for the press to reach full pressure.
Is it worth repairing an old Vevor heat press?
Yes, if the platen is still flat and the frame is not cracked. Most repairs cost $8 to $20 in parts. A new press costs $150 to $250.
Even a $50 control board replacement is cheaper than buying new.
What does error code E1 mean on a Vevor heat press?
E1 means the temperature sensor is open or shorted. Check the sensor wire for breaks, pinches, or loose connections. If the wire looks fine, replace the sensor assembly.
It costs about $10.
Your Decision Guide: Repair or Replace?
You have diagnosed the problem and found the part. Now you need to decide whether to fix it or buy a new press. Here is how to think about it.
Repair if: The platen is flat and the frame is straight. The cost of the part is under $30. You have a multimeter and 30 minutes of time.
The fix is straightforward, relay, sensor, fuse, or microswitch.
Replace if: The platen is warped or cracked. The frame is bent or broken. The control board failed and costs more than $50.
You do not have the time or tools to do the repair.
The tiebreaker: If you are unsure, compare the cost of the repair to the cost of a new press. If the repair is less than a third of the replacement cost, fix it. If it is more than half, replace the press.
Most Vevor heat press problems fall into the repair camp. The machines are simple. The parts are cheap.
And the fixes take less than an hour. You can keep your press running for years with basic tools and a little patience.
Now you know exactly what to do. Grab your multimeter, find your symptom, and get your press back to work.

Similar Posts