Garmin Dash Cam X310 Parking Mode Settings

Getting your Garmin Dash Cam X310 parking mode settings right is the difference between catching a hit-and-run and finding a dead battery the next morning. The X310 has a powerful parking mode, but it is not a set-it-and-forget-it feature. You need to match the settings to your car, your driving habits, and your parking environment.
Manufacturer specs confirm the X310 supports four voltage cutoff thresholds ranging from 12.4V down to 11.8V. That might sound like a small difference, but picking the wrong one can leave you stranded. As of 2026, this is still one of the most misunderstood features on the camera.
Let us walk through exactly what each setting does and how to choose.
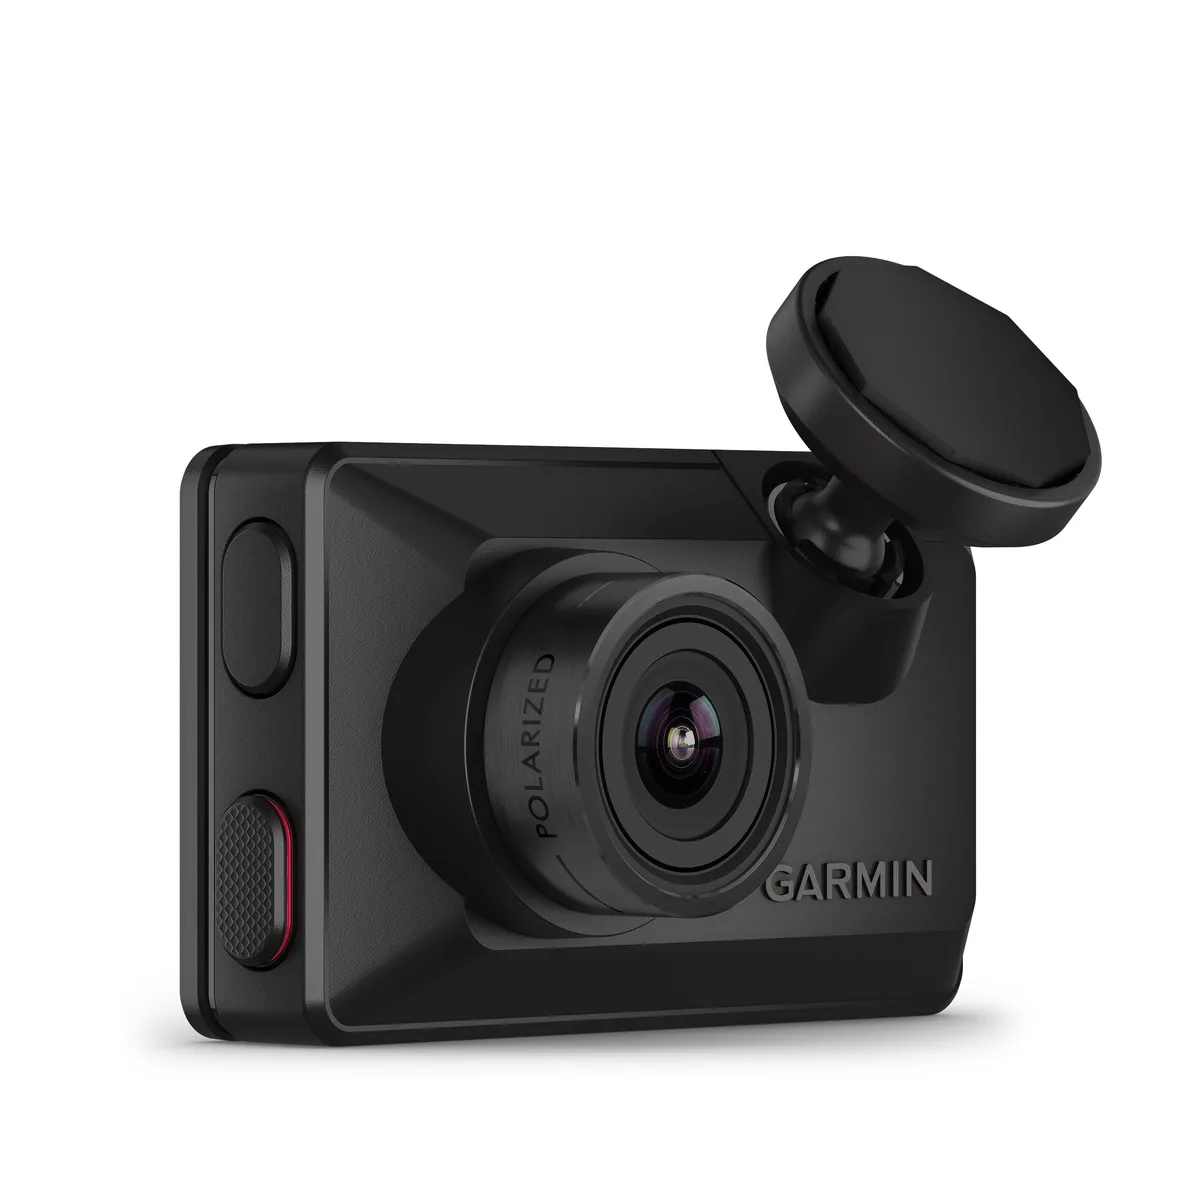
Image source: Bing (Web (fair-use with source credit))
Quick Answer
The Garmin Dash Cam X310 parking mode uses impact detection and motion sensing. You set a voltage cutoff to protect your car battery. Choose between Event Detection and Time-Lapse modes.
Set the G-sensor sensitivity from 1 to 5. These settings live in the Garmin Drive app.
Why This Matters More Than Just a Setting
Parking mode on the X310 is not a single toggle. It is a system of decisions that interact with each other. Get one wrong and the whole thing falls apart.
The Real Cost of Getting It Wrong
A dead car battery is the most obvious problem. The X310 draws power continuously while parked. If your voltage cutoff is set too low, the camera keeps recording until your battery cannot start the engine.
The most common complaint from new owners is a dead battery caused by incorrect voltage cutoff settings.
Missed events are the other side of the coin. Set the G-sensor too high and a passing bus triggers hours of useless footage. Set it too low and the car that sideswipes you in a lot leaves no record at all.
The balance is tighter than most people expect.
Who This Guide Is For
This guide is for anyone who parks their car where something could happen. Street parkers in busy cities. Commuters in crowded lots.
Ride-share drivers who leave their car running between fares. Delivery drivers who are in and out of their vehicle all day. If you have ever walked back to your car and wondered if something happened while you were gone, these settings are for you.
What We Are Going to Cover
We will break down each parking mode option one at a time. Voltage cutoff thresholds. G-sensor sensitivity.
Event Detection versus Time-Lapse. Hardwiring versus OBD-II power. Real-world scenarios that show how these settings work together.
By the end, you will know exactly what to set for your situation.
What Parking Mode Actually Does on the X310
The X310 has two distinct parking mode options. They record differently, use different amounts of power, and serve different purposes. Understanding the difference is step one.
Event Detection Mode
Event Detection is the default parking mode on the X310. The camera sits idle, watching for two things. A sudden impact registered by the G-sensor.
Or motion in the camera's field of view.
When either trigger occurs, the X310 wakes up and records a short clip. The clip is saved to a protected folder so it does not get overwritten. After the clip ends, the camera goes back to idle.
This mode uses very little power. The camera is not recording continuously. It is just listening for a trigger.
That makes it the best choice for most drivers.
Time-Lapse Mode
Time-Lapse mode is different. The X310 captures a frame every second and stitches it into a continuous video. You get a compressed view of everything that happened while you were parked.
The advantage is complete coverage. You see every person who walks past. Every car that pulls in next to you.
Every shopping cart that rolls by. Nothing gets missed because there is no trigger threshold to clear.
The trade-off is power consumption. Time-Lapse mode keeps the camera active and recording. It draws more power from your battery.
It also fills your SD card faster.
How the X310 Decides When to Start
The X310 does not guess when you are parked. It uses a simple logic check. When the vehicle ignition turns off, the camera waits a short period.
If the power source drops below a certain threshold, the camera knows you are parked.
This is why the power cable matters. The cigarette lighter adapter shuts off when the car turns off. The hardwiring kit and OBD-II cable provide constant power.
The camera needs constant power to stay in parking mode.
The Role of the G-Sensor
The G-sensor is a small accelerometer inside the X310. It measures sudden changes in motion. A hard impact registers as a spike.
A gentle bump barely moves the needle.
The sensitivity setting tells the camera how big a spike counts as an event. Higher sensitivity means smaller bumps trigger recording. Lower sensitivity means only hard impacts count.
We will talk about where to set this in a moment.
Power Source Requirements
Parking mode requires constant power. The standard 12V car adapter shuts off when the engine is off. That means parking mode never activates with the included adapter alone.
You need one of two cables. The Garmin Constant Power Cable, which hardwires to your fuse box. Or the Garmin OBD-II Power Cable, which plugs into your car's diagnostic port.
Both provide continuous power. Both support the voltage cutoff feature. We will compare them in detail later.
The Most Critical Setting: Voltage Cutoff
The voltage cutoff is the single most important parking mode setting on the X310. It is also the one people get wrong most often. Let us fix that.
What Voltage Cutoff Does
Your car battery operates at a specific voltage range. A healthy battery sits around 12.6V when fully charged. When the engine is running, the alternator pushes it to around 14.4V.
The X310 monitors the battery voltage while it is in parking mode. When the voltage drops to your chosen threshold, the camera shuts down. It stops recording to preserve enough power to start your engine.
That is the entire purpose of this setting. It is a safety net. A dead battery prevention feature.
The Four Voltage Thresholds
The X310 gives you four options. They are set in the Garmin Drive app under the parking mode menu.
| Threshold | What It Means | Best For |
|---|---|---|
| 12.4V | Battery is 75% charged | Older batteries, cold climates, short trips |
| 12.2V | Battery is 50% charged | Average batteries, mixed driving patterns |
| 12.0V | Battery is 25% charged | Healthy batteries, longer commutes |
| 11.8V | Battery is nearly empty | New batteries, frequent long drives, EVs |
How to Choose Based on Your Car Battery
Your battery age is the biggest factor. A new battery holds voltage better under load. An older battery drops faster.
If your battery is more than three years old, start with 12.4V.
Your driving habits matter too. Short trips do not fully recharge the battery. If you drive 15 minutes to work, your battery may never reach full charge.
In that case, 12.4V is safer. Longer commutes give the alternator time to top up the battery. You can use 12.2V or 12.0V.
The Risk of Setting It Too Low
Setting the cutoff at 11.8V gives you the longest recording time. It also puts your battery at risk. A lead-acid battery discharged below 11.8V can suffer permanent damage.
The battery may no longer hold a full charge. You could be buying a new battery every year.
Cold weather amplifies the risk. Cold batteries have reduced capacity. A 12.0V cutoff in winter might leave you stranded even with a healthy battery.
If you live in a cold climate, keep the threshold higher.
The Risk of Setting It Too High
Setting the cutoff at 12.4V is conservative. It protects your battery well. But it also ends parking mode early.
You might miss an event that happens after the camera shuts down.
This is the trade-off. Battery protection versus recording coverage. There is no perfect answer.
You have to balance the two based on your situation.
A Quick Rule of Thumb
Start at 12.2V for most drivers. That is the middle ground. If you have a new battery and long commutes, try 12.0V.
If you have an older battery or short trips, use 12.4V. Adjust from there based on whether you ever find the car slow to start.
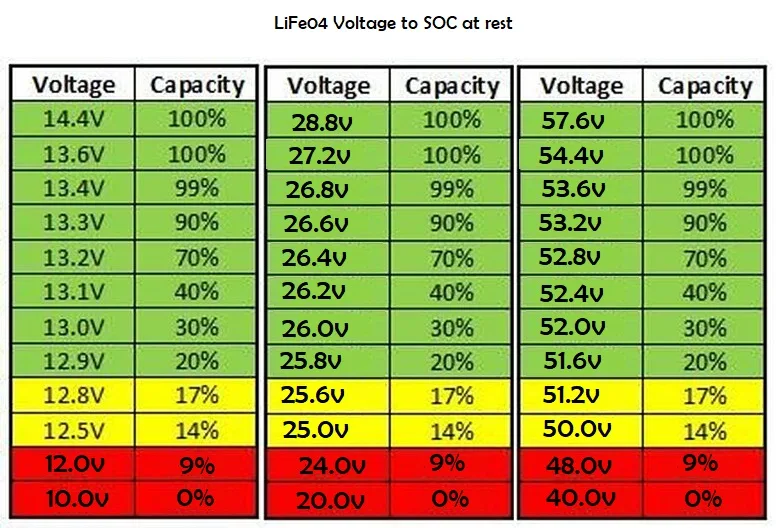
Image source: Bing (Web (fair-use with source credit))
G-Sensor Sensitivity – Finding the Sweet Spot
The G-sensor sensitivity setting controls how hard an impact needs to be before the X310 starts recording. It is a simple slider in the app, but the right setting depends entirely on where you park.
What the G-Sensor Detects
The G-sensor measures acceleration forces. A car door closing nearby registers a small force. A shopping cart bumping your bumper registers a medium force.
A car hitting your parked vehicle registers a large force.
The sensitivity setting tells the camera the minimum force level that counts as an event. The X310 offers levels 1 through 5.
Sensitivity Levels Explained
| Level | Sensitivity | Typical Triggers | Best For |
|---|---|---|---|
| 1 | Low | Hard impacts only | Quiet residential streets, private driveways |
| 2 | Low-Medium | Moderate impacts | Quiet lots, low traffic areas |
| 3 | Medium | Moderate impacts, door slams | Average parking lots, mixed environments |
| 4 | High | Light impacts, nearby traffic | Busy streets, tight parking spaces |
| 5 | Highest | Very light motion, vibrations | Crowded urban lots, street parking |
Why Factory Defaults Do Not Work for Everyone
The X310 ships with level 3 as the default. That works for a lot of people. But not for everyone.
If you park on a busy street, level 3 may miss a sideswipe. If you park in a quiet lot, level 3 may trigger every time a truck drives past.
The factory setting is a guess. It is not tuned to your specific parking environment. Changing it is not optional.
It is necessary to get useful results.
How to Adjust for Your Parking Environment
Start with level 3 and park for a day. Check the recorded events. If you get a dozen false triggers from passing traffic, drop to level 2.
If you get nothing, bump to level 4.
The key is to watch for false triggers. A false trigger is not harmless. It fills your SD card with garbage footage.
It also means the camera is using power to record things that do not matter. Every false trigger reduces the time you can stay in parking mode.
Common False Trigger Sources
Heavy trucks and buses are the most common false triggers. The ground vibration from a passing semi can register as an impact. If you park near a bus stop or delivery zone, you may need to lower the sensitivity.
Weather is another source. Hail, heavy rain, and strong wind can all trigger the sensor. If you live in a storm-prone area, level 2 or 3 is usually safer.
Car washes are a special case. The high-pressure spray and mechanical brushes create constant vibration. Turn off parking mode entirely before entering a car wash.
Or switch to low sensitivity beforehand.
Testing Your G-Sensor Setting
You can test the setting without waiting for a real event. Park the car, make sure parking mode is active, then walk up and gently bump the bumper. Check the app to see if the X310 recorded the event.
Adjust if needed.
This is a 10 minute test that saves you days of frustration. It is worth doing.
Two Ways to Power Parking Mode (And Which Is Better)
The X310 needs constant power to run parking mode. You have two official options from Garmin. Both work.
But they are not the same. One is better for most drivers. The other is better for specific situations.
Garmin Constant Power Cable (Hardwiring Kit)
The Constant Power Cable hardwires directly to your vehicle fuse box. It taps into a fuse slot that has constant power. The cable includes an inline fuse for safety.
It also has the voltage cutoff module built in.
This is the cleaner install. The cable runs behind the headliner and down the A-pillar. No wires hang loose.
No adapters plug into your dashboard. The camera looks like a factory install.
The hardwiring kit supports all four voltage cutoff thresholds. The module is a small box inline with the cable. You set the threshold by flipping a small switch on the module itself.
This is separate from the app setting. Both must match for the feature to work properly.
Installation requires some patience. You need to find the correct fuse slot. You need to route the cable cleanly.
If you have done a dash cam install before, it takes about 30 minutes. If you have not, plan for an hour. The process is similar to a similar dash cam installation process you might have done before.
Garmin OBD-II Power Cable
The OBD-II Power Cable plugs into your car's diagnostic port. That is the port under the dashboard where mechanics plug in their scanners. The cable draws power from that port.
It also reads the vehicle's battery voltage through the OBD-II system.
The OBD-II cable is easier to install. You plug it in and run the cable to the camera. No fuse box work.
No wire stripping. It takes about five minutes.
The trade-off is the voltage cutoff. The OBD-II cable uses the Garmin Drive app setting for the voltage threshold. The hardwiring kit uses a physical switch.
Both work. But the OBD-II cable may not be compatible with all vehicles. Some cars shut off the OBD-II port when the engine is off.
If that happens, the camera loses power and parking mode never activates.
Comparison Table
| Feature | Hardwiring Kit | OBD-II Cable |
|---|---|---|
| Installation time | 30 to 60 minutes | 5 minutes |
| Difficulty | Moderate | Very easy |
| Voltage cutoff | Physical switch on module | App setting |
| Looks | Clean, hidden wires | Cable visible at port |
| Compatibility | All vehicles | Most, but not all |
| Fuse box access | Required | Not needed |
| Port usage | None | Occupies OBD-II port |
Which One Is Better for You
If you want a clean install and full control, go with the hardwiring kit. It is more work upfront, but it looks better and works with every vehicle. The physical voltage cutoff switch is also more reliable.
You set it once and forget it.
If you want the easiest possible install, go with the OBD-II cable. It is perfect for a rental car or a vehicle you do not want to modify. Just check that your OBD-II port stays powered when the engine is off.
You can test this with a simple 12V test light or multimeter.
What Works Best for Different Drivers
Daily commuters with a permanent car should use the hardwiring kit. It is a one-time install that stays out of sight. Delivery drivers who switch vehicles often should use the OBD-II cable.
It is easy to move between cars.
If you own an electric vehicle, check the manufacturer's guidance first. Some EVs have sensitive electrical systems. The hardwiring kit is generally safer because it uses a dedicated fuse tap.
The OBD-II cable draws power from a port that may have specific electrical characteristics.
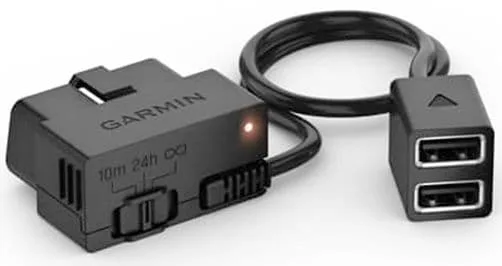
Image source: Bing (Web (fair-use with source credit))
A Note on Installation Safety
Both cables include fuses for a reason. Never bypass the fuse. If you are hardwiring, use a fuse tap that matches your vehicle's fuse type.
Mini blade, micro blade, and low profile mini are the most common. Check your owner's manual to confirm.
If you are not comfortable working with car electrical systems, have a professional do the hardwiring install. A mistake here can damage your vehicle's electrical system. It is not worth the risk.
For the OBD-II cable, make sure the plug seats fully. A loose connection can cause intermittent power loss and missed recordings.
Step-by-Step: How to Set Up Parking Mode on the X310
Now that you understand the settings, let us walk through the actual setup process. Follow these steps in order.
What You Need Before You Start
You need the Garmin Dash Cam X310 with the latest firmware installed. You can keep your camera's firmware current by checking the Garmin Drive app for updates. You also need either the Constant Power Cable or the OBD-II Power Cable.
A high endurance microSD card is recommended. The X310 supports cards up to 512GB. A 128GB card is a good starting point for most users.
Step 1: Install the Power Cable
If you are using the hardwiring kit, find a constant power fuse slot in your fuse box. Use a fuse tap that matches your vehicle's fuse type. Connect the ground wire to a clean metal bolt.
Route the cable behind the headliner and down the A-pillar. Secure the cable with zip ties to prevent rattling.
If you are using the OBD-II cable, locate the diagnostic port under the dashboard. Plug the cable in firmly. Route the cable along the edge of the windshield or dashboard.
The installation is much simpler.
Step 2: Pair the Camera with the Garmin Drive App
Download the Garmin Drive app on your phone. Turn on the X310. Open the app and follow the on-screen instructions to pair the camera.
This connects the camera to your phone for settings adjustments.
Step 3: Enable Parking Mode
In the Garmin Drive app, go to the camera settings menu. Find the parking mode option. Toggle it on.
The camera will now enter parking mode when the ignition turns off.
Step 4: Choose Your Recording Mode
Select either Event Detection or Time-Lapse. Event Detection is the default. It is the best choice for most drivers.
Time-Lapse gives you complete coverage but uses more power. Choose Time-Lapse only if you park in a high risk area where you want to see everything.
Step 5: Set the Voltage Cutoff
Go to the voltage cutoff setting in the app. Choose the threshold based on your battery age and driving habits. Refer to the table earlier in this guide.
If you are using the hardwiring kit, make sure the physical switch on the module matches the app setting.
Step 6: Adjust the G-Sensor Sensitivity
Find the G-sensor sensitivity setting in the app. Start at level 3. Park for a day and check the recorded events.
Adjust up or down based on false triggers or missed events.
Step 7: Test the Setup
Turn off the engine. Wait for the camera to enter parking mode. The LED indicator should change to show parking mode is active.
Walk up to the car and gently bump the bumper. Check the app to confirm the event was recorded. This confirms everything is working correctly.
Common Mistakes to Avoid
Do not skip the voltage cutoff setting. The default might be too low for your battery. Do not use the included cigarette lighter adapter and expect parking mode to work.
It will not. Do not forget to format the microSD card in the camera before use. This ensures the card is properly configured for the X310.
Do not assume the factory G-sensor setting is right for your environment. Test it.
Real-World Scenarios: What These Settings Actually Look Like
Theory is useful. Real examples are better. Here are five common parking situations and the settings that work best for each.
Scenario 1: Street Parking in a Busy City
You park on a busy street in a city. Cars pass constantly. Pedestrians walk by.
The risk of a hit-and-run is real. The risk of false triggers is also high.
Use Event Detection mode. Set the voltage cutoff to 12.2V if your battery is healthy. Set the G-sensor to level 4.
This captures side impacts from passing cars. It ignores most of the smaller vibrations from traffic. Check your footage every few days to adjust if needed.
Scenario 2: Office Parking Lot, 8 Hours a Day
You park in a large office lot. Traffic is moderate during the day. Very little activity at night.
You want to catch any incidents during work hours.
Use Event Detection mode. Set the voltage cutoff to 12.0V if your commute is long enough to recharge the battery. Set the G-sensor to level 3.
This is the factory default and it works well for moderate traffic. You will get a few false triggers from nearby cars. That is acceptable.
Scenario 3: Overnight Parking at Home
You park in your driveway or garage. The risk is low. You mainly want to catch any vandalism or theft attempts.
Use Event Detection mode. Set the voltage cutoff to 12.4V. Your battery is not being used for long periods, so you can afford to be conservative.
Set the G-sensor to level 2. You do not need high sensitivity. Only hard impacts matter.
This minimizes false triggers and saves power.
Scenario 4: Extreme Weather (Hot Summer, Cold Winter)
You live in a climate with extreme temperatures. In summer, the interior of your car can exceed 140 degrees Fahrenheit. In winter, your battery capacity drops significantly.
In summer, use Event Detection mode. The X310 uses a supercapacitor, not a lithium battery. It handles heat better than many cameras.
But the internal temperature can still affect performance. Park in the shade when possible. Set the voltage cutoff to 12.2V to account for heat related battery stress.
In winter, set the voltage cutoff to 12.4V. Cold batteries lose capacity. A 12.0V cutoff might leave you stranded.
Set the G-sensor to level 3 or 4. Cold weather makes the sensor slightly less sensitive. You may need to compensate.
Scenario 5: Long-Term Airport Parking (Multiple Days)
You park at the airport for a long weekend or a week. You need the camera to last the entire time without draining the battery.
Use Event Detection mode. It uses less power than Time-Lapse. Set the voltage cutoff to 12.4V.
This is the safest choice for multiple days. The camera will shut down earlier, but it will protect your battery. Set the G-sensor to level 3.
You want to catch incidents without wasting power on false triggers.
If you use Time-Lapse mode, the camera will likely shut down after a day or two due to the voltage cutoff. Event Detection is the better choice for long-term parking.
Frequently Asked Questions
Can I use parking mode with the cigarette lighter adapter?
No. The cigarette lighter adapter shuts off when the engine is off. Parking mode requires constant power.
You need the hardwiring kit or the OBD-II cable.
How long can parking mode run before draining the battery?
It depends on your battery health and the voltage cutoff setting. A healthy battery at 12.2V cutoff can run parking mode for 12 to 24 hours. At 12.4V cutoff, the camera shuts down sooner.
At 11.8V cutoff, it can run for multiple days, but the battery may not restart the engine.
Will parking mode overheat the camera in summer?
The X310 uses a supercapacitor, which handles heat better than lithium batteries. The camera can operate in temperatures up to about 140 degrees Fahrenheit. Direct sunlight on the windshield can exceed that.
Park in the shade or use a sunshade to reduce heat buildup.
What size SD card do I need for parking mode?
The X310 supports microSD cards up to 512GB. A 128GB high endurance card is a good starting point. Event Detection mode uses less space than Time-Lapse.
A larger card gives you more storage for parking events.
How do I know if parking mode is actually recording?
The LED indicator on the X310 changes when parking mode is active. Check the Garmin Drive app to see recent events. You can also turn off the engine and wait for the camera to enter parking mode.
The app will show the current status.
What happens if the voltage drops below the cutoff?
The camera shuts down completely. It stops recording to preserve enough power to start your engine. When you start the car, the alternator recharges the battery.
The camera powers back on and resumes normal operation.
Does parking mode work with both front and rear cameras?
The X310 supports a rear camera accessory. If you have a rear camera installed, parking mode works for both cameras. The settings apply to the front camera.
The rear camera follows the same parking mode logic.

Similar Posts